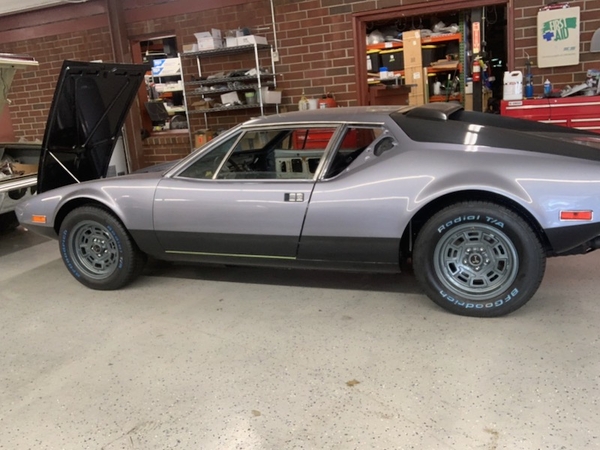
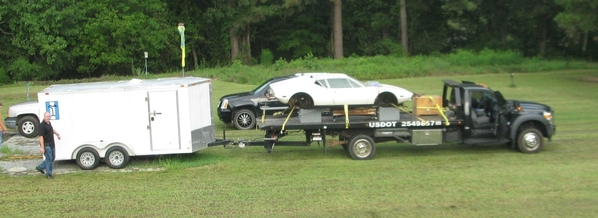
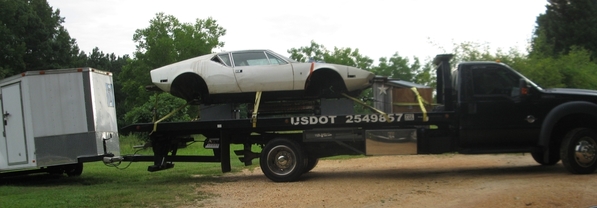
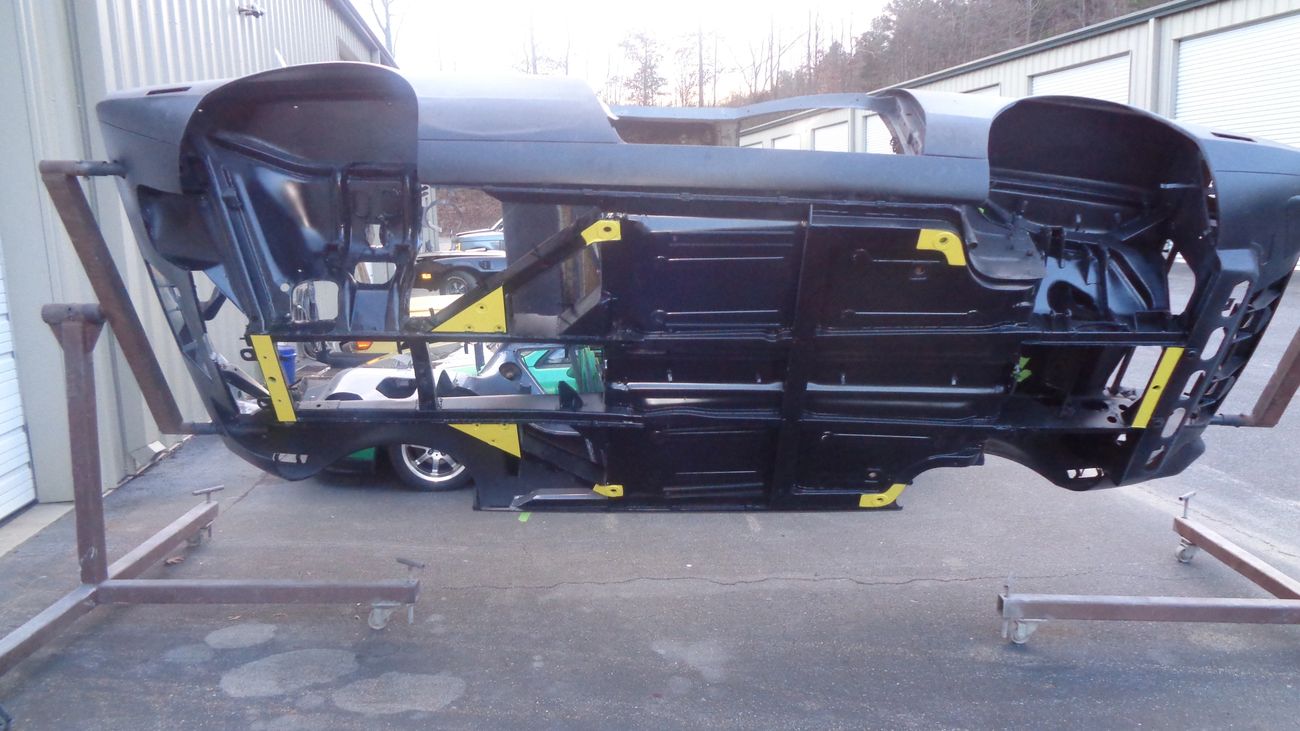
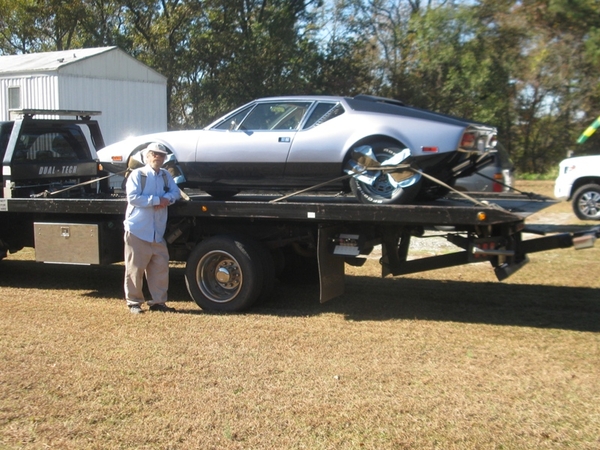
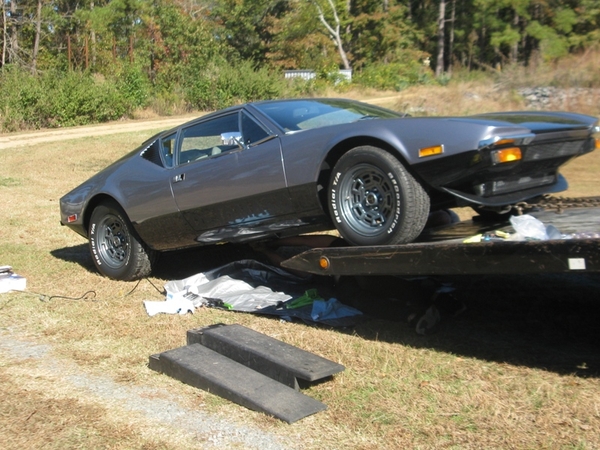
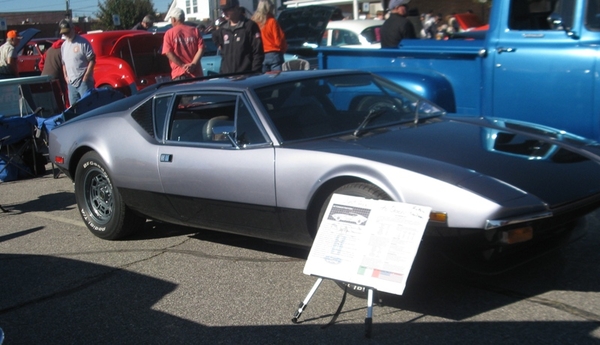
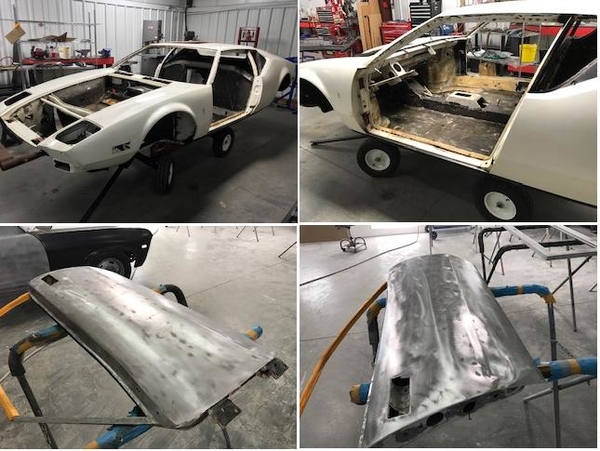
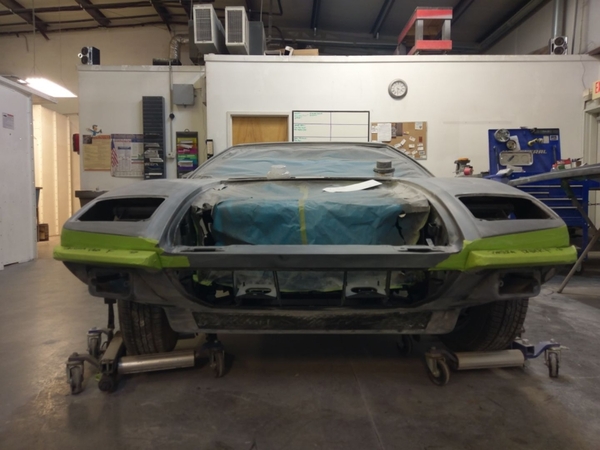
After 35 plus years, the shell of 5177 was rolled from its shed and is on its way to GunnerZ along with a trailer of parts.
The Owner and a couple employees drove 4 hours early this morning and loaded 5177 for the return trip to the shop.


Replies sorted oldest to newest
Another rescue begins. Well done
Congrats! That's a big step!
Looks cool with that DT trailer!
Rocky
Hope you'll share progress reports!
Awesome!
That's great news!
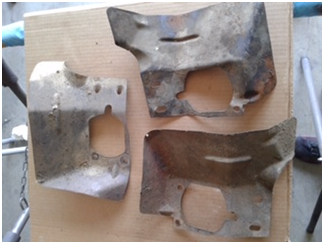
They don’t look like pantera parts. Maybe they’re from his tractor.
They might be left over from your Spitfire, or your TR-6.... I haven't seen anything like them.
Rocky
as for those 3 pieces, I am wondering if the tech doing the inventory threw them in as a test ![]()
Just knowing it is no longer under my shed feels better.
What color are you thinking of painting it?
I want a driver. the paint selected for ease of repair in the the future, hopefully from Ford colors.
those colors are to be in the GT Scheme of "Shades of Grey"! the upper being near silver and the lower a near black. with a decal in the lower section.
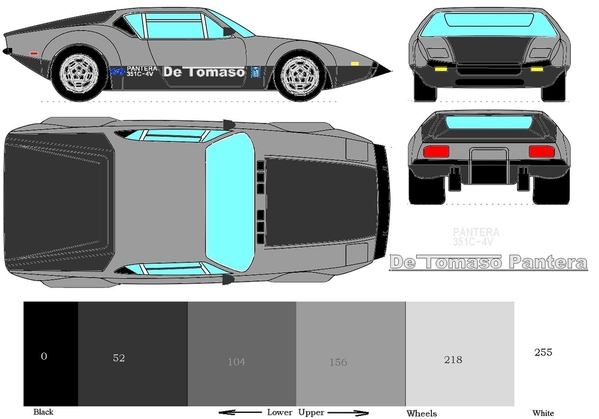
As far as the build, It will be near original with the exception of modern AC!
The builder and I disagree on one item so far. I requested use original harness and modify it for the changes I want. Where he suggested and wants to use a modern harness.
Comments requested as to whether or not.
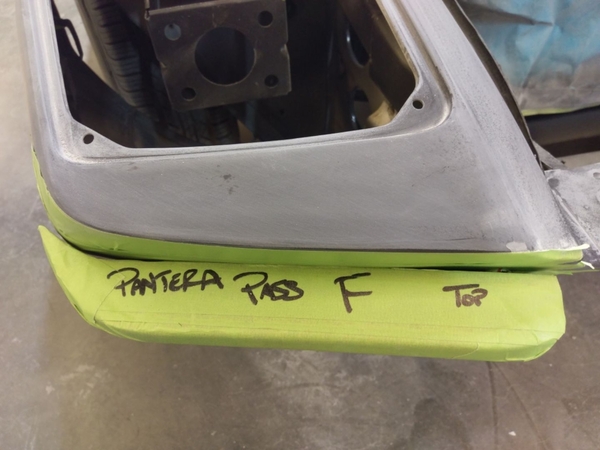
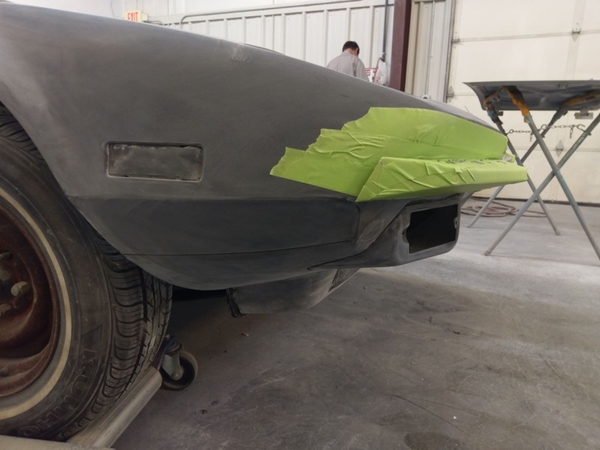
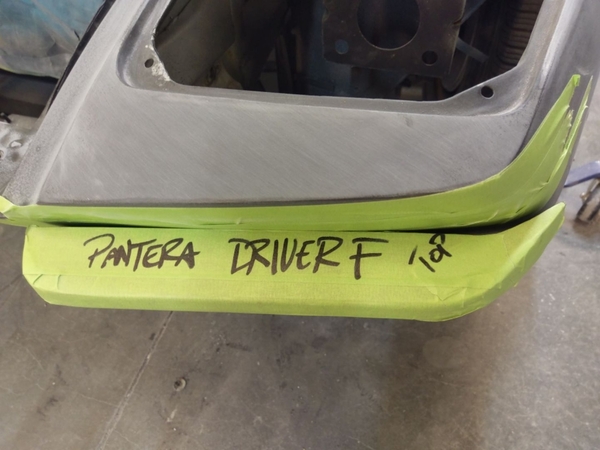
another disecion is whether to go back with L bumpers or fill in the body holes and go with the polish stainless I purchased. While I think the look is better, the ideal that they are just bolt on trim is concerning. the Builder wants to see what he can do to make them functionaly as bumpers.
Again, comments requested
I am sure there were be lots more request for comments as the work progresses

Great to see they jumped right in with the stripping. New wiring is great, but costly as it is time consuming. Maybe, if he will commit to a price for that part of the job, it could help you decide. I cannot imagine making the body fit bumpers Functional in any way, but they look a lot better than the 74 bulk. These bumper are the Amerisport .

I am seeking ideals on what items need, or could be done to the body when it is on the rotisserie.
That's great that the shop you chose is making such good progress. At this pace there is no doubt your car will be finished before mine.
My first thought is to address all drain holes and add the drain holes others with more P-car knowledge have suggested in previous posts. Next I would inspect the undercarriage for any hidden rust pockets and its integrity. Make sure that all tabs, brackets and anything else is there and the way you want it. It's easy to overlook the detail and later have to do some grinding and welding after paint.
I would have a serious discussion with your body shop professional about hidden areas and rust proofing or paint or whatever is appropriate to keep you car from rusting later on. It really is sad to see a beautifully painted car have rust poke through in a year or two after the "restoration".
Another thing to check for is damage. It's not unusual for low sports cars to have undercarriage damage from running over something. Perfect on top, dented on the bottom.
I'm only about half hour from your body shop. I would be happy to meet you there during one of your visits to meet and chat a bit.
thanks Mike, that is what I am looking for.
just to mention, I didn't chose this shop, the Owner heard of my situation from his family member that does some grounds work for me. So that is why a shop not that familair with Panteras is doing my car.
I sure wish I could met you there, but I doubt if I will even go to the shop. I have just emailed the Owner about his policy on visitors, so I need to here back form Him first, but having someone checkup on the car would be GREAT!
Here is the initial list I gave Him about what I wanted. while I think it is just an outline for farther discussions, he said that was more than most the car owners give him
That is quite a list.
Hi JFB -
(Not having read your list - yet...)
My suggestions might be:
1. Reinforce all Jack Points, especially the one at the back of the car (the box beam that terminates the frame). There is a standard size rectangular bar that fits right in there, see one of the early pages of my 5357 thread.
- JFFR reinforced his forward jack points, and tied these into a stiffening system of his own design to provide a stiffer frame, without the wacky stiffening kit that takes up the room in the luggage compartments.
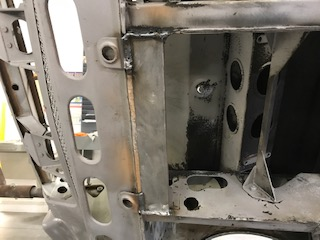
2. Seam weld the car, at least in areas that supply structural stiffness. This can be a big project, but your car is in the state where it can be done.
3. Improve / strengthen suspension mounting points - like "Push1267" did on his Group 4 car over there in Denmark.
4. Check the areas of the car in front of the engine compartment bulkhead on either side. There is a big hole where debris can get in on either side of the engine bay front bulkhead, and the debris lays right agains a single thickness body panel.
5. Drop the battery below the front trunk onto the steering rack - you fabricate a tray and a door for it.
Rocky
thanks,
here is Push's post
https://pantera.infopop.cc/top...ilding-a-gr4-replica
I'll be studing that one for a WHILE, there is a LOT of info there. Given "I" will not be driving hard, need to weight cost to have it done versus benifit
Nothing to report nor new photo's to share. the biggest activity (as far as I know) has been the transfer of funds to cover man-hours for paint removal and some body work!
the recent communication was asking about frame modes for jack plates. I wrote the following notes and emailed to shop.
...That's quite a Plan! I Think You Covered Everything. Gonna take Awhile. Good-Luck with it! It Will Be Fun!
To add a little Note...on the '74 Pantera, the Factory Fuel Gauge, Already has a RED Light Built Into the Face. It Comes ON at Aprox. 30 Miles of Fuel, Left. 'About' 2 Gallons, by My Experience.
MJ
thanks MJ for reviewing my INITIAL plan. My agreement with Billy (paint shop owner) is that nothing is really a MUST, so I listen a lot to what He suggest.
As for the details of the dash/instrument panel, I've had some new thoughts, but holding off in providing to him until he gets there in the rebuild. instead of trying to add warning lamps near the guage, maybe put them between the tach and speedo, where the original "brake" warning lamps were. Not sure about keeping brake warning anyway
I am thinking of moving the wiper switches to under the window switches in the center panel. Deleting the "courtesy lamp" and "manual radiator fan" switches. I would also expect the HVAC fan switch will be part of the modern controls that will be on the passenger side of the center section
While it's on a rotisserie, now is the time to address strengthening the chassis. The following are good to do even for a street driven car, otherwise you will experience cracking in your new paint at all the usual locations - base of the front A-pillers adjacent to the windshield, y-area curve at the top of the rear quarter decklid opening, and outside lower corners at the tail lights...
Seam-weld the entire car. Once stripped, you'll see in the engine bay that all the panels are merely spot welded together. Many have found when restoring their cars that a number or the spot welds have let go over the years, further contributing to body flex and cracking. Welding these seams will significantly strengthen the entire chassis/structure of the car.
Also, weld in 18 gauge doublers at the key locations where the body tends to crack...
More info on this thread: https://pantera.infopop.cc/top...783#1598208420462783
I've been told that Dennis Qualla in Colorado sells the aforementioned body doublers. Other vendors may have them as well.
Regardless of whether you intend to drive the car hard or not, simply going in and out of driveways subjects the car to substantial body twist/flex and will lead to cracking. These mods help prevent that.
Anyway, keep the pics and updates coming!
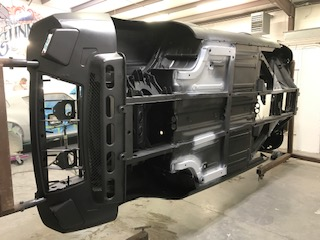
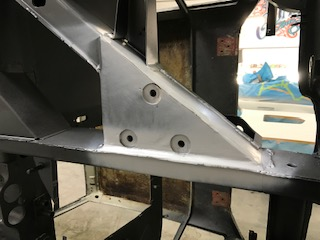
update
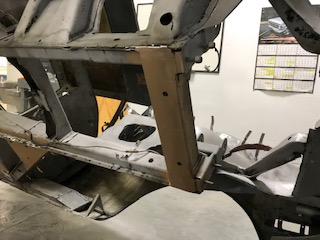
the seams have been stitch welded and the "jacking plates" installed
a floor jack plate across the rear cross member (will be drilled in the center for the tire jack peg)
Not sure about the rear post jack arm position under the motor mounts
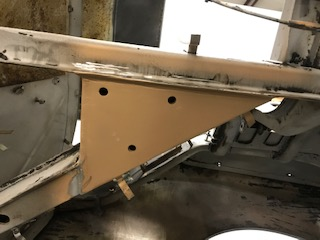
the center frame tire jack position
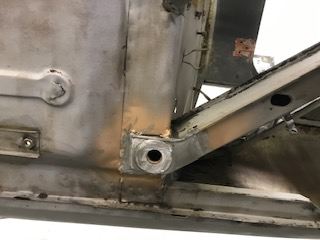
the front frame tire and post jack arm position
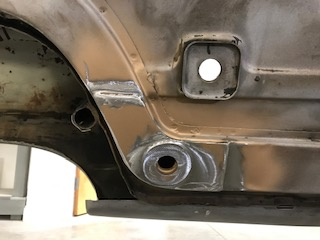
and added a front frame floor jack position (also will be drilled for tire jack plug)


That looks good, Joe -
I use that front jack point a lot - I use a 2x4 that fits precisely in there, I would love to have a permanent jack point like you've now got.
I don't know if I'd waste (much) time drilling the front or rear to accept the hand crank jack - If you're at home, you use your floor jack, and on the road, you pull out your AAA card!
Rocky
So the body was good, without rust?
What's next?
Looking good JFB, I agree with Garth 100% on the extra plates on the tail lamp outer edges and tops of the roof B pillars. Mine all cracked back after a few years.
So any pictures of the reinforcements around tail light corners? I'd like to see how they are located.
transsami posted:So any pictures of the reinforcements around tail light corners? I'd like to see how they are located.
Me Too! or even a marked up photo on exactly where they go
Here are a few other links on the subject...
https://pantera.infopop.cc/topic/body-supports
https://pantera.infopop.cc/topic/body-reinforcements
Also, you may want to reach out to Mike Drew for some pics...
Thank you for the links.
What I'm looking for is that where are those supposed to be welded. I don't see any possible way to do it from the inside. So are they welded on the outside and just bondoed over?
-Sami
Love it. Cat on the rotisserie for Christmas.
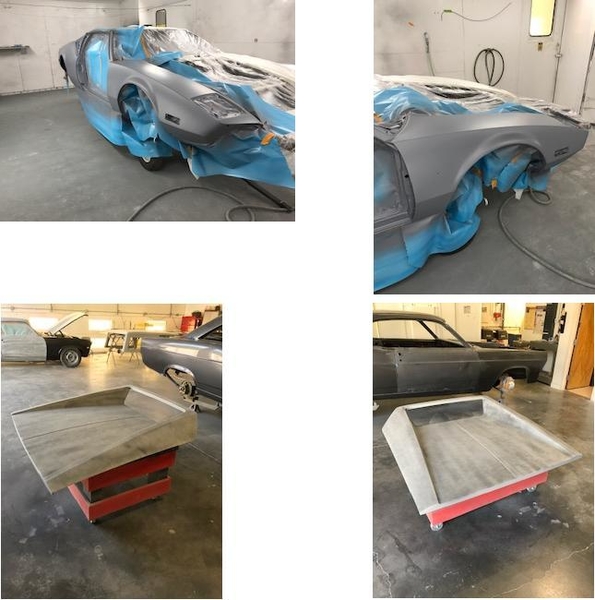
after Holidays and shop vacation, we had an update call today.
Big thing was chosen paint. Shop had mailed me several painted "shell" based upon color I tried to describe. We both decided on a silver called "Forged Silver Metalic" and a near black called "Phantom Grey Metalic"
My engine builder seems like he will be a hold up.
an upcoming item we discussed was some changes to the dash layout I would like. that is mainly put the wiper/washer in the center console, use the right side center console for "vintage air" control and add idiot lamps for oil pressure and coolant temperture. I don't see a need for brake warning.


some update pics
Progress is being made! Congrats!
I little up date.
well, the local legionary Cleveland engine builder that had mine for a couple years told be to come and get the pieces as he was no longer able. this was a real disappointment. So I loaded up the pieces and took to the Car Builders shop (GunnerZ) about 4 hours away (Denver, NC.
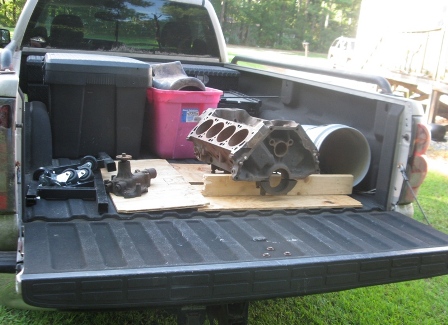
given that GunnerZ location to all the NASCAR shops, I sure hope they can find an engine builder,
this was the first time I had visited GunnerZ but was impressed with organization and cleanliness.
what I gathered, there was work on all the pieces so assembly should start showing progress some. For example the suspension is on for fitup and comes off for final painting latte
I've lost interest but the shops manager seems to be agressive at finding info and parts. surprising though was they were waiting to get rear axle bearings due to covid related delays


 When it comes to building a new Cleveland patience seems to be the most valuable item on the parts list.
I retrieved my block and components from the first engine builder when there had been absolutely no progress after 3-4 months.
My second engine builder finally delivered my engine to me after about one full year and I’m very glad I pulled a valve cover for inspection of the new roller rockers. See photo. 😳😡
That discovery prompted me to take it to my third engine builder with instructions to completely tear down the engine and check all clearances, and reassemble.
The third machine shop has a engine dyno along with a chassis dyno. The engine dino resulted in 454 hp with 475 foot pounds of torque.
Yours may also be a long journey but I hope your results are as good as mine were. 🤞🤞
Larry
Larry, what was the cause of that roller rocker being off, stud not in the head correctly?
Assembly laziness.
CHI 4V heads. ARP studs, Comp Cams guide plates and rocker arms.
The ID of the guide plates was slightly larger than the diameter of the studs and thus allowed the guide plates to be adjusted for correct, or incorrect, positioning.
I had cautioned the engine builder that guide plate alignment was often troublesome for assemblies like this and if necessary they are sometimes cut, properly positioned and then welded to retain correct alignment.
and yet he delivered the engine to me as pictured. 😡😡
The previous photo was the worst example of misalignment but not the only example.
The third shop found they were able to obtain correct alignment with judicious attention to correct alignment as allowed by the ID versus OD diameter differences.
Larry
I'm curious on how the car coming along. Any updates?
I am curious also and CONCERNED.
the excuse is COVID ! very little work (thus no invoices) since the "shut down"
Oh man, sorry to hear that. The extra wait must be excruciating. Hopefully they will be back at it soon. Will be worth the wait! I have plans on taking mine down this year for full restoration at some point. As to not clutter your thread, I may PM you with a few questions when I get there.
Check out Jon kaase racing engines. He is a big Ford engine builder. He also competes in the Engine Masters Challenge and has won many of them with different Ford engines.
I had a discussion with shop building 5177 last week. (I've lost interest
and relying his abilities.) Progress is VERRY slow
The engine builder that abandoned the project a couple years ago had found
"the" ford aluminum intake, in his opinion, better than BT. He was onboard
about making carb base level and re doing studs.
Coming to now. The engine is supposed to be complete EXCEPT, builder
didn't do any thing to intake. During last week discussion with car shop,
he stated he want to "get measurements with engine in" (makes no sense to
me)
So, to my questions and request for info.
Wouldn't the machine shop instructions be mill carb base parallel with head flanges (then Heli coil studs to be square to machined carb base.
Is there anything I am missing? Would anyone know of a pantera shop/dealer
my builder could talk to confirm the intake NEEDS to have the carb base level. AND can be done without taking measurements in the car.
Or some good replies I could forward him
Yes, milling the carb base flat is just as simple as you outlined. It does not require any in-car measurements.
BUT......
AFAIK, the Blue Thunder “Pantera” intake is the ONLY intake that offers a parallel-to-the-ground design when installed in our Panteras. All the other intakes are designed for passenger cars which install the engine at an angle as opposed to the flat installation in our cars. so those intakes have an angle which positions the carburetor flat when installed in a standard passenger car.
The carb base does not NEED to be milled flat for your Pantera application.
Just about every Pantera on the road does not have a flat carburetor base. The workaround is to fine tune your fuel bowl levels to avoid fuel surging out the vent tubes during hard braking. There is also a modification that can be made to the two fuel bowl vent tubes - connecting the two of them with a fuel-safe piece of tubing that has an air vent hole at the highest point.
milling your intake flat is the ideal approach, but it is likely not worth any more grief in your already frustrating endeavor
Larry
As Larry said, there are many, many cars without this modification and they all work fine. Personally, I don't think its worth the effort.
another update . . .
the desired engine builder acquired a Ford Aluminun dual plane intake he thought was the ultimate for street.
NOW, that another (unkown to me) engine builder had to finish up AND the plan to use Throttle body fuel injection, the consecese is don't use a dual plane !
the take off intake was a Torquer. I dug it out of trash and had local guy skim the base level and increased the threaded depth.
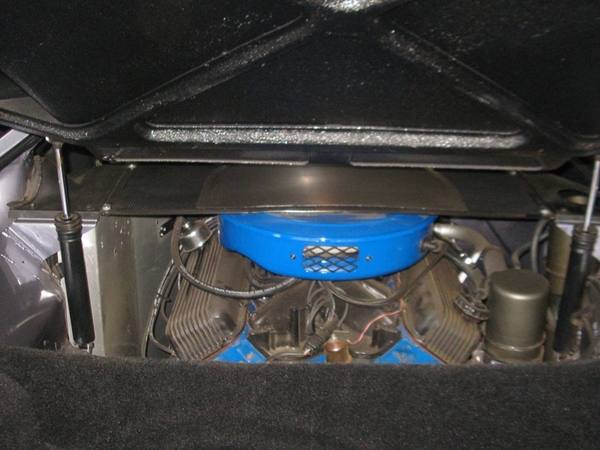
Here is a pic of engine just prior to installing intake. Now the intake doesn't lineup with heads so going to a machine shop for another cut.
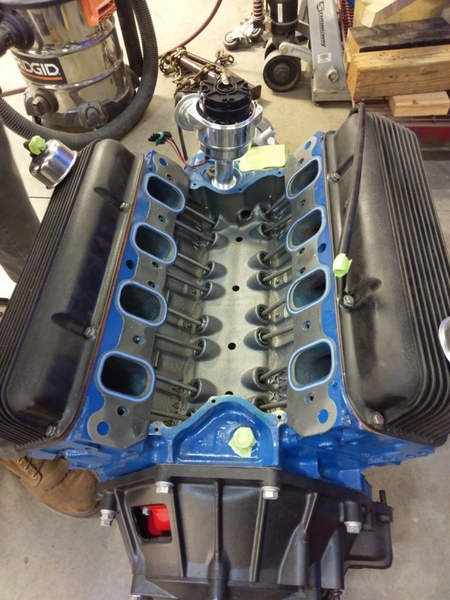

Looks good! Nice and clean!
So you’re running a flat tapper cam?
Any other exciting mods?
that is the embarrising question. . . I don't know how the engine is built.
I requested the "G Pence, Street" custom grind.
Hey the good news, its painted and plans are to fit into the bay some time soon
the new shop manager, has promised to send photo's from his phone to me in text. I am NOT phone savy and it has taken me all day to get from text to computer to here. And I don't know if I can repeat
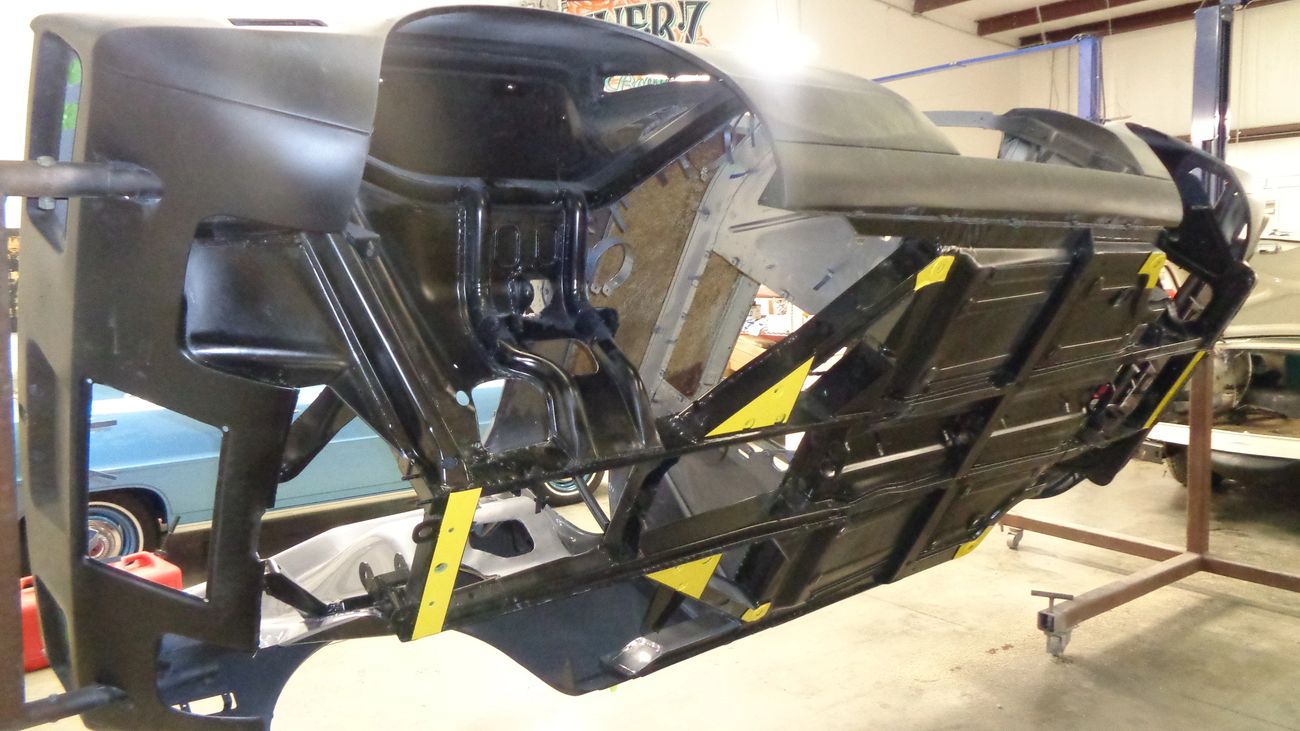
Looks like your boys do really nice work!
The black Trans looks really different ( No - I mean nice different !!)- Is it an epoxy or powder coat ?
the "black" ZF is a Ron McCall recomendation and he did when rebuilding it.
Sale point is it will easily rinse clean.
the silver engine bay (instead of black) was recomended by builder, GunnerZ
Percy,
The coating is originally intended for firearms. It is sprayed on and baked ( much like powdercoat but leaves a much thinner coating that is very durable and chip resistant) at 375deg for 1 hour.
Ron
Joe,
That color looks amazing! The work that has been done looks top notch. Curious why they left the metal tabs in the engine bay instead of routing the AC hoses/wiring harness inside the fender well?
You should be excited! It is progressing nicely.
Ron
My question on the coating is how it handles spotting that could be caused by fuel and other chemicals found in the engine bay???
Larry
If this ZF was coated with Cerakote, it’s pretty tough stuff. Engine builders coat pistons with it! I doubt it will stain or spot from chemicals or fluids. I guess time will tell. I used it on my ZF too but mine was done in a medium gray with Cerakote clear coat over it, to make it easier to wipe up any fluids that will inevitably get spilled on it. Most Cerakote coatings do not require heat to cure, so they work well on porous metals and castings like Campagnolo magnesium wheels. When heat isn’t used to cure, you don’t get the out gassing that’s so common with powder coating. I’ve even had Cerakote applied to plastic, to make it look like metal.
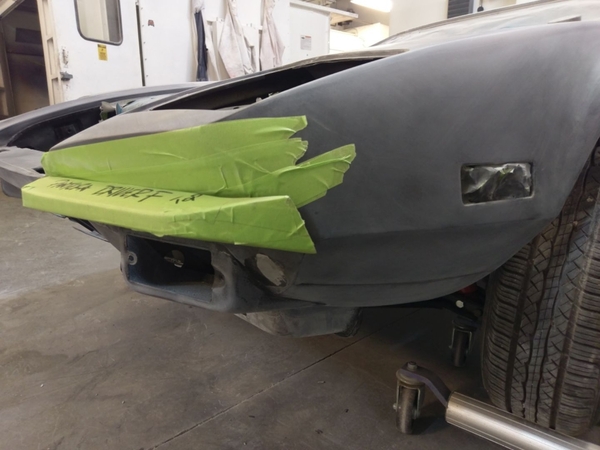
Just a little grinding work and they will be just fine. I had to do the same thing because my car didn't have front bumpers when I bought it and the used set I bought did not fit perfectly.
Well, surely that .4"-ish mismatch is within tolerances lol, j/k. I would have considered the Mr. Fiats at that point, but we all know about hindsight (and for all I know might have been from the same source anyway, there's a lot of that in Panteradom). I truly sympathize. Though being "around the corner" at that point, might not be as noticeable as one would think, but still the principle of the matter.
Nice to see progress continues…. I’m happy for you!
We did this in 4 months but it was just strip and paint. No mechanical! https://www.youtube.com/watch?v=WeGcZWE5ca8
not sure . . . but Yours was my insperation
the sample were labelled Forged Silver (upper) and Phantom Grey (lower)
So you painted using two tones of paint?
did you use the beltline as the dividing line or was it located somewhere else?
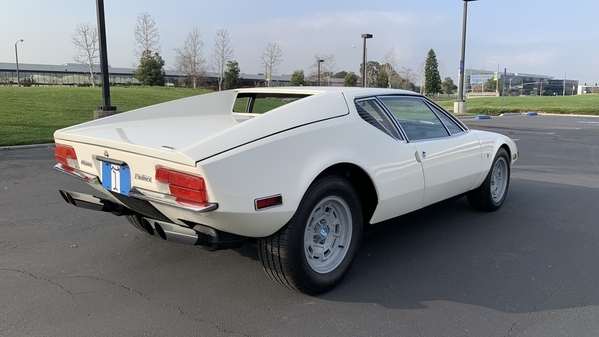
if you study the photo of 2511 you may think it is also painted with two tones, but that is just a function of the surface below the belt line catching the sunlight differently than the top.
Larry
belt line and both hoods are the near black. those photos appear to have the silver darker than the sample.
being optimistic here in preperation to getting 5177 back.
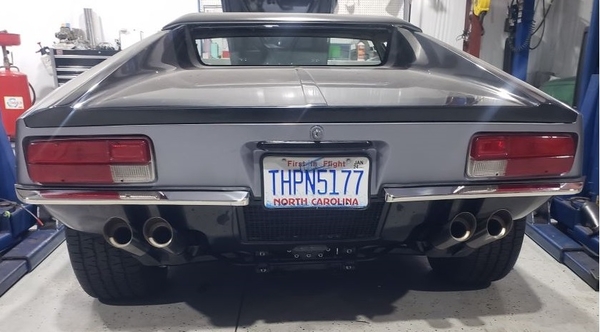
what is the opinion of using the VIN in the license plate. I was thinking
THPN5177
(NC allows up to 8 charectors)
You can save a bunch of property taxes by licensing it as an antique. My taxes went from about $100 to $1200 over the course of a year. Of course, you're in a different county. For antiques the assessed value stays at $500 for the life of the car plus you can put on antique plates on it as long as you have a valid registration and carry the valid tag with you. I don't believe you can customize antique tags though.
Looks like some real progress.
Joe
Great to see the progress shots . It is always hard to keep the momentum going after the third year !! Keep at it - the overall end quality will be better than new !
Perc
Looks great! Congrats!
Real progress, looks great! Maybe you will be driving it before the end of this year?
Wow!!! Awesome
@racecarmike posted:Real progress, looks great! Maybe you will be driving it before the end of this year?
that was hoped
BUT, A mix up on the wheels will be a couple months before they come back. (I think they are on a boat to Italy via Panama and the Suez)
speaking of this. . .
Is there 15X7 and 15X8 aftermarket wheels that would work till Campy's come back
MANY years back I got a SS exhaust by Wilkinson (new, second hand).
The shop rebuilding 5177 called to say the driver side is not fitting, interference with gas tank shield and engine mount. (info second hand from Techs through Manager)
My response was it was OK to hammer tubes. I thought I read this has been seen before and forcing tubes would make acceptable.
Is that so OR is there something else?
There was an article in which I believe was in Hot Rod magazine if I remember correctly where they dented some of the primary tubes and it didn’t affect power. They could possibly modify the tubes which would be more work.
Dear JFB,
I have had driver's side header primary interference by the motor mount and gas tank on two sets of GTS headers over the years. On the first set, I discovered years later that the BFH approach was used to obtain suboptimal fitment. With the recent second set, I was smarter and checked with an exhaust expert. His method is to heat the area of interference with an oxyacetylene torch to orange hot and while the steel is relatively soft, then apply a round (various diameters available) to the problem area followed by judicious whacks with a BFH.
The common BFH method applied to cold steel, in my experience, results in a mechanical reduction of ugly appearance. The oxyacetylene BFH and round tool combined with a BFH produces a better esthetic result.
Obviously, not many people will observe such things given the location of the corrections on the primary tubes. Also, my headers were not stainless steel, which may be a important point. It is good to know your options.
Warmest regards, Chuck Engles
I have recently installed two sets of Wilkinson's stainless exhaust and was able to get them into the cars without massaging the header tubes. Instead I used an air file to slightly shave the motor mount and also slightly relocated gas tank shroud. Wilkinson said the he header tube should not touch the shroud and that the smallest of gaps is sufficient.
I did this years ago when Wilkinson first sold these. The answer was as Steve said to shave down the motor mount.
Congratulations!
Must be exciting after a long journey!
Would be grateful of the cam specs if there available, is it a stroker? did i read correctly you made 475 ftlb that's great with that idle.![]()
I've actually "lost" the specs I provided for the grind. I think G Pence changed to specs in post. I do not have any output expectaion values.
The restro shop ia suppose to have keep the paper work from the grinder.
That vid is sopposedly the first crank and no tuning done yet, I am interested in idle and vacuum
bore and stroke are still 351
Ok thanks I see it was Larry's post with some dyno numbers
That’s great news!
Very nice 🙂🙂
Ah, the advantage of an 8 digit custom plate. No one will understand what it means but......
I got up nerve to make the 7 hour RT.
only had a few minutes to look /talk. I did check the clutch effort. while doable, it could slide me accross the dynamat
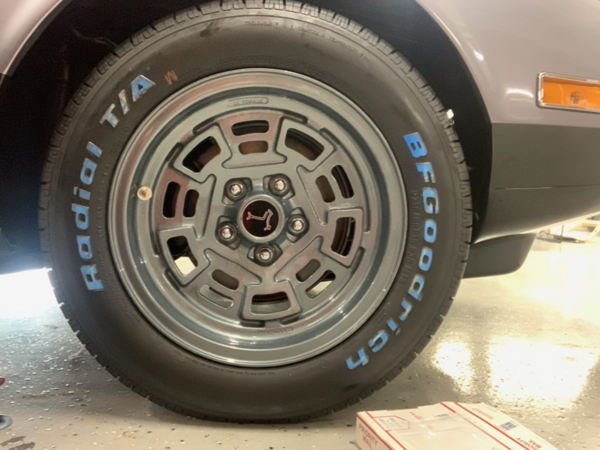
After being refurbished by ""ferrari shop" the wheel look great, EXCEPT the color is slightly darker.

And today they sent pics with doors and hoods on. I hope the engine screen will clear a factory air cleaner

It’s coming together! Are you seeing the light at the end of the tunnel?
PS… From what I am seeing in the pictures, it looks like very nice work!
Congrats!
jfb,
If you're in the area again, you're welcome to stop in. I'm in Greensboro.
Congratulations on all the progress! Looks great!
Just gettin caught up JFB…. Long journey, for sure, but she’s lookin awesome man!!😎👍
As for "seeing the light at the end of the tunnel" ie, getting 5177 back, I still have a bad feeling !
Slow progress is exactly right though. I AM keeping this post as up to date as things happen.
Today, pic with the refurbed wheels and BFGoodriches on.
AC installed and checking with vacuum.
there was a "problem" getting original type air filter on. . . interferance with new distrubutor, but that was resolved.
EDIT....
Anyone make their own center caps? If so diameter (& thichness) would be appreciated.
I am thinking about a polished (chrome) with just the “cattle brand” engraved.
Joe…
I have an old brass one on my display shelf.
Just grabbed a dial caliper…
dia. => 2.336” -> 59.3 mm (60 mm?)
thick. => .044” -> 1.17 mm (1 mm?)
My stock wheels are in a storage unit, so I couldn’t test fit the emblem…
(Someone will correct me if this medallion isn’t sized for wheels…)

Ps. Car is looking good! Coming together!
Looks Great!!!
Would you recommend the shop? Asking because I have a half finished car.
Thanks, Mike
what is your budget? I am embarrassed ti even mention what this has cost (and it is not finished AND I am supposedly being given special considerationI would ) The Owner seems to be a Great Guy, very knowledgable, and I thinks His initial intentions to "help" me were good, but his buisness has changed (gotten bigger). I think the work is concourse quaility. Dealing with the several "project mangers" has been EXTREMELY stressfull.
I don't think (and been told) their normal customers don't have specifiec way they want the car to be.
This is as much as I want published
I would highly recomend visiting his shop (https://klassicrides.com/) and asked to see 5177. the Owner is Billy and my current project manager is Rob (never met him)
Hey Joe - keep it going- you are so close !
Had the same wilkinson 2 inch header interference issue myself but chose to carefully ball paen the new Stainless heat shield on the fuel tank as the solution. It seemed to work and did not compromise the pipes. I had a 2 1/2 inch big bore header set previously installed which had some serious tap dancing on the pipes to be made to fit so this is a common issue.
Just aa question - did you replace the AC piping and do you have advice on that ? Did you refurb or replace the under dash fan unit ? The TX valve ? Still got to do this and all advice welcome.
Perc
My "instructions" were to replace AC with modern unit and controls. I can't recall but something like a Gen II unit was suppose to be a near drop in. The First project manager had other ideals and he purchased a Gen I unit, disassembled, threw away the controls and fitted the core, evaperator and fan on exisiting box (plus a LOT of labor charges) He planned to use heater slide lever with long cable to an engine location heater valve.
Our disagreements lead to owner assign new project manager and He was not going to use the long cable so I DON"T know how controls will work. actually HVAC work is big thing NOW and thus holding off on dash till finished.
The shop frabricated their own hoses and manifold for rotary compressor. New condensor, dyrier and fan but I've not been informed on any brand used,
due to disagreement with second project manager, 5177 was moved to the recently acquired facuiliy. Last week's head butt was over the differance between the rear trunk insert "fitting" over new coponents versus my instructions to modify trunk to allow condensor air flow access engine area. Luckily I talked to Owner and He agreed and though mod was being done and assrued me it would.
Hopefully next update will have HVAC completed and interior going in.
I hate hearing stories like this. It’s your Pantera. You tell them what you want done and they should do it; period, end of story. They are allowed to have their own ideas but if you don’t fully embrace them, they should drop it in a big hurry.
Did they at least know enough to re-route the A/C hoses through the passenger side wheel well? Did they move the drier to the wheel well too?
A few of us, here, have installed Restomod Air heater / AC units. They make a few that are more compact than the Vintage Air units, thus easier to install. That being said, this is not a trivial installation. It’s easier in a late dash Pantera than an early dash car.
Hey Joe
Was it recommended to replace your condenser unit ? Mine looks to be in OK condition and the fan works but I have not pressure tested it yet. I have a new dryer and Sandken rotary compressor already fitted.
The under dash fan unit sounds remarkably similar to a bucket of bolts being poured down a washboard so I have a new one ready to go in , but I wasn't intending to replace the under dash evaporator unit.
Is that the restomod unit you were discussing ?
Any comments on the current recommend TX valve optimal replacement type that they have fitted to 5177 ?
Thanks
Perc
I can't answer . . . those questions are beyond the tech knowledge of the project manager. asking fixed or varible orifice got me silence over the phone. If I get back to shop and have some time with techs, I hope to get answers then.
during a "heart to heart" with Owner a few months back, he stated few clients have knowlede of their car and the others just wanted X brand car. so this why I can't get alone with project managers
Thanks Joe
Yes - when you are shelling out hard earned readies you expect the people involved to know the detail of their craft backwards.
If you hear anything more it would be of great interest.
I can see another (3rd??) full dash removal coming soon for 6997 - my favourite thing ......!!! ![]()
Cheers and hang in there
Perc
There has been no "looking ahead". the hold up on working for the last few weeks has been acquiring the metal stamps to make a replacement YIN tag for the dash! They are ready to install dash, except for that tag.
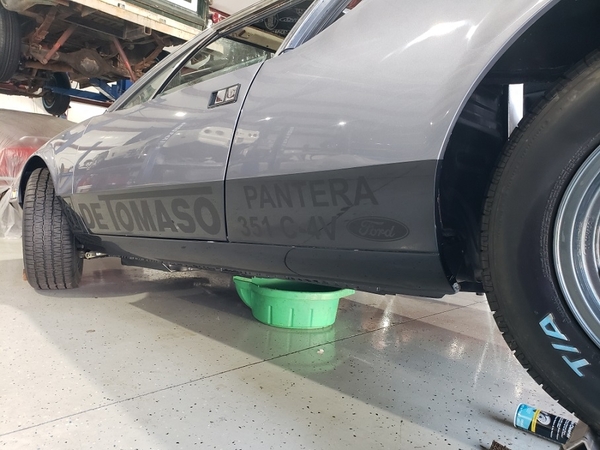
way back (years ago) I posted the way I wanted paint and the graphics.
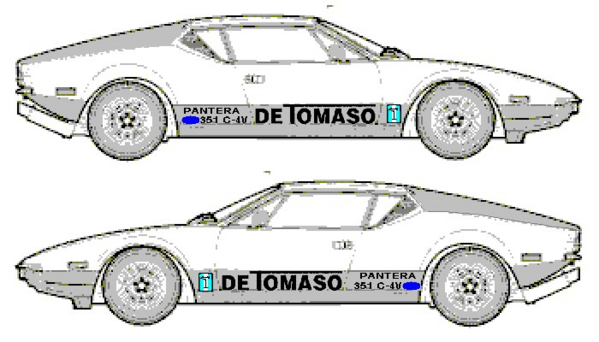
the Owner suggested "ghosting", AND I liked the ideal. Here is a couple pics I got today.
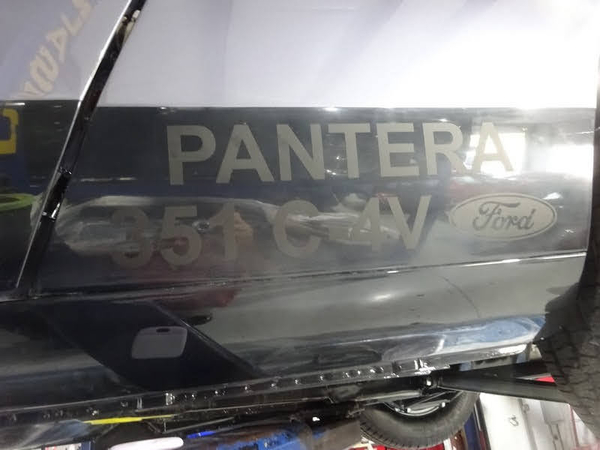
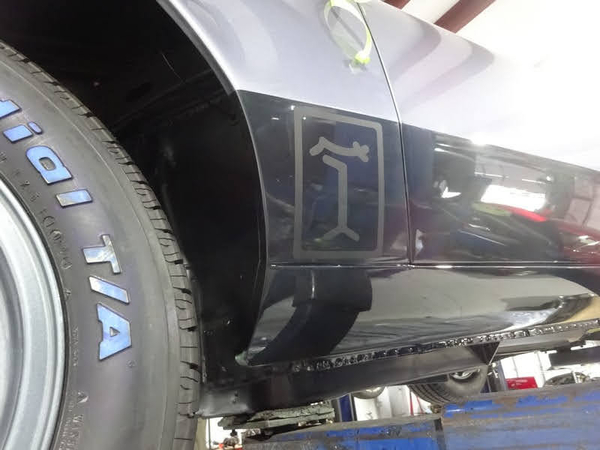


The "ghosting" look good, to me anyway.
Looks good, Joe!
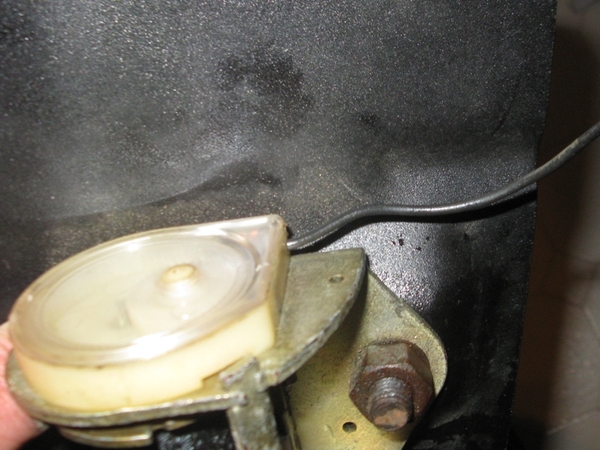
The only thing that can be leaking where the drain pan is cooling tubes. That’s not any kind of technical challenge to solve. Very minor problem, as you know.
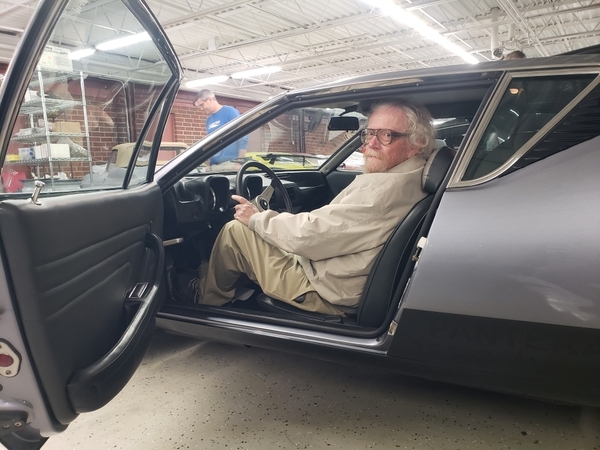
I want to see pictures of the car with you driving, with your curly hair and Glock (holstered, of course!)
Only sorry to see you’ve cut back on your instrumentation!
😎😀
Chuck
as for the MAYBE leakes . . . I requested those gates shrink fits instead of clamps. sure hope it is not those! Another possibility is the heater control valve. there was a butting of heads with the first manager and they are now having to make changes.
Funny you mentioned hair. for the past decades, I've just got a #2 buzz cut (better with hard hat and latter just less effort). But for the past few months I have decided to just let it grow, trouble is, no longer red.
GLOCK! HLL NO. I aint no gangster. Italian Berettas, old school metal frames.
I did not replace the instrument Christmas tree. But I have request a couple of gauge redundant & diverse idiot lights (coolant temp and oil pressure). I think the Holley Sniper EFI display will have those indications also. I sort of wished I request adding clock (but wrist watch will have to do for now}
I hope they have not lost that ebony shifter knob.
Your car looks great !!!
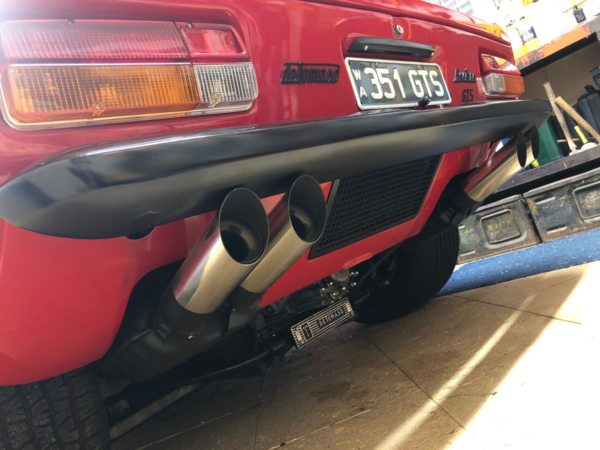
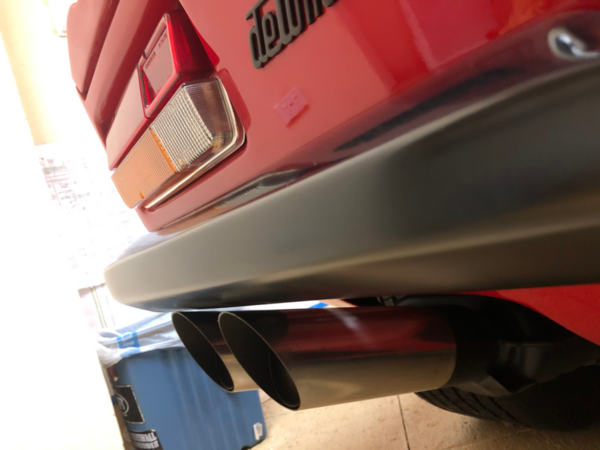
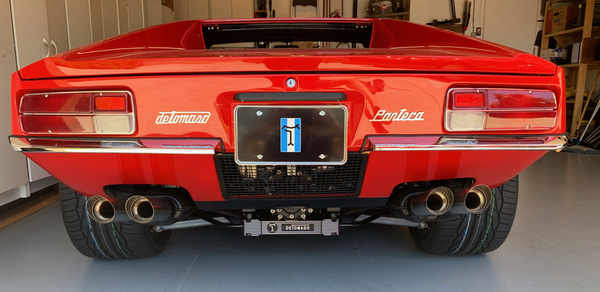
What exhaust system did you go with?
Thanks.
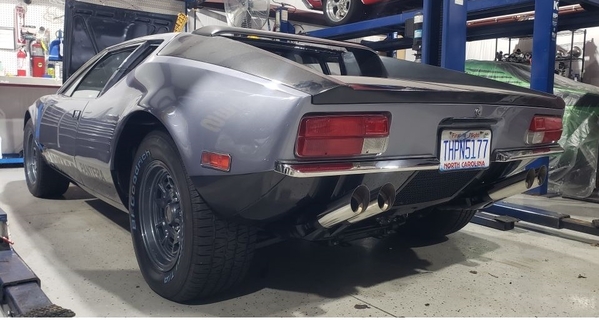
many years back, a Wilkerson SS system was listed here for less than an hour as I snatched it. https://pantera.infopop.cc/top...768#1598208419926768
It was for an "L" as the mufflers and tips seemed to hang low. So while I got a "deal" originally, it had to be made to fit better. At that time I was not thinking about going with the small SS bumperretttes
the header tubes were left as is, just a little hammer work for clearing motor mounts
I visited the shop when they first cranked and one could talk while it was idling. I am hoping it will be relatively quite
I thought I recognized those tail pipes. Those SS headers and mufflers are on two of my cars. I think their sound is approiate for Panteras. The tail pipes were re-angled for both of my cars because they have small chrome bumpers. It looks like they put a little more angle on yours, more like a 71, and it looks good.
Here is a photo of original exhaust on a 71 Pushbutton.
I should also mention that your exhaust system is high performance with large diameter tubing and improved baffling throughout the system.


What diameter is the Wilkinson exhaust pipe?
How does this system compare to a factory GTS system?
Thanks in Advance
They did a nice job fitting those mufflers on your car. Looks great.
Looks really good, Joe!
What’s left to do on your car Joe? When do you expect to take delivery?
For the last YEAR, it has been two weeks from ready to deliver!
Asking for a punch list gets a silence over the phone.
my punch list of things I believe.
install interior trim / carpet. I was told by unreliable source the dash was now in, been two weeks and no photo to prove. the two pod dash will have old covering. there will be mod to move wiper & washer toggles to the gauge section.
mount the two chrome mustang type mirrors. These were purchased a couple years back.
mount the front spoiler.
the gills and side glass
last invoice had note to purchase another master cylinder, havent heard anything about that.
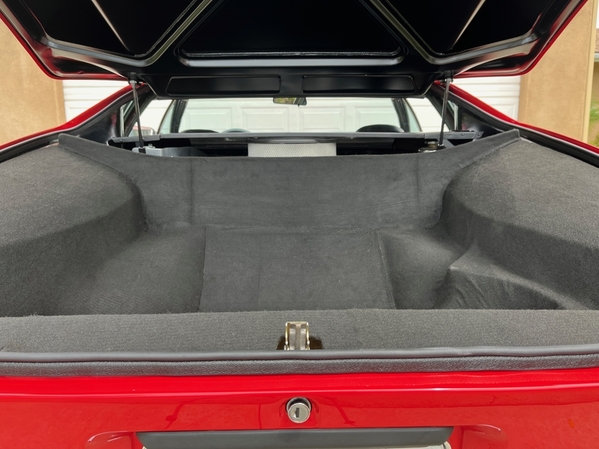
I requested trunk liner to be mod'ed to provide AC condensor to vent to rear window opening. Owner actually agreed with this about month ago, but has not been mentioned.
the muffler and exhaust tips were also my request and again the Owner agreed it would be worth the effort (for looks) Invoice and pic thursday show that is DONE.
I was hoping to have made the Long Island Pantera Club's exibition at Norfolk Navy yard but gave up on that happening.
a couple months back, the Owner and I talked about getting me back to shop "two weeks" before they trailer it back. But no mention since. Also have not come up with a good way to do so. He jokingly offerd to fly his new plane and pick me up (I didn't fair well when I had to fly comercial so I wouldn't want to try small plane). Four years ago, when this started, my plan was to hitch a ride to pick it up and take off on trip through Smokey Mts and "Tail of the Dragon"
doesn't seem to be a lot to do, but when you wait to you are installing to order needed pieces, no telling how long.
I've been think about a new post / article "How a professional restoration made me hate the day I bought a Pantera". I can only hope the realiblity and driveabilty will be as good as claimed (can't use promised)
another concern is getting the take off / spare parts back.
I just now took a quick outside measurement of the tailpipe near the exhaust can and it is about 2.5".
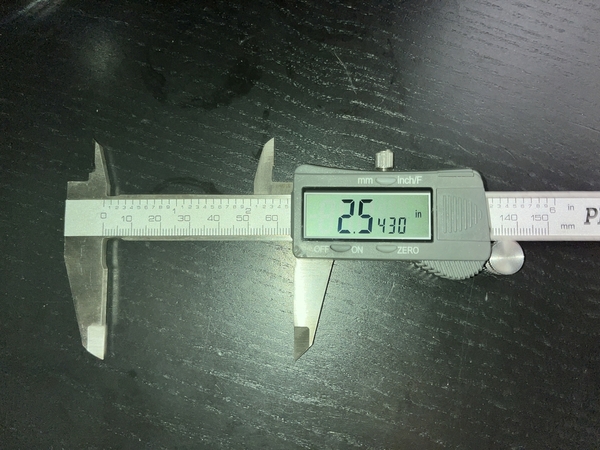

Also, Wilkinson calls it his version of the factory GTS exhaust system. It is full stainless and has a ball connector where the header and tailpipe meet making adjustment of the can/tips painless. I don't know what a factory GTS muffler sounds like but these are on the loud side.
The ball connector is a most excellent upgrade.
I have factory GTS mufflers with steel GTS headers from Dennis. I have always thought and been told that my car has a very good sound, but it is not loud.
Larry
So far, the only “color” on 5177 is the Koni’s (orange) and the block & air cleaner (blue). My instruction book actually called for those to be shades of grey, but I let that slip by.
I have the blue / white deTomaso flag for the front grill, but thinking, is there the rectangular badge to fit that bezel with just the branding iron on black. I have seen several branding irons, but would prefer the badge & bezel.
Previous post, I was asking about the wheel centers and surprisingly the Shop found some black w branding iron!
@stevebuchanan posted:I just now took a quick outside measurement of the tailpipe near the exhaust can and it is about 2.5".
Thanks Steve. I have the Pantera Performance mufflers on one car and the GTS exhaust on my other car. They both sound nice but the Pantera Performance mufflers are loud. I don’t know how much the different engines are affecting the volume.
Supposedly the shop puts MILES on the car before delivering. they have a dyno "treadmill"" also use to check things, so the sales pitch is the car will be able to make trips .
I use to take TOTD before it became named. my short cut coming from TN back home.
Hey Joe I have the Wilkinson GTS mufflers.
You cant talk next to the car rear when its idling but they are not bad inside the car. No issue when driving - great sound.
The Wilkinson GTS rear pipe measured in at 2.5 inches diameter and the header offtakes at 2 inches diameter.
The eyeball joint between the headers and exhaust assembly is a fantastic addition. My car previously had a full 2.5 inch header collector and a modified rear exhaust set up on a fixed flange. It was pretty well impossible to get the twin exhausts straight and level and miss all of the suspension interference and rub points. Consequently I had two or three suspension rub holes in the old exhaust when it was pulled . With this setup you can get it pretty well spot on and clear everything using the standard mounts.
Looking at the suspension clearances it is close to the maximum possible without getting contact when the suspension moves.
Just be aware when you start it up for the first time half the paint will burn off the exhaust collector painted end pipe ( which also looks like stainless underneath ) making one heck of a lot of smoke ! The shop should do it outside !
In my view a good performing high quality product that fits really well. You don't get to say that too often.
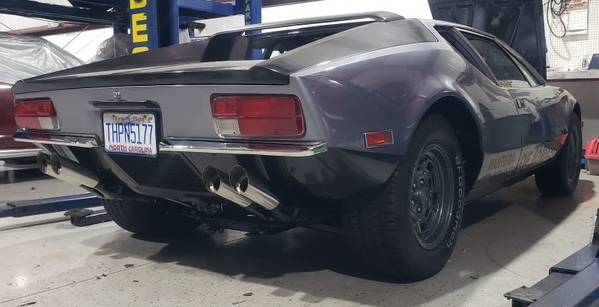
the "Ghost Cat" getting some Sun !

wouldn't let me put all pics in first post


Looks great!
Ron
I like the way you finished your wheels. I’ve seen lots of people try a darker finish and it rarely looks right IMO. The color of the car has a lot to do with it too. That color wouldn’t work on a red car. Might work on a yellow car. Regardless, you nailed it !
Hey John, glad to see your car coming to fruition!
@davidnunn posted:I like the way you finished your wheels. !
THANKS. . . I actually had nothing to do with the selection. the story I was told, that is the color Ferrari uses. when I first saw them, I was mad, BUT felt it was not worth repainting. Then when placed on the car I too liked it. thinking the argent silver would be to bright.
they found IT !

text today 5177 was moved to upholstry shop !!!
Given the seats and panels were already done, headliner and carpet should be their main work. Hope all that Dynamat doesn't become problem.
OH.... and seat belts.
Hi Joe
You might want to overlay the Dynamat with some Dynaliner under the carpet- the black HD foam with the adhesive backing. They offer a 3mm and 6mm thickness. The 3mm moulds easily to the floor shape. Provides a bit of underlay springiness to the carpet and stops some of the transmission from the Panteras patented Seating Heat Integration Tunnel ( you can do the initials )
Just a thought.
My dad and I are glad your ebony shift knob turned up!
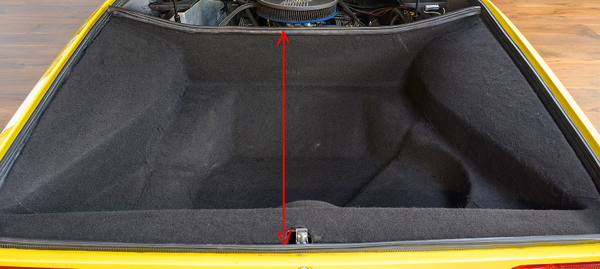
The tub looks stock to me. If it was shortened you would see patched fiberglass at the bottom and back of the tub on the side that faces the engine. Your dimensions look similar to mine.

the pic i used is NOT mine, just used to show dimension asked.
I have no recent pic of mine. they say they see no mod, but they just asked.
Not any issue, more just "like" to know
Got it. The rough dimension you are seeking is about 38".
Shop said car was "almost" finished and I visited to see what they were calling ready. disappointing .
question . . should the turn signal switch "lock" in direction or do you need to hold? didn't recall the horn is on end of turn signal.
with proper adjusted shift linkage should you be able to "palm" the knob into gears? right now Tech was saying forceful shifting was correct (wonder what he is using to compare as this was their first Pantera)
Gosh, I hope bending legs and twisting to get in gets better with practice.
even ny size 9 walking shoes are struggling to get on the correct pedal,


I am sure that others will respond as well, I have an earlier car and have had a few others as well, turn signal should lock and self cancel at least on my cars it always did, all my cars you never had to force the shifter but everyone definition can be different, for the car I just finished I had RBT do the trans and you can shift it with 2 fingers. I wear a size 12 shoe and I make them work as far as getting in and out its a young persons game but when you have the opportunity to drive one or own one you fit into it. ACS
Hi John
A couple of simple checks on the stiff gear shift issue. It should be easier.
Check the gear shift trunnion mount on the left hand side of the engine near the fuel tank. Was this renewed and is it aligned ? The later trunnions have a PTFE center which slides on the shifter shaft better than the earlier brass stock ones .Make sure the shaft is moving easily and clearing the corner of the engine block in all positions.
Did the shop disassemble the gear stick mount and clean and lube the ball mount at the base of the shifter mechanism in the center console ? That can get stiff when it has not been used. Also check the shifter gearstick shaft and make sure it is not too grooved from the gate - they can break off it it gets too deep especially with a firm shift .
Does the firewall boot look like it is at mid rest point in neutral ? That can make the shift feel firm on either the forward or rear shifter positions on the shift as it gets overly compressed and stretched if its not centralised.
Also check if the ZF gearbox shift shaft receiver box on the top LHS of the gearbox has been cleaned internally and regreased. Old grease can certainly gum it up on the shaft and make things feel real stiff.
How was the shift into reverse? That is usually the most difficult to get working properly. DId it grate going in ?
It is a minor adjustment to resolve the turn signal hold down issue. The turn signal cam needs to be leveled. Your shop needs to pull the steering wheel hub and move it on the splines so that the cam is mostly level. They need to start with good wheel alignment and a level steering wheel.
Our ZF transaxles take some effort to shift, and they are not a quick shifting transmissions. More so with the original -1 on early Panteras. Our ZF's are harder to shift when cold. Maybe try it again when the transaxle itself is hot to the touch after driving for 20 minutes or so.
The pedal box is very constricted. I drive my Panteras with my shoes off at this time. Some of us have sawed off the lower right corner of the brake pedal at an angle so that their shoe on the gas pedal does not collide with the brake. The brake pedal can be shifted left by 1/2" away from the gas pedal and I began working on such today. By Friday I can let you how much it helps. Kirk Evans sells parts for the pedal box to make this happen. You have to pull the pedal box to install the modification. It shifts both pedals (clutch and brake) to the left by 1/2"
in response, I have been extremely disappointed in the documentation ie know what was actually done, however the shift linkage was supposed to be all new ujoints and trunion. I brougth my "take offs" back and there was aziplock bag of little ujoints! what ever Vendor they used should give me a kickback!
while all gears including reverse just didn't feel right but first was the hardest. I even had to roll from stop in second a couple times in my 20 minute drive
I don't suspect any wrong with actual trans axle as I recall going though the gears by hand when out.
from earlier query about trunk tub, I didn't use a tape , but mine has definally been shorten. provides a real good veiw of block annd bell housing! I don't have pic
It should not be difficult to get into first if the whole set up is adjusted properly in my opinion.
There are some excellent articles prepared by others on this site on the process of adjustment of the shift linkage to get both the shift lever and the gearbox properly centered and aligned. If a mechanic has not come across one of these rear gearbox linkages before they may have struggled to get it correct without some of the wisdom contained in the advice on this site.
Further the 3d printable centering tool also published here was a big help to me in getting the gearshift at rest alignment correct. There is a point where you may want to get it home and do some adjustments yourself.
The help and assistance accessible through this site is second to none. Be sure if you have any issues there is a depth of past knowledge accessible and many ready to assist.
@Percy posted:....There is a point where you may want to get it home and do some adjustments yourself.The help and assistance accessible through this site is second to none. Be sure if you have any issues there is a depth of past knowledge accessible and many ready to assist.
I have PAST that point. (even though my mechanical abilities have drindel a lot in the past years)
Over the years i have forwarded the "manager" information and not sure it gets past to techs. last night I found an oild email with info from servide manual, TSBs, and comments from here on just this and forward to "mamanger" owner and all the common adresses for shop!
All I can see is the handle of the Glock....? 17C or 18C?
5177 is back home!
HOWEVER....
my bad luck seems to contine. about 3 miles from home and the roll back had to come pick it up. coolant tube hose blew off. at least they were able to make repairs.
BUT .. .
still more things not right. I started some, but a big problem with charging will need more than what I am able
tonight on battery charger and mybe car show tommow
another question.
was the shoulder belt seperate, fitting into a hole the the lap buckle?
I currently don't have shoulder and the lap retractors not working, that plastic string looks out of place. oh, to remove the lap retractor i though the seats were going to removed)
oh well. pays your money, takes your chances


Regarding the belt.. mine (5357) has the two piece units…. A retractable lap belt, and a fixed shoulder belt that has to be connected before you plug in the lap belt…
yours may be the same…
I started to back out with the problems, but I went to Cotton Festival Car Show.

actually had a good time talking and showing features of 5177. definately got the attention from visitors, but the "judges" just walked by!
several questioning why I painted the deloren!

Joe - Glad you made it to the show! Car looks great!
I was at a show in Tucson, and they parked me next to the DeLauren dude! The guy was insufferable! I had to move my car over with the other Panteras!
Chuck
Another possible Pantera quirk I forgot.
when you turn key to crank, and it fails to crack, do yo have to turn key all the way back to locked steering before able for second try to crank?
sorry about not getting some glamour shots, but the problems have me over whelmed. ------------
earlier I asked about rear tube lenght . . . well mine had been cut. actually worked goog for car show, leaving in and still seeing motor and tran. (also having a gravel drive is going to be a challange for dust)
can any one tell if this is a long throw slave? I actually have too much clutch travel (if throw out is set right)
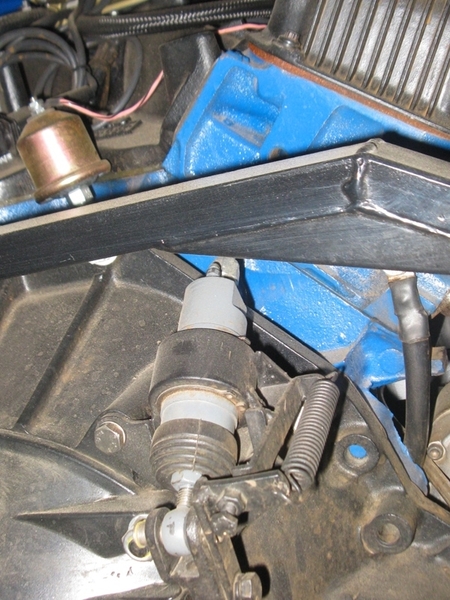


Joe- looks like a stock standard unit to me .
surprising, comparing TR6 clutch where I go to the carpet and with what seems like less than an inch up the clutch is ingaging. But the Pantera has to come what feels like inches almost at top, before engaging.
trying to control the realy hard to hold clutch and the super easy reving throttle has lead to some interesting rolls from stopped.
after a few minutes driving with a lot of shifting both legs are cramping up, one for the workout and the other for isometric
If the clutch doesn't start to engage until the clutch pedal is near the top of its travel, try increasing the free play at the slave cylinder.
Aluminum slave cylinder = long throw
Iron slave cylinder = standard throw
John
Need to check your adjustments per the Technical Information manual. Do you have the pedal effort reduction kit?
i have that linkage. when i can get assistane i will measure the full clutch clearane & throwout clearane at full engage. feel like the thowout is clear.
clutct functions, just wasted travel. I had a quick thought of adjustable pedal stop. But that would be out of the effective travel for the effort reduction, so fine tuning the slave sometime.
9 is left handed.
continuing with a shifter question. when shifter is center of 2/3 and fixing to wedge down to tighten jam nuts. How much side to side free play is expected or too much? I am going about 1/3 to the 4/5 slot back to the 2/3 slot.
Joe, FWIW, my stick in neutral is ever so slightly left of center of the 2/3 slot. Last time I had to do the jam nut thing it took several tries even with 2 people, but I never wedged the stick. Just tightening the nuts tends to "change things" from what you intended, but wedging should help considerably. And we both have fresh rebuilds by Ron McCall, so I assume should be similar, and I'm pretty well adjusted within the shift gate at the moment. If I need to come down to help, I don't mind, just can't tomorrow/Wed. That said, I assume a lot of that could depend on all the linkage geometry and orientation. You have my cell in the NC thread if needed. By the way, your car looks amazing, I should have come to the Cotton Festival, but the Norfolk event showed me I need to address a couple of things, which I started today. (Hint: Keep an eye on your header bolts with your new rebuild, they will need some tightening pretty soon, also snug up intake bolts).
I been thinking, I wish someone with "OK" or good shifting could let shop try. Even let me try, maybe I have lost a lost of desterity
Do you know if the detent in your cabin shifter box is intact?
It centers the shifter in the 2-3 gate.
If the turnbuckle is loosened, you should be able to feel it settle in. If you use wedges to center the shifter, try and be sure you're in the detent.
The transmission also has detents. Again, with the turnbuckle loosened, you should be able to manually get it to settle into its 2-3 detent.
Now tighten the turnbuckle. Both the cabin shifter box and the transmission should now settled into the same detent position and not resisting each other.
To center the shifter fore and aft, loosen the shift shaft U-joint pinch bolt at the transmission. It must be loose enough to slide back and forth on the splines.
Manually position the stub sticking out of the transmission to its center position. You'll feel where it wants to settle in. Slide the u-joint on the splines to center the shifter and tighten the pinch bolt.
In fact, tighten all the shift shaft u-joint pinch bolts as tight as you can. Every problem I've had with shifter adjustment has been the u-joints slipping on the splines.
Good advice - makes sense…. It might be fun to use the detent I removed, and readjust my linkage!
Thanks!
Also make sure none of the u-joints are coming in contact with body as you shift through all the gears.
hearing how i was not happy, the Owner and Main Tech flew over this AM.
the master tech and I discussed all the instructions on how to adjust. as found trans detent was up in 2nd. ajusting to bring two detents together, holding in 2/3 center to loosely jam nuts. To me it was such a GREAT improvent. as I sat going through 1 thru 5 smoothly. Tech and owner had to agree it was better. the tedius came setting jam nuts. first try 1 thru 5, but no revered, second try reverse but no 4 & 5. sever trys got a good compromise to get all gears (not perfection, but very drivable.
ALL linkage was new bought assembled. (I might even have a new shifter)
So I can now drive 5177. It just makes me nervous (and scared), after driving pick up, this thing is QUICK.


")
")


")
")
")


")