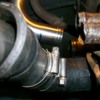
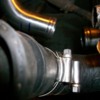
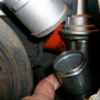
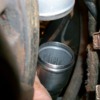
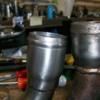
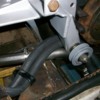
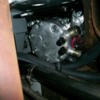
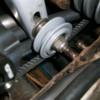
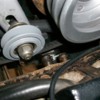
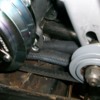
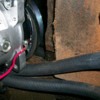
Here I think I optimized the top hose on the water pump...but suffered at the bottom....
OK! Backup to HEATER HOSE!
I fast forwarded a bit to AC pump fitment and put my heater hoses in place. I used straight hose as I couldn't initially find the long hose with a molded 90 degree at the end.....and found that when I routed my hoses with a nice bend radius back to the oil pan then to the left to the frame clamp that things went bad quickly! I started with this:
I fast forwarded a bit to AC pump fitment and put my heater hoses in place. I used straight hose as I couldn't initially find the long hose with a molded 90 degree at the end.....and found that when I routed my hoses with a nice bend radius back to the oil pan then to the left to the frame clamp that things went bad quickly! I started with this:
Attachments
When I tried to get my shiny new SD7 AC compressor in here....there was "no more room at the inn"!!!!
So I had located a DAYCO #80406 hose which has a 90 molded into one end...4" of hose on the short side and 48" on the long end. The hoses I took out were 44 on the long end, so these will work great! 5/8" diameter hose.
DAYCO #80406 about $12-13 from RockAuto.com
So I had located a DAYCO #80406 hose which has a 90 molded into one end...4" of hose on the short side and 48" on the long end. The hoses I took out were 44 on the long end, so these will work great! 5/8" diameter hose.
DAYCO #80406 about $12-13 from RockAuto.com
Attachments
So, I don't have the hoses in my grubby fingers yet....so experimented with what I had.
I took the straight hose off and just laid it in place where the originals came out. They need to go up against the lower tank tube, they will lie down on the chassis (smooth any welding boogers with a file!!!!), they need to fit into the clamp....and head for the firewall where they will go UP and OVER the ALTERNATOR. ...and you thought we were all done with this one....not so fast.....I'm not even done with that.....
This was a "see how the AC Pump fits.... exercise today.
Here is a shot of the hose interference when run over the top of the lower tank tube.... It looks worse from the front!
You also get a partial view of the little "L" bracket I made to hold the lower tank tube in position.
Attachments
Steve,
A lot of us are using a shorter #63812 90 degree hoses and then having that connect to the heater shut off valves. They are then accessible between the chassis rails for summer or winter operation.
Julian
A lot of us are using a shorter #63812 90 degree hoses and then having that connect to the heater shut off valves. They are then accessible between the chassis rails for summer or winter operation.
Julian
I thought about that as an option too! There are shorty "straight" pieces of tubing for splicing such a thing also! I found on the O'Reily Auto Parts website for a couple of bucks each....
Haven't had time to think about shut off's yet....."cuz I fixed mine" and it should work.....right?
S
Haven't had time to think about shut off's yet....."cuz I fixed mine" and it should work.....right?
S
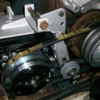
Next 4 posts are of pump in place showing where water hoses will need to run and what to watch out for....namely that pesky AC idler pulley! If you put an oversize pulley in here...watch out you don't push it all the way down into the heater hose!!!
First pic
First pic
Attachments
Once I was done.....it all fit!
PLEASE NOTE: BELT IS WAY TOO BIG, so don't use this number to go buy a belt....shouldn't have put that in the pic! This was just to rough test fit the alignment and fitment of all the other stuff!
There is still much to do yet....like a Chinese jig saw puzzle or building an engine....you don't put the pistons in then try and put them on the rods....or put in the crank.....!
I need to take this all apart and install gaskets, and all the water hoses!
Assembly is something like this:
1) install all large water pipes & hoses & unions
2) install heater hoses
If you are working with a hoist, then perhaps reverse 1 & 2!!
3) install AC pump bracket
4) install pulleys
5) install AC pump and belts
5A) Place alternator into position in bracket
6) make top engine heater hose connections (don't trim until alternator is placed!
7) Adjust alternator belt and tighten everything down.
8) Beer, bandaids, and pain killers!
9) Place holder for the stuff I forgot........
Attachments
Steve,
Do yourself a HUGE favor and throw that Ac belt tensioner away and replace it with the unit from IPSCO. You will thank me every time you need to replace the belt. Makes the job dramatically easier and less frustrating.
Also, Weld the bottom alternator nut to the bracket . ( use an all-metal lock nut and not a nylock)
Ron
Ron,
Great affirmation on both actions you suggested!!! They are on my list!
Great affirmation on both actions you suggested!!! They are on my list!
quote:Originally posted by Mangusta:
Haven't had time to think about shut off's yet....."cuz I fixed mine" and it should work.....right?
Did you take the heater valve apart and replace all the internal seals? Even then they tend to bypass a little so you have coolant continuously circulating through the heater and combating the A/C in summer.
Julian
Anyone have a picture of the IPSCO belt tensioner?
Another helpful suggestion is to make the inner tensioner nut from a threaded rectangular block of steel. That way is rides up and down in the guide, but doesn't require two wrenches to tighten it...
Therefore you only need 3 hands, instead of 4-5 to adjust the tension on the belt.
Rocky
Another helpful suggestion is to make the inner tensioner nut from a threaded rectangular block of steel. That way is rides up and down in the guide, but doesn't require two wrenches to tighten it...
Therefore you only need 3 hands, instead of 4-5 to adjust the tension on the belt.
Rocky
Rocky,
I think that is basically what the IPSCO idler is;
http://www.ipsco.org/Pantera%2...s/Idler%20Pulley.htm
Julian
I think that is basically what the IPSCO idler is;
http://www.ipsco.org/Pantera%2...s/Idler%20Pulley.htm
Julian
Joules,
Yes, there was only one o-ring in the stock valve that I found.
There is a TINY orifice to allow water to circulate...but it's like a .030" slot.....and it barely shows when fully closed. I had to readjust to get it to show when fully closed, as I still believe that you need some flow in the heater hoses to prevent cavitation....but I haven't had time to sit and stare at the water passages in the block and water pump....to figure this out.
I had a BAD experience with the 302 in the GOose because a previous mechanic hosed up the hoses for the heater.....! Bad thing happened when the water valves were closed.....
I don't care to have the same happen here!
In fact, I may just put an "H" in the two main hoses just to prevent this from occurring. Use 1/2" thru T's with a 1/4" or 3/8" down leg and connect the two with a short piece of hose.
This way, when the valve is completely clogged up with crap..... the water can still circulate and get air bubbles out of the water pump.
Ford used this sort of feature in their heater hoses up past the 429's and 460's and on.....
That's my thoughts for now on it.....
Steve
Yes, there was only one o-ring in the stock valve that I found.
There is a TINY orifice to allow water to circulate...but it's like a .030" slot.....and it barely shows when fully closed. I had to readjust to get it to show when fully closed, as I still believe that you need some flow in the heater hoses to prevent cavitation....but I haven't had time to sit and stare at the water passages in the block and water pump....to figure this out.
I had a BAD experience with the 302 in the GOose because a previous mechanic hosed up the hoses for the heater.....! Bad thing happened when the water valves were closed.....
I don't care to have the same happen here!
In fact, I may just put an "H" in the two main hoses just to prevent this from occurring. Use 1/2" thru T's with a 1/4" or 3/8" down leg and connect the two with a short piece of hose.
This way, when the valve is completely clogged up with crap.....
Ford used this sort of feature in their heater hoses up past the 429's and 460's and on.....
That's my thoughts for now on it.....
Steve
I enjoyed and appreciate you posting your work and progress.
I have noticed an apprehension about the water pump being “dead headed”. While I only know what I have read here, the Cleveland has an unique cooling arrangement that is described by George in the 7th post in this discussion
http://pantera.infopop.cc/eve/...50045562/m/346105744
I am not familiar with the front of the block (and hopefully some one that is chimes in), BUT I think the passages that allow this “controlled” recirculation can be blocked by improper gasket or the actual water casing not specific for Cleveland.
BTW, thanks for mentioning about special sockets for square plugs...I got a set of 8 point on the way!
Thanks, Joules -
I thought it might be something more spectacular.
I made mine out of a piece of rectangular bar stock, and tapped it. Easy to fabricate, but time is money.
Actually, time is often better than money.
Rocky
I thought it might be something more spectacular.
I made mine out of a piece of rectangular bar stock, and tapped it. Easy to fabricate, but time is money.
Actually, time is often better than money.
Rocky
The IPSCO idler uses the hex head on the end to loosen and tighten. If you tap a flat bar and use the stock shaft you then have to reach through the belt and find the flats on the shaft behind the pulley. Not impossible but not as easy as the IPSCO unit.
Forest
Forest
quote:Originally posted by Mangusta:
Joules,
Yes, there was only one o-ring in the stock valve that I found.
There is a TINY orifice to allow water to circulate...but it's like a .030" slot.....and it barely shows when fully closed. I had to readjust to get it to show when fully closed, as I still believe that you need some flow in the heater hoses to prevent cavitation....but I haven't had time to sit and stare at the water passages in the block and water pump....to figure this out.
I had a BAD experience with the 302 in the GOose because a previous mechanic hosed up the hoses for the heater.....! Bad thing happened when the water valves were closed.....
I don't care to have the same happen here!
In fact, I may just put an "H" in the two main hoses just to prevent this from occurring. Use 1/2" thru T's with a 1/4" or 3/8" down leg and connect the two with a short piece of hose.
This way, when the valve is completely clogged up with crap.....the water can still circulate and get air bubbles out of the water pump.
Ford used this sort of feature in their heater hoses up past the 429's and 460's and on.....
That's my thoughts for now on it.....
Steve
Here's a 4-port heater valve that Sacramento member installed in his Pantera that's pretty nice. It puts the heater valve on the engine bay and is trimmed(controlled) by a potentiometer installed in the dash. You can control how much hot water flows to the heater core while the rest feeds back to the engine.
Attachments
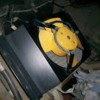
BUTTTTTT, grape pickin' didn't last all day, so when I got home I did need to do something on the car....so I cleaned up my condenser fan out back! I spun it the other day....and didn't like what I heard....so pulled the fan out, disassembled it, cleaned everything up, oiled the bronze bushing, and put it all back together again!
Sealed bearing sounds like it could use replacing, can hear the balls moving around....so used some 3in1 oil and hit the bronze bushing on one end and tried to work some into the sealed bearing on the other end.....
I will be replacing at least the one line from the pump to the condenser and the drier unit. SOon! ...after hoses....and pipes!
Here is end result. Cleaned up nice enuf!!!
Steve
Attachments
quote:Originally posted by Mangusta:
When I tried to get my shiny new SD7 AC compressor in here....there was "no more room at the inn"!!!!
So I had located a DAYCO #80406 hose which has a 90 molded into one end...4" of hose on the short side and 48" on the long end. The hoses I took out were 44 on the long end, so these will work great! 5/8" diameter hose.
DAYCO #80406 about $12-13 from RockAuto.com
For the European people, I use alway's
Gates 2392
Simon
Simon,
Gates doesn't appear to be marketing that particular hose to the US market! I did find it via the UK ebay site and more (Google).
No spec's listed or not much...but looks like the same idea!
Really comes in handy trying to turn that corner with the heater hoses!!!
Cheers!
Steve
Gates doesn't appear to be marketing that particular hose to the US market! I did find it via the UK ebay site and more (Google).
No spec's listed or not much...but looks like the same idea!
Really comes in handy trying to turn that corner with the heater hoses!!!
Cheers!
Steve
OK, back to Erica! She needs to cool the cabin now also....and part of my (growing!) list of things to do....is look at the screen in the AC evaporator!
Just to clarify "where" this little screen is...
It is behind the hose connection at the evaporator expansion valve. You do not take the expansion valve loose, but you do need to remove the HOSE from the expansion valve!
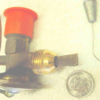
I am reposting Larry's excellent picture of the screen at issue and it's orientation in the valve!
More to follow...
Attachments
SO, I climbed in there today, removed the glove box (who puts nuts on a glove box that spin while you are trying to get the bolts out?????) and pulled off all of the gooey tape substance that was covering the connection.
The connector in question faces rearwards in the cabin with a 90 on the hose to make the corner....
Using a 3/4" wrench on the hose fitting, and a 14mm on the expansion valve, I carefully moved the nut (NOT THE VALVE!) and it popped loose, released a small amount of pressure, and spun off easily.
Looking into the valve, at first I thought that I didn't have a screen in it!!! BUT if you REALLY get your face down in there with a bright lite, you can see the screen outer edge....and in the middle of mine was a black mess!
I had a small dental pic of sorts and used it to wiggle the screen out of it's bore.
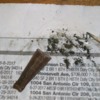
Soaked it in paint thinner and washed it with a small acid brush. Stuff wasn't coming out of the center so I used a toothpick to convince stuff out.... What a tangle of stuff! Metal chips, fuzz of some sort, and lots of tiny black stuff.
Check out pic!
So, all nice and clean. Pushed it back in place with the metal end of the brush and carefully tightened the fitting.....! Now, how to flush the evaporator out????
Attachments
So, that's what I did this afternoon. Earlier in the day, I was thinking about the IPSCO nifty idler setup and I came up with a flaw that was rather niggly......
While this moveable standoff is GREAT for simple adjustments, if one was ever to need a new bearing or pulley, you would need to remove the center retaining bolt.....at which time you would hear a little "klunk"....or not.....which is that moderately priced little piece falling somewhere in the bowels of your car!!!!
The original standoff, while difficult to adjust, didn't have this problem of losing the rear fastener when changing bearings as all that biz took place out front!
After thinking about it a while.....there were two ways of fixing this....
1) Have IPSCO make up a new threaded block with metric threads to match the original, machine out the standoff, and get a new metric bolt. But this still didn't completely solve the issue unless you used the original standoff...
OR
2) Do something similar, inspired by what I found on Ford 8.8 rearends, used to retain the nuts for the disc brake backing plates while installing. They had a "no-rotate" tab on them for assembly (or disassembly!) that is pretty slick! No wrenches needed!
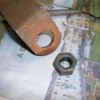
So, I found a piece of scrap steel (Old generic muffler shop muffler hanger) with a nice big hole in it. Like this.....
Attachments
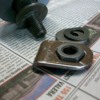
...then spent about 20 minutes with a large rat tail file, and a smaller round file, and an air cut-off wheel, and came up with this! Width is same as large washer, just under 1.2" and will move up and down the U-channel just fine with no issues.
It needs to be welded yet. I am waiting for delivery of a proper lock nut to weld on rear of AC bracket for alternator mount making that bolt a "one wrench thing" also!
I cannot use a nylock here as welding will destroy the integrity of the lock function! So I ordered a "flange lock nut" in a 7/16-20 thread (fine) to fit the bolt that I found in my car, from Fastenal.
Once the nut comes in, will weld up both at the same time! In the mean time I have LOTS of other stuff to do....and since I am waiting on parts and materials for other stuff higher on my list (chronological order....) doing this was no hit to my schedule!!! Just a freebie fix!
I also ordered a new bolt to hold the expansion tank in place. One stud had busted off in the past, and was replaced with a 4+ inch socket head screw with a 1"+ stack of washers on it!!! I now have a nice shiny supply of 1/4" x 1" washers to use! New hex head metric hardware will be mo better!
Just a note....the M6x1.5 nylocks used on the expansion tank studs are no longer available at normal outlets! In fact, I couldn't find ANY M6x1.5 bolts in the Fastenal catalog.....like they were wiped off the face of the earth...! All appears to be M6x1.0....
Not a big deal, just something that I noticed....
Parts are now soaking in Evapo-Rust solution to get the steel nice and clean for welding!
Cheers!
Steve
Attachments
quote:Originally posted by Mangusta:
So, that's what I did this afternoon. Earlier in the day, I was thinking about the IPSCO nifty idler setup and I came up with a flaw that was rather niggly......
While this moveable standoff is GREAT for simple adjustments, if one was ever to need a new bearing or pulley, you would need to remove the center retaining bolt.....at which time you would hear a little "klunk"....or not.....which is that moderately priced little piece falling somewhere in the bowels of your car!!!!
There is no danger of any other part of the assembly falling out except for the threaded block, if you don't have your finger holding it and/or a shop rag bellow to catch it if it falls. The rest is assembled on the through-bolt and come out together as soon as the last thread on the bolt disengage from the block. Just don't drop 'em
Attachments
Agreed. When you remove the bearing/pulley assy , you simply hold the block with your finger and thread a second 7/16 bolt into the block to hold it in place while you replace the bearing/pulley. I have personally never had to replace a bearing (They use high quality modern sealed bearings instead of the 45 yr old original design) but have had to remove them to make the belt change easier. Takes seconds for one person rather than minutes with two for the stock arrangement.
Ron
Ron
Guys,
You are correct....IF you remember to try and get fingers behind the bracket....but it's tight in there with a stock pump...perhaps a little bit of room with a rotary. "Tricky!"
I was thinking more of the next mechanic down the road, not knowing what was going on.....
Here is my "other" suggested fix that I didn't put in my note! Like I said....I was thinkin'!
Take said block, drill for a through bolt, weld bolt to block. Now you have a "stud", secured by the block, which can be dealt with from the front for repair or removal.
There are many ways to skin a cat.......
I read something somewhere that said that most engineering projects take at least three cycles thru the development process to get things proper. So what would Rev C look like?
Ciao!
Steve
Add Reply
Sign In To Reply


