I know it well. I've got one on my Audi TT. I don't know what current it draws but when I turn on the heat I hear the alternator and feel the rpm drop.
These pumps are designed for continuous use and can run the lifetime of the car. It is not big amp drawer.
If the Audi TT is sensitive enough to register the pump starts it is most likely because other things draw much more current at the same moment, like the heater fan for instance.
If the Audi TT is sensitive enough to register the pump starts it is most likely because other things draw much more current at the same moment, like the heater fan for instance.
AHAH!!!!
Hope you're all full of deviled eggs, sugary eggs, and yellow chicks and bunnies!!!
Stupid simplicity strikes again!!!!!
What is R & L at the front of the tunnel....is NOT R & L at the rear of the tunnel!!!
The two metal tubes start out side by side, then go top to bottom down the side of the tunnel and exit crossed!!! My bad! No drawing from how I started....!
Today, I took all of the heater hoses off at the rear of the tunnel and confirmed no crap blocking flow. Got a little....but not very much. Flushed the core with water....got flow!
SO, filled it all back up again, fired it up....and the "non valved" hose/tube at the heater core was starting to heat up first!!! Wrongo! Hoses are crossed!
Now I need to let the thing cool down so I don't scald myself when I attempt to make hoses fit which have been beautifully trimmed and manicured, dressed, sent to prom.....but the wrong prom!
It's always something....! DeT strikes again!
Ciao!
Steve
WE HAVE HEAT!!!!!
After correcting the faux paux with the stupid hoses, I filled it up with coolant and pretty much instantly had warm under console pipes!
Now, after months... BACK TO COOLING...!
Don't touch that dial!!!
Steve
After correcting the faux paux with the stupid hoses, I filled it up with coolant and pretty much instantly had warm under console pipes!
Now, after months... BACK TO COOLING...!
Don't touch that dial!!!
Steve
WE HAVE COOL!!!!!
System had been holding since way back at about 26-27" of vacuum while I fought with the heater hoses. Fired the pump back up and sucked the system down to 28-29", about a half hour or so just for kicks.
Attached the Freon tank, purged the line, and proceeded to fill with gas....up to the point where the car needed to be running to get any more gas in the car. Sun is down, about 63-65 degrees in the garage...so not enuf to warm the tank!
Eventually pumped enuf Freon to get the pressures to around 155/9 and a register temp of about 40 degrees! YAY!!! With fan on high, that should freeze the wife out quite nicely!!!!
Tomorrow, once all cools down, will try and get the charging hoses off without taking a damned oil bath again! Hazards of old threaded R12 connections! Will need to get sneaky rabbit on the things......
THEN, apply AC goopy tape to all of the metal bits and holes in the housing....get the RH duct put back in place, & control cable attached.
Once done with that, we can finally direct our attention back to getting the upper dash cover back in place...... More Rubieo Goldbergio going on with the wiper switch lamp install, big gauge retainer hardware....spaces that don't like big hands.....
BUT we are once again moving in the proper direction!!!!
Cheers!
Steve
OK, lot going on in the last 10 days!
Just finished installing the dash today,....or at least about 99% of it. Still need to snap the vents in place, the side panels, and rear section of the console!
One issue I did run into, was one of the connections for the ignition switch wiring to the dash wiring. One of the wires had apparently heated up pretty good....and pretty much roasted the brass connector such that the little screws appeared rusty and were in no form going to unscrew as intended.
After cutting the connector apart, I was able to get the switch side of the wire loose. After that I busted the other screw off...and had to get out the Dremel cutoff wheel with a micro thin wheel on it and cut down the side of the brass piece until it loosened up and fell off.
The burned portions of the wires were cleaned up using a small stainless parts brush, heat shrink added where needed, and wires were tinned. Turns out that the chassis wiring bits had already been tinned! (THANK-YOU!!!) Some pretty big wires are doubled up on this deal! Much bigger than the switch wire on the other side of it!!! Again, various bits of heat shrink AND a new piece of splice connector block....and I can continue with the dash installation!
Not sure where I found this stuff, (first guess might be a Fiat 850 spider) but it is the same named maker as was found on the one I took out!!! MAMUT Spacing is a tad different.....but the rest works just fine!
Getting this wiring back up into the dash from whence it came is a bit of a chore!!!!! If you are doing this job, take a picture of how this wiring all fits up in the dash when you drop the column down to get at the gauges etc!!! You will be glad you did!
Once that was all back and in, I was able to confirm that the new LEDs I put in all the gauges worked! Can actually see the danged things now!
I've also been working on cleaning up a set of seat tracks, so I can pull my Recarros and install a nice set of Vette seats that came with the car. But that's another post to come.
Have also been busy working on moving to new location. So busy with picking out cabinets, wood flooring, counter tops, moving stuff, cleaning up house so we can move in....clean up old house so we can move out..... 35 years of squirreling parts away in my garage and sheds is not gonna be easy......not looking forward to this all......!!!!!!
SO, I need to get this garage queen back on the road!
Tomorrow is a PCNC tour of Brizio's shop as well as another car collection owner near by! Time to take a break.....! If we get home early enuf, need to bust out the MIG welder to weld up a seat track hole that had been mercilessly hogged out for some unknown reason.... AND I need to weld the lower brace for the RH rear wheel well back in place. Hope to not screw that up OR the paint too badly. Since this is a 74, it should have the lower section painted black...which it isn't at the moment....but I want it to be such....and hopefully this area to be welded will be in the black area.....! Need to figure out how it fits in there and how to weld it....!
...then put the engine cover back on, the final console pieces and side covers up front, and I can put firewall cover back in the car too!
Only been WAY TOO LONG on this project....!
Cheers !!!
Steve
Attachments
OK, a quick peek at DIY derusting last seat track bottom.....!
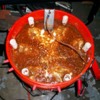
Reverse Electrolysis in action!
$5 Home Depot bucket- a splurge!
$4 piece of 6ft 3/8" rebar
$1 for two alligator clips and a red bootie
scrap copper wire and wire nuts I had in the cabinet for more years than I care to think about....
$4 for Arm and Hammer "washing soda" Makes the magic happen in the water...2lb box will last a long time!!! 1TBSP per gallon of H2O.
AND an old Dell DC voltage laptop computer power supply that was scrap. You can also use a car battery charger too.
Bucket is too short to do entire track so had to flip it over once. Not a biggie. This was a first run at trying this method out. But I can do all sorts of stuff like calipers etc. You can get creative with nylon tubs etc but principle is still the same. Internet sez that apparently some folks have used a swimming pool to derust a car chassis or body....hope they weren't renting!!!
The rust wipes off pretty much, but in the really pitted areas where the zinc is gone, you will need to hit it with Scotch Brite pads or a small brass or stainless parts brush and then wipe it down clean, even wash with soap, then paint to preserve.
Oh, and use in a well ventilated area! Gas given off is hydrogen! No boom in the garage please!!!!!
Cheers!
Steve
Attachments
Got any before pictures?
Sure!
Here's a before.....pretty scarfy on the bottom side!
The top slide pieces had a little bit and ya can either let the bucket do the heavy lifting, then drop them in the Evap-O-Rust to do the fine work, or just the latter.
The last piece I did, after letting it sit for 12-16 hours or so looked good. Again, stainless brush work gets the typical black film off and any scruffy pieces left on....so you can either continue to bucket it....or coat with some Rust-Oleum and call it ready to install! Just don't paint where the rollers ride or where the two pieces slide together!
Cheers!
steve
Attachments
OK, here is an after picture of one of the other lower seat mounts which was equally as grungy as the one above.
I welded up the three leaf clover hole in the one above, ground and filed it round and level again, hit it with some high temp silver/grey Rustoleum rattle can paint to protect it further.
If doing this, just be sure to keep paint off of the surface on the upper piece slides against the lower piece (put some synthetic grease there!) and also keep paint out of there the rollers roll. Everywhere else should be covered! They won't be shiny zinc plated.....but they won't be ugly and rusty!
Presently going to run the stock OEM rollers...have been told this is a bad idea.....but they are all still round! Well seats aren't going in just yet, so will need to source some eventually. Hopefully the old ones will allow us to try out the ('Vette) seats and see if we like them!
Update on the dash!
Reassembly of the interior is almost complete! Have everything installed except for the front lower RH tunnel cover. Going to leave this off until I know that nothing is leaking!!! Those panels are a PITA to install...! Seems like they are a mighty tight fit what with carpet seams everywhere!
Also need to put the seat belt bar back in place.
I worked on getting the RH lower wheelhouse cover mount fixed up too! Looks like it was spot welded in place originally, but both of those have torn out and left tiny holes. Not optimum for trying to re-spot weld them OR MIG weld them back into place!
I used my Roper punch to put a good hole in the horizontal seam that is inside the wheel well, and drilled out the lower hole so that a sheet metal screw fits thru it. Then used self tapping screws into the bracket to secure the piece to the horizontal seam and the lower rocker panel seam. If this doesn't hold it well enuf, will need to resort to more violent means of keeping the bracket in place!
Need to de-slime the cover a bit....not sure what got on it, but looks oily......then I can install it and FINALLY put the rear wheel back on! ....set it down off the blocks.....AND GO FOR A RIDE!!!!
We'll see.....other project involves carpet, padding, nailing strips....and a dumpster.....and same dumpster and a small truck full of floor tiles......ugh!
What did I get myself into........this time baaaaby?
Cheers all!
Steve
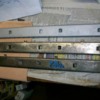
Picture guide...
Top rail, RH hole was the three leaf clover hole...welded up and hand finished back down, plus paint....
Middle rail is last one out of the bucket. Probably spent more time in there than the others......have only cleaned it with small stainless brush.
Bottom rail was bucketed, AND dipped in Evap-O-Rust for a final treatment. I think this one was pretty bad, as it didn't clean up as well as the others. But it is WAY better than when I started!
Attachments
RH Lower Wheel Well mounting bracket which I spoke of above.....shown in approximate position as mounted on car.
Have cleaned rust off of it with brush, and coated with primer and paint. Ready to go back on car as soon as I get some spare time to advance this project forward!
Almost to the end of this saga. Get ready for next bag of snakes!!!
Cheers!
Steve
Have cleaned rust off of it with brush, and coated with primer and paint. Ready to go back on car as soon as I get some spare time to advance this project forward!
Almost to the end of this saga. Get ready for next bag of snakes!!!
Cheers!
Steve
Attachments
These tracks are something that the entire assembly should all be stainless.
To me, it seems that no matter what you do has little long term effect.
Switch to the bronze rollers. At least those won't freeze to the tracks.
If I had it to do again, I'd consider ceramic coating the tracks. It may not be 100% effective over 20 years but it sure won't hurt.
You just don't want to do these things over and over again.
Steve, that photo looks like an aft rear fender brace and isn't on earlier Panteras. Which reminds me- I tack-welded or brazed the right side brace for that car to the fender when Howard Renshaw owned it. I'd stored it for a while as part of a surprise birthday present by Howard's wife. Boy, that's been awhile- think it was 1985 or so. Those seat rails are about what you'd expect from light galvanized steel on a car stored in a car-port near the water (Sac'to River Delta area) for 20 years. You've done well on what I remember as an exceptionally clean '74 before carport storage. Hope your new place has a garage!
Add Reply
Sign In To Reply


