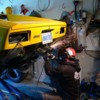
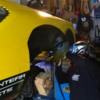
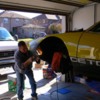
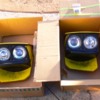
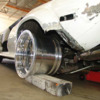
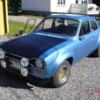
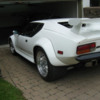
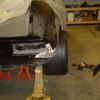
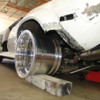
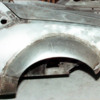
Last Saturday I had the Ontario crew out to help me with my GR4 conversion. Here is Russ, on Evans' headlight conversion, Wayne on welding detail, and Sam Civello on metal fabrication. Things are going well with the help of my Pantera friends.

Attachments

Images (1)
  • DSCF1594_(Small)
Original Post

Replies sorted oldest to newest

quote:
Whos flares do you use? How do they fit? Did you measure how much wider they are front and rear over the stock fender?

I used Hall flares but they are all made by Bob Byers. The flares extend 2 3/4" in front and 4" in rear. Takes alot of balls (or lack of brains) to take a zipsaw to a perfectly good $50k car. My neighbour walked into the garage while I was cutting and said "you're f@$ked", then walked away.
Do they fit? Hell no. They are glass and can be manipulated with some physical persuasion. Good thing I'm in top shape and svealt like a cheeta. BAWAHAHAHAHA!
Paint colour? Not sure, but it will be dark. Not black. Black is the meanest colour for a Pantera but I can't live with the maintenance again.With my last black Pantera, I had to carry a rag around in my back pocket to wipe off fingerprints and I started to feel like Chachi (sp) from Happy Days.
I was going to fill in the rear exhaust holes but decided to replace the entire rear panel with a new piece.
Should be ready for paint by the end of December.
Will
quote:
Takes alot of balls (or lack of brains) to take a zipsaw to a perfectly good $50k car.


Agreed, I agonized, measured then re-measured, looked at it some more, before getting the cut off wheel out. My measuring wasn't helped by the fact the car was stripped down with no suspension to use as a reference point. The flares don't go where you'd first think just looking at the two wheel well edges. But once the cutter hit the first fender it was all go from there.

Did you just screw the flares on or bond them? I'm using a product from Lord Fusor Adhesives that Bill Gaino (LPB) put me onto. Mine will be blended to the body.

Julian
Last edited by joules
quote:
Originally posted by PanteraDoug:
Nice. Got more pictures of that car?

Now isn't it a problem painting the car with the flares bonded on? There isn't a natural place for the paint to end? It needs to bridge the gap?

Hey LPB?
Just like the red car, there will be no gap. I would expect the glue would squeeze out of the gap, get hard, be trimmed, sanded, primed and painted. Better rough it up good to start with, both sides. First you need to make sure that you have no tire rub to cause a re-crack. I have never put on flares like those. It would be easier to blend them in with the qtr, but that's a different look. I belive I would do one first before I jump all the way in. I see then attached like that all the time so there must be a procedure. WILL, Your flares don't have that little flat edge like the red car. I have attached lower side skirts with tiny headed rivets in countersunk holes, and then filled over the rivet heads.Looks like Your gonna have your work cut out for you finishing the edge where it meets the qtr.
But if you fill the ridge, even radius it to the !/4, won't the paint in that radius have the tendency to crack?

I've seen a lot of the plastic bumper covers on the new cars have the paint peel right in those ridges because the paint isn't flexible enough. Particularly the clear coat.

I don't know? I think that red car is kind of the "before" picture and I wanna see what the current or the "after" picture looks like. I think it is gonna crack and you are going to have paint the entire car to fix it and to match the color.
Check out this car at PI. Same flare as the red car, a little different than Wills. http://tinyurl.com/yhslhox Who runs their body shop? They sure were well bonded to the bare metal, and must be to not crack. Notice how wide an area was ground down on the car, and how more bonding material appears to be pushed up from underneath, this would make it attached even stronger, as it needs to be.

Attachments

Images (1)
  • rever_rear_wreck
Last edited by lastpushbutton
I don't want to sound like I'm putting these flares and systems down, because I am not.
Considering the fact that the stock steel fenders need to be cut to do this at this point I won't consider it either simply because there is no going back.

I have just had life lessens that tend to prove to me that there is always just one little drawback to something.

Well here to me it is obvious that the flares are sticking out so far that they definitely are put out there in harms way. I'm not convinced either that the difference in the materials being bonded together, steel and fiberglass, have a similar coefficient of expansion here and that a two stage paint will have the durability to survive say ten years of NY cold winters and hot summers without cracking along the obvious expansion of the bonding joint.

Anyway, kudos to all of you guys. The cars look fantastic. I hope they last forever for you with little problem.
As long as the bond holds, there should be no crack, your right to worry though, nothing lasts forever. I have these Honda young kids come to the shop with their low air dams busted all the time. I fix, replace, it is inevitable, they gonna hit something. I like the look too, but I can't cut my button car either. One thing I would do Will,since these flares don't appear to have the square edge, is to at least block the very edge flat where it meets the body, so that the flare starts of 90 degrees from the qurtr panel. You don't want it tapered thin to the place where it meets the body. You can fill any air pockets that appear in the edge of the 'glass after you flatten it, but before you bond it. It will be thicker than the tapered edge, and stronger. Note the above pics. Pay careful attention when you make the bond, clean, dust free, 60-80 grit scratches, warm temp. Let it ooze out and trim before it fully sets, let it firm up yet still a little flexy. Make yourself a very small sanding block, maybe the size of a box of matches. Your gonna need it when you start sanding up to the edge of the squared flare.
Adhesive science has come a long way in the last number of years. Most new cars use panel adhesives now. If you bond 2 pieces of 20ga metal together, you will tear the steel before the bond releases.
When the flare is mounted with the adhesive, I'll use nuts and bolts to fasten until the bond sets. The flare lip with be trimmed and sanded before installation. When the excess bond gets squeezed out from the lip, I'll simply run my finger over the lip, just as you do with caulking to remove the excess and give it a clean smooth finish. I don't plan on doing any sanding around the lip after it sets. Then I'll remove the nuts and bolts and fill the holes.
Will
Not a Pantera, but still a Ford.. This car I built some years ago got fiberglassfenders attached to the steel. It worked just fine. After I cut away the fenders in a similar way to what 4NHOTROD have done, I extended the rear inner fenders out til the fenderopening, and welded them making for one sturdy place to attach the flare. In front I made a bead of about 1/3" in the fender to stiffen it, and I used epoxy to "glue" the flares in place. Roughed up the paint and fiberglass, and screved it together so it would sit where it was supposed to do while curing. Bonded over the holes when it was cured, and the flares survived with no cracks a good "bit" of spirited driving on some twisty roads around where I live.

Attachments

Images (1)
  • minescort
quote:
Originally posted by David B:
Looks mean, Will. Let's see it with the wheels on!

Hey Doug, my original GT5 has fiberglass flares mounted to steel. Not sure how it was done back then, but I never had a crack in all these years. And these flares have taken a beating. Pretty tough too.


They must be pretty thick. I'm sure that the factory knew what they were doing. They really hang out there exposed to just about everything.

If the original fenders didn't have to get cut up I'd be much more comfortable with this conversion.

Don't get me wrong. I thing the cars look great. I guess I'd be better off buying a GT5 already done so I don't have to be so wimpy about the entire process?

I sure it's gonna come out great Will. Carry on. Wink
David,

I am reliably informed that #9178 (and a few other early GT5) came from the factory the way it is today with the fiberglass flares blended to the fenders and not showing any discrete 'add on' line.

On the subject of cracking, I have had a few cracks in the front flares, but not at the join, simply because the suspension is set so low the tire has hit the flare a couple times.

The GT5S cars have all steel fenders, so are 'blended' by nature of the steel being a stamped panel.

Julian
Yeah I thought the rivets would complete the GR4 look but it looks a little "racecarish" IMHO. I like it but I don't. I look at top end GR4's like DOES 200 and Rapids cars and they look sweet without the rivets.
Hey, if I want them after all I have to do is bring out the cordless and the rivet gun!
Will
Last edited by 4nhotrod
Thanks for the kind words Will.It's been a pleasure working on your car I can't wait to see it painted and on the ground.Will and I experimented with that 3m panel adhesive and I have to say that stuff is almost as good as welding.Will bonded some scrap pieces together and I could not break the joint even with a hammer.Maybe one day I will get mine done and we could finally go cruising.
quote:
The panel adhesive would hold the steel flare to the fender without welding?

Still need to weld the marker light holes which leads to a full repaint.
The fibreglass flares are incredibly strong once bonded. They are quite thick and the compounding curve adds to the strength. They are so big and the contact area is so large that I beleive it adds strength to the area that was cut. I can't flex the flares at all. And anyone who knows me, knows that I am a huge massive powerful man.
BAWAHAHAHA
Will ( 4'13")

Colour?Not black, but it will be dark. Not sure yet.
Last edited by 4nhotrod
..... Will great work, I should have done fiberglass to my car...I would have been done a year earlier ? LOL

A word of caution ..keep a wet sponge handy when welding the marker lights ...welding in a circle distorts the panel .. a wet sponge shrinks it back ...

Doug the adhesives and epoxys today are excellent. I bonded hinges to my carbon fiber decklid and its stronger then the material around it.

Ron

Ron
quote:
Originally posted by PanteraDoug:
I'm not clear on the cutting of the stock fenders. This has to be done to clear the tires?

The wide tires almost look like they wood clear the stock fenders.

You have to cut those puppys before putting on the flares (that's unless you want to jack the rear way up like an old Nova). These couple links below may help for a visual. I could take any photos that may help, as this can be tricky stuff!

http://www.poca.com/index.php/gallery/?g2_itemId=1899

http://www.poca.com/index.php/gallery/?g2_itemId=1586
Are the flares on Does200 'glass?

I've never seen a car with the wide wheels and tires on, without the flares on, and with a reference point to the original openings.

While I convinced of the aesthetics of the change, I'm not convinced that it is the way to go as far as the steering and handling go.

As per previous discussions, I'm not sure what the solution to the front caster should be. Maybe just a power steering system to dampen the
steering chatter?
quote:
Originally posted by PanteraDoug:
Are the flares on Does200 'glass?

I've never seen a car with the wide wheels and tires on, without the flares on, and with a reference point to the original openings.

While I convinced of the aesthetics of the change, I'm not convinced that it is the way to go as far as the steering and handling go.

As per previous discussions, I'm not sure what the solution to the front caster should be. Maybe just a power steering system to dampen the
steering chatter?

Yes, they are metal flares custom made by prior owner from the real factory fiberglass flares. Steering and handling are fine with mine, although it has some Group 5 setup from Wilkinson years ago. Not sure if that would make a difference or not.
Will, you are well underway and waaay too late to turn back, but I heard that "conventional wisdom", whatever that is, advises fitting the new wheels to the car before fixing the flares. I've heard of a few cases where the flares ended up being either higher or lower than the owner thought they would be once the car was lowered onto its own suspension. Therefore the safest route is to install the wheels, lower the car, and fit the flares where they need to be based on the car at rest.

I can't give you any specific examples of cars that turned out weird, but I think I remember seeing some in PI many moons ago where the owner lamented the fact that the flares were perfectly located for the stock, higher-profile tires of the narrow body look, but if he had it to do over again he wished he would have installed the flares a little lower (or higher) to look "right" on the new rims.

I don't know if it will affect your car or not? I've also never done this myself (I admire your courage and think you'll have a fantastic looking car!) but pass on warnings that I've heard over the years..
Here is the car with the wheel only with the factory wheel lip. I have not cut my fenders yet so they still have the original arch. I only ground out the filler so the flare would mock up correctly. I will cut them after final fitting
You can see that a set of wheels for a wide body would stick out considerably on a narrow body. The fenders must be cut or there will be tire rubbing.

Attachments

Images (1)
  • 62708_004rs
Do you have a side view picture of that?

I'm thinking that the flare lip if filled to be flush, is likely to crack down the road at some point?

Maybe that's why there factory avoided that on the later cars? The solution to that was to go with the full steel fendered cars.

Is it completely necessary to fill in the side marker light holes? In one picture that I saw it looked like the rear possibly would just fit?

Why can't the steel fender, once properly cut, be flanged so that the lip on the fiberglass flare be flush with the surface of the fender. That way not only could you use bonding adhesive but also countersink rivets these as well?

The ends of the rocker panels need to be trimmed too don't they?
quote:
Will, you are well underway and waaay too late to turn back, but I heard that "conventional wisdom", whatever that is, advises fitting the new wheels to the car before fixing the flares. I've heard of a few cases where the flares ended up being either higher or lower than the owner thought they would be once the car was lowered onto its own suspension. Therefore the safest route is to install the wheels, lower the car, and fit the flares where they need to be based on the car at rest.

I can't give you any specific examples of cars that turned out weird, but I think I remember seeing some in PI many moons ago where the owner lamented the fact that the flares were perfectly located for the stock, higher-profile tires of the narrow body look, but if he had it to do over again he wished he would have installed the flares a little lower (or higher) to look "right" on the new rims.

I don't know if it will affect your car or not? I've also never done this myself (I admire your courage and think you'll have a fantastic looking car!) but pass on warnings that I've heard over the years..


I've heard that countless times now. I've also corresponded with no less than 3 people who ordered wheels before the flares and had them sent to a shop afterwards to have the backspacing changed ($$$$). I have no idea why anyone would order wheels first. As long as you have a circle mounted(same diameter as your future wheel/tire combo),proper flare mounting can be accomplished.
I made a 3" spacer and stud extentions so I could use my existing wheels to fit flares (fore, aft and upper placement)at correct ride height. The wheels I have now are within 1/2' in total diameter compared to the new ones. I used the existing wheels to center the flares. Once bonded, I raised the suspension to ride height and took measurements and ordered wheels with proper backspacing.
I can't count how many widebody cars have spacers and longer studs.Or the wheels are not positioned properly to the flare lip. I'll be damned if I'm going to send rims back for modifications ($$$), install new studs ($$$) and spacers ($$$) after spending $5000 on rims. Isn't that the whole idea of ordering "custom" rims? You order exactly what you need.
Doesn't make any sense to me at all to order wheels first, guessing at what they're suppose to be, then pay a body man to "adust" 4 flares at $70/hr when all I have to do is order wheels with proper backspacing afterwards.
But then again, everyone is telling me I'm doing it backwards...
We'll see.....
Will
Last edited by 4nhotrod
quote:
Maybe that's why there factory avoided that on the later cars? The solution to that was to go with the full steel fendered cars.


My flares covered the maker light holes just about in the middle.

Also, the original fender lips MUST be cut out or else the new wheels (outboard by 2-3" from stock) WILL hit the original fender lip and cause body damage)
Will
Will
This is the reason I said that about the side marker lights. This light seems to barely clear...but it does.

Also if the steel on the existing fender was flanged. The finished surface height of both the fender and the flange of the flare would be flush.

Flanging it isn't that big of an operation. You can do it with the vise-grip flanger that Eastwood sells or there is a neumatic operated one that rolls it.

As far as what comes first, the chicken or the egg, I watching and learning.

http://search.eastwood.com/sea...10&y=9&p=Q&ts=custom

Attachments

Images (1)
  • Pantera_wrecked_fender_flare
quote:
Originally posted by PanteraDoug:
This is the reason I said that about the side marker lights. This light seems to barely clear...but it does.

Also if the steel on the existing fender was flanged. The finished surface height of both the fender and the flange of the flare would be flush.

Flanging it isn't that big of an operation. You can do it with the vise-grip flanger that Eastwood sells or there is a neumatic operated one that rolls it.

As far as what comes first, the chicken or the egg, I watching and learning.

http://search.eastwood.com/sea...10&y=9&p=Q&ts=custom
The group 4 flare is bigger and the lip is also wider.As far as installing the flare flush with the original panel it is all a matter of taste.Filling the marker light hole is really no big deal but will be necessary if you decide to go group 4.If you go with steel flares you do not need the lip because they will be welded so you do not need a bonding surface.
quote:
Originally posted by 4NHOTROD:

I've heard that countless times now. I've also corresponded with no less than 3 people who ordered wheels before the flares and had them sent to a shop afterwards to have the backspacing changed ($$$$). I have no idea why anyone would order wheels first. As long as you have a circle mounted(same diameter as your future wheel/tire combo),proper flare mounting can be accomplished.
I made a 3" spacer and stud extentions so I could use my existing wheels to fit flares (fore, aft and upper placement)at correct ride height. The wheels I have now are within 1/2' in total diameter compared to the new ones. I used the existing wheels to center the flares. Once bonded, I raised the suspension to ride height and took measurements and ordered wheels with proper backspacing.
I can't count how many widebody cars have spacers and longer studs.Or the wheels are not positioned properly to the flare lip. I'll be damned if I'm going to send rims back for modifications ($$$), install new studs ($$$) and spacers ($$$) after spending $5000 on rims. Isn't that the whole idea of ordering "custom" rims? You order exactly what you need.
Doesn't make any sense to me at all to order wheels first, guessing at what they're suppose to be, then pay a body man to "adust" 4 flares at $70/hr when all I have to do is order wheels with proper backspacing afterwards.
But then again, everyone is telling me I'm doing it backwards...
We'll see.....
Will


Will, I think you are doing a great job.
My wheels have no spacers or long studs or anything. When I bought them from wilkinson I told him I was doing a GT5 conversion and he said he knew what I needed.
I was given options on the dish of the spokes and I told him what I wanted for that and and that was it, they fit perfect.
I think you have skipped one downfall that some people run into in that your car already had a alighnment on it. A local guy here had a GR4 done and when he rebuilt his suspension and had it aligned one of the front wheels hits the flare.
You are also smart to do it at ride height, another mistake that gets made is people not doing that.
I don't think it matters whether you order wheels first or not where you have a mock up wheel/spacer to use.
Flare mods at $70/hr? I thought Sam was working for pizza and beer! Big Grin
From what I have been reading it looks like the GT5 conversion is a little easier than the GR4 as far as flares.
You guys keep up the great work I'm sure the car will be fantastic! Smiler
I noticed that the factory Group 4 cars had small round side marker lights and I noticed that no one with "tribute" cars seems to have used them?

Also the gas tank is actually now going to be inside of the G4 flare and the original street inner splash shields don't really work anymore.

Are you guys who have finished the flairs using any of this?

I'm thinking that the G4 fiberglass flairs with the fenders flanged and not GT5 running boards, is the way to go.

I actually can envision the fiberglass flares taking more abuse then the steel.

From what I see in these pictures the rear flares in the back need the most work to make fit?

Now the rear wheels are going to 13" wide and 335s? Isn't there a shortage of those now?
Will keep up the good work ... good choice in fiberglass ... I purchased 2 sets of steel flairs that fit like shi# ... a set of wheels for $$$ thats were the wrong offset and had to add 1" spacers and longer studs ... and still not done. They covered the marker lights so I bought AUDI markers. I'm not sure why the vendors cant make a set of steel flairs that actually fit and the proper offset on the rear wheels to fit a GR4 flair ? This is not rocket science. BUt in the long run I learned that nothing I bought fit properly .. I refabricated 1600 x 2 sets of flairs and 5500 in wheels the wrong offset plus 1" spacers.

Think fiberglass and panel adhesive. LOL
Well, I don't weld that well...but I can use a hot glue gun. Big Grin

Plus with all the heat put to these panels how is anyone ever going to get them straight without about 500 pounds of body filler?

Hum. Wrong offset? If the flares are steel and they are 1" too wide, can't you just cut them 1" where you are going to weld them anyway?

There is no way I'm going to drive a car with 1" spacers. Already wound up in the weeds years ago with that one. Cop thought I got killed.

Got a picture of the Audi side lights and don't the vendors sell the G4 side lights?
I straightened the panels with a propane torch and a sponge on low heat. Then a body hammer and dolly.

The rears were 7" past the stock panel ..I cut them back 1" and then added 1" spacer .. the spacers were made with so they center on the axle and center inside the wheel with 1/2 bolts threaded thru the axle. It will be fine .. my other choice was to TIG the spacers to the wheel ?

No pics of the lights ..an Audi 2001 side light.


Ron
Stretching and shrinking steel panels with heat? You're a better man then I Gunga Din. Big Grin

7"? I would tend to think with a flare that large that someones thinking was 1)this is the only way I can make the steel flare 2)this is a custom set up and whoever does the installation has to trim them to wherever they want to?

Not that I am an expert on anything at all. Just ask my wife. She'll tell you I don't know anything? Frowner
quote:
I noticed that the factory Group 4 cars had small round side marker lights and I noticed that no one with "tribute" cars seems to have used them?

I found these LED's. Super bright and slim design. Not quite sure if I'm going to install them. I Like the look at night and the safety factor, but don't want to take away from the look of the car.
Will

Attachments

Images (1)
  • DSCF0167_(Small)
quote:
Originally posted by 4NHOTROD:
quote:
I noticed that the factory Group 4 cars had small round side marker lights and I noticed that no one with "tribute" cars seems to have used them?

I found these LED's. Super bright and slim design. Not quite sure if I'm going to install them. I Like the look at night and the safety factor, but don't want to take away from the look of the car.
Will


I like those. Where'd ya get um?
I got to the door last night and disassembled parts to remove trim.
I've never seen a picture of the wiskers and the burried trim screws, so if you're wondering how they are secured, here's a photo...
The outer wiskers have 3 (under main window) and 2 (under 1/4) window. They were also held on with some type of adhesive. I had to cut away the wisker hair to find the screws. No need to save the wiskers, the vendors sell better ones now.
Under the wiskers, there are 3 screws holding the outer trim on. You don't want to damage that trim, it's very expensive (~$250 each)
Update: Sam finished the front end dolly work and we removed windshield. Found a few tiny holes and welded.
I'm up early today sealing the bare metal with epoxy primer.
Will

Attachments

Images (1)
  • DSCF0170_(Small)_(2)
Car should be painted in the next 2 weeks.It's a custom "House of Kolors" cobalt blue over black with pearl. It's been a long process but with the help of Sam Civello I think it'll be worth the work.
I don't know what I would have done without his help. Thanks Bro!
I'll post pics when there's more progress.
I have to go work my second job now to pay for this thing...
Will (Chippendales dancer)
The house of Kolors Cobalt can be diluted in clear and sprayed over any color of base to give it a multitude of different colors. On the website, there are 3 pics of Cobalt blue cars and they all look very different.
I was looking for a deeper blue that only comes out when the sun hits it with very little metal flake. The first samples he showed me looked like they should be on a 80's ski boat.
I'm happy that he was able to mix the formula I was looking for.
Will
Post
×
×
×
×
Link copied to your clipboard.
×