

Hi Tom,
Thanks. No, I didn't make any such mods to the sway bar mounts. I only heated them to square up the studs, as they were going all directions. The bolt on e-brake bracket sounds like a good idea.
Hi Gary,
Thanks for posting the pics/ideas. The trunk upgrades look fantastic, nice finished off look. I love the clean look.
Side frame rails mods are a great idea, and I like the gussets you have added. I was talking with Kirk about ideas in this area too. While I like them all in principle, not sure I'm going to cut open the frame only for this. I may include some mods inside the front radiator support when I have that open.
I checked out other pages on your site. Nice metal work!
Thanks again.
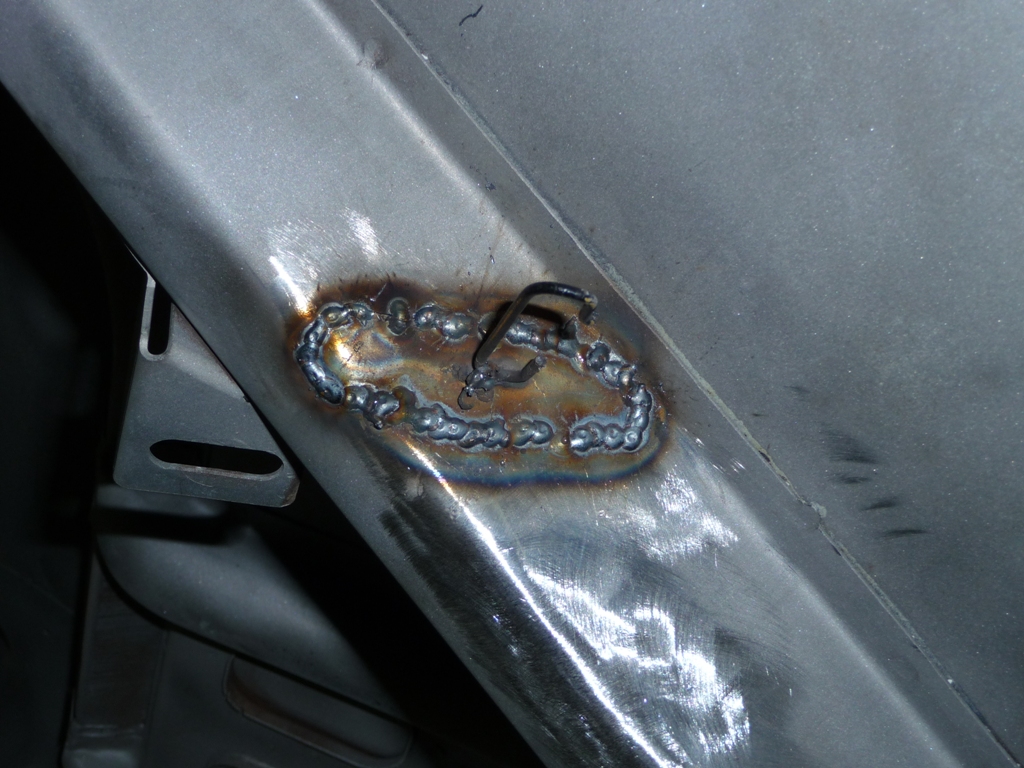
OK, so I've been able to spend about an hour each night over the past few days in the shop. I finished welding and grinding the jacking pad, and made the tin cover. I'm going to hold off on welding it on, as I'm thinking I'm going to pick up a cheapo spot welder considering the pending rocker panel work.
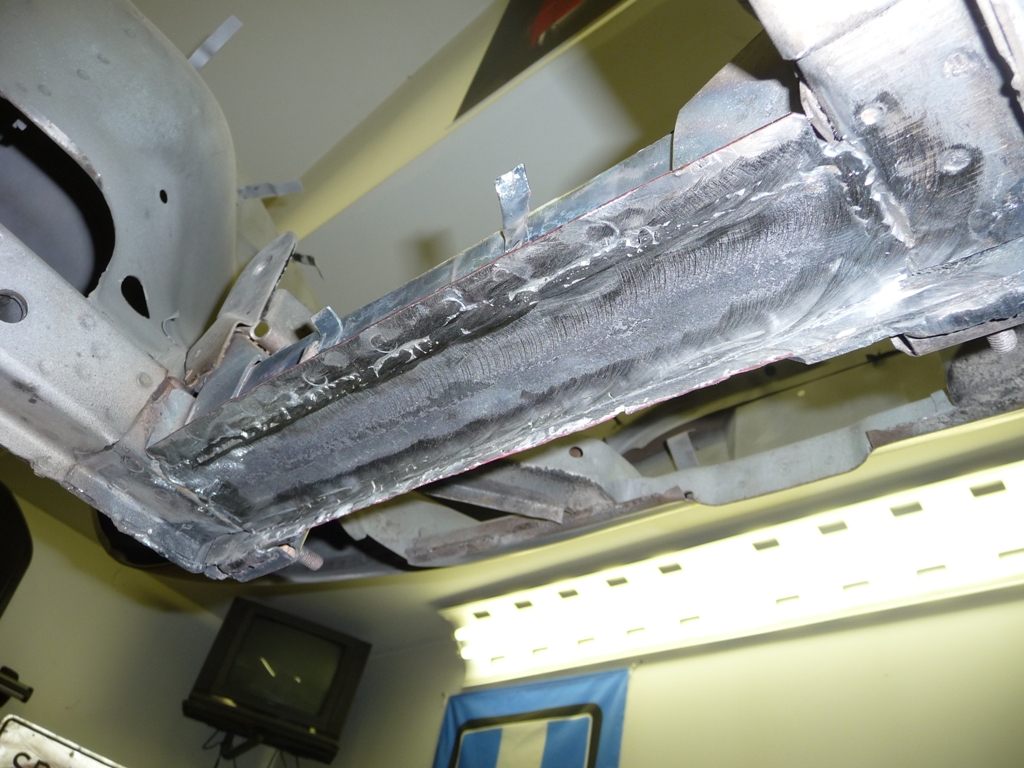
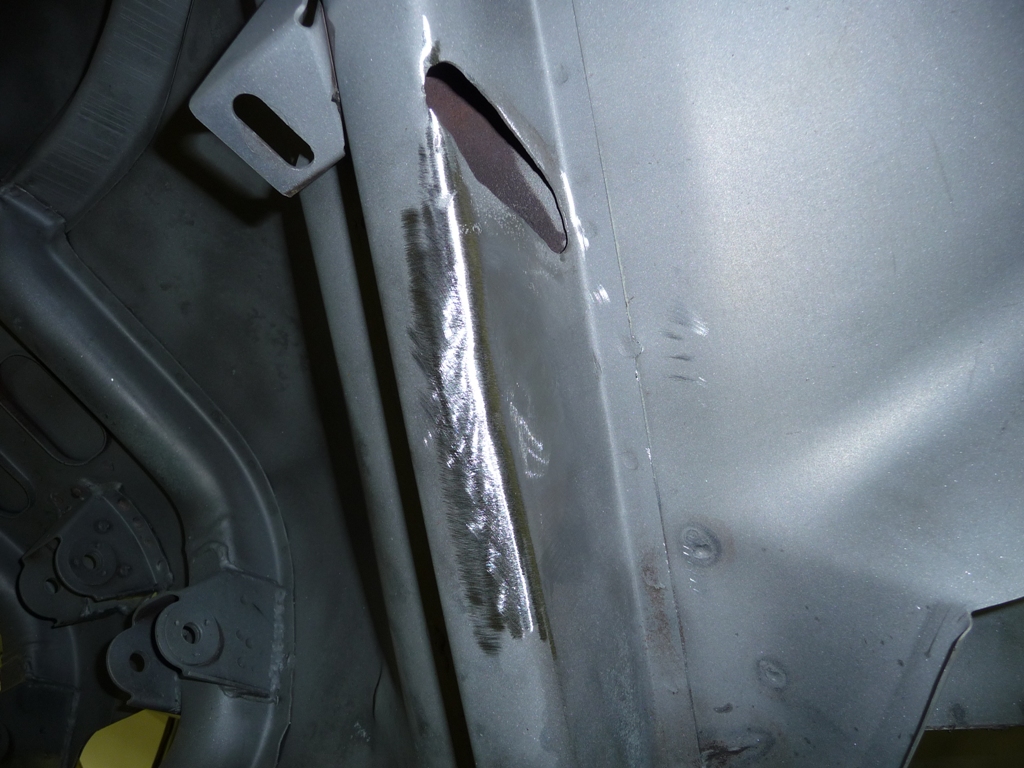
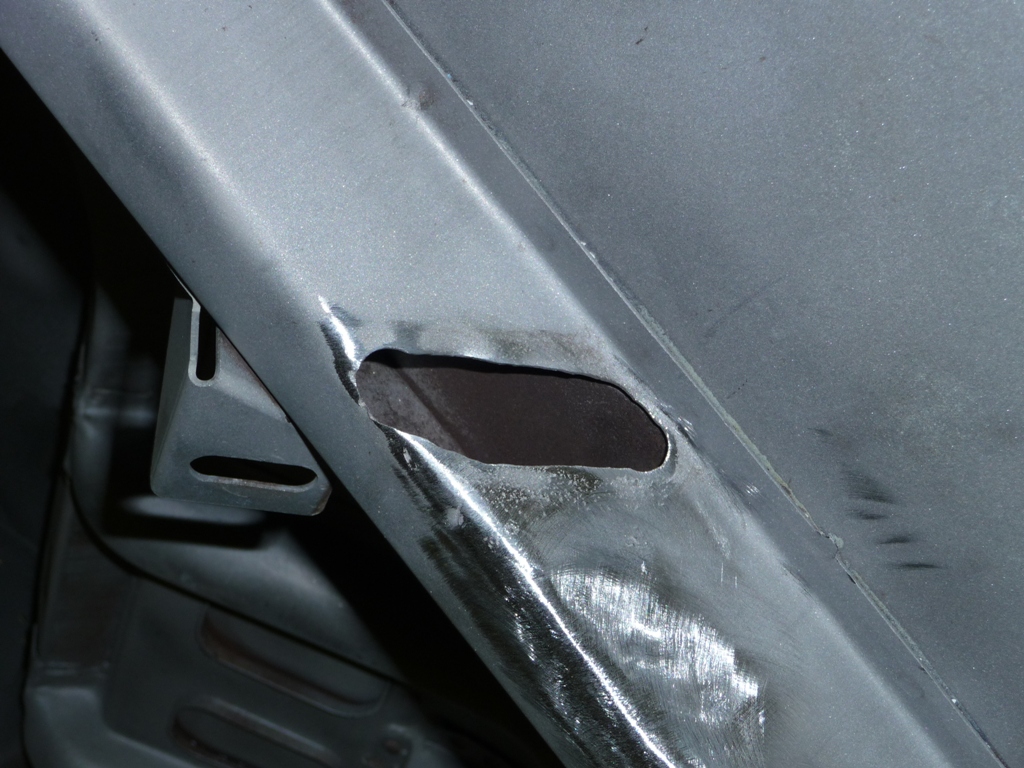
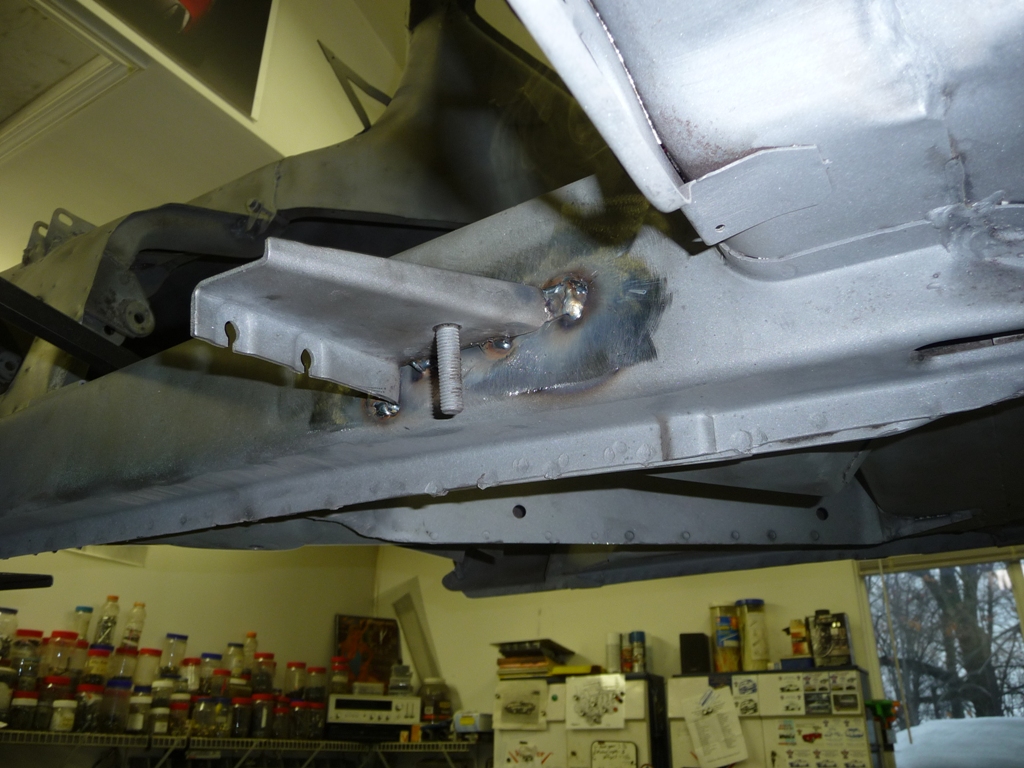
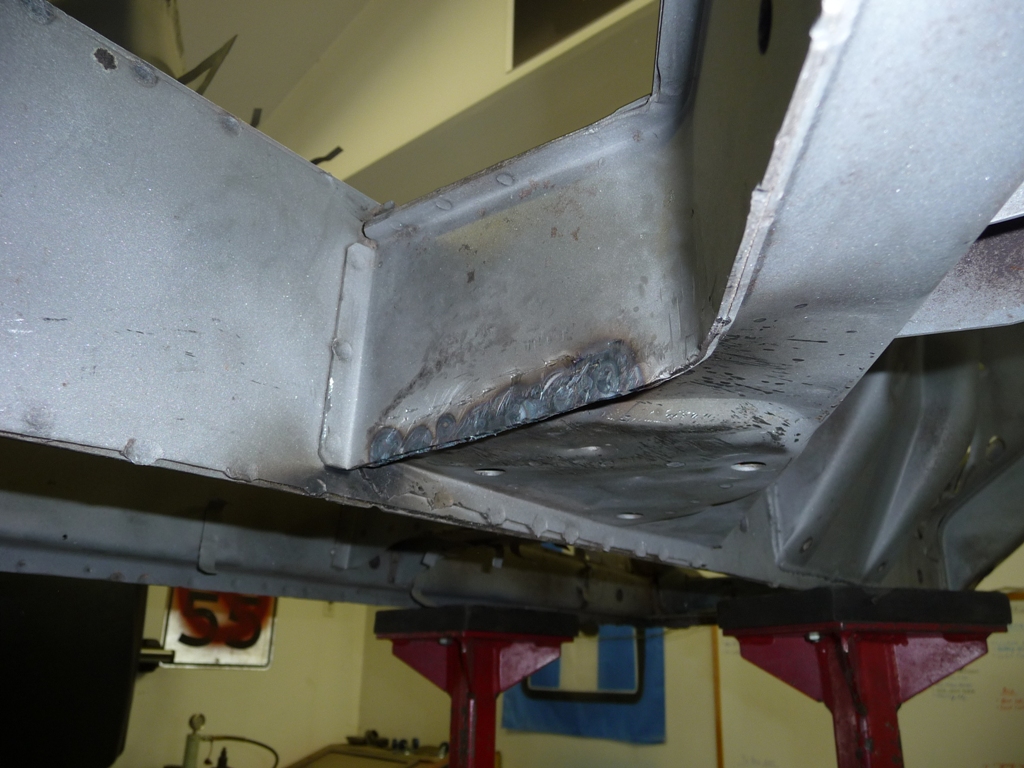
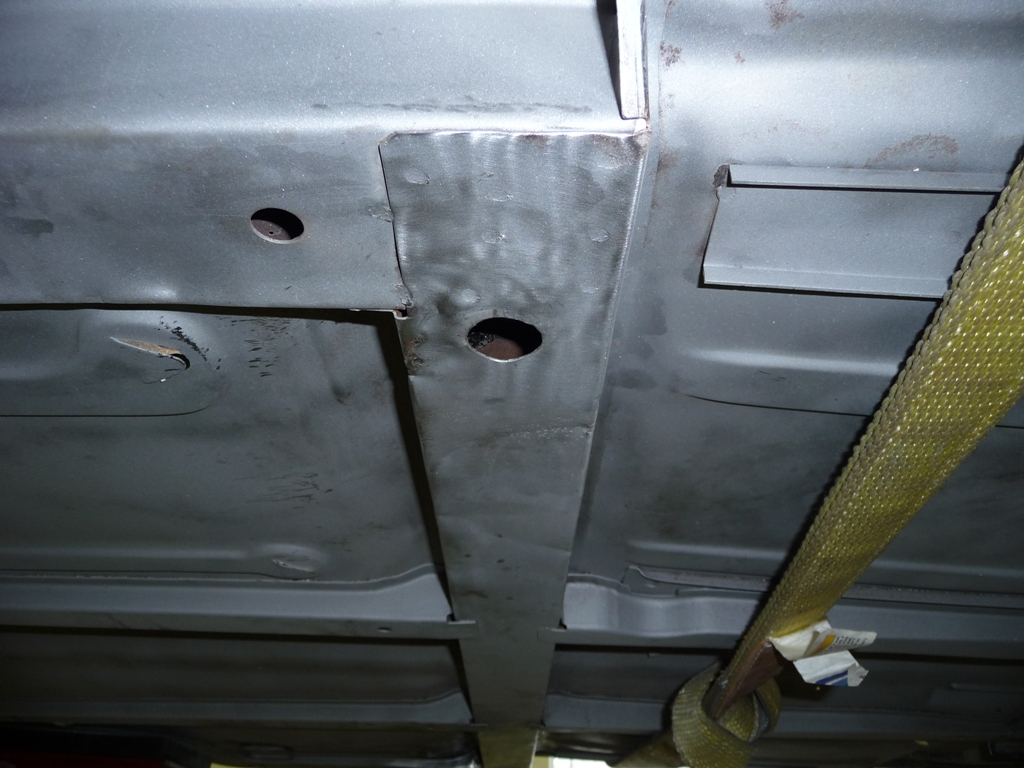
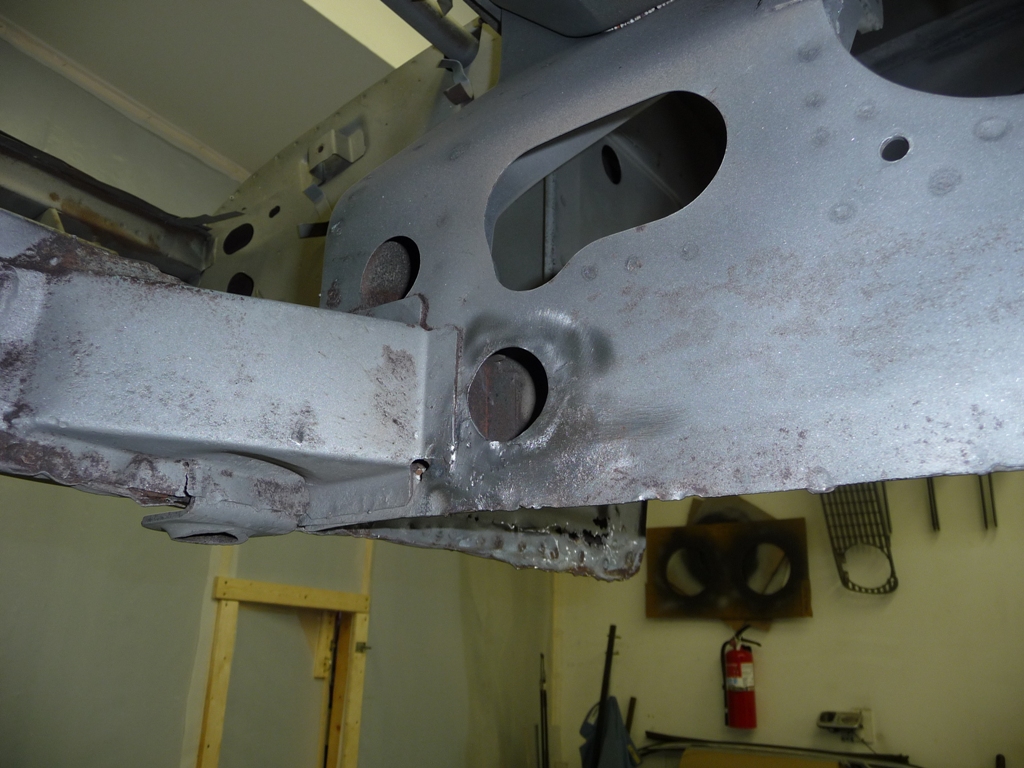
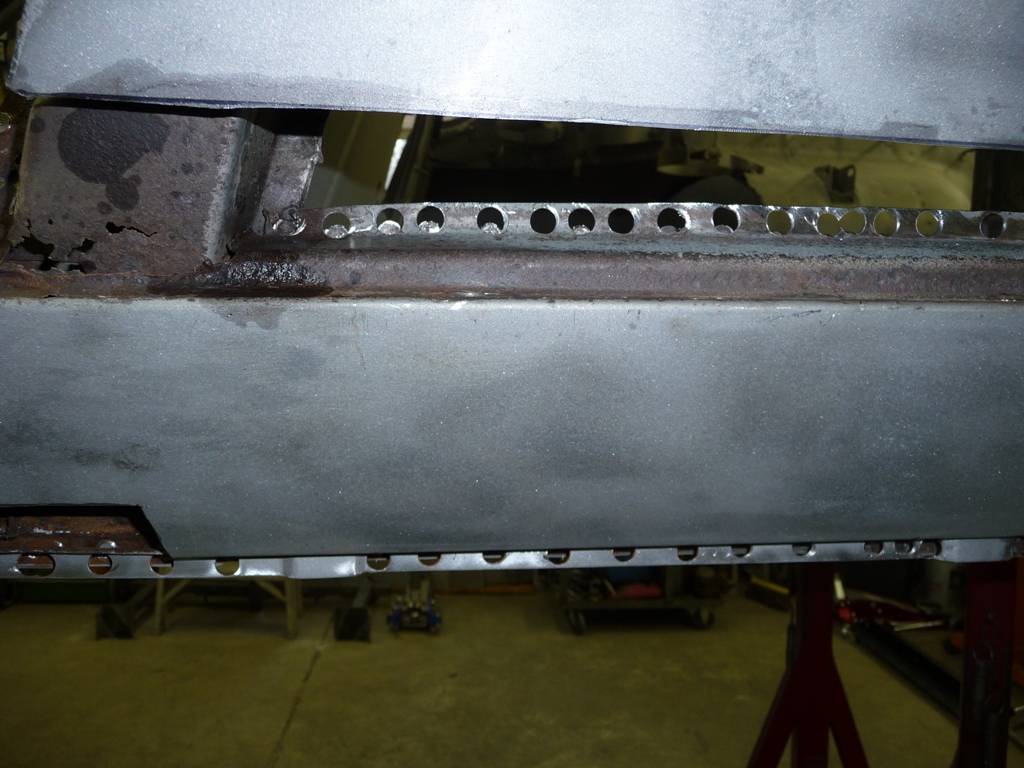
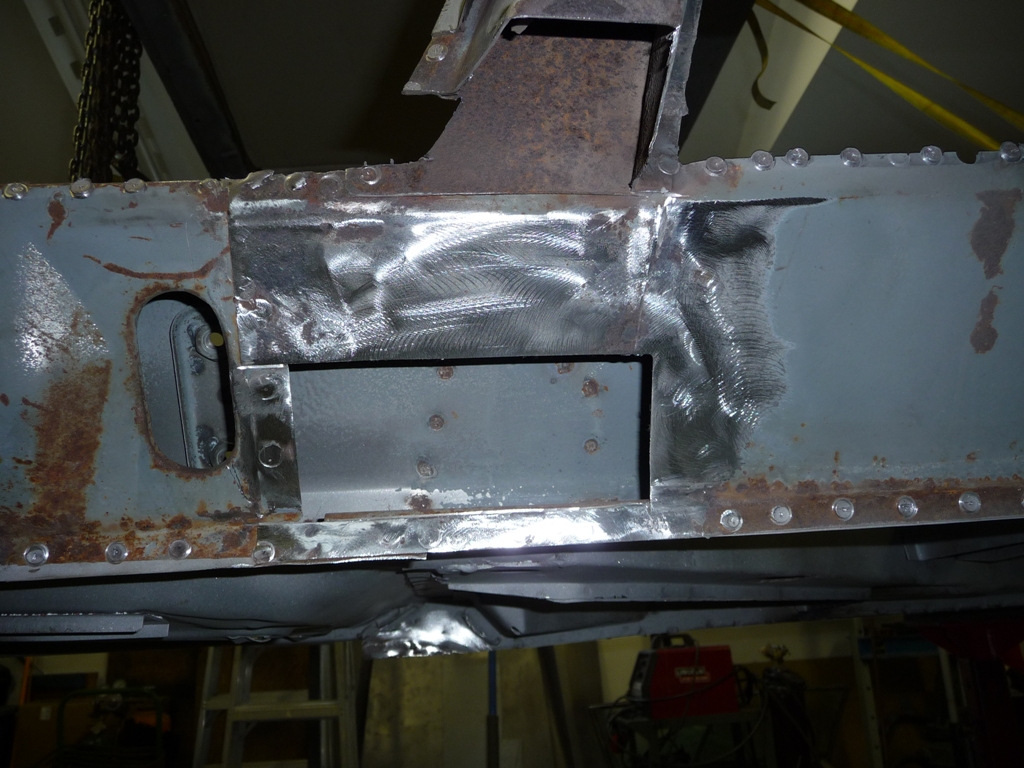
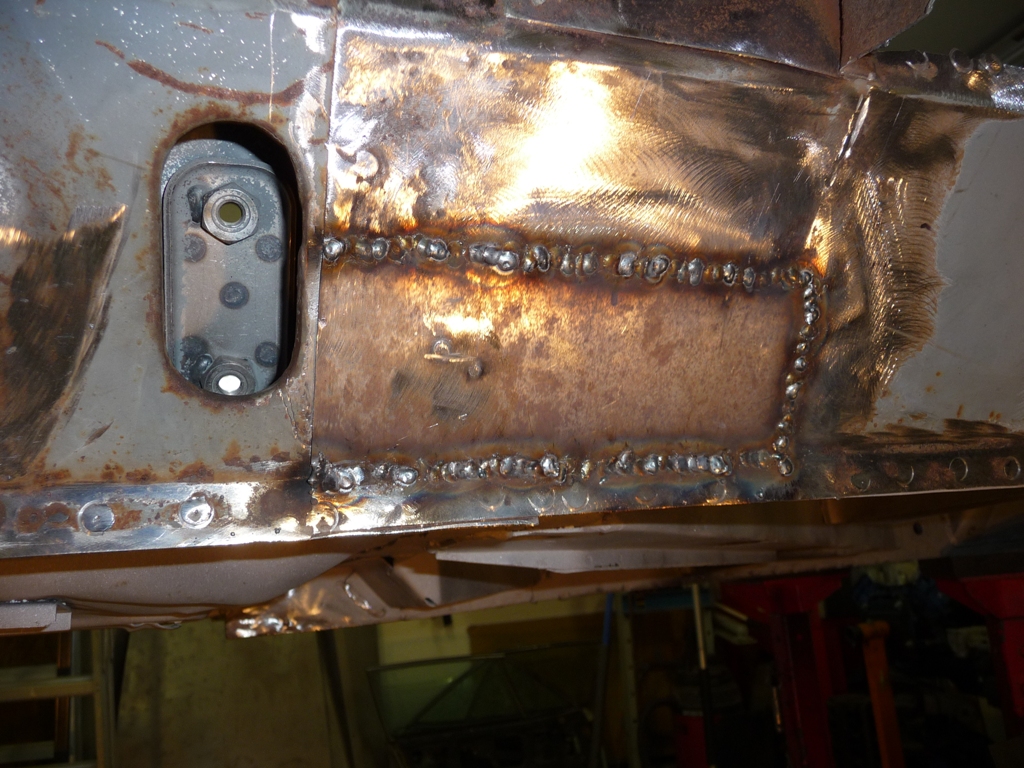
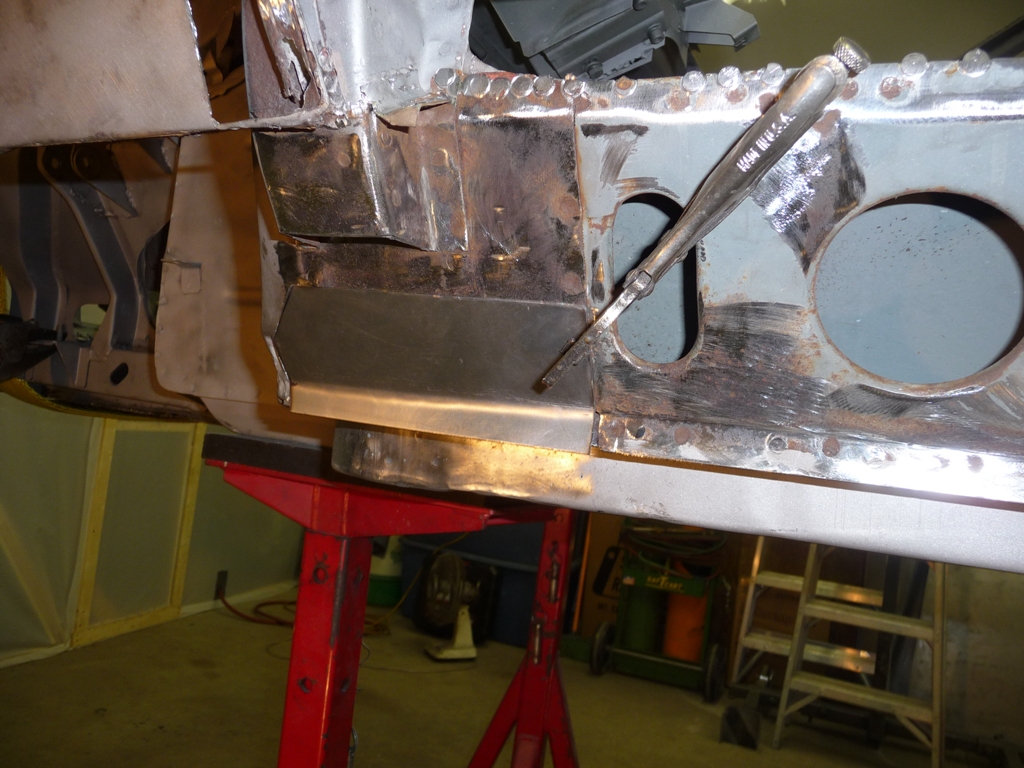
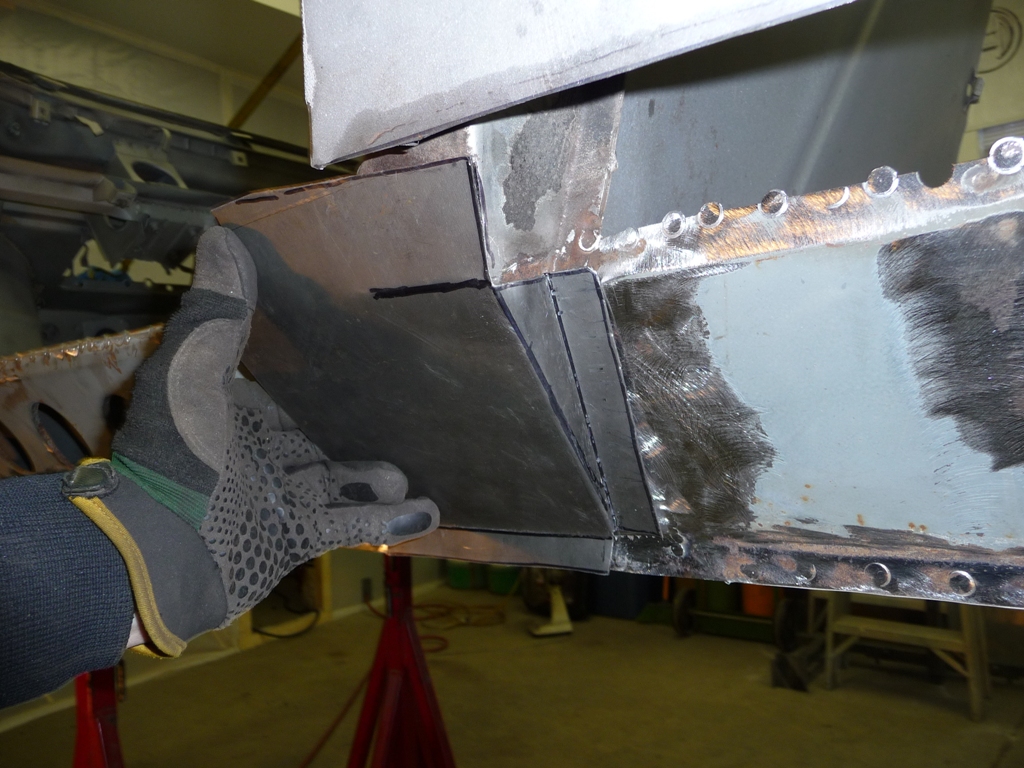
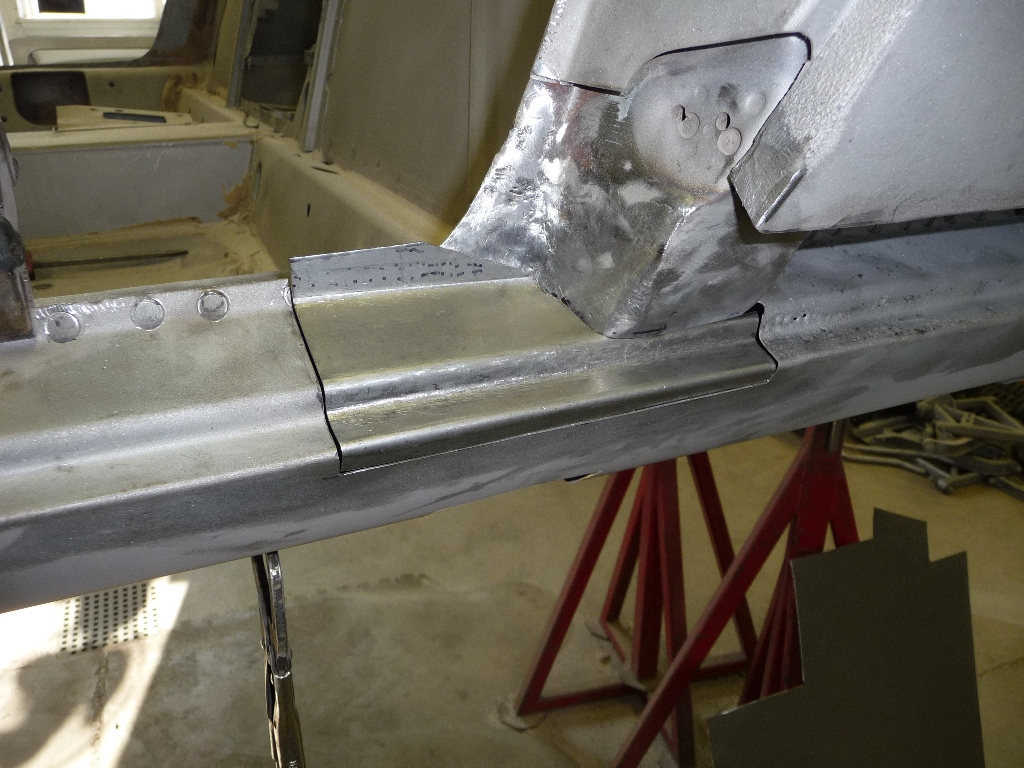
Next was to repair the torn hole by the cross member.
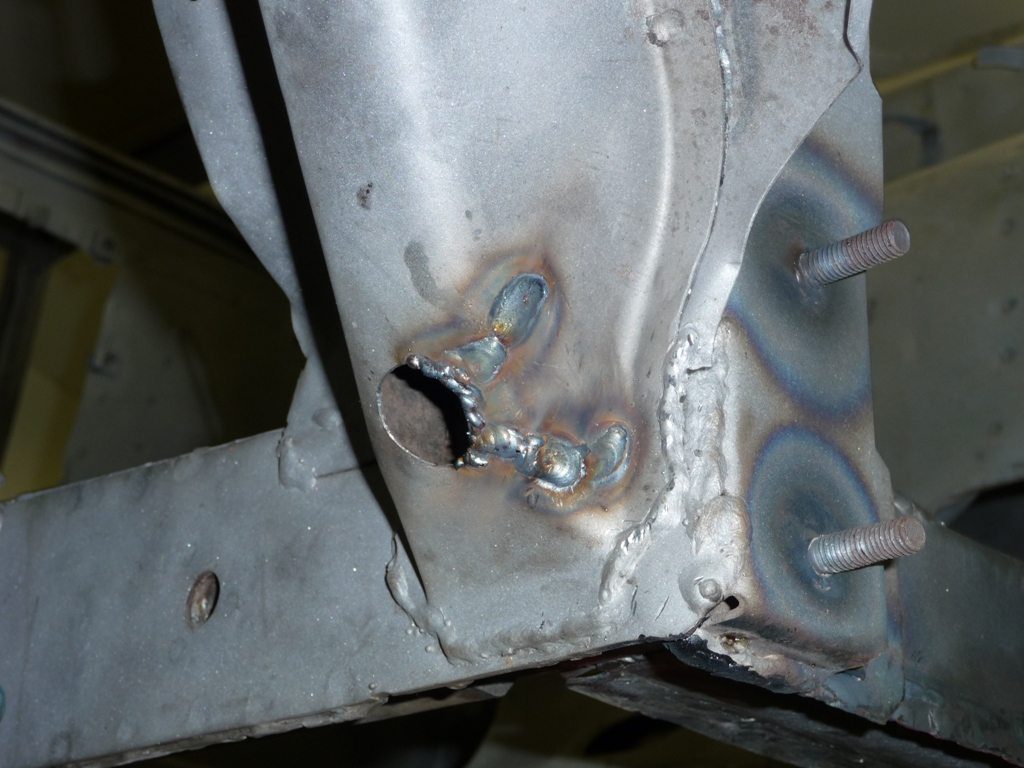
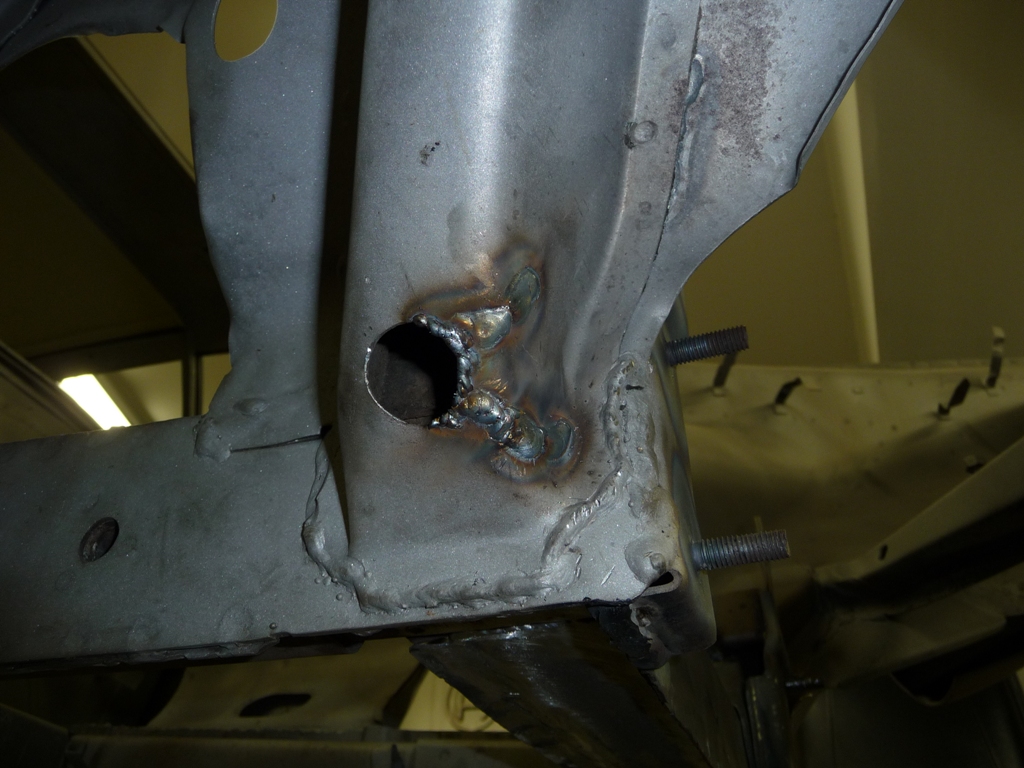
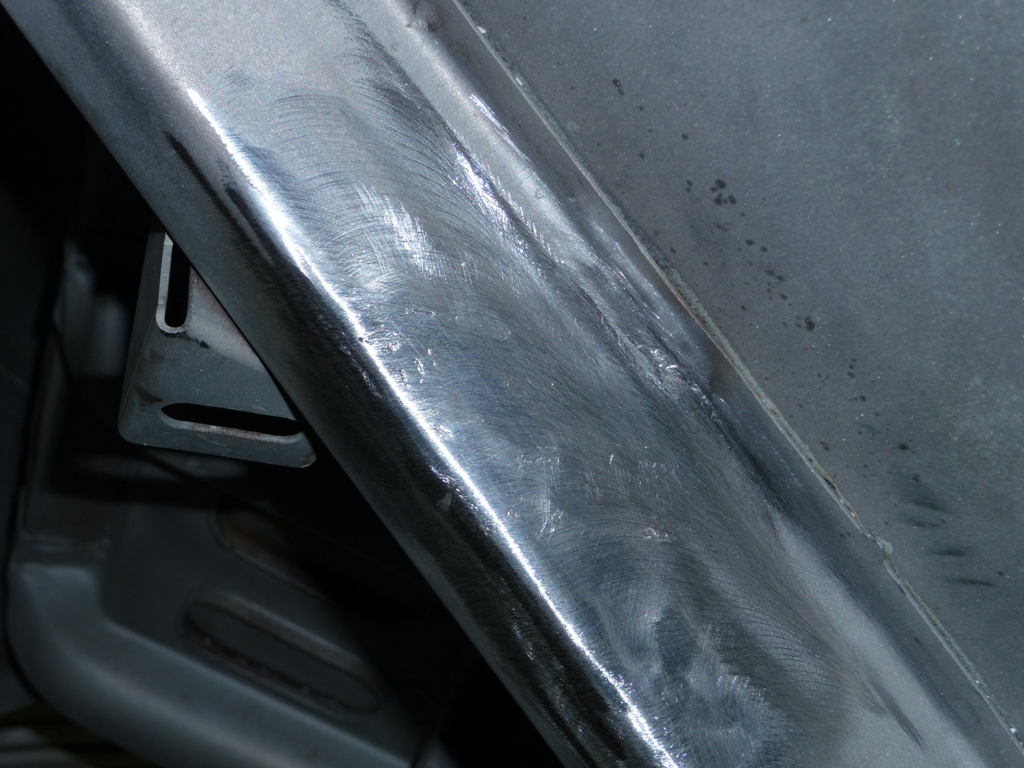
Then I hammered out a dent in the frame rail just above the hole repair. I drilled a hole on the front side, and used a punch as a dolly and took my time with the hammer.
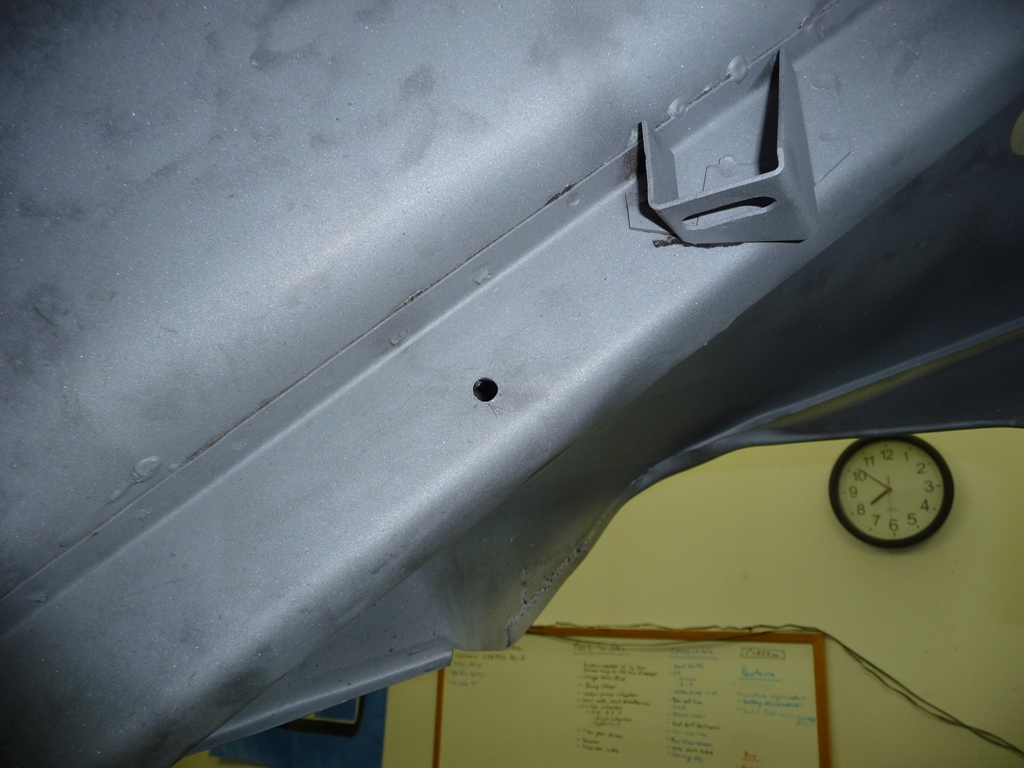
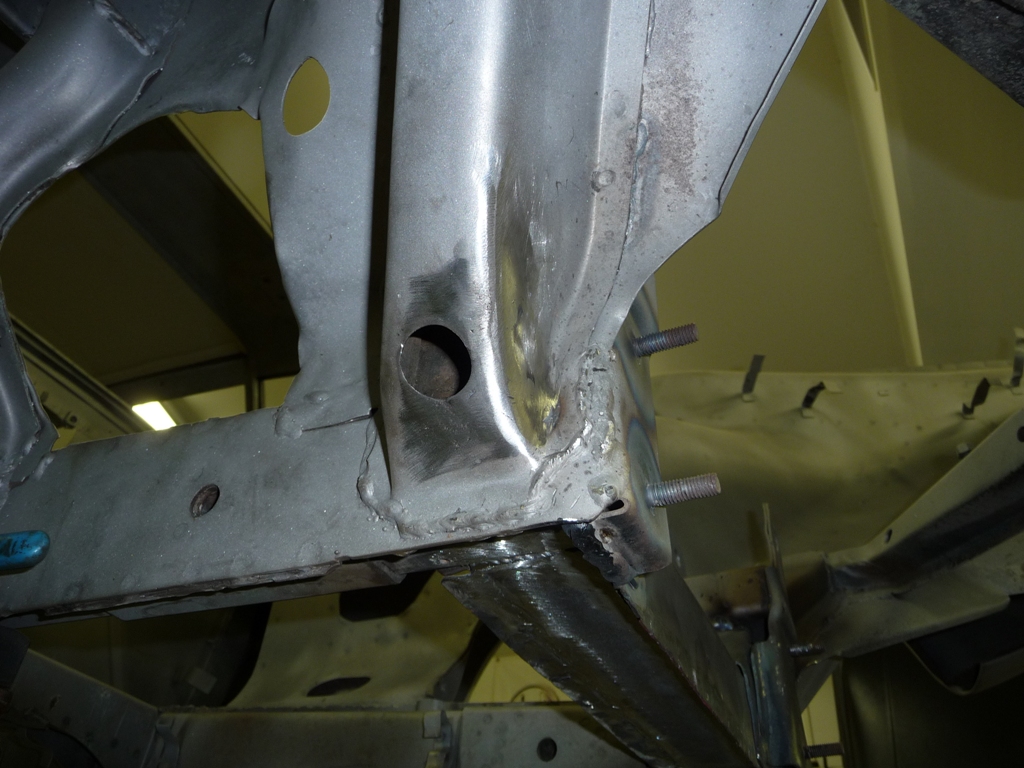
Next project will be to fill in the hole of unknown purpose above the dent repair.
Ta ta for now...
Next was to repair the torn hole by the cross member.
Then I hammered out a dent in the frame rail just above the hole repair. I drilled a hole on the front side, and used a punch as a dolly and took my time with the hammer.
Next project will be to fill in the hole of unknown purpose above the dent repair.
Ta ta for now...
Hi Rob,
Looking great! Really enjoyed my trip up last week even though the drive was a bit snow-nasty. I loved your shop location with drive time to hobby cars less than 50 steps---yes a beautiful home with the garage/shop combo attached---can't beat it.
To all---Rob has allot of history in Mustangs with numerous restorations under his belt and a successful parts development background he may wish to explain in the future.
Keep up the good work my friend.
Kirk
Very impressive work, but even more impressive progress. I'm starting to wonder if your wife is away on holidays with the kids! It's fun to follow the work and thanks for posting the details and pics Rob.
Mark
Mark
Thanks guys...
Kirk, It was great meeting and chatting with you. You have a wealth of knowledge trapped in your grey matter... I'm glad you made it home OK. For those that don't know, we had a couple weeks of wicked "real" winter weather in the region. Kirk decided to test his driving skills and come up at the front end of that stuff. I'd be happy to share whatever info is of interest to anyone. I've restored quite a few vintage stangs, mostly 69s. My personal 69 Mach was a 3yr journey of extensive modifications. If interested, you can view the build here: Rob's Mach I I'd be happy to share any nuggets of "wisdom" I've accumulated if anyone is doing one.
Mark...are you implying that I might be neglecting my family responsibilities.... um...well...
Regarding progress:
I managed to get up early both sat and sun and get a few hours in each day prior to the family emerging from their tombs. Got a few more small projects hammered out. Even tried out the new spot welder. I'll try and get an update posted tonight.
Kirk, It was great meeting and chatting with you. You have a wealth of knowledge trapped in your grey matter...
Mark...are you implying that I might be neglecting my family responsibilities....
Regarding progress:
I managed to get up early both sat and sun and get a few hours in each day prior to the family emerging from their tombs. Got a few more small projects hammered out. Even tried out the new spot welder. I'll try and get an update posted tonight.
OK, so here's what I got done over the weekend.
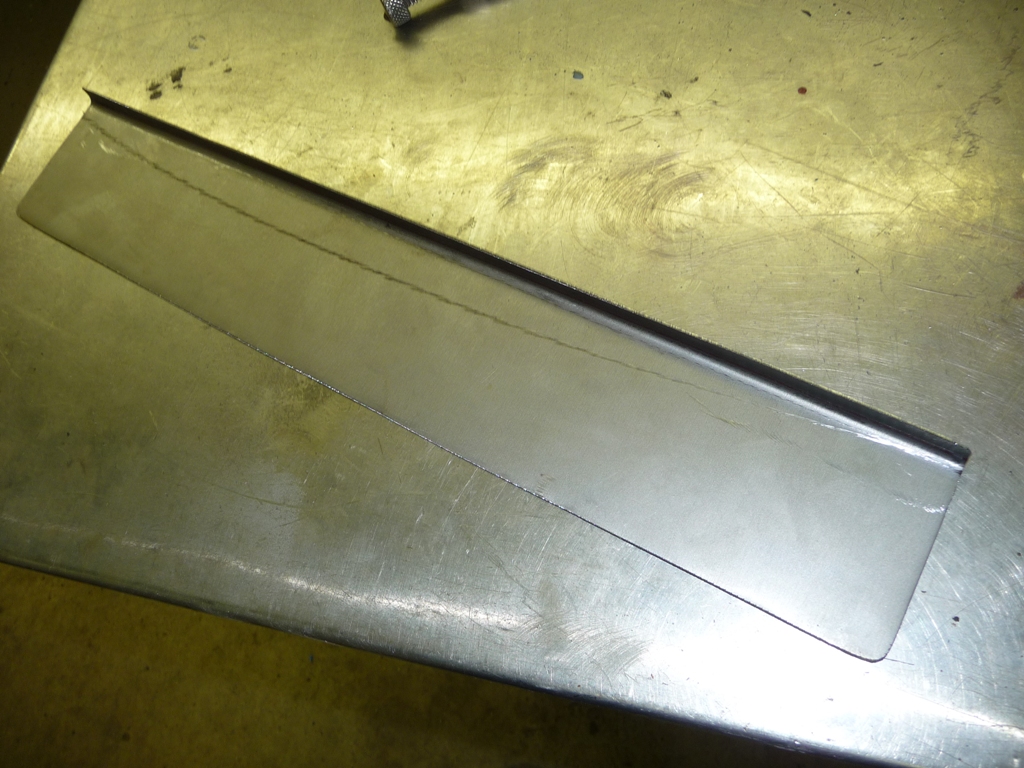
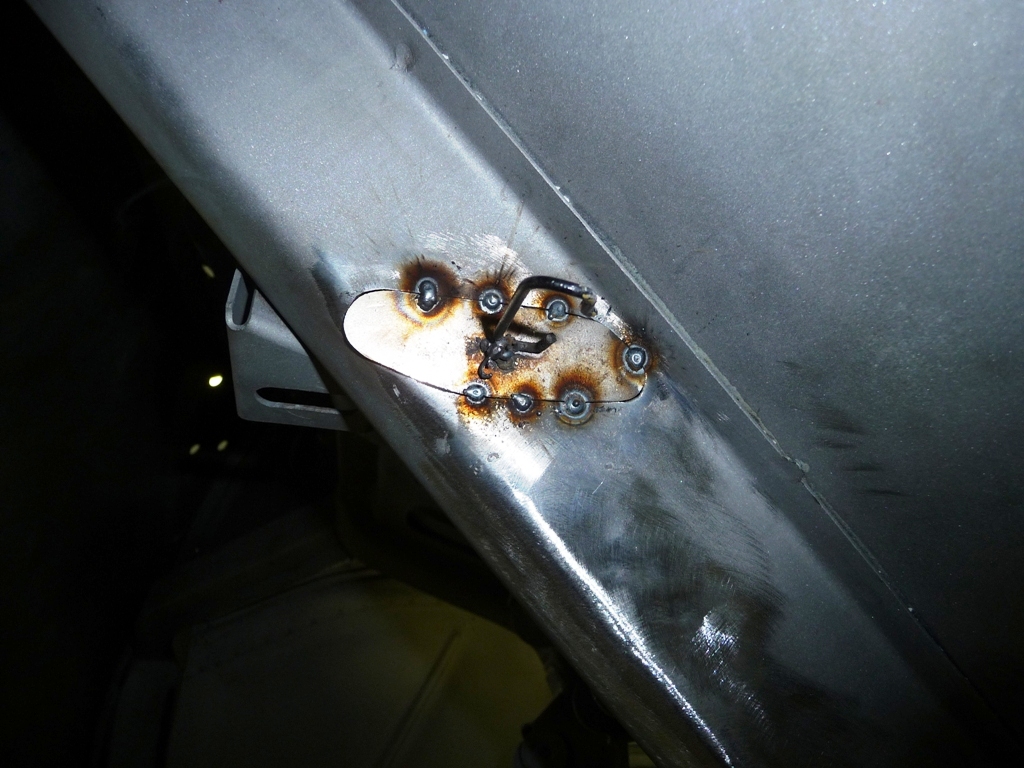
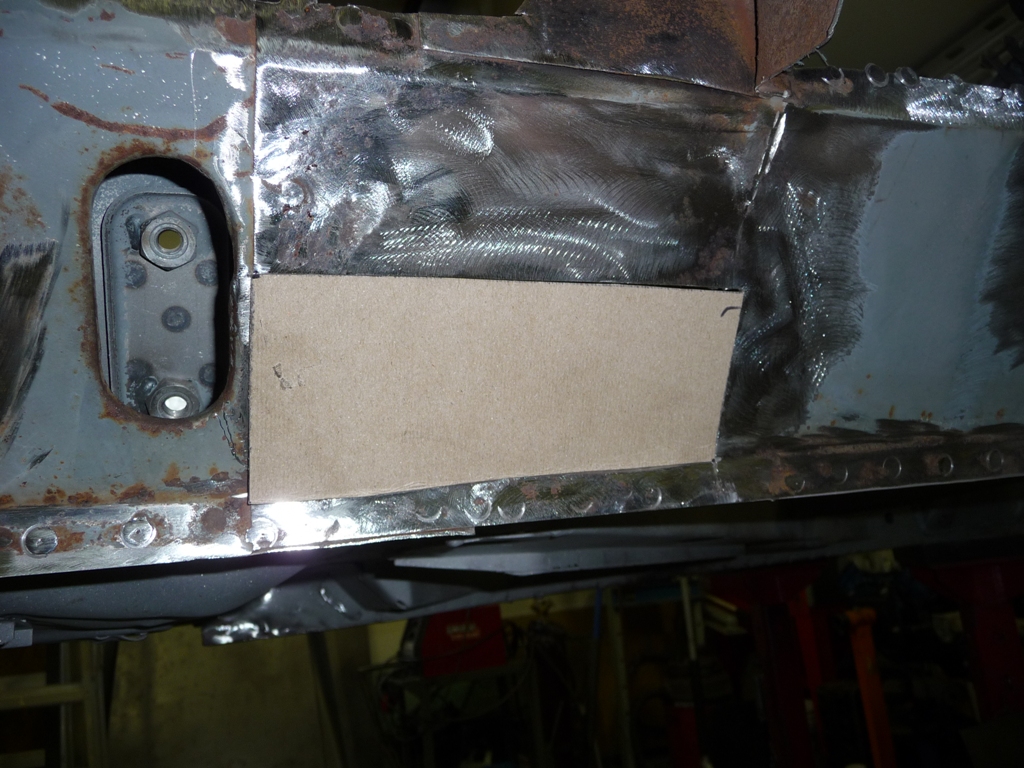
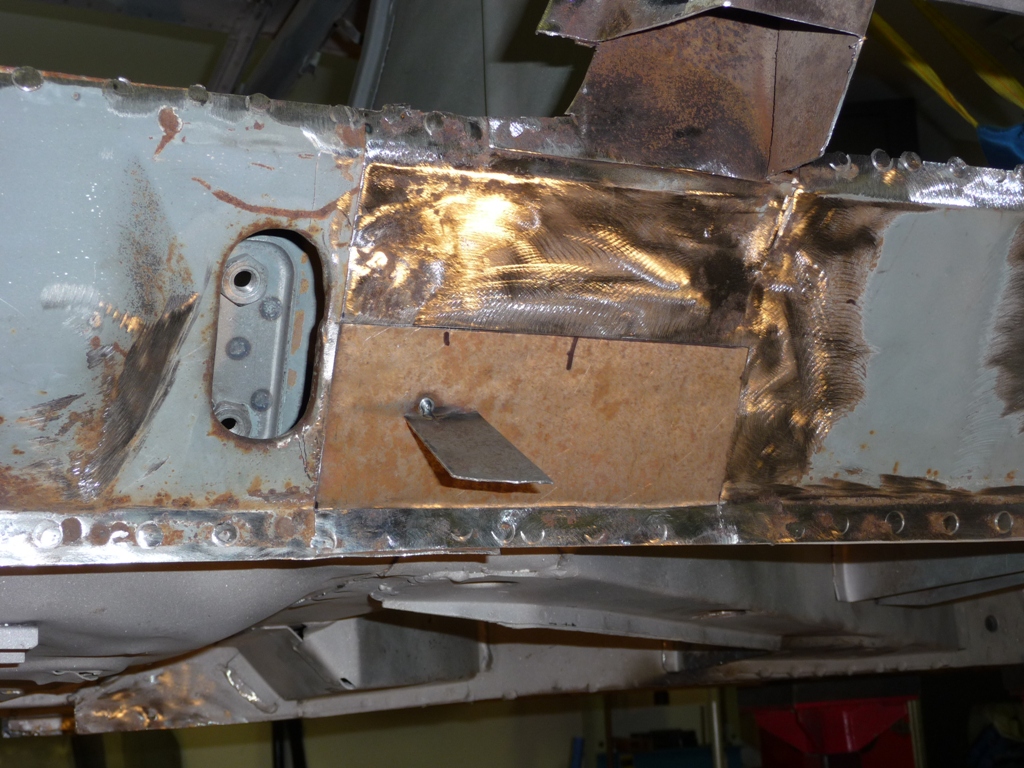
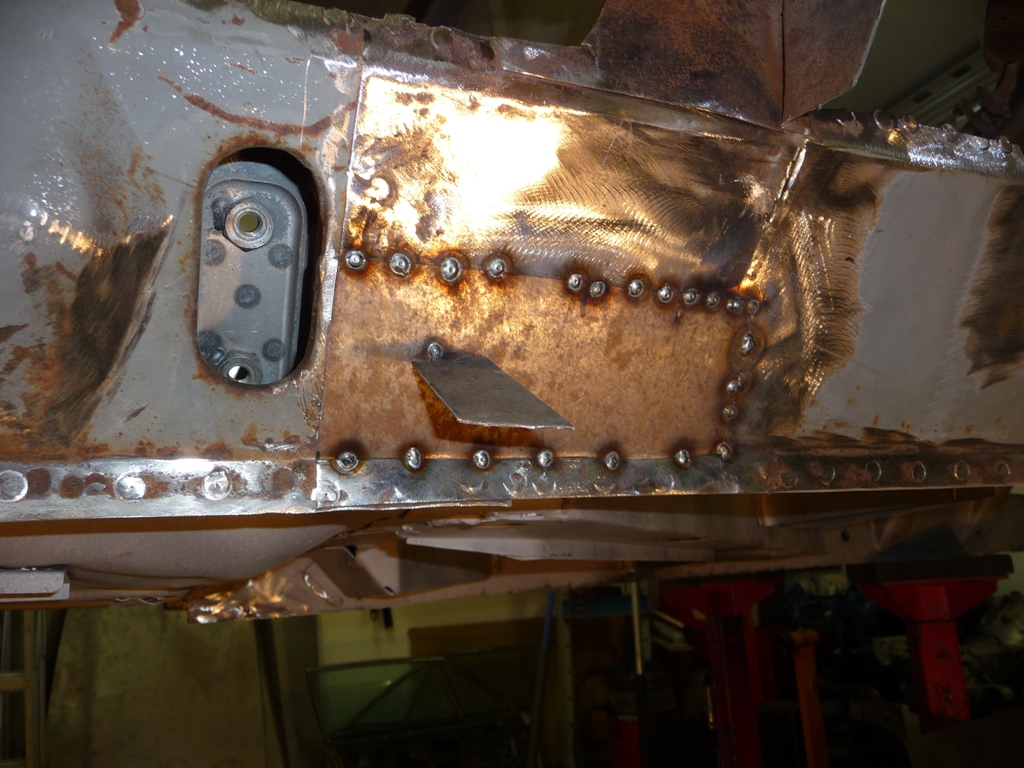
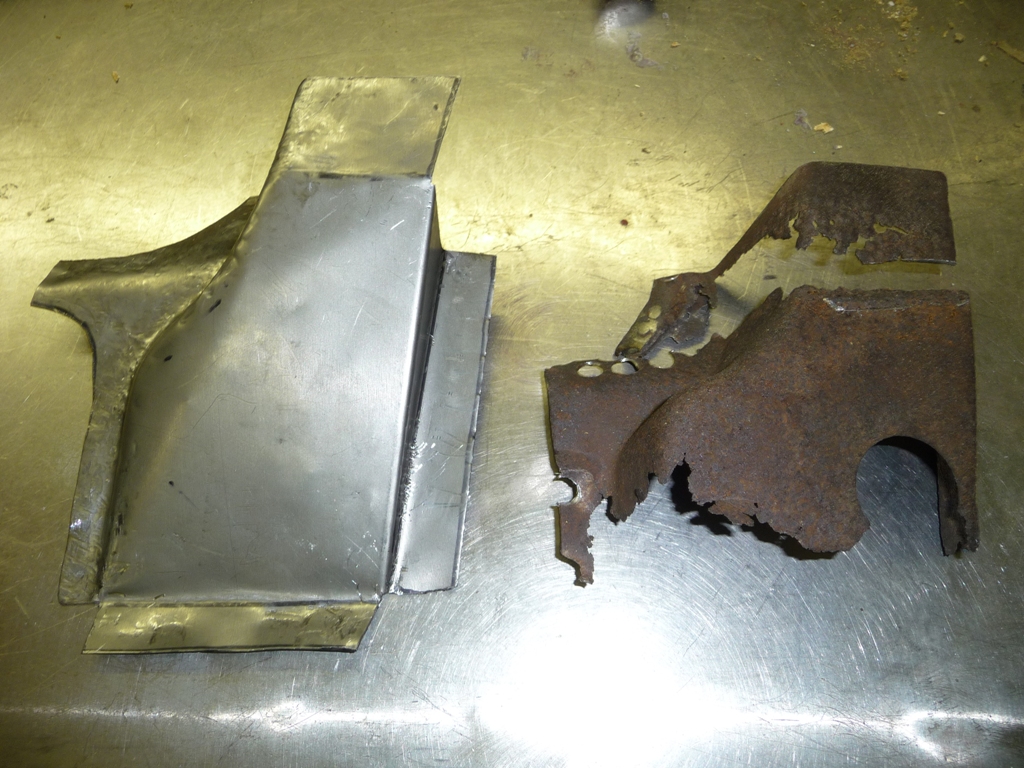
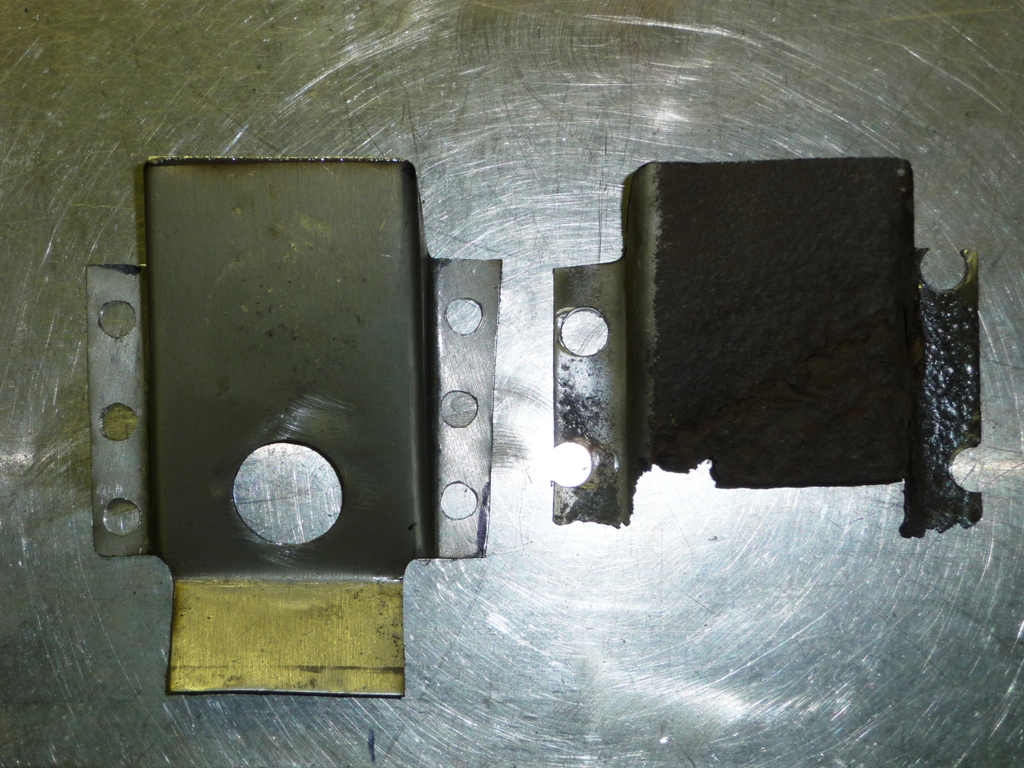
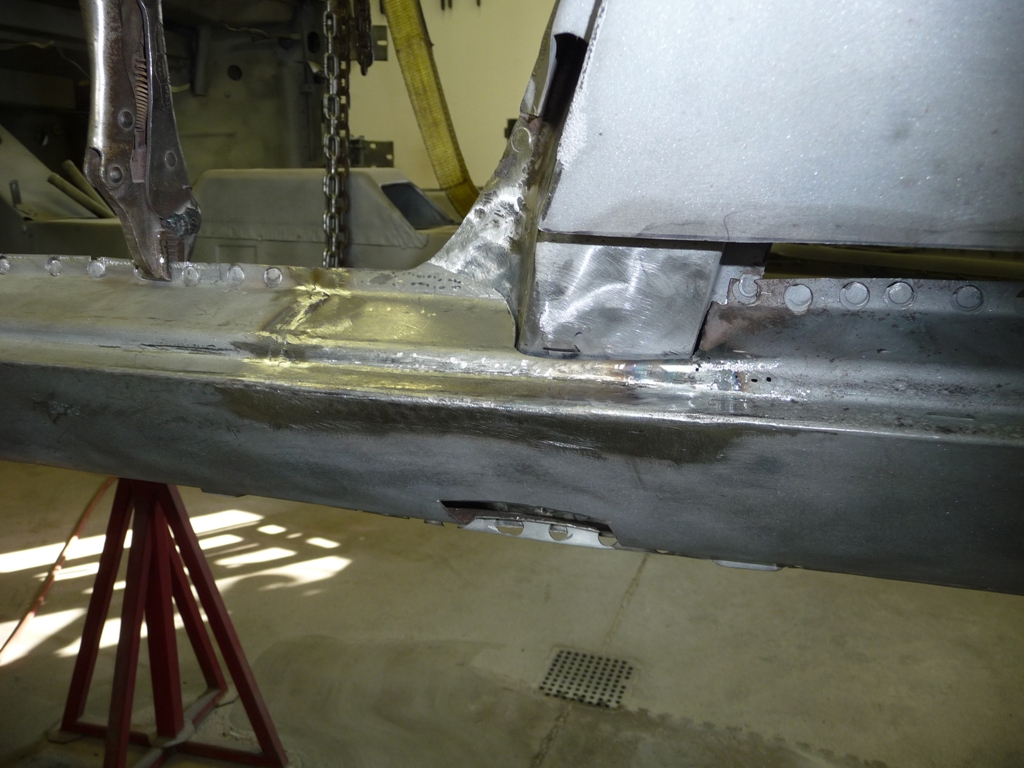
Made filler patches for the holes of unknown purpose. My method in this type of situation is to make my patch an exact duplicate of the hole. Weld them and ground them clean. The wire is just a handle so I could hold them in place to shape and weld them. (both sides were the same project, so only showing the one)
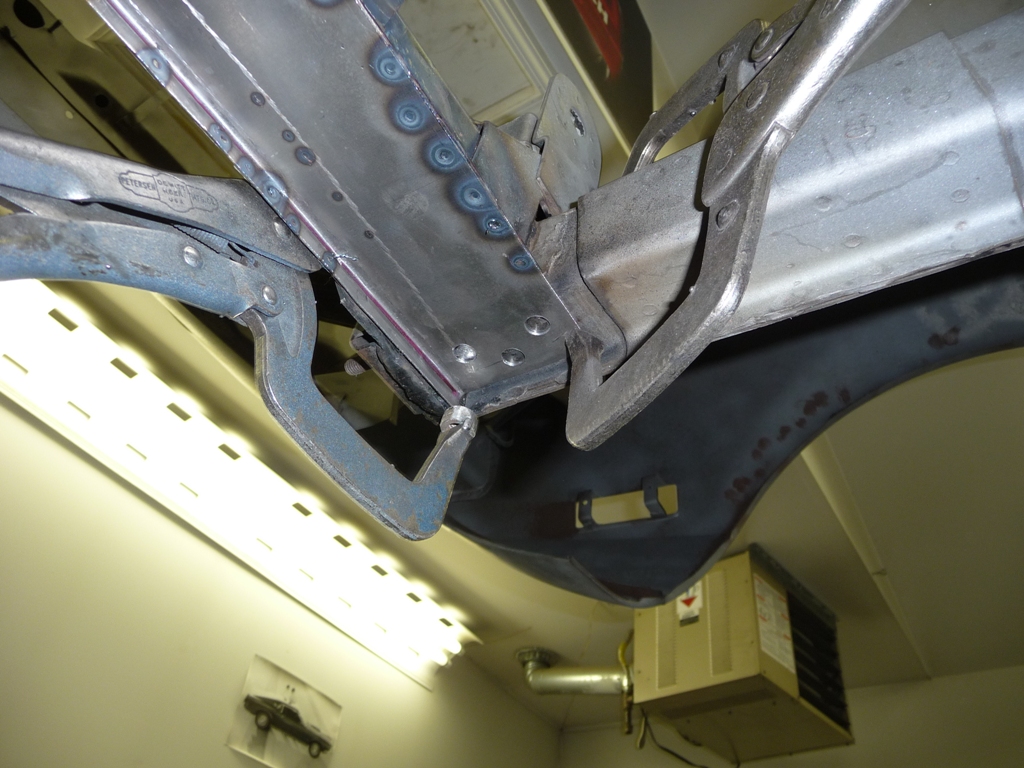
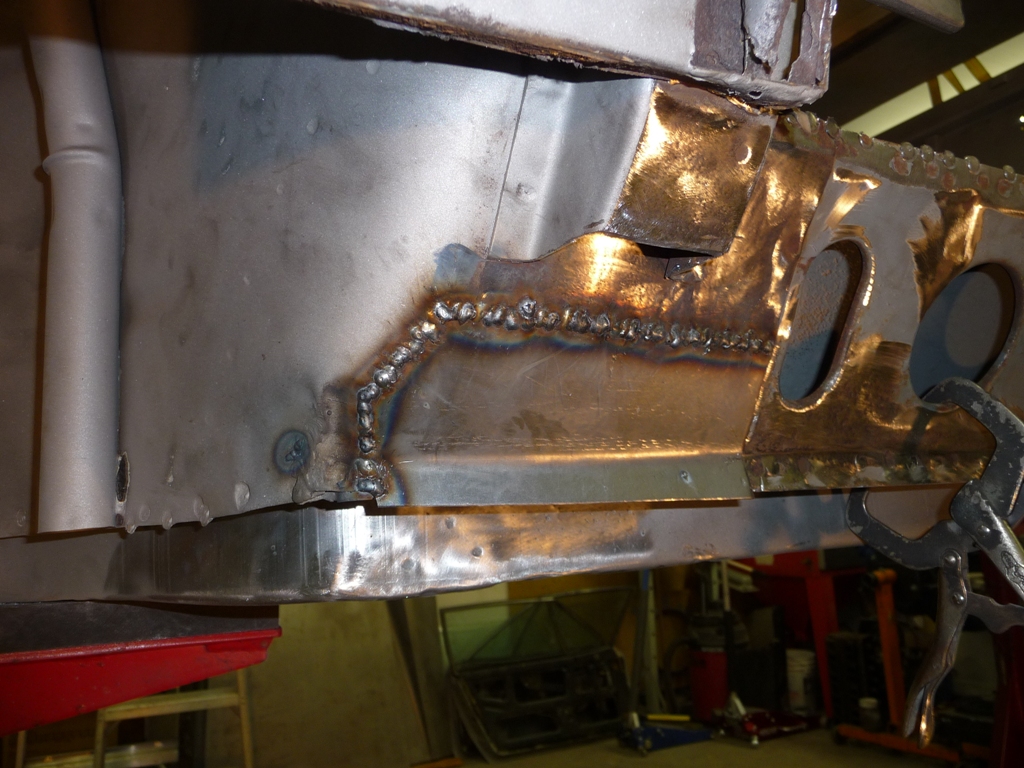
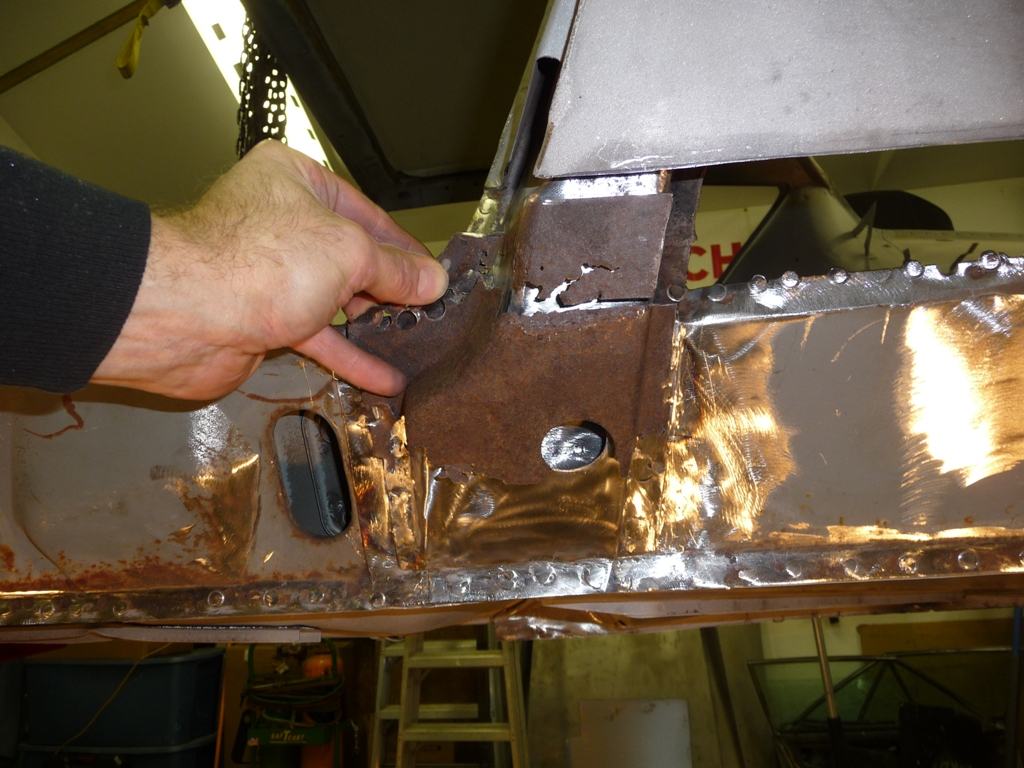
Then a knocked out the E-brake reaction bracket. Cut the crappy welds off, ground it clean, welded up the holes and dents and remounted.
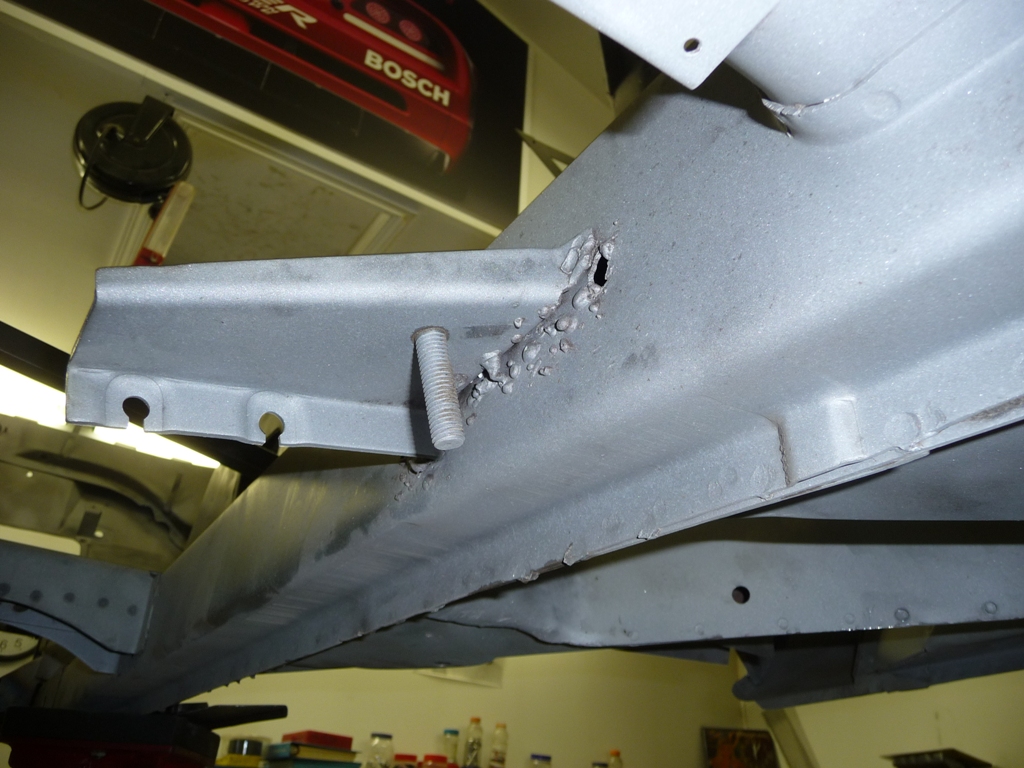
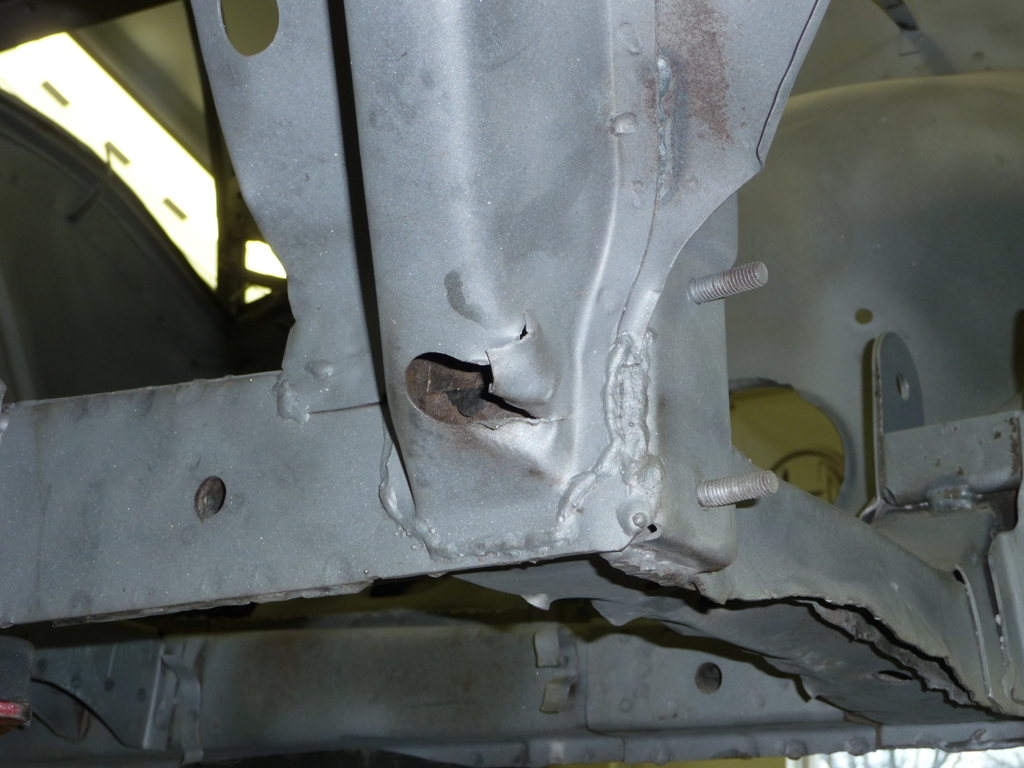
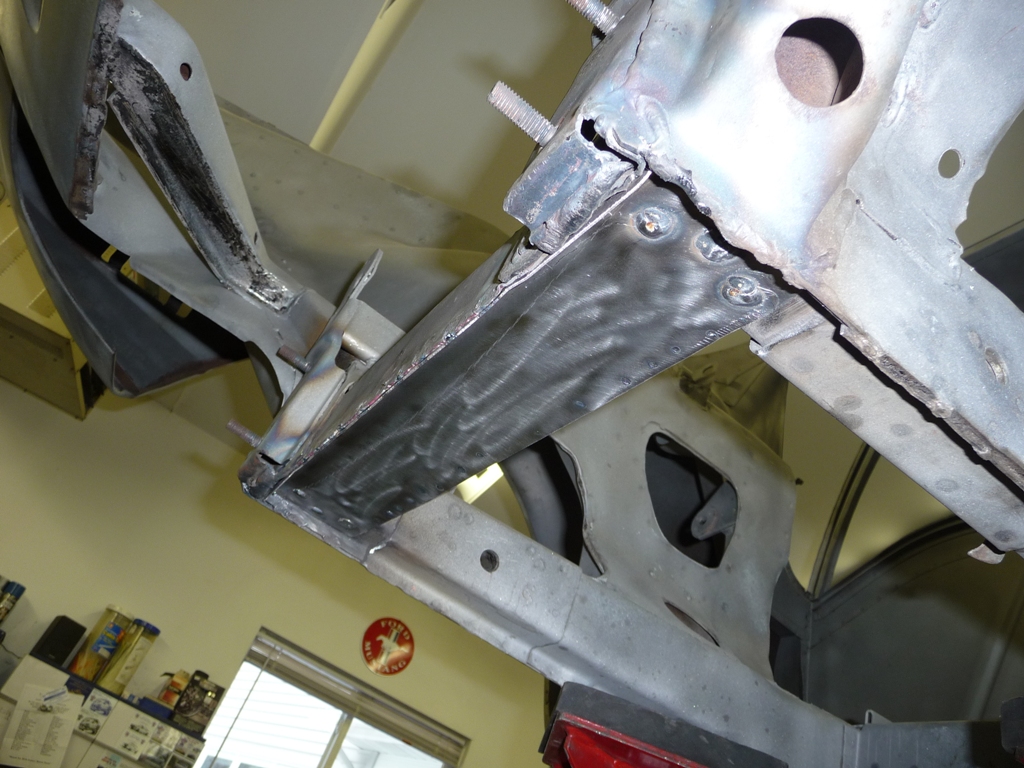
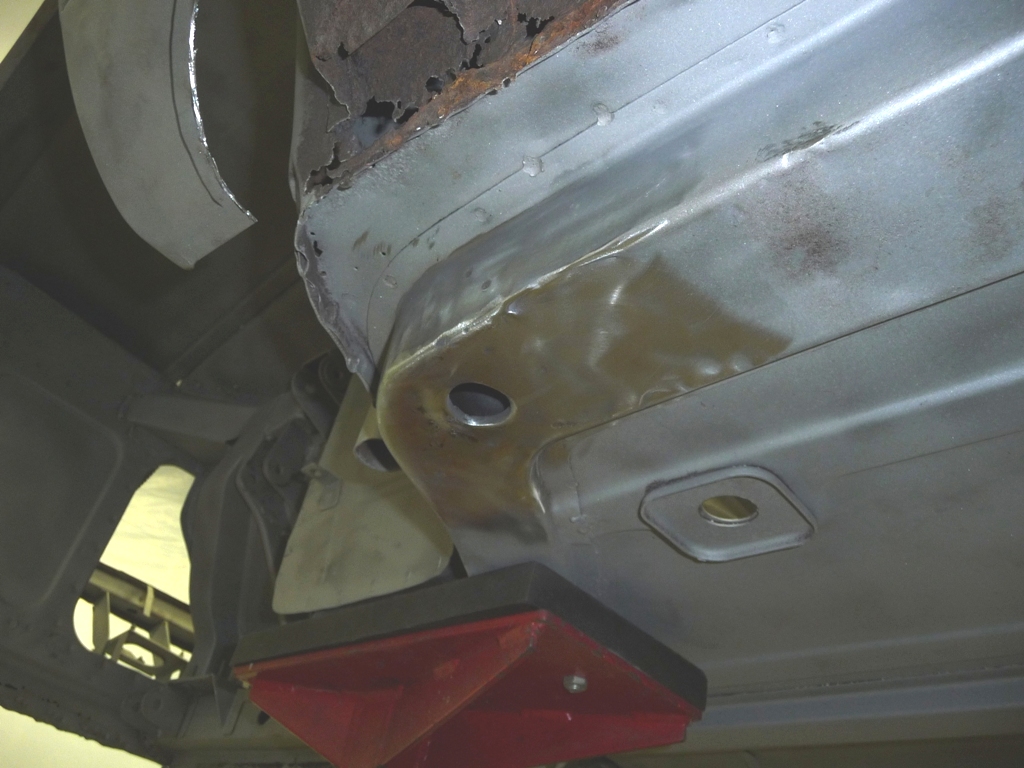
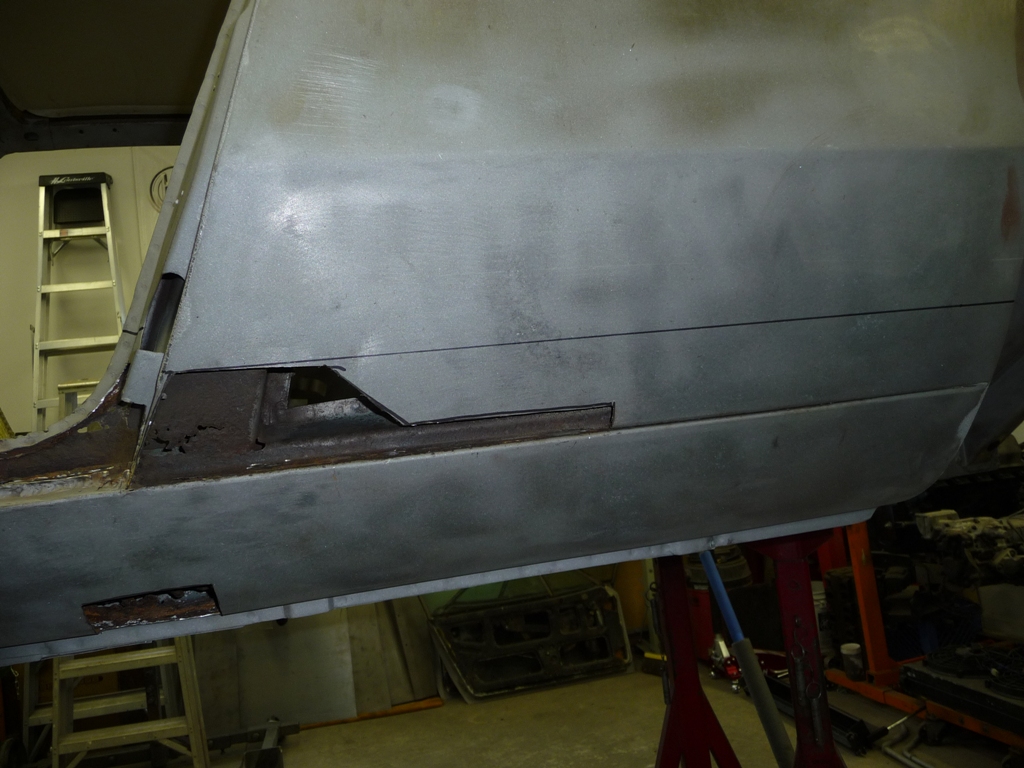
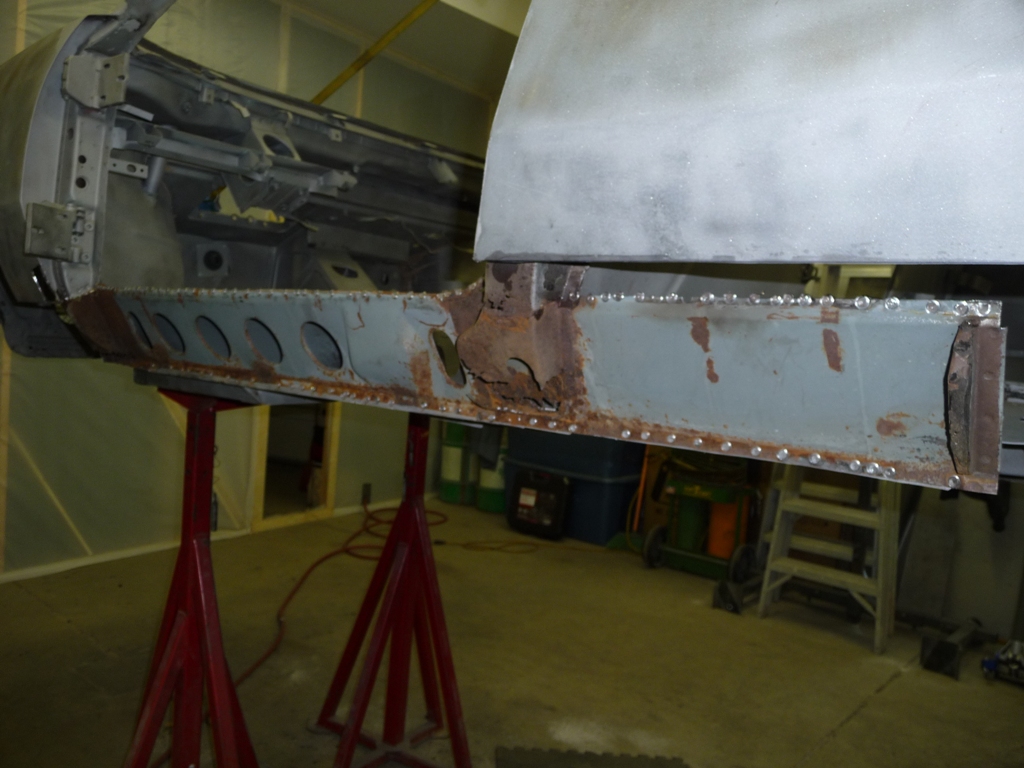
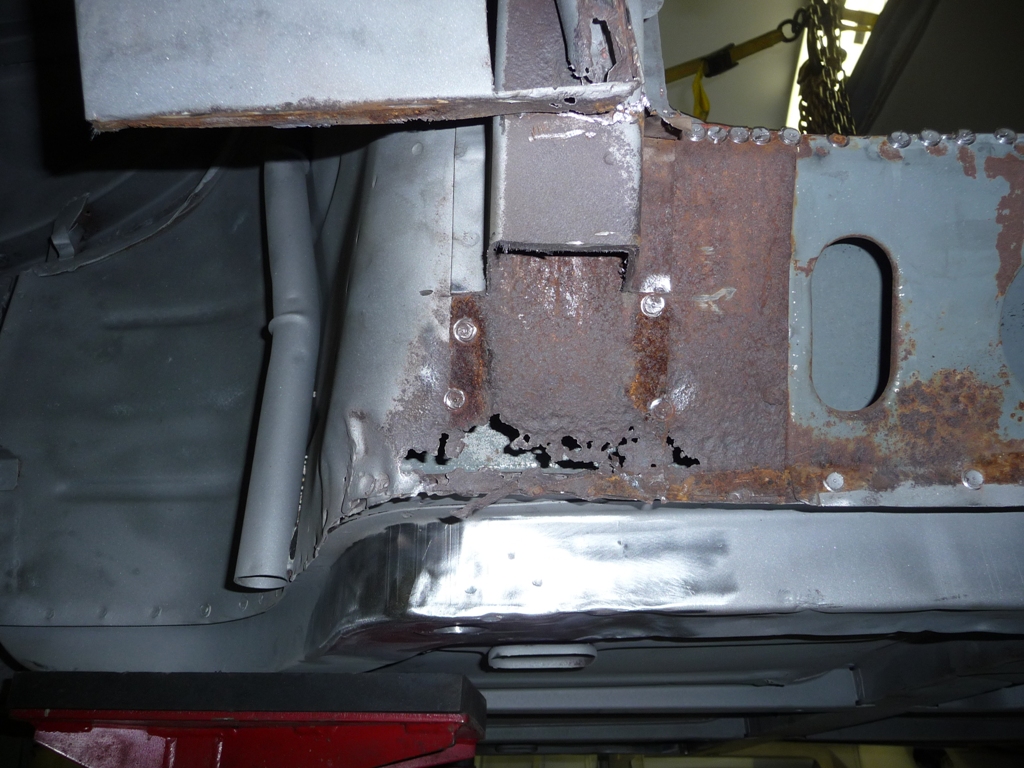
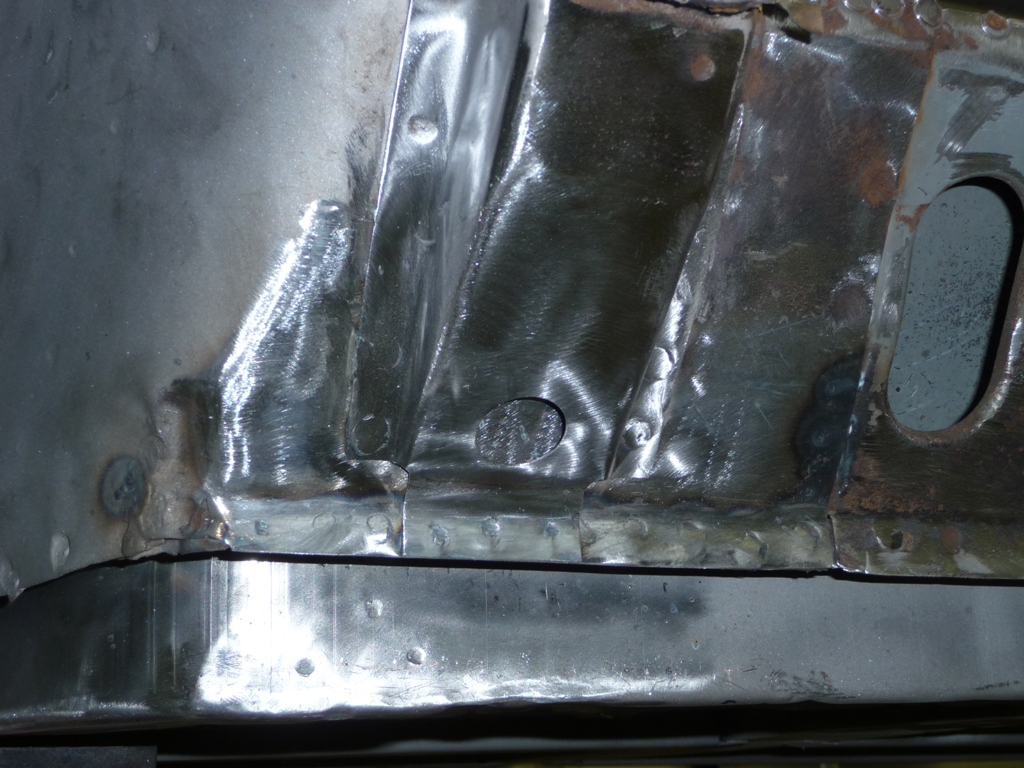
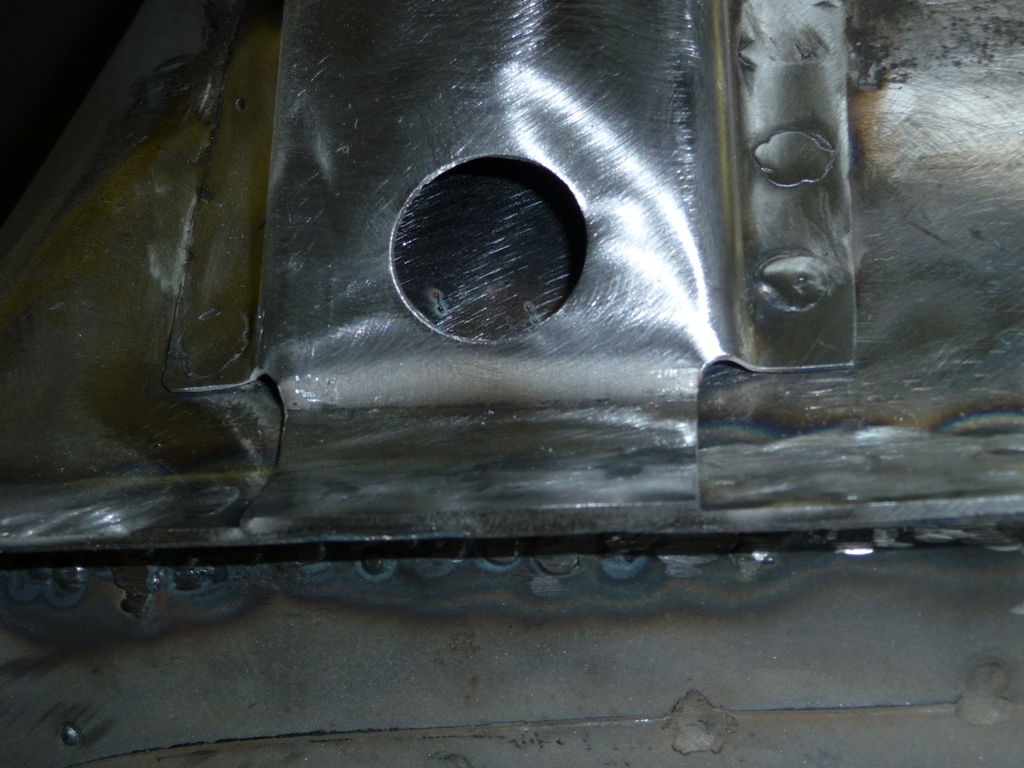
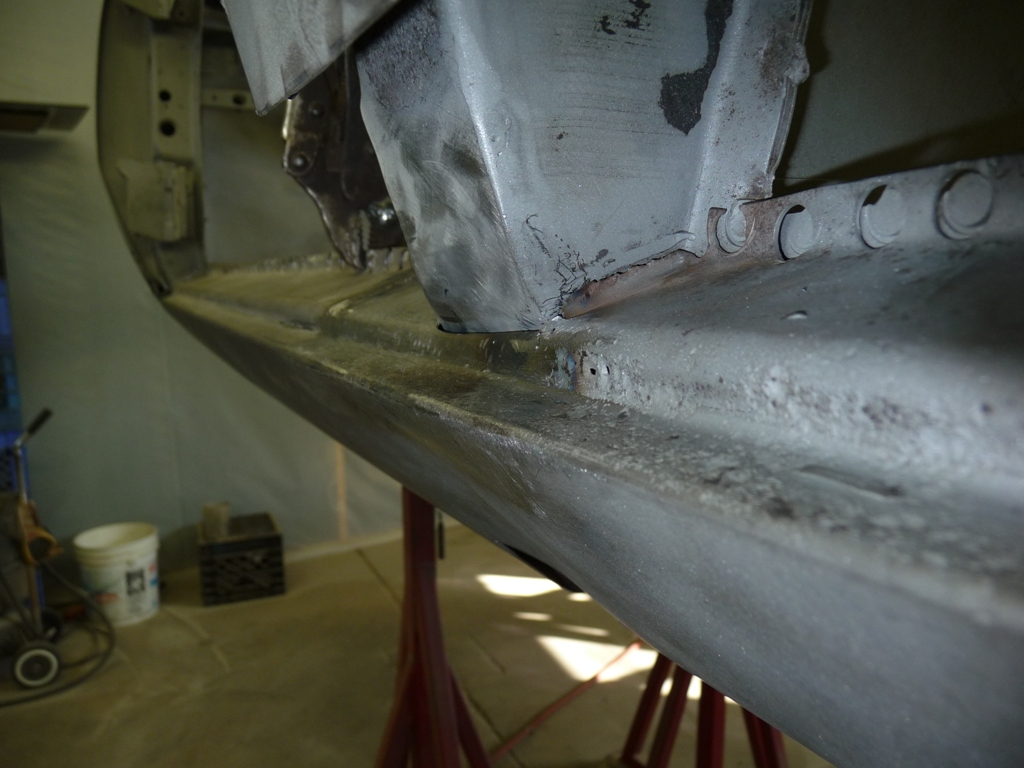
Then took on the frame under the driver's side engine mount. It was badly bent. Looks like a large rock was hit or something like that. I think this car spent more time in ditches...than on the road.. I hammered the lip back, separated the joint, hammered the bottom panel down with a slide hammer, then shaped the bottom by using a punch through a drilled hole again.
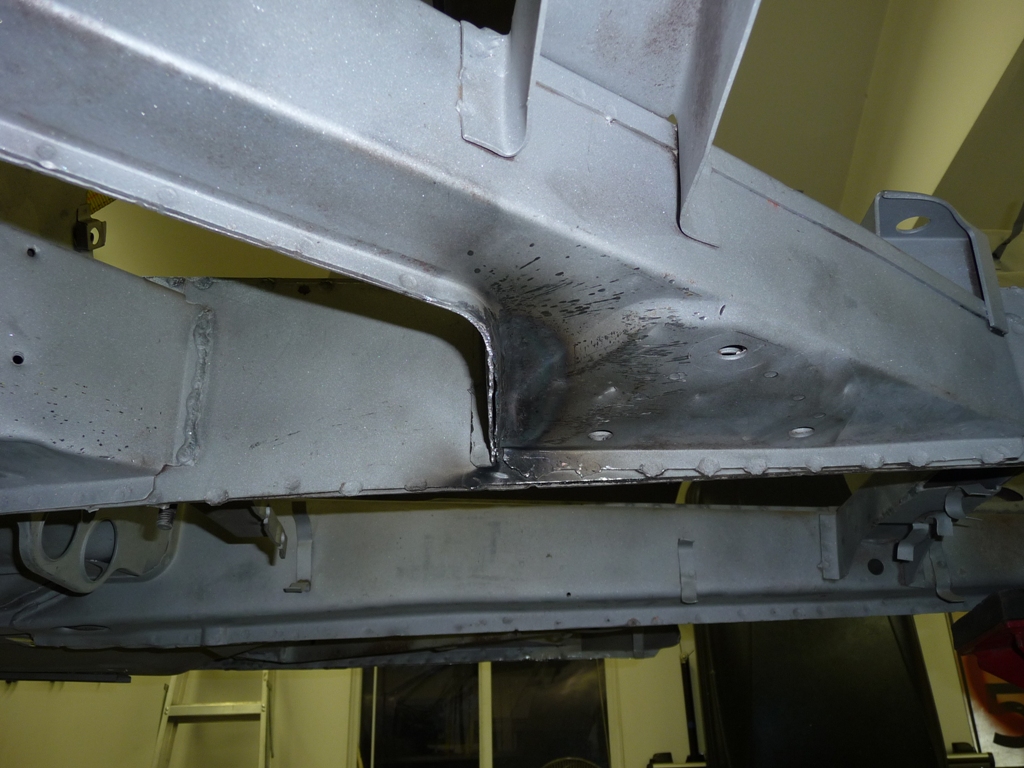
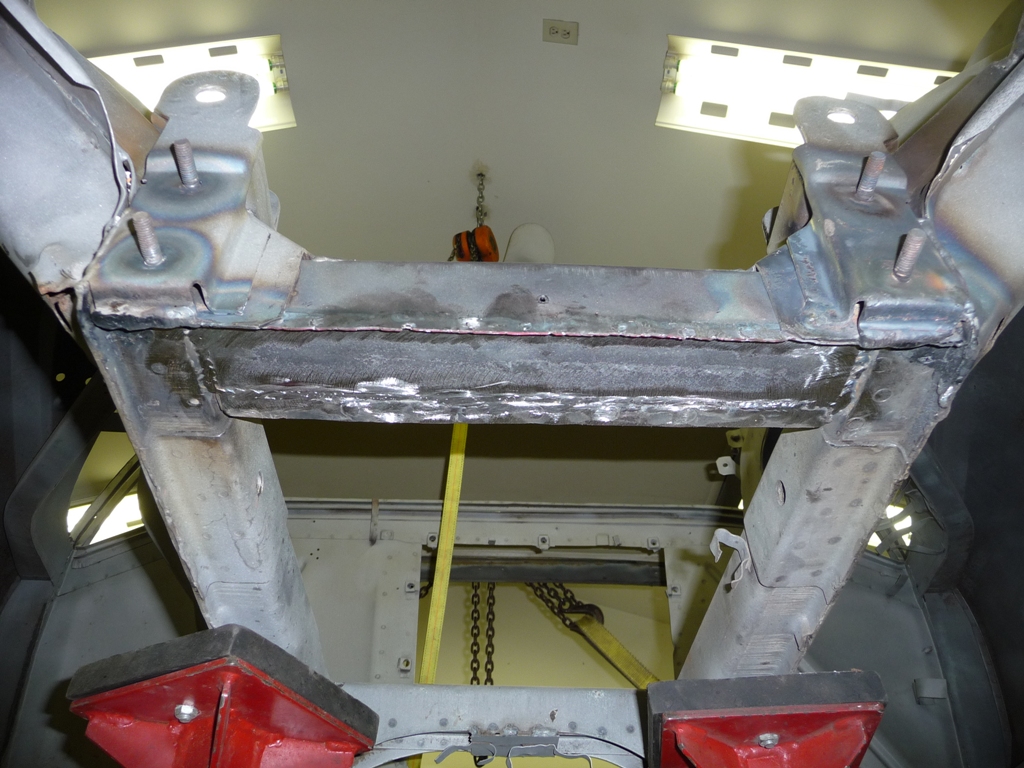
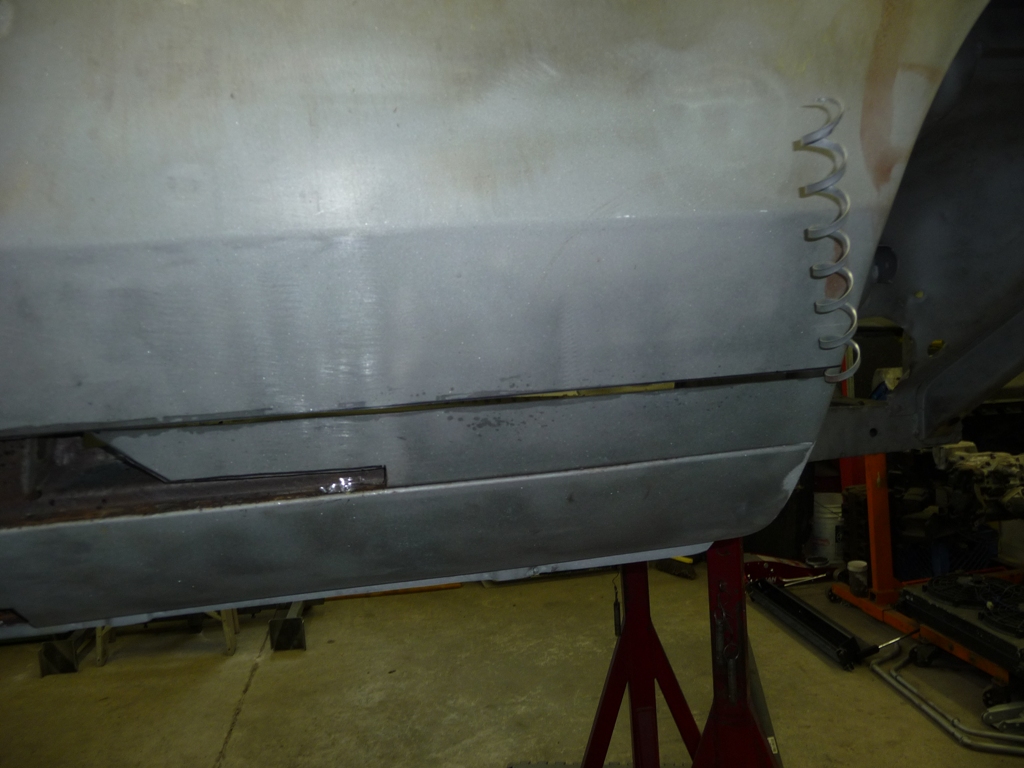
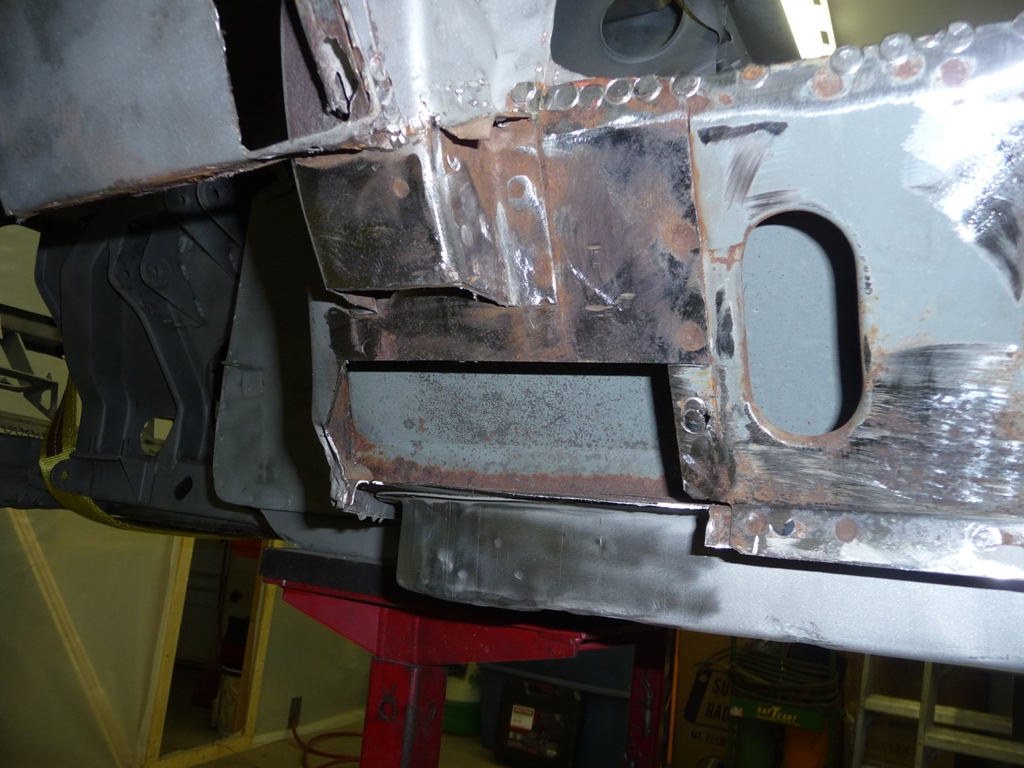
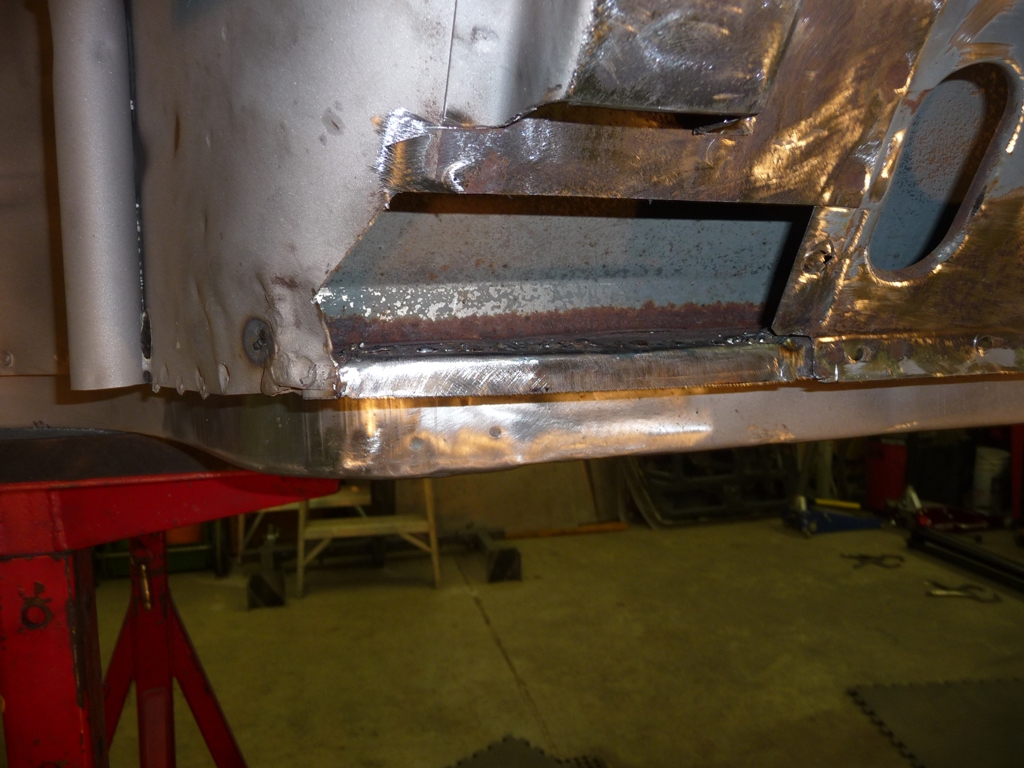
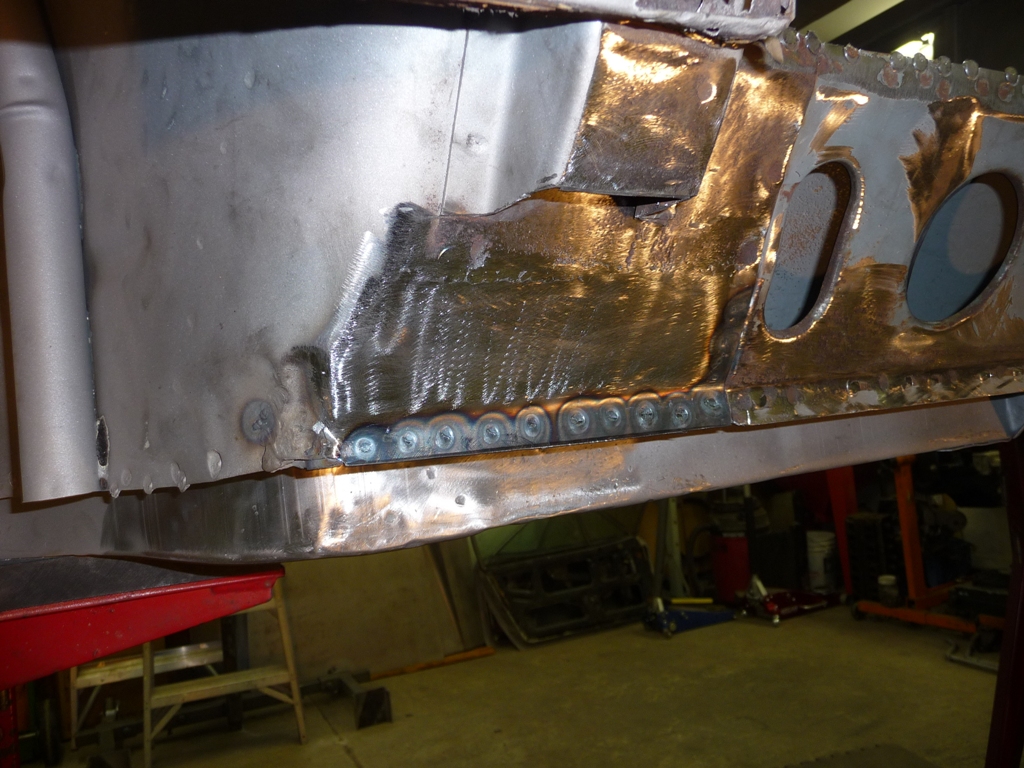
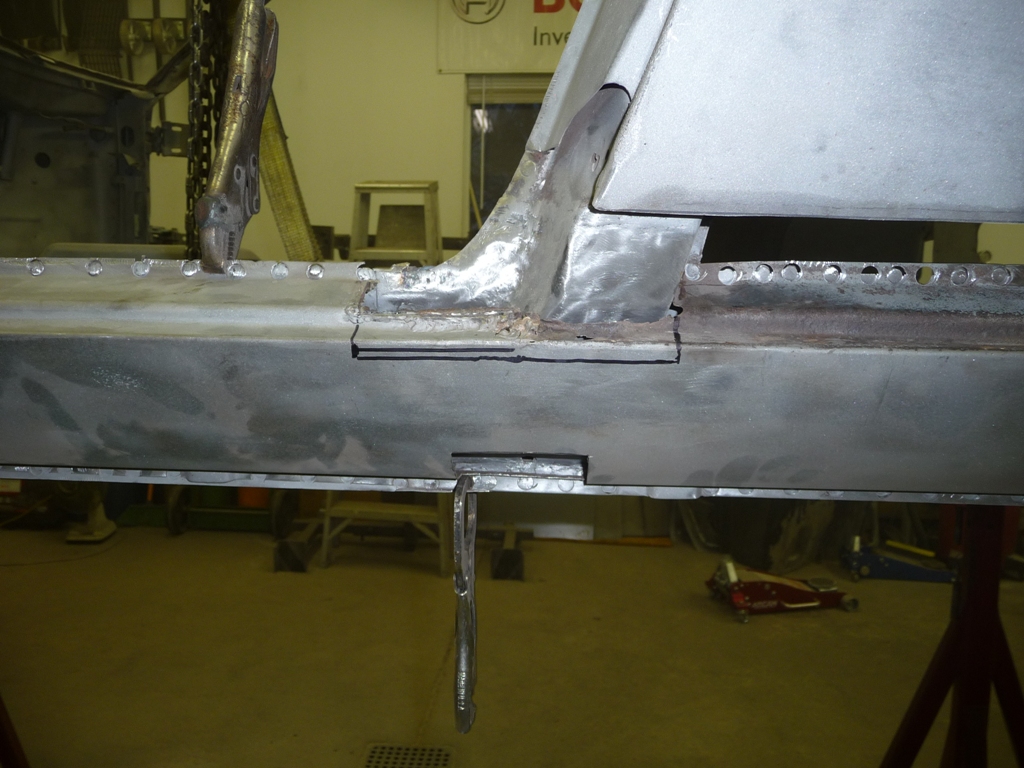
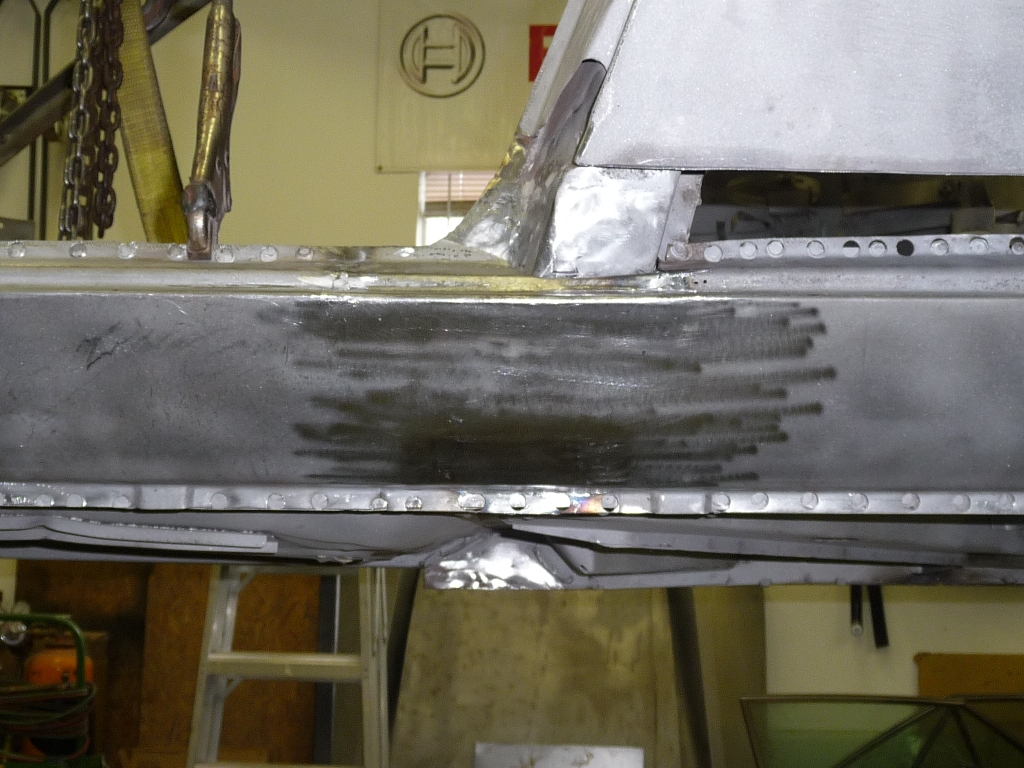
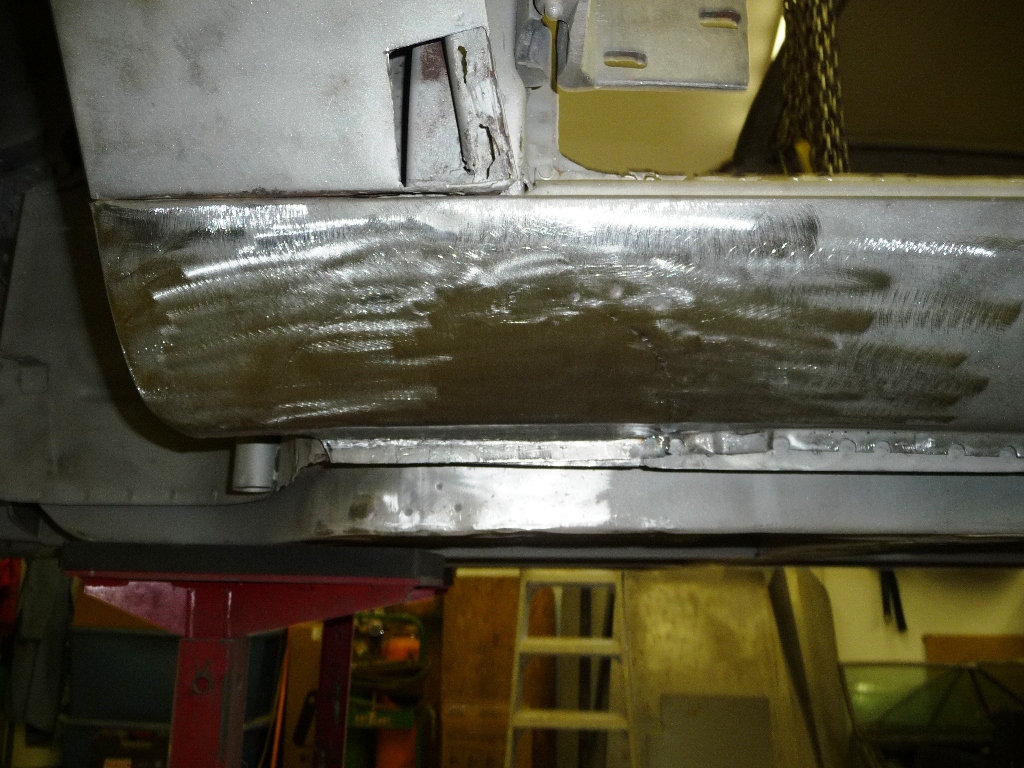
Then, I tried my first project with the new spot welder and hot glued the bottom panel on the rear cross member.
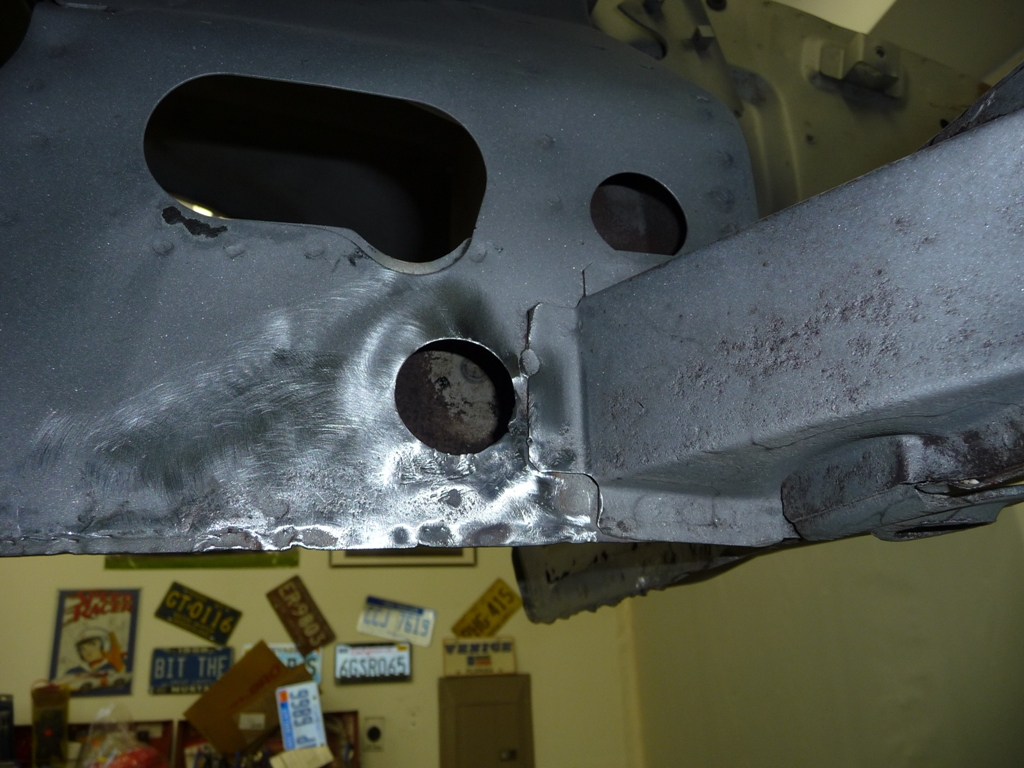
As a refresher...here was the before...

Next projects will be continuing to straighten all the "off road" damage... A few more, then I'll likely pull the front valence. Ciao for now...
Made filler patches for the holes of unknown purpose. My method in this type of situation is to make my patch an exact duplicate of the hole. Weld them and ground them clean. The wire is just a handle so I could hold them in place to shape and weld them. (both sides were the same project, so only showing the one)
Then a knocked out the E-brake reaction bracket. Cut the crappy welds off, ground it clean, welded up the holes and dents and remounted.
Then took on the frame under the driver's side engine mount. It was badly bent. Looks like a large rock was hit or something like that. I think this car spent more time in ditches...than on the road..
Then, I tried my first project with the new spot welder and hot glued the bottom panel on the rear cross member.
As a refresher...here was the before...
Next projects will be continuing to straighten all the "off road" damage... A few more, then I'll likely pull the front valence. Ciao for now...
Keep up the great work, Rob.
Lots of good stuff showing up on this board recently.
Rocky
Lots of good stuff showing up on this board recently.
Rocky
Thanks Rocky, appreciate that.
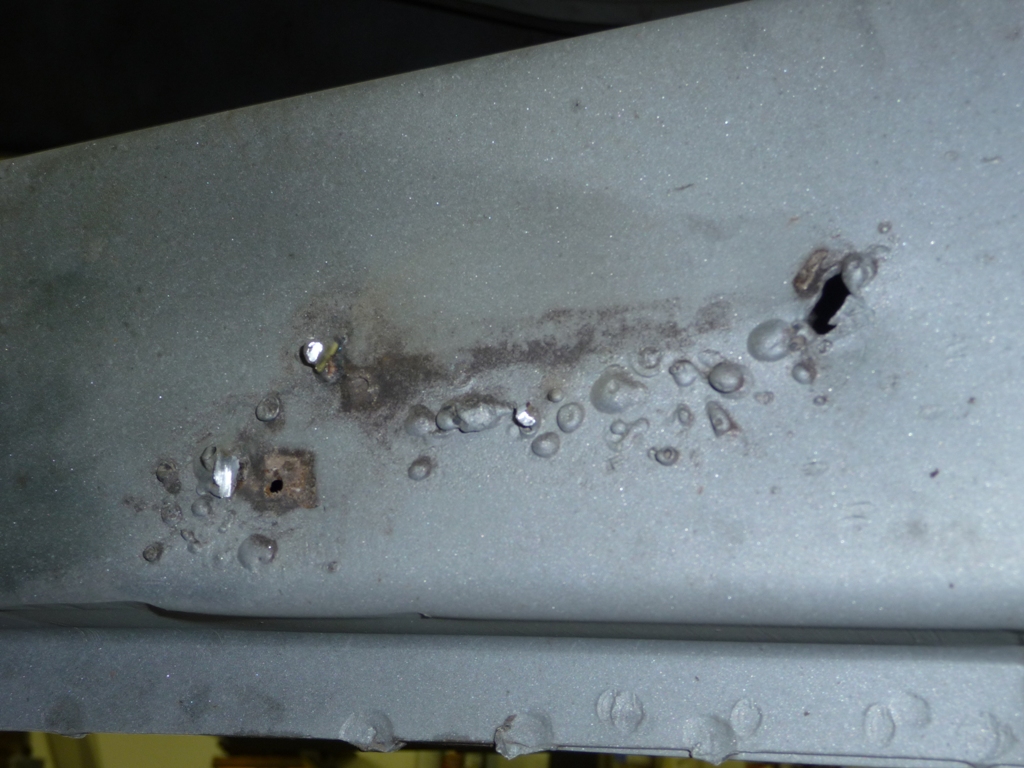
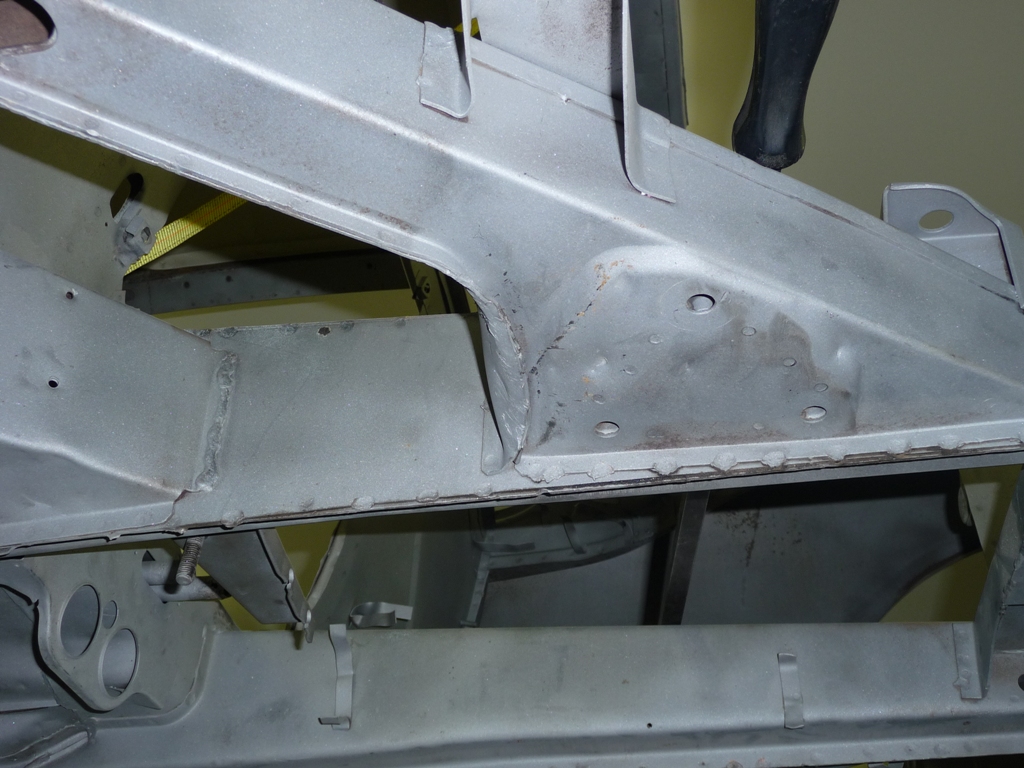
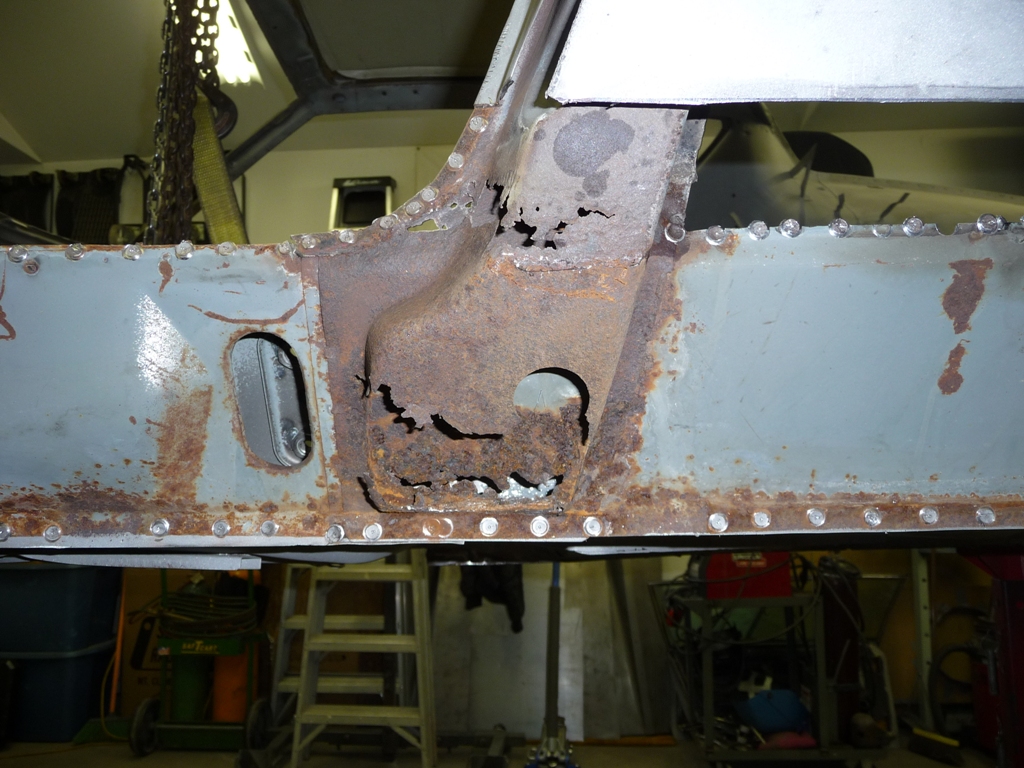
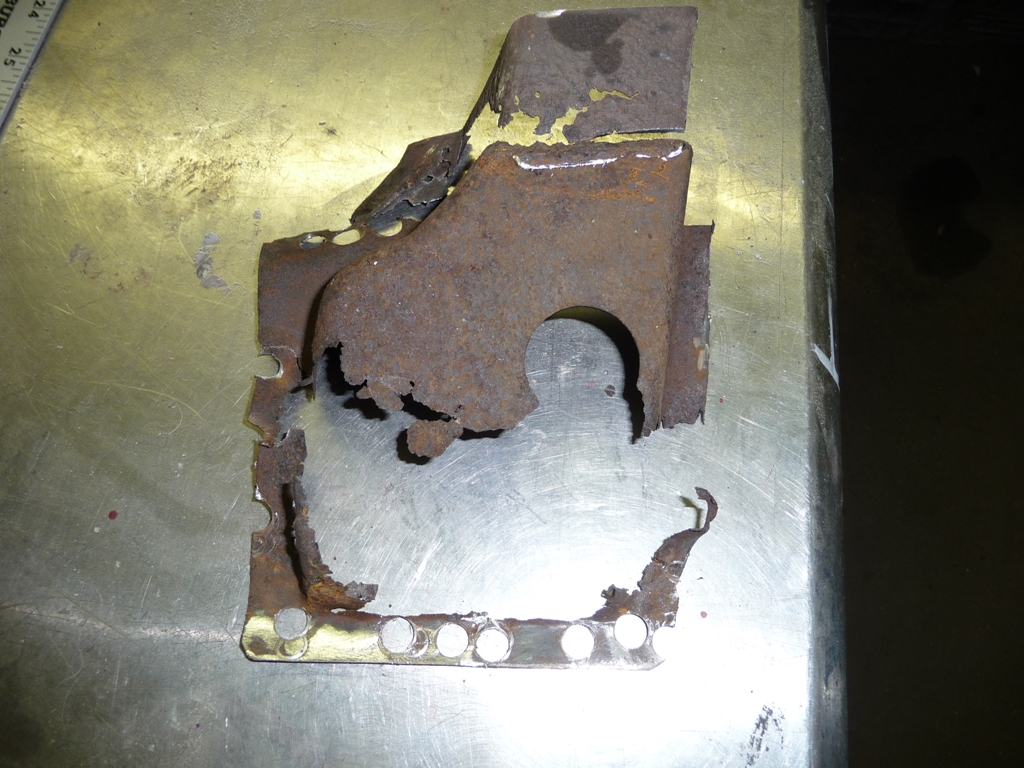
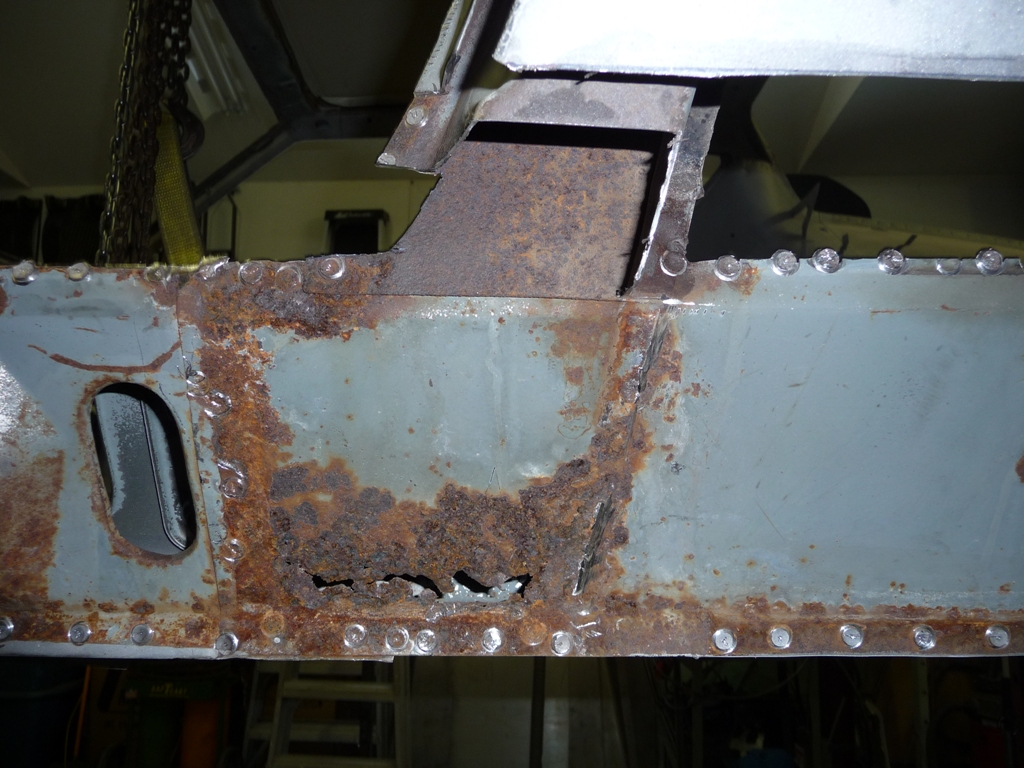
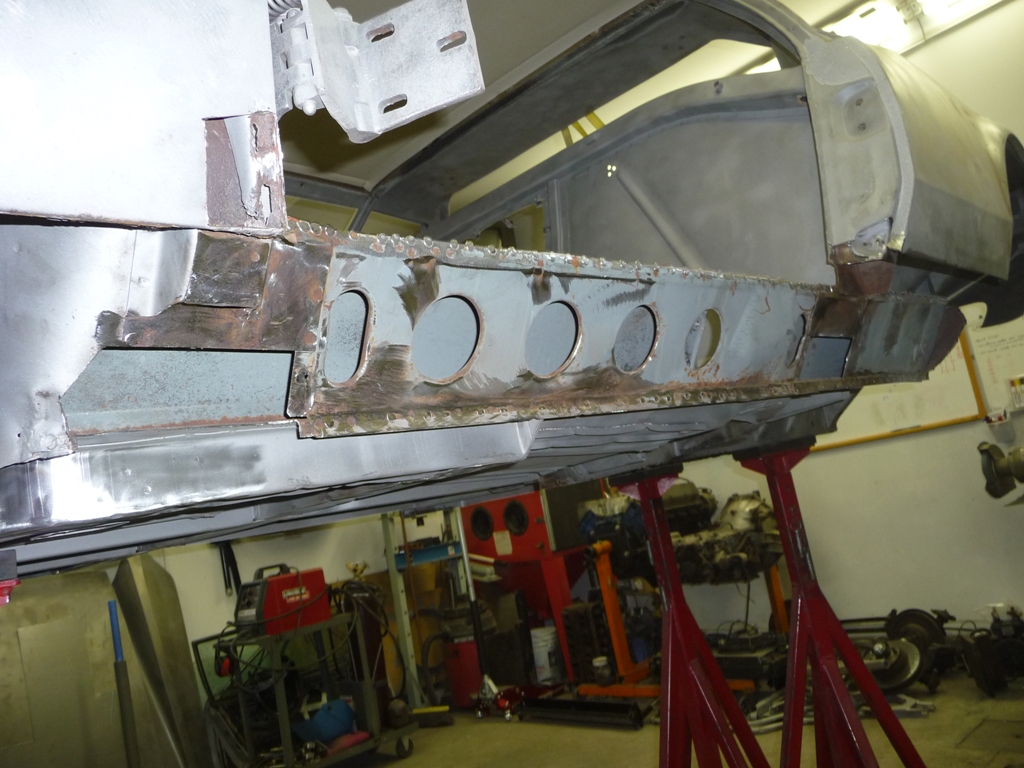
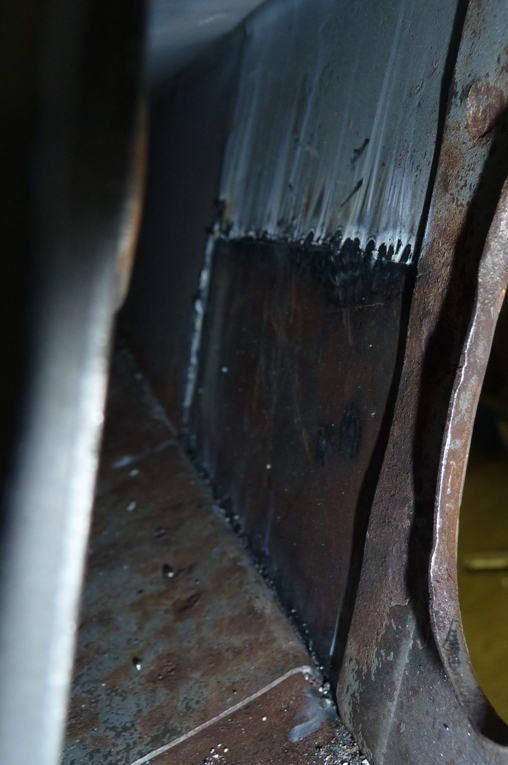
OK, so I was out of commission last weekend due to a minor eye surgery. No biggy, but had to sit on the couch all weekend. Managed to sneak in about two hours yesterday, and today the house was empty...so I got to rock a roll a little bit before the girls showed back up at about 4pm. I spent quite a bit of time finishing up repairs on the torn/damaged frame holes...
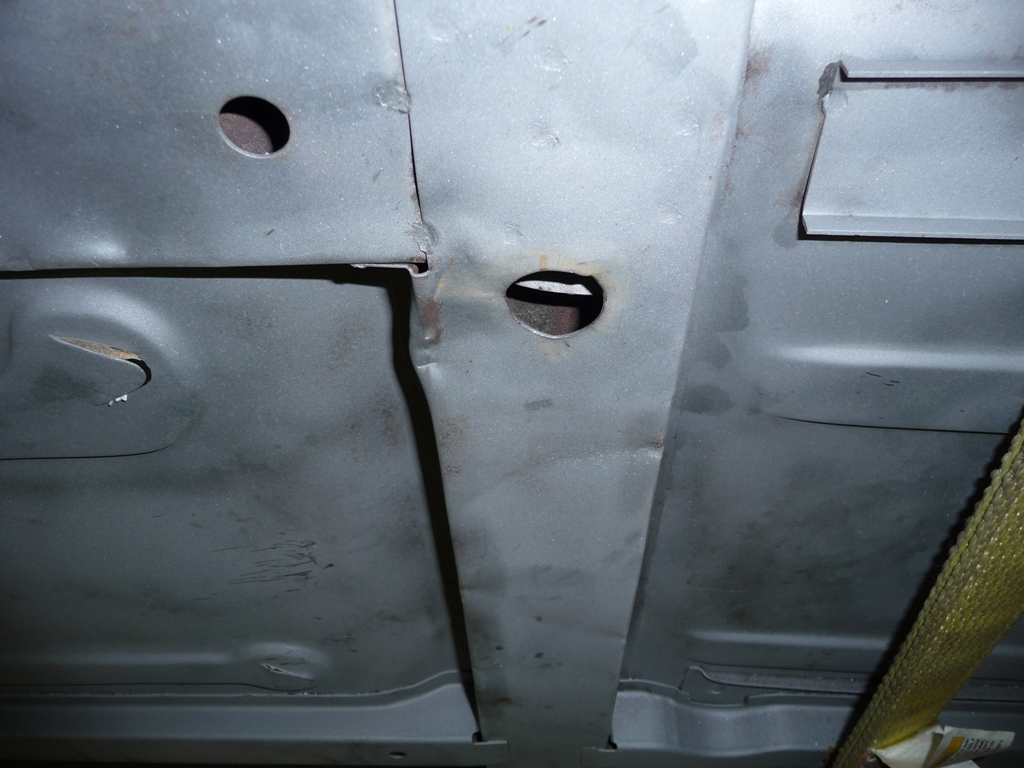
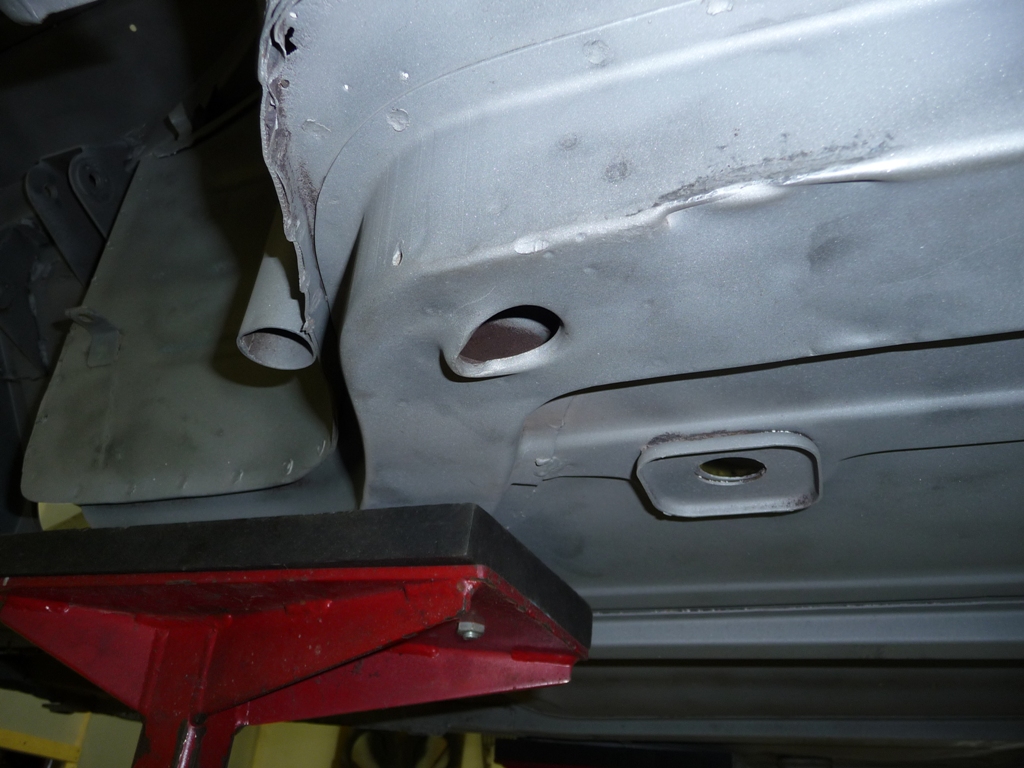
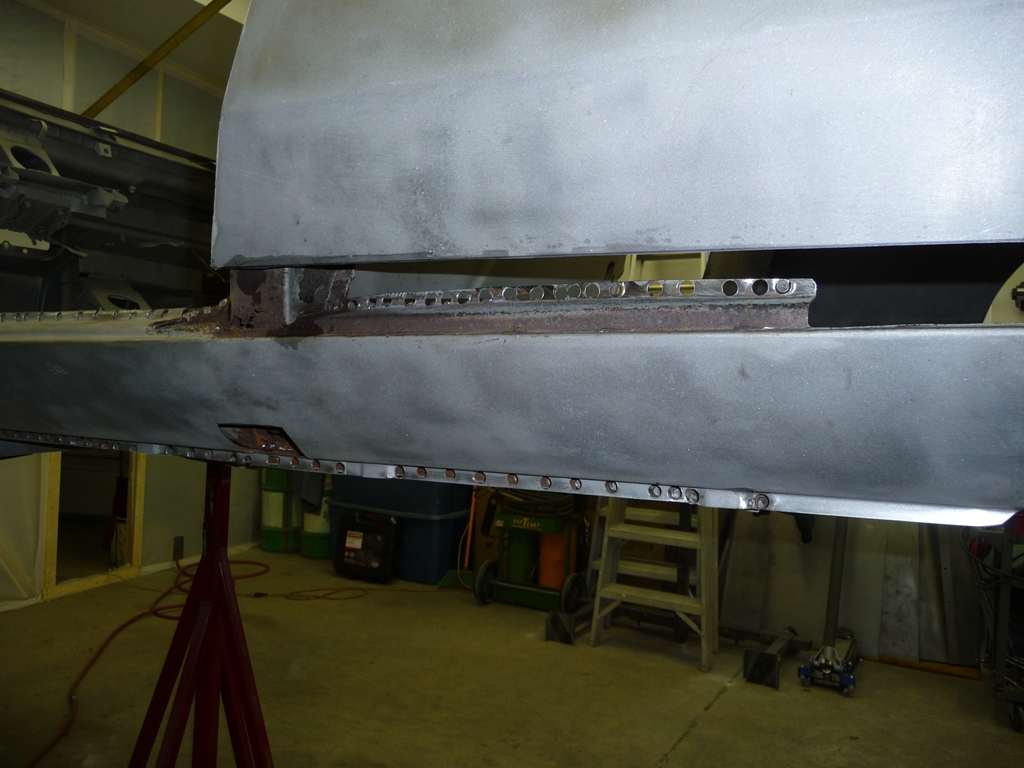
Both front frame holes looked like this...

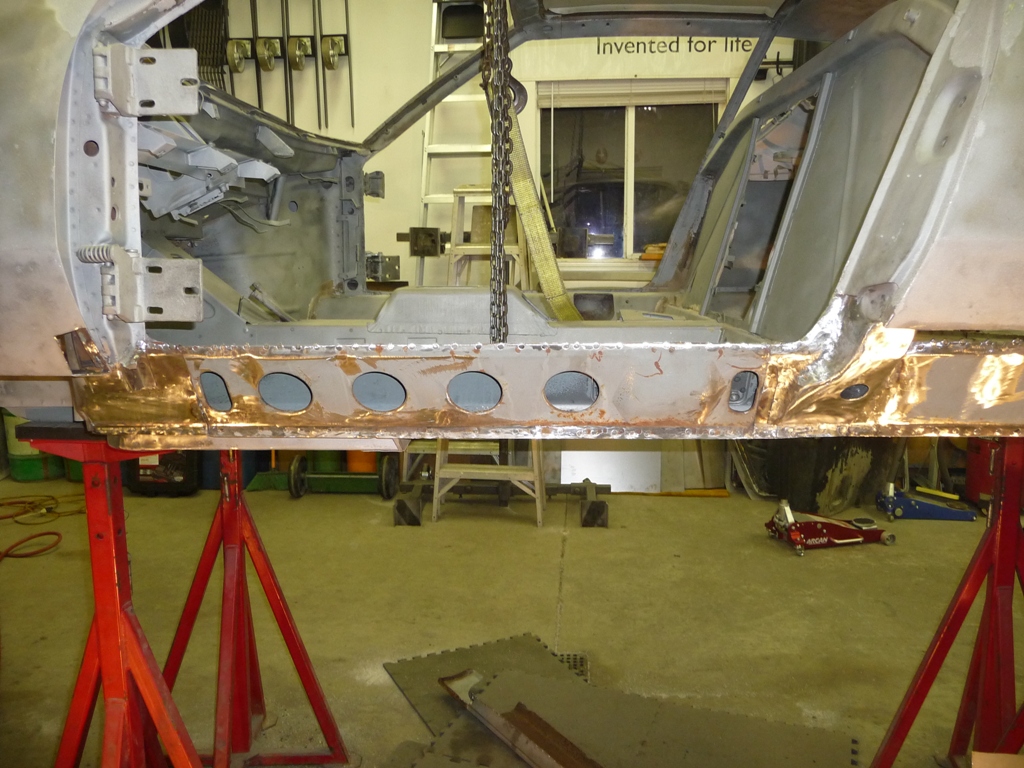
These repairs concluded the underbody work, so I lowered the car down on the stands to get started on the rocker repairs.
After contemplating it for a while...I made the tough decision to cut off more 1/4 panel in order to get to the spot welds.
Oh crap....no turning back now.....
With all the welds cut or ground off, the rocker was removed to expose the ugliness in full light.
Here is what's left of the bottom of the "B" pillar....
The inner rocker isn't all too bad. The section under the nastiness had to be removed though.
Then did basically the same procedure on bottom of the "A" pillar.
So...here's the total damage at the end of the day.
Unfortunately I will need to break out the sand blaster next weekend to clean up all the rust before I can proceed. Then, it's time to start fabricating some panels.
OK, so I was out of commission last weekend due to a minor eye surgery. No biggy, but had to sit on the couch all weekend. Managed to sneak in about two hours yesterday, and today the house was empty...so I got to rock a roll a little bit before the girls showed back up at about 4pm. I spent quite a bit of time finishing up repairs on the torn/damaged frame holes...
Both front frame holes looked like this...
These repairs concluded the underbody work, so I lowered the car down on the stands to get started on the rocker repairs.
After contemplating it for a while...I made the tough decision to cut off more 1/4 panel in order to get to the spot welds.
Oh crap....no turning back now.....
With all the welds cut or ground off, the rocker was removed to expose the ugliness in full light.
Here is what's left of the bottom of the "B" pillar....
The inner rocker isn't all too bad. The section under the nastiness had to be removed though.
Then did basically the same procedure on bottom of the "A" pillar.
So...here's the total damage at the end of the day.
Unfortunately I will need to break out the sand blaster next weekend to clean up all the rust before I can proceed. Then, it's time to start fabricating some panels.
Real impressive work, Rob. I love your confidence on the disassembly. I thought your underbody frame rails look better than many I have seen. Thanks for taking the extra time to document your process.
Thanks JT... but a monkey can take things apart....let's see how well I do going back together...
Nice work and very timely. I am doing almost the exact same work on my car right now, and seeing much of the same damage.
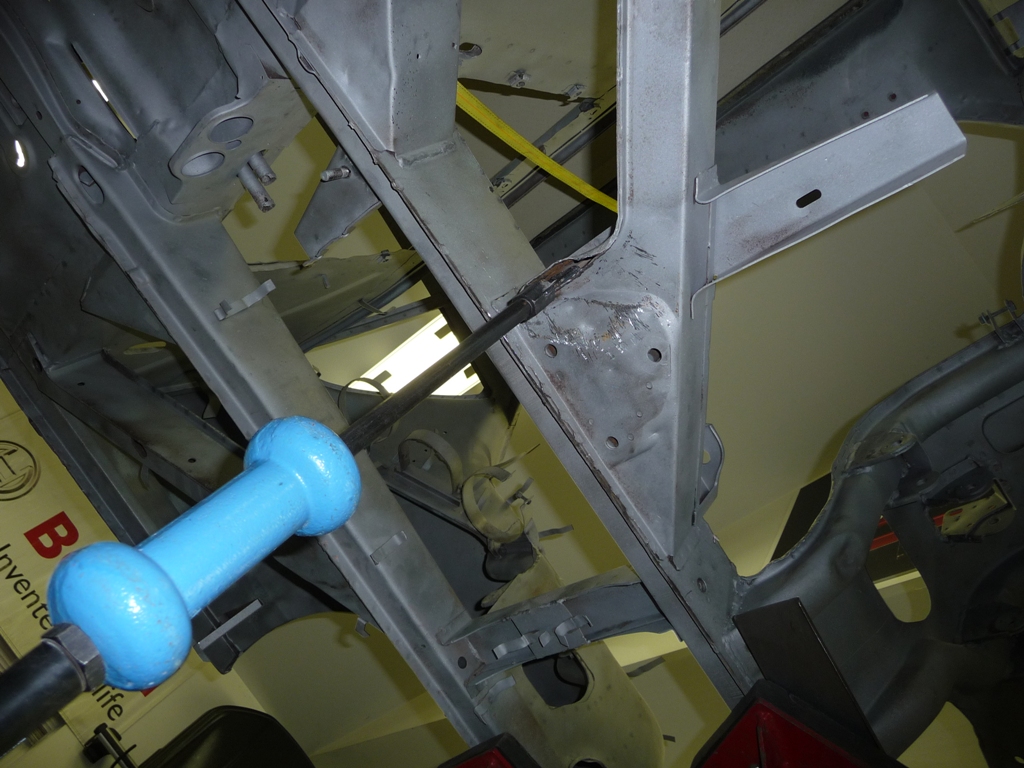
Looking at the first 4 pics of your last post - how did you get the jacking dents & crushing out of those underbody stiffeners? Mine has this damage too, and I have to decide should I straighten them out or cut off the damaged sections and make new. Rodney
Looking at the first 4 pics of your last post - how did you get the jacking dents & crushing out of those underbody stiffeners? Mine has this damage too, and I have to decide should I straighten them out or cut off the damaged sections and make new. Rodney
Thanks Rodney. Great..glad I could be your ginny pig..uh.. I mean help out.
Regarding the frame rail damage, I use a combination of slide hammer with a variety of different head attachments, hand hammering to keep areas of distortion in check, and some heat applied in specific areas to assist with making a specific area more ductile during shaping. i.e. if I'm slide hammering here and it's distorting over there (in a way I can't control different with hand hammer)then I'll warm up the area here a little where I want to movement, and hopefully to overall distortion is reduced.
I did the same assessment as you. Ultimately, I decided to try and straighten...worst case...I'd then cut it out and rebuilt it if I failed.
Hopefully I've adequately answered your question.... Rob
Thanks. That is helpful. I hadn't used heat yet so I will try that. I also drilled a hole opposite the damage and used an air hammer with a blunt tool, which worked Ok. In some places that is not possible. I'm a novice when it comes to body / sheet metal work, so I learn as I go. Just trying to learn in the less visible spots. 
UFO, keep in mind if heat is used the metal oxidizes very easily after and must be coated. The air hammer works, but I find it a bit uncontrollable, so usually do it by hand. Takes longer, but I personally get a smoother result with less stretched metal.
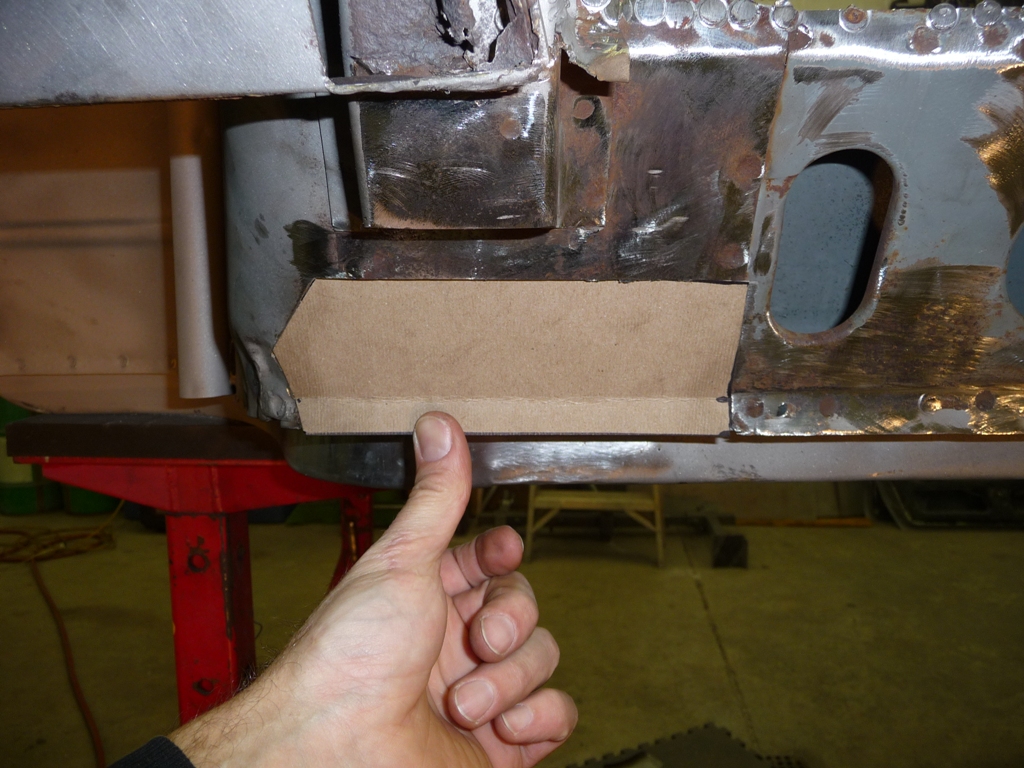
So... I managed a couple hrs this past Saturday and had an empty house for about 5 hrs on Sunday. Being the procrastinator that I am...I tackled the easy one first.
Cardboard template
Final fitment of patch
Tack welded, then I work around from each tack weld and add one more with each pass. I do this to try and avoid getting too much heat in the panel.
With all the gaps between the initial tack welds filled, I grind it clean.

Here is what it looks like from the inside of the rocker
Then the front piece....
same process...
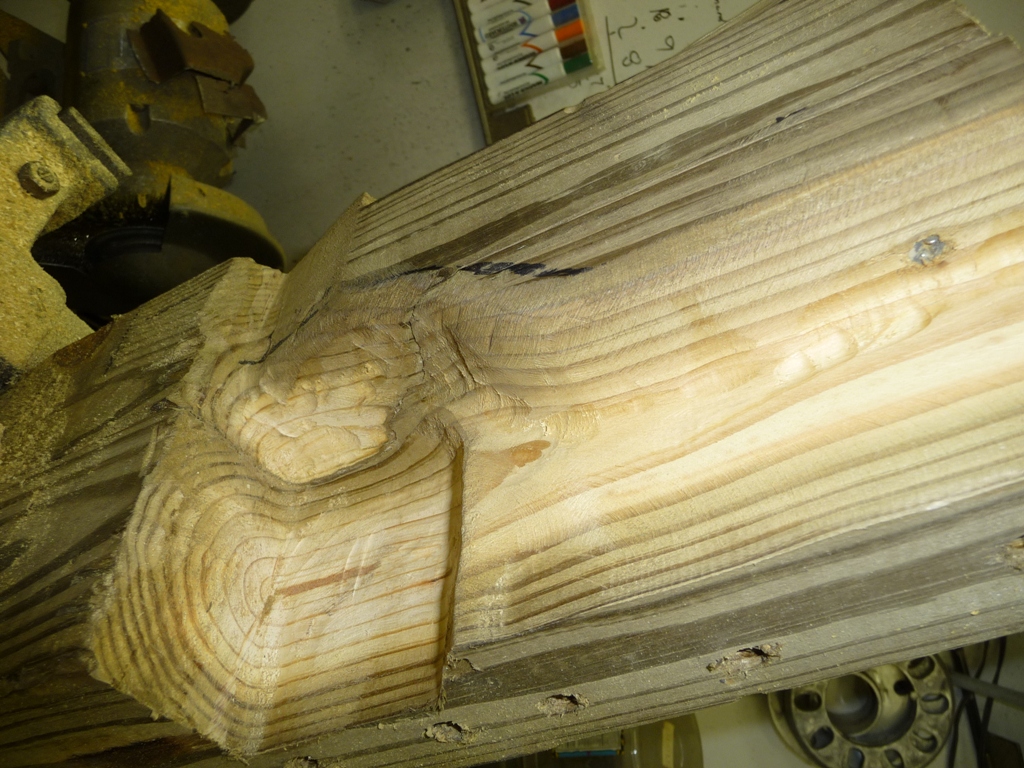
Then...the hard one...
I decided the best approach would be to make a form, so I screwed a couple of 4x4s together and hogged out a form to hammer the metal into to try and get a near net piece to work with. It took the better part of Sunday...with OK/acceptable result for a sub structure.
So... I managed a couple hrs this past Saturday and had an empty house for about 5 hrs on Sunday. Being the procrastinator that I am...I tackled the easy one first.
Cardboard template
Final fitment of patch
Tack welded, then I work around from each tack weld and add one more with each pass. I do this to try and avoid getting too much heat in the panel.
With all the gaps between the initial tack welds filled, I grind it clean.
Here is what it looks like from the inside of the rocker
Then the front piece....
same process...
Then...the hard one...
I decided the best approach would be to make a form, so I screwed a couple of 4x4s together and hogged out a form to hammer the metal into to try and get a near net piece to work with. It took the better part of Sunday...with OK/acceptable result for a sub structure.
Rob,
You may want to consider not closing off the bottoms of the A and B posts you repaired. They fill with dirt that filters through the construction holes from the upper structure, get moist just from the humidity and will rot the bottoms again. I am sure you're protecting the inside and the car will most likely never see weather again---I just prefer to have any dirt filter out through the rocker drain divots rather than get trapped.
Looking great!
Kirk
Hi Kirk....funny...I was pondering that very thing on my drive to work this morning. I was trying to decide on holes in the bottom corners or a hole bottom center. I think I've decided on bottom corners. Got an opinion? thx
Feb 9th weekend progress... got the driver's rocker hammered out...
Started with addressing the drain holes mentioned by Kirk above. Decided to make holes both at corners and center. What the heck...belt and suspenders...
Then tackled the bottom sub structure of the A pillar.
On this one, I planned ahead and incorporate the holes into the form.
Then I tackled the rocker repair at the B pillar.
This line was kicking my butt.... Ultimately I had to call on my shop helper for another set of hands in order to get it. I figured with the door closed, this line runs parallel to the door bottom, so it had better be right.
Then filled the bottom B pillar hole.
Then the A pillar hole.
Then coated it all in the Eastwood "Internal Frame Coating".

Here is the "before" again...
The driver's side is now ready for re-assembly.
Started with addressing the drain holes mentioned by Kirk above. Decided to make holes both at corners and center. What the heck...belt and suspenders...
Then tackled the bottom sub structure of the A pillar.
On this one, I planned ahead and incorporate the holes into the form.
Then I tackled the rocker repair at the B pillar.
This line was kicking my butt.... Ultimately I had to call on my shop helper for another set of hands in order to get it. I figured with the door closed, this line runs parallel to the door bottom, so it had better be right.
Then filled the bottom B pillar hole.
Then the A pillar hole.
Then coated it all in the Eastwood "Internal Frame Coating".
Here is the "before" again...
The driver's side is now ready for re-assembly.
I must say these pictures are an inspiration. I can weld, and I can do work like shown (almost), but I rarely have the patience to do it that great in a place where it can't be seen. I remember fixing a floor pan on my orig Camaro, spent more than one day bending to get the right profiles, and nobody will ever see it. Is it worth it? Not if you do it for a living, but if you have time to do it on your own pride and joy, that's great. 
One question. Some pictures indicate that you haven't fully welded on mating surfaces, only spot welded, or was it just WIP? I always weld fully, is there a reason not to, can it get too solid so it'll twist other things?
One question. Some pictures indicate that you haven't fully welded on mating surfaces, only spot welded, or was it just WIP? I always weld fully, is there a reason not to, can it get too solid so it'll twist other things?
Rob, it may be worth fitting the doors while you do some of the repair. My door jambs had a lot of lead in from the factory to correct for some sloppy metal work and poor fit. I removed most of the lead then cut-refit the door jambs to get the doors to fit a lot better. I don't want to inundate your thread with my pictures so here is a link:
http://www.rc-tech.net/pantera1/door/door.htm
http://www.rc-tech.net/pantera1/door/door.htm
BTW, here is a door hanger which made things much easier for me to put doors on and pull them off multiple times:
http://www.rc-tech.net/pantera1/dh/dh.htm
Great for painting too. The doors should be on the car for the paint color to flow correctly. I did the next best thing. I had them next to the car and ran the paint gun form one panel to the door to the next panel. It's a little ahead of you but just showing more value in the door hangers:
http://www.rc-tech.net/pantera1/paint3/done2b.jpg
Add Reply
Sign In To Reply