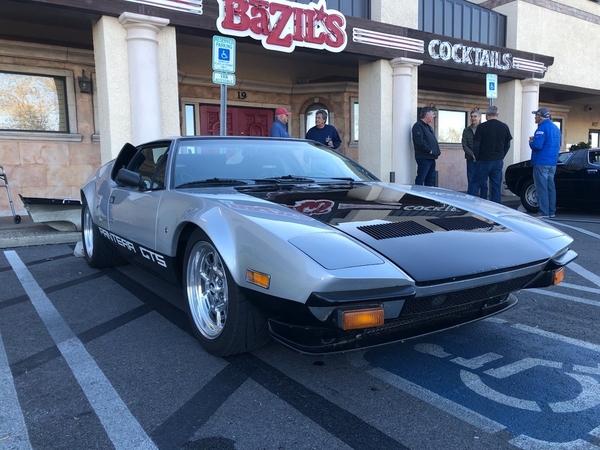
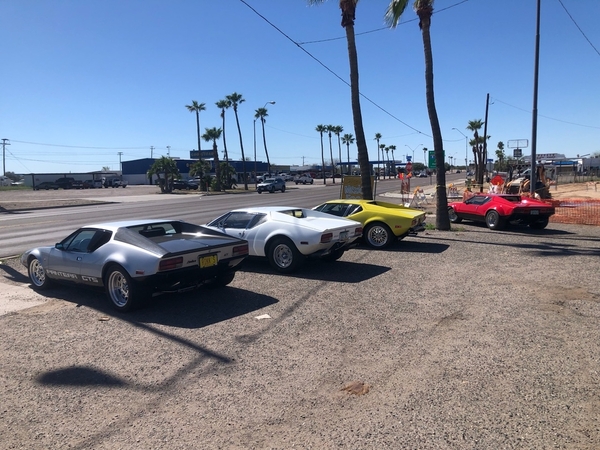
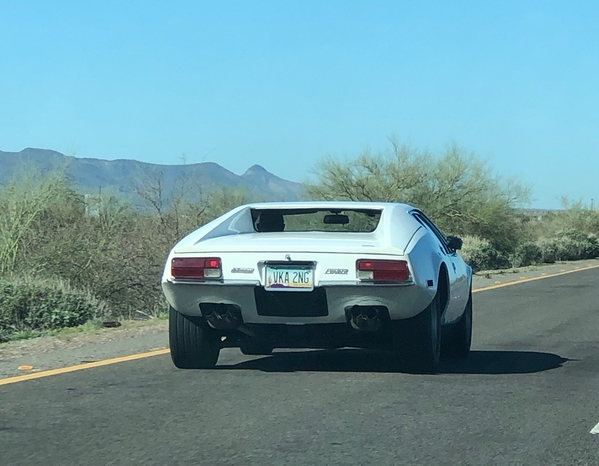
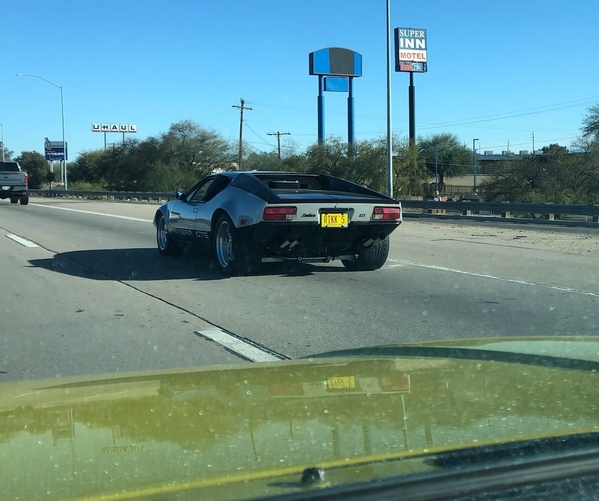
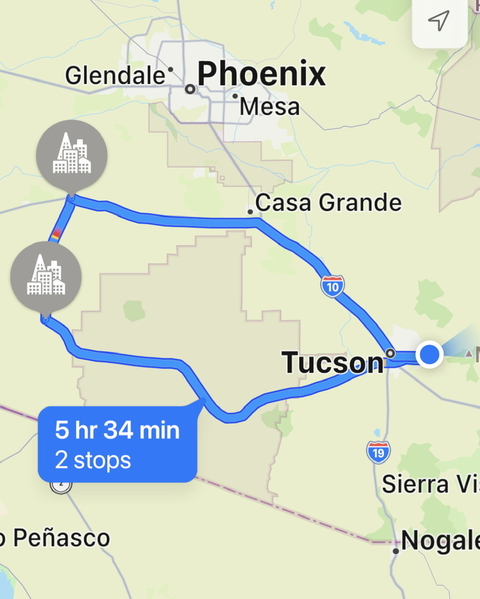
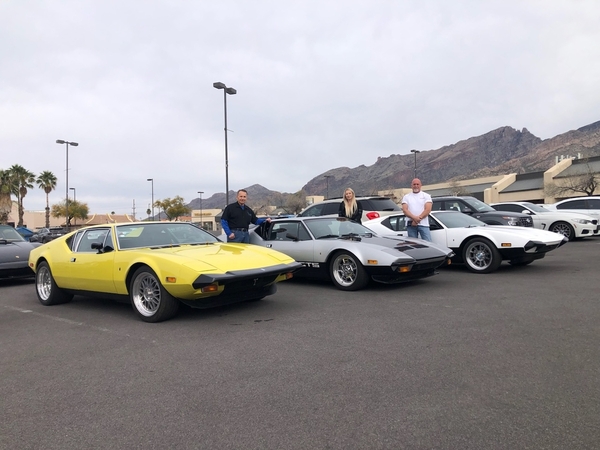
Dyno Day Completed -

Lots of great tuning, and 20 good pulls on my "new" motor.

It ran great, sounded good, was happy and well behaved. We found some issues that would befuddled me if I had tried to solve them in the car (low fuel pump pressure, and a terribly stiff vacuum secondary diaphragm that felt OK, but was causing the secondaries to open late / erratically).

In fact, we spent the whole morning working these little challenges. Once we got past these issues, we were able to tune the engine to optimization.

What we seemed to find was that ultimate power is currently limited by my exhaust - primarily in my header collectors.

I was able to run / tune with all the critical systems of my own car (flywheel, distributor, air cleaner, ignition, coil, headers and muffler).

It was a long day, but a fun time, and a great learning experience for me.

Rocky
Last edited by rocky
quote:
Originally posted by Rocky:
Well - everyone has to make trades on the configuration of their motors for various reasons (cost, fitment, etc.)

I am convinced (as is my builder) that Doug is right, and the limiting factor in this build is at the end of those headers.

Does Hall sell Fiat parts?


Most of the disappointment is from the exhaust BUT I've played with that intake and I can tell you that just a Torker is night and day over it.

The Holley Strip Dominator is documented 25hp over the Torker. Not by me. By an ancient magazine article and possibly confirmed by one of Dan Jones dyno pulls? I'd have to re-review those?

What you have in that manifold is a pretty thing but it is the best to use with an automatic transmission, not a manual.

I was running a Holley 4779 with a leaned out idle circuit so it wouldn't smart you eyes at idle.


I think that it is the entire header itself that is the issue. This is ancient technology that the Pantera chassis on "under" headers restricts.

You need a 2" primary tube header, about 36" long primary tubes, and a 3-1/2" collector about 6" long to maximize exhaust contributions.

Simply put, that's a no can do in a Pantera. Not on UNDER the car headers.


Most headers are going to have two long and two short tubes on each side. That's more a function of what the builder can get into the assembly and to get it to fit to the chassis more then desire. Even the 180's are not going to have all equal length tubes to them.

In an early Mustang it is possible to get equal length primaries, or very close to it.

So sure, there is usually a compromise somewhere. I do remember Dan Jones saying that the Blue Thunder intake had 4 ports that flowed well and 4 that didn't and it needed to be reworked. That was proven on McLain's flow bench. Makes sense to me from my own results with it.

To be 100% truthful, I ran the Shelby lettered version of it. It is said that the Blue Thunder is a "continuation" but I can't verify that. I gave up on it 25 years ago. It's a good thing it's pretty, 'cause it sure isn't very smart?


How much power there is to find in the exhaust probably varies from set up to set up, but your induction flow has got to compliment the exhaust. Your's doesn't.

It is probably safe to say that with the right headers, there should be 75 to 100hp hiding and ready to be unleashed.

With a 1-3/4" x 24" long primaries, right there that's a killer BUT just simply changing the collector on THOSE headers is probably an honest 25 to 30 hp gain. I'd do that as a minimum.

The problem is, it doesn't fit well through the rear suspension.

Look at the headers from Pantera Pro-formance. They reduced the collector to 3" for clearance to get it through the suspension BUT it's a real collector and ANYTHING helps. The primaries on their GTS headers are also 2".


If I were you, I'd start borrowing sets of headers to try on the dyno before you settle on a combination. Maybe even a set of 180's to compare the power differences with? Check out Dan Jones dyno's. I know he was working on headers but don't remember how far he got with those tests?

The headers that you have are certainly alterable collector wise. The issue is going to be if it will clear when you put them on the car.


Why don't you let someone else do the hard work and either buy in or copy what they did?

Also a full 2-1/2" exhaust won't hurt either. Those only loose a couple of horse power at the very top rpm's to a full open 3" exhaust. That's not bad at all but 2-1/4 is restrictive.

None of this is your fault. From the very beginning the original Pantera exhaust was a bad compromise.

When 350hp was a lot of power for the street, that wasn't a problem. Things change.

http://www.precisionproformance.com/


And just to add on another thread here, I wouldn't be surprised at all that 1.8 rockers show a noticeable increase AND that is a cheap trick as well.

Just be sure that the valve springs can handle that extra lift.


Of course this experimenting would be simpler if the dyno was yours and you could mess with the set up under no pressure to get off of the machine?

So what do you need 500hp for anyway?

That's your dyno in your garage right? Big Grin
Last edited by panteradoug
You guys are funny. Irritating too.

It's very easy to spend somebody else's money.

All the choices in my car are a trade between performance, budget, amount of labor to install and getting the parts to fit in the vehicle while retaining a relatively stock engine bay, that can have a tub in it.

Nevertheless, I am willing to have a more scientific discussion on the current state of my engine.

Yes, I had all the spark plug wires installed.

The carb is now a Holley List 4609, modified for 4 corner idle, and has quite a bit of work done to it. 735 CFM.

Holley 4609

Yes, it is currently set up with a vacuum secondary carb. Previously, I was running a Braswell double pumper racing carb, with mechanical secondaries, and no choke or choke horn. This was swapped because:

  • It wasn't mine
  • It was a PIA to start every time with no choke

    Testing on the dyno showed a constant vacuum across the venturis through the RPM range (3000 - 6000). The engine is not running out of carburetor.

    Testing on the dyno indicates that once the engine was making peak horsepower, changes to jet sizing, and changes to timing had very minor effects on the power, yet fuel consumption could change relatively significantly.

    My builder is also convinced that the restriction is in the collector in the header. This was determined by testing without the tailpipes (enlarged) and the ANSAs.

    You can see the modifications already performed to my exhaust in this thread, and the link below also implies the "standard" Hall Headers are not optimal. Sorry about the missing photos...


    ANSA MPS-1 Modificaiton

    Joules Comments on Collectors


    Anyway - The motor is off the dyno. I have a lot of work to do to get the motor back in the car.

    I am happy with what I have done.

    I will hold off on installing the headers till near the end of the project. I am sure that by that time, this group will have "crowdsourced" me the ~2500 it will take to buy the correct Pat M. or Pantera Pro-Formance headers and exhaust that will unlock my missing 30 HP. PM me for PayPal instructions.

    Likely, I will have enough donations to get a set of both. If you guys do that for me, I promise to post up a review of each configuration. This will allow you all to criticize other aspects of my build.

    Rocky
  • Last edited by rocky

    IMG_6466_[Small)Shakedown cruise today - getting ready for a trip to Monterey.

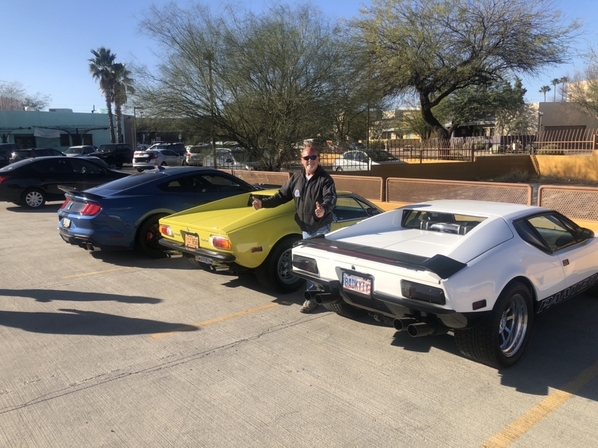
    Riding with the Cobras... unfortunately, the number of Panteras in Tucson is dwindling!

    Should be a good trip up Mount Lemmon - I'll post up pictures.

    I am very happy with my new motor from SRE Motorsports.... there are two more SRE Engines in the Cobras here....

    Rocky

    Here's the pictures - link to the "Events Photos" Forum...

    Shakedown Cruise with the Cobras.

    Attachments

    Images (1)
    • IMG_6466_(Small)
    Last edited by rocky
    quote:
    Originally posted by PanteraDoug:


    Look at the headers from Pantera Pro-formance. They reduced the collector to 3" for clearance to get it through the suspension BUT it's a real collector and ANYTHING helps. The primaries on their GTS headers are also 2".


    I dig up this subject.

    You say the collector of Proformance headers is 3" but on their site they write 2 1/2" ??????

    Beyond this question, do you think these headers are the best for a street engine of about 450 HP?
    quote:
    Originally posted by René #4406:
    quote:
    Originally posted by PanteraDoug:


    Look at the headers from Pantera Pro-formance. They reduced the collector to 3" for clearance to get it through the suspension BUT it's a real collector and ANYTHING helps. The primaries on their GTS headers are also 2".


    I dig up this subject.

    You say the collector of Proformance headers is 3" but on their site they write 2 1/2" ??????

    Beyond this question, do you think these headers are the best for a street engine of about 450 HP?


    I would go with what the website says, but I would think that the exhaust pipe is 2-1/2" and the collector 3"?

    I wouldn't know which headers are the best. I've got Hall's 180's.

    Pat Michal has dyno numbers on his. As I recall, they were impressive numbers.

    From what I can tell, they are very high quality and very well engineered.

    06-17-2014_[6)_(Medium)06-17-2014_[6)_(Medium)Hi Rene -

    My headers started life as "Hall Big Bore" headers. They have 1 7/8" primary tubing, but we cut out the (crappy) "merge", installed a much improved stainless band clamp between the headers and tailpipes, and then upgraded the stock tailpipes to 2 1/2" all the way back to the stock Ansa cans.

    Even with these mods, I might suggest there may be better header / muffler solutions that could provide increased performance.

    (Rumor has it that / I have heard anecdotally) the Hall headers are a boat design. The best thing about them is the clearance of the engine bay and suspension with no, or minimal mods to the stock tailpipes and mufflers.

    There are no "collectors" per say - only the 4 tubes coming together at the same spot. I am convinced there is more horsepower in my engine wanting to get out, stifled by my exhaust configuration....

    That being said - "better is the enemy of good enough" - I'm not in the market at this time for a new exhaust (in both Euros, or time).

    Here's a link to the exhaust portion of my thread...

    5357 Exhaust Upgrade


    Here's a picture of the "merge" and the flange from the Hall Setup... that HAD to go...

    Attachments

    Images (1)
    • 06-17-2014_(6)_(Medium)
    Last edited by rocky
    Hi Rocky

    I watched and read a little (it's hard for me to read in English) the 43 pages of your topic, you did a very great job.

    I also think to modify/improve the exhaust of mine with a pipe exhaust as big as possible according to the suspensions and I'll perhaps make the mufflers myself but I am not able to manufacture the headers and wish to buy the "best" possible without going up to 180 ° which modify too much the original aspect and prevent to use the rear trunk.
    Rene -

    Thank you for the compliments. I appreciate it.

    My headers were chosen for fit and compatibility over ultimate performance. We all make trade-offs.

    I, too, would be interested in learning the BEST "through the suspension" header, tailpipe, and muffler combination.

    Who knows, I might be tempted to upgrade!

    Regards -

    Rocky

    Got a small new project completed today - seat belt holder-uppers!  My wife will greatly appreciate this one - it always took about 5 minutes of fumbling for passengers to fasten their seat belts.

    Anyway - I started by ordering 2 Ford "Buckle Sleeve - Black 12"" from LMC Truck for $13.90 plus $8.75 shipping.  These are Part No. 48-2334-BL. Then I set them on my bench for 3 months.  This is an important part of the process.

    Finally I got motivated, and trimmed the tops to clear the upper half of the buckle assembly, and shortened the tubes, and cut a notch so that the installation would force the belt to stand up straight between my Corvette C-4 seats and the center console. 

    I am very happy with how it worked out.  Labor was easy, and the plastic holders were very reasonable.IMG_9956 [Large)IMG_9957 [Large)IMG_9958 [Large)IMG_9959 [Large)IMG_9961 [Large)IMG_9962 [Large)IMG_9963 [Large)IMG_9964 [Large)

    Rocky

    PS>  The last picture is added as a special bonus for two of my friends.  They will recognize the connection!  Thanks to you both for your hospitality!


    Attachments

    Images (8)
    • IMG_9956 (Large): LMC Sleeve - As Delivered
    • IMG_9957 (Large): Buckle Trimming
    • IMG_9958 (Large): Finished Upper Sleeve
    • IMG_9959 (Large): Mount Configuration
    • IMG_9961 (Large): Pass. Side Installation
    • IMG_9962 (Large): The "Big Cat"
    • IMG_9963 (Large): Installation Complete
    • IMG_9964 (Large): Bonus Picture

    No - I kept the bottom loop, which is attached (from the factory) to a steel (powdercoated, or painted) bracket. 

    At the bottom end (where the belt bolts to the floorpan), I had to cut the sleeve (slightly) so the painted bracket can sit flat on the floor, and the seat belt webbing is rotated so the belt is oriented straight up.  The rest of the plastic bracket rests on the carpet, and forces the seat belt to stand up vertically.

    It will be obvious once you get your hands on one and look at it in the car.

    Pictures 4 & 5 (counting from the top) try and illustrate it.

    Rocky

    Thanks for the compliments.


    Group 4 Tail Lights getting prepped for install.

    I am using the Pantera Electronics light modules, so the surface of the buckets doesn't have to be "ultra reflective".  The insides were much shinier when I got them, but they got a light "soda blast" to provide a clean surface for the finish. 

    The Jon Haas (P-E) setup runs the wires through each of the bucket light sockets, so in this case, they are not required.  I expect to do some work to seal off the insides  as I run the wires through the back of the buckets.  Probably use heat shrink, or some other technique. 

    I am pretty excited about this upgrade.  It should be a pretty easy swap.  I have some matching connectors to the stock harness coming from Jon, so once I get the buckets wired up, and the light assemblies installed in the buckets, the swap from the US lights, to the Group 4 configuration should be a snap.

    Fingers crossed!

    Rocky


    IMG_0837 [Large)IMG_0838 [Large)IMG_0839 [Large)IMG_0840 [Large)


    Attachments

    Images (4)
    • IMG_0837 (Large)
    • IMG_0838 (Large)
    • IMG_0839 (Large)
    • IMG_0840 (Large)
    Last edited by rocky

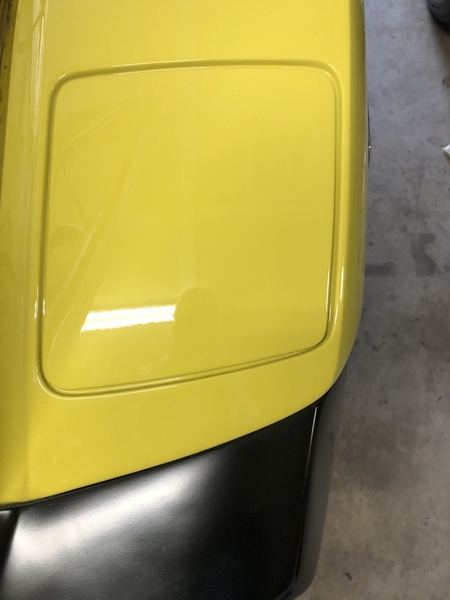
    Since I am getting paint work done, I had some minor body improvements applied.

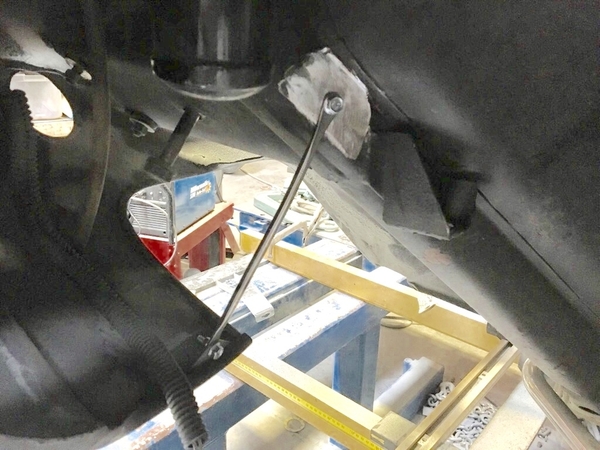
    One of them (a tip o' the hat to Larry Finch) is to strengthen the rear lower valence panels.  It's a simple mod, but takes a little welding. 

    The first picture is the fully executed mod - the second and third pictures are the tabs installed on my car.  I'm going to fabricate the support rod, and drill / tap the structure mount point myself - hoping to save about $12 on the project! 

    I thought this was a good idea, and now is the time to get it done!

    IMG_7110

    image0

    image1

    Attachments

    Images (3)
    • IMG_7110
    • image0
    • image1

    (Not sure why my pictures didn't show up in aprevious post, so I deleted it...) 


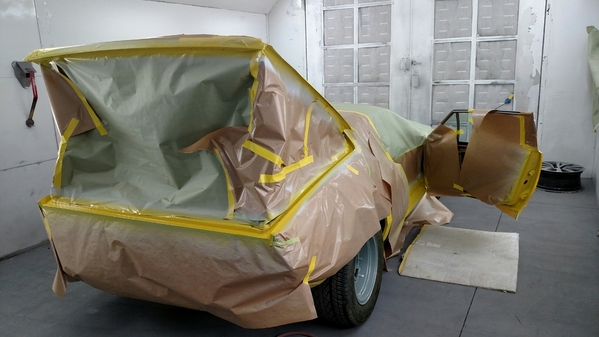
    Working with my buddy to keep the American Economy rolling forward.

    * * I'm in the booth for paint!   Whoo-Hoo! * *

    I suggested a couple minor modifications (bumpers, grills, gills, and a "old school" spoiler).... 

    My body and paint guy rightly pointed out a couple items that convinced me to go in for paint...


    Looking forward to the final result... 


    PS>>>  PM me if you are in the Southwestern portion of the United States, are considering an update to your body, or need paint, and are interested in a recommendation to a Body and Paint shop that has DIRECT experience with multiple Panteras.... 

    PSSS>>> I am digging the "old school" spoiler...

    PSSSS>>> Somebody (on this board) sold me a bumper that was too short...  Discussions with Kirk Evans pointed out that fiberglass parts get smaller & smaller as they go through a mold / part duplication sequence, and you have to know what you are doing to end up with the fiberglass part to come out of the mold as the same size as the original.

    I suspect the dude that sold me the front bumper knew that  it needed work to make it fit...  but he didn't tell me that.... GRRRRR....  Anyway - if he (or she) is reading this...  I hope that they feel bad for selling parts that they knew didn't fit, but pretending that they didn't know it...    But maybe they didn't know it...  Let's hope so... 


    Let's hope these pictures work!  All three were taken today (5/21/2020)!

    IMG_1604 [Large)IMG_1597 [Large)IMG_1599 [Large)


    Attachments

    Images (3)
    • IMG_1604 (Large)
    • IMG_1597 (Large)
    • IMG_1599 (Large)

    Of course when you drop off your car at a shop - something is going to break.

    About 30 min after I left the shop on the initial delivery, my buddy called me.... "Hey - do your lights work?  They aren't going up!"


    Of course I said "YES - or they used to yesterday!"! 


    Here's we we found...

    IMG_1547 [Large)


    Luckily I had a spare brass gear left over from my Taurus Window Motor conversion done back in 2015. 

    I will tell you that getting that headlight motor plate on and off was a nightmare!  Maybe I'll write that up for a Tech Article!

    All reassembled, painted, reinstalled and greased and adjusted PRIOR to painting.  NOS Limit Switches installed in prep for my Pantera Electronics headlight / motor controller install.

    If I tried to do the reinstall after the paint - I am sure I would have regretted it!

    Rocky


    Attachments

    Images (1)
    • IMG_1547 (Large)
    Last edited by rocky

    It is taking a little longer to have pictures than I predicted above, but owners are always optimistic, and quality takes time.

    The windshield was installed about a week ago, and all the trim (the black underneath) is done.  It's in the final stages of paint "conditioning" and reattachment of all the "accoutrements" (handles, trim, lights, etc.)

    In addition to the overall paint, I am also having the front bumper, grills, screens, and gills redone in the appropriate black color to match the bottom of the car, and my mirrors.

    Great work by the Duval Body and Paint Team!

    Rocky

    PS.  These pictures are from about a week ago.


    06-02-2020 [1) [Large)06-02-2020 [2) [Large)IMG_1818 [Large)


    Attachments

    Images (3)
    • 06-02-2020 (1) (Large)
    • 06-02-2020 (2) (Large)
    • IMG_1818 (Large)
    Last edited by rocky

    Getting very close to delivery.  All hardware painted and installed (bumpers, gills, grills, mirrors, spoiler).

    A little buffing, a clean up, and she should be ready to hit the road.

    Here's a couple of pictures, of both the paint, and some of the finish work on my fiberglass bumper, and new (old-school) spoiler.


    I don't know if you recall (I sure do) - but some dude sold me a fiberglass bumper, and after I got it painted and tried to install it - it didn't fit.  It was about 2" too short across the front of the car.  Discussions with Kirk Evans indicate that fiberglass parts have a tendency to get smaller in the manufacturing process, and that there were front L bumpers circulating around that had this problem.  I guess he (the seller of my bumper) forgot to mention that.

    The professionals at Duval Body and Paint split and extended the bumper, and then trimmed the back of the bumper for a near-perfect fit to the front contour lines.  The split is in the center - under the DeTomaso Logo.


    IMG_2444 [Large)IMG_2447 [Large)IMG_2448 [Large)IMG_2449 [Large)IMG_2451 [Large)

    Attachments

    Images (5)
    • IMG_2444 (Large)
    • IMG_2447 (Large)
    • IMG_2448 (Large)
    • IMG_2449 (Large)
    • IMG_2451 (Large)

    Rod - your bumper is probably right near mine in the production sequence.  Apparently the amount of "shrinkage" is related to the dimension, and so it is much more apparent in the bumper long axis than the "height" on the car.

    So luckily the fitment and geometry relative to the car features doesn't change much, the bumper only needs extension....  There was precision fiberglass work needed to make the recessed emblem hole look right relative to the DeTomaso badge.  We could have gone with a flat bumper, but I liked the recessed look.

    The car is done - pickup tomorrow.  Here's a final picture after cleanup.


    07-07-2020 [3) (Large)


    Attachments

    Images (1)
    • 07-07-2020 (3) (Large)

    Finished Larry's mod on the rear tail panels.

    While these look more "bent" than Larry's do (and they do have about a 30* bend in them), the angle of the camera makes them look more wiggly than they are.

    I made my first set of braces out of steel strap, but didn't really like how they laid in there.  So I used some steel tubing.  It worked out well.

    Rocky

    IMG_2876 [Large)IMG_2880 [Large)


    Attachments

    Images (2)
    • IMG_2876 (Large)
    • IMG_2880 (Large)

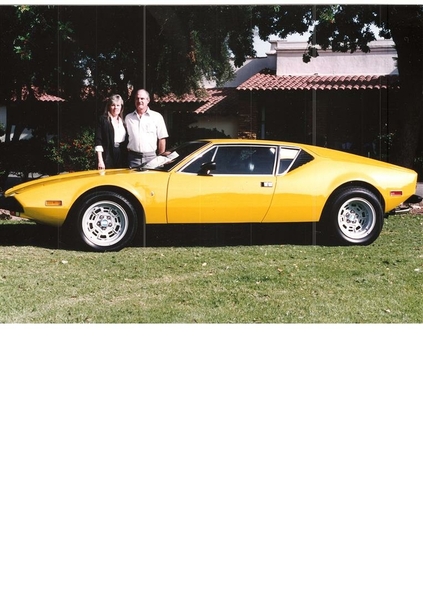
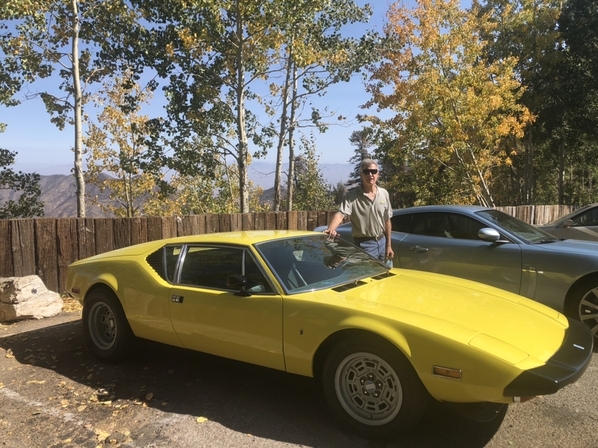
    A little bit of sad news.  The Previous Owner (PO) of 5357 (Neil Dettorre) recently passed away.  He really took good care of my car before handing it off to me.

    Here's a couple of pictures.  First one is from the POCA Newsletter, the Oct. 2020 Issue.  Thanks to POCA for the photo and the write-up.

    The middle photo shows Neil and his wife Carol, in November, 1991.  I believe it was down in Newport Beach or some POCA event where there was professional photography (MIAD?) associated with the event.

    The bottom picture is myself and Neil at the same function - the 2016 Fun Rally in Las Vegas.  We had taken a tour of the Shelby Museum and Factory.

    Pantera_5357_and_Neil_Dettorre

    Neil_and_Carol_and_5357_Nov_1991 001 [Large)

    Fun_Rally_iPhone [18) (Medium)

    Attachments

    Images (3)
    • Pantera_5357_and_Neil_Dettorre
    • Neil_and_Carol_and_5357_Nov_1991 001 (Large)
    • Fun_Rally_iPhone (18) (Medium)

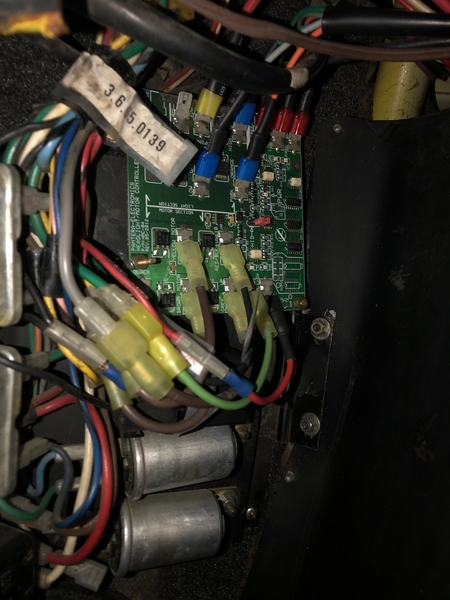
    I finished the install of the PE (Pantera Electronics) Headlight/Motor Controller.

    While I can't say it was a "3 banana job", it took me the better part of a day to do the majority of the work.  When you read the manual, it's a little off-putting, because of the number of steps, but once you dive in, the job is pretty straightforward, and the manual is clear.  But it really only becomes clear once you make the commitment to do the install and you get under the dashboard!

    The first part of the job was tuning up, checking, and lubricating the stock lift motors.  It wasn't clear that mine had been looked at in 45 years.  I took the headlamp assemblies out, removed the rear splash shields, and removed the buckets.

    It was amazing the pile of screws, nuts, washers and lock washers pulled out of the front!  While the POs weren't lubricating the headlight system, I think every time someone went up in there, they dropped a washer or two!

    I cleaned up the area, lubricated the nylon bushings and the motor drive gear, and the "sector gear" on the headlight lift rod.  As you will recall - I had already replaced the broken plastic gear with a brass one.  My motor assembly plate needed a little fine tuning to engage perfectly.

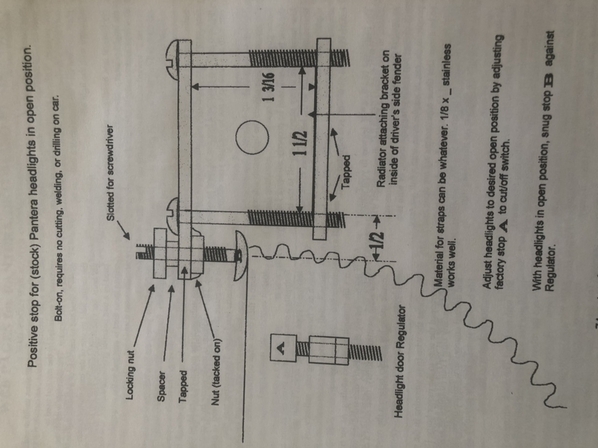
    I fabricated a little "sector gear stop" that mounts to the driver side radiator support (thanks, Rick),  This simple bracket provides a stop for the buckets when extended, and is intended to reduce headlight shake when driving.  Mine is based off this photo, but the execution is slightly different.
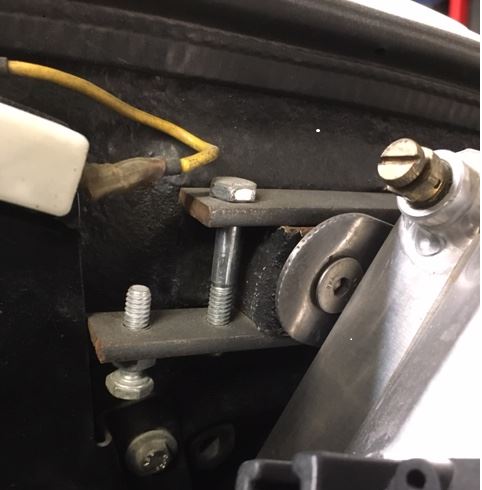
    Sector_Gear_Stop

    Once I was satisfied the stock system was OK, I jumped into the install of the PE HMC.

    It's pretty straightforward - modification of the limit switches with jumpers, removing the stock headlight relay, mounting the HMC board, and wiring it up.

    I made short 3" extensions from the headlight relay wires to the HMC board, it just made the hookups easier.  You can see them in the last picture (below).

    Next was a single sense harness (2 wires) to the stock headlight switch.  Pretty straightforward, and easy routing.

    Finally, a 6 wire harness to/from the passenger side fuse panel.  For my own convenience, prior to the install, I had contacted Jon Haas (PE), and requested that he fabricate me the wires needed for this one, and the headlight switch harness.  This eased the "prep" effort, I got wires with the correct color code, and I was able to create a very neat harness, with good routing from the drivers side relay panel to the fuse panel.

    I had a minor "head-scratching" moment when the wires on the fuse panel that I was looking at didn't match the manual's drawing, but it turned out the wires needed are on the BACK of the stock fuse panel.  The fuse panel needed to be removed from it's mount to access the three required wires.  A quick call to PE (Jon) pointed me in the right direction, and allayed my concerns.

    Once the HMC was connected, there is an extensive checkout procedure in the manual - an excellent plan to ensure that "bonehead" wiring errors won't damage any critical systems.  I am proud to say, I passed the wiring test with flying colors!

    Honestly - anyone can do this install.  You just have to be careful, take your time, and follow the instructions.

    I reinstalled the buckets, installed the headlights (new Toyota H4 Semi-Sealed Beams), and I am good to go for improved night driving!

    Anyway - a couple of tips for those of you doing this install.....

    Buy a bunch of the Yellow .250" wide terminals (for 10-12 AWG wire), both male & female.  You use a lot of them throughout the project.  You also need the Blue and Red ones as well, but not as many.

    I used more terminals because of my extensions from the existing relay wires to the board, but having extensions certainly made the connections easier.

    John Haas can build you the the harness from the HMC to the fuse paneI if you want.   I felt like it was a good investment, and I didn't have multiple sizes of Gray, Orange and Pink wire.

    Once you open things up - figure out how you want to mount the controller board on the relay plate.  It goes on with only two attachment screws (For the L Model - the two lower holes), and you will need spacers.  What I did was run long machine screws from the backside of the plate, and then used a jamb nut to hold the screw to the plate.  Then I used two plastic spacers (they were different lengths because of a bend in the plate).

    This is another one of these "Gosh, it's working fine, do I really want to do this?" type projects, but I hope it will take some load of my switches and wiring.  One nice thing is the board has a lot of indicators that will help you troubleshoot it if things go wrong with the lighting.

    Here's a few pictures for your enjoyment.
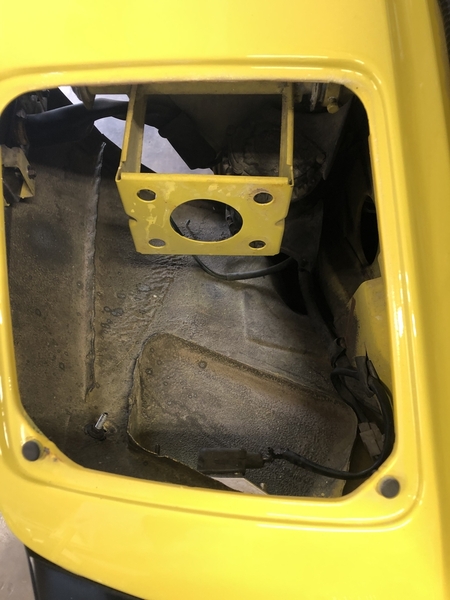
    IMG_4379

    IMG_4380

    IMG_4382

    Attachments

    Images (4)
    • Sector_Gear_Stop: Sector Gear "Anti-Shake" Stop
    • IMG_4379
    • IMG_4380
    • IMG_4382: Controller Installed with Extensions
    Last edited by rocky

    If you are looking for a nice fitting, reasonable front trunk seal, try this:

    Metro Moulded TK 10-M SUPERsoft Trunk Lid Seal

    I just got mine at Amazon for $15, but now Amazon shows "out of stock" and a price of $40?

    ($40 is what Hall Pantera charges for their front trunk seal)

    Anyway - it fits good and looks good.  Maybe not exactly what you want for your 100% original, concourse car, but that's a choice you have to make.

    image0image1

    Attachments

    Images (2)
    • image0
    • image1

    Hello, All...

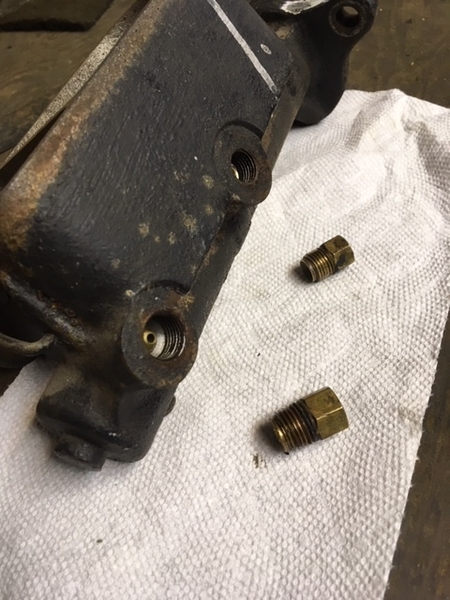
    I am swapping out a Ford SVO master (or one from a small ranger pick-up - I've never been able to get the straight answer on it) to a Wilwood master and proportioning valve / distribution block from SACC.

    I have a couple of questions for this august body of grey-bearded sliverbacks (as it were).

    In Picture 1 - Has anyone seen this booster modification to adapt the booster to the two bolt American brake MC?  Most everyone else uses an adapter block.  This looks like it was done by welding two bolts directly into the booster body, and plugging the original holes.  I am just curious if any of the vendors were doing this in the post-1985 timeframe?  This came on my car from the PO, but I never got the opportunity to ask him about it.

    IMG_6214 [Large)

    I am wondering if the actuating rod can be pulled out of the booster without damage?  it slides forward, but seems to have a stop up against the booster diaphragm.  I am not sure that I really need to remove it.

    The threaded part with the acorn nut on the pushrod...  how far will that unscrew?  It looks like I might need another 1/2" just based on measurements of the two masters.  I am wondering if I will have to fabricate a longer one.

    IMG_6217 [Large)

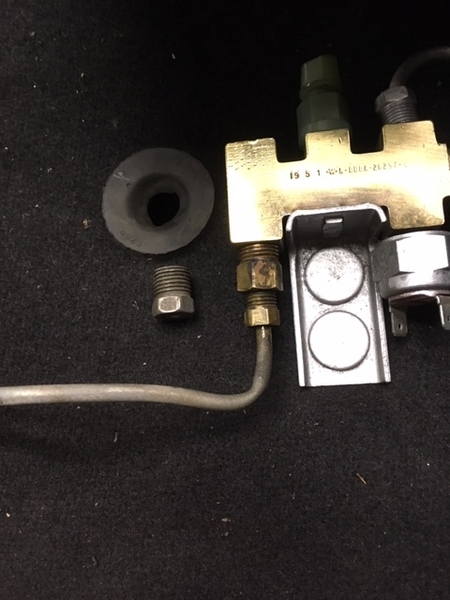
    In the picture below....  the rear brake pipe connection which previously came out out of the distribution block....  That sure doesn't look like a "bubble flare" to me.  It's a 1/2" nut...  Looks like a good old USA flare to me....  but that's not supposed to be stock, is it?

    IMG_6218 [Large)

    Comments and advice appreciated.

    Rocky


    PS>  Scott's setup of the Master / Proportioning Valve / Distribution Manifold looks really nice to me (some might call it "AMAZING"!)

    It all integrates the manifold / valve together, it comes with bracketry/pre-bent tubing to mount to the MC, and gives you a brake light switch.  You loose the shuttle valve function (and sensor for the dash light), but you don't need it.

    I am running stock Girlings up front (with Porterfield R4-S pads) on vented rotors, and SACC / Wilwood rear calipers on the stock rear calipers.

    I'll post up more pictures when I'm finished.

    IMG_6216 [Large)

    Attachments

    Images (4)
    • IMG_6214 (Large)
    • IMG_6216 (Large)
    • IMG_6217 (Large)
    • IMG_6218 (Large)
    Last edited by rocky

    "I am wondering if the actuating rod can be pulled out of the booster without damage?  it slides forward, but seems to have a stop up against the booster diaphragm.  I am not sure that I really need to remove it"

    Chuck,

    the actuating rod can be taken out. It looks like a "Valve". You might want to take it out in order to make length adjustments per the top crew in oder to optimize the gap between the main cylinder piston. The gap should be minimal, as it translates to the pedal play.

    Only question I have ..how do you bleed the bath tube brake fluide reservoir ? I prefer the original model with the plastic container on top of the cylinder on which there are srew in adapters for a "automatic" bleeder container.

    My main is by the way from a BMW 2002 got it from Mr Jäckel.

    Matthias

    Thanks, Matthias...

    Yes..  I agree with your comment on the need to eliminate the space...  I probably have about 1/2" (12-15mm) distance difference between the two MCs, with the Wilwood being longer.  So I have to do something there.

    I am just not sure how much I can screw the adjuster out of the rod.  I guess I should first mark it with nail polish (my wife and daughters always wonder where their bright colors go to), and then just try and unscrew it.

    The Wilwood MC comes with a "Bench Bleeder Kit" that allows you to cycle the fluid through the pump and back into the reservoir before you hook up the lines.

    I've got some other things to do first (before I install the MC & fill with fluid), like sort out my plumbing, plan my routing, and decide which lines I will keep, and which lines I will replace.  Also have to fix the carpet / felt under the old MC & distribution block.

    Thanks for the tips!

    Chuck

    Last edited by rocky

    Chuck nail polish is a key "tool", did use it here as well, ok the color variety in my houshold is humangous..

    No, I used the nail polis on the tip of the rod to finalize minimal gap, as measuring the gap is hard to do as no real ref. point. Several attempts in/out until binding then 1/4 to 1/2 half turn back of the booster push rod.

    KEY is a good seal as well, the seal between the bake booster and the push rod (in my case the push rod part of the main). I had sever issue here as I lost vacuum, resulting in missfire of the engine in push mode. I added 2 rubber seals from the plumbing industry/forcet stuff, as there was a decent gap on the main side to accomodate this set up. Top result!

    Matthias

    Need some help...


    Does anyone know where I can find either an adapter, or a reducing union for the rear brake line? 

    I need a female - female union:

    One side 1/2"-20 for 3-16" line

    One side 3/8" for 3-16" line.

    I don't want to try and reflare the line in the car (under the brake booster). 


    OR:  Maybe a 1/2"-20 (Female) - 12"-20 (Female) union.


    Thanks -


    Rocky

    Good suggestion Mike.

    I am at Merle’s Auto Parts now, and it’s a little more complicated.

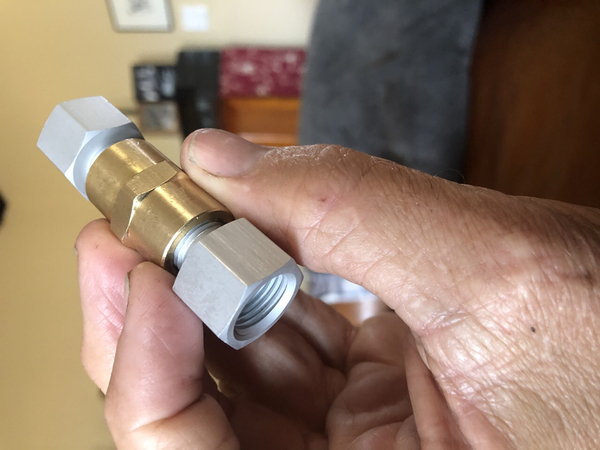
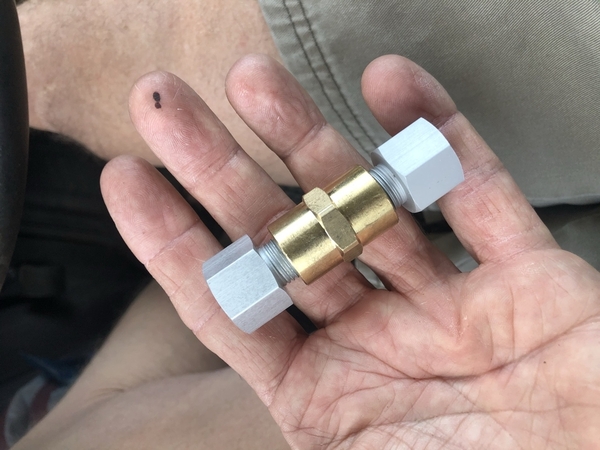
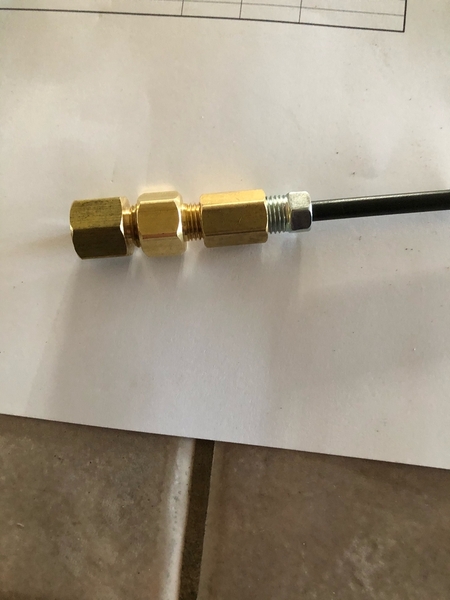
    They don’t make a reducer that jumps from 1/2-20 directly to 3/8-24, you have to go to a quarter inch first. But that string of three fittings (two reducers, and a union) is a lot better solution than what I was considering, which was far from ideal, as the brass coupler was pipe threads (tapered) and would have left a huge air pocket that would have been very hard to bleed.
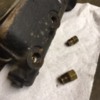
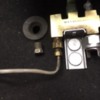
    Here's the solution I am going with.

    Fitting

    I also heard from a friend (Thanks, Larry!) who suggested that reducer fittings are found on Ford Master Cylinders.  I had not turned any of these up, but if anyone has a part number, this could be a single jump to a 3/8-24 union.

    ".......if you were looking for a fitting that would reduce the 1/2-20 flare nuts to the 3/8-24 ‘normal’ sized ones, the smaller of the two brass adapters installed into the various Ford iron master cylinders will do the job."

    Larry_W_Recommendation [01)

    Larry_W_Recommendation [02)


    Rocky

    Attachments

    Images (3)
    • Fitting
    • Larry_W_Recommendation (01)
    • Larry_W_Recommendation (02)
    Last edited by rocky

    Had a fun day out with our newest Pantera owner (Stuart), who has brought Jack Furrier’s push button Pantera back to Tucson, Arizona!

    214C2984-00D0-4454-AF07-F4688AD38543E1A4413B-6320-47E0-A8D0-7B0D5DAD43D4418A00B2-01E8-4505-99A7-0A8E23AD2F68

    It’s a very early car, with single slot wheels!

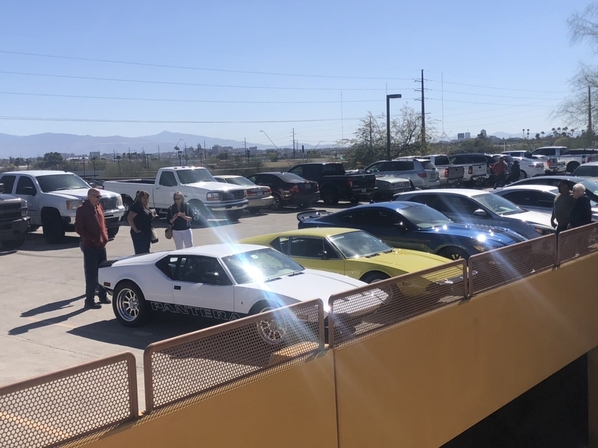
    Rick P. from Green Valley came up, as did Jim & Jacki Fusco from Wilcox in their super awesome Mustang. It was great fun,  and a super good breakfast!

    Thanks to everyone for making the effort  to come out!

    Rocky

    Attachments

    Images (3)
    • 214C2984-00D0-4454-AF07-F4688AD38543
    • E1A4413B-6320-47E0-A8D0-7B0D5DAD43D4
    • 418A00B2-01E8-4505-99A7-0A8E23AD2F68
    Last edited by rocky

    WOW Rocky !

    After your prompt on the cross member, its taken me most of the afternoon to read though 5357s continuous thread - some of which I had seen, most of which I had missed.

    I think I am only 65% of the way on 6997 on the various improvement as compared to where you have got to. Well done on documenting on what are some monumental tasks. The good news 6997 is in one piece at the moment running load and strong and straight as a benchrest rifle ! First time in a few months as I have been rebuilding the cooling system, another part of your posts that were very interesting to me.

    All I can say is I still have a bit of a way to go but am going to finish this beast!


    6997 - back together !

    Attachments

    Images (1)
    • 6997 - back together !

    You do great work!

    That mod was inspired by one of our AZ Pantera owners who had an electronics fail, and his starter started cranking (without him in it).  The car went forward, jumped the curb, and rolled into a wall, stopping forward motion.  The starter was still going, slipping the clutch.

    He was able to reach in and shut things off instantly.

    It was at that time I realized what a valuable mod a battery disconnect could be.  I use mine all the time.

    Obviously, all the Race Cars have them, so it may even add 5-10 horsepower!

    Rocky

    Last edited by rocky

    62B83F76-3591-4387-A016-209240257426Completed my three-point seatbelt upgrade.  My stock buckle cover was in the process of disintegrating, and since we have a track day at the end of the month...

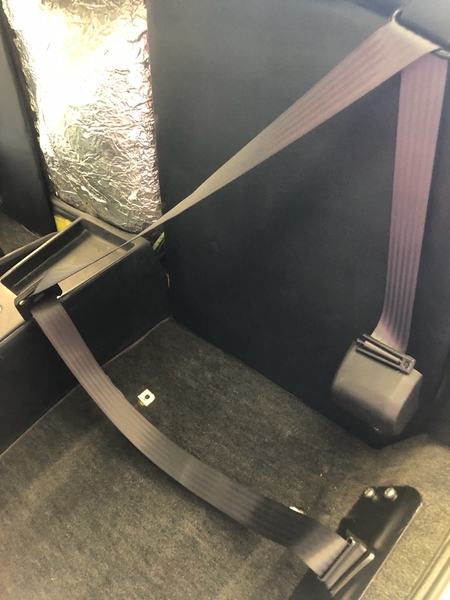
    I got the FJ-40 Toyota Seat Belt kit.  It all went together very smoothly...  The main challenge was the retractor mounting on the sill, bending the attachment bracket to a precise 20* angle (so the retractor is vertical), and the fiddly upholstery work to my bulkhead cover.

    I think it came out pretty nicely.

    The lower mount was made more challenging because my car (5357) didn’t come stock with a bulkhead mounted 3-point belt.  If that were the case, this would really be a straightforward install.

    Pantera_Seatbelt_Project_April_2023 [12) (Large)Pantera_Seatbelt_Project_April_2023 [13) (Large)Pantera_Seatbelt_Project_April_2023 [14) (Large)Pantera_Seatbelt_Project_April_2023 [19) (Large)

    Attachments

    Images (5)
    • Pantera_Seatbelt_Project_April_2023 (12) (Large)
    • Pantera_Seatbelt_Project_April_2023 (13) (Large)
    • Pantera_Seatbelt_Project_April_2023 (14) (Large)
    • Pantera_Seatbelt_Project_April_2023 (19) (Large)
    • 62B83F76-3591-4387-A016-209240257426
    Last edited by rocky

    Also worked the carburetor (a 735 CFM Holley 4150).

    The carb setup had been dyno’ed, and all the parameters had been optimized for my car.

    But it had recently been running rich…. something had changed. It also had a slight bog on acceleration.

    I was planning on replacing the power valve, and the accelerator pump diaphragm.

    But what I found was that the bowl attachment screws on the primary fuel bowl had worked (slightly) loose.  This was allowing fuel to bypass the metering in the metering block, and causing the rich condition.

    Happy to get that issue worked out, a no-cost solution!

    Rocky

    Last edited by rocky

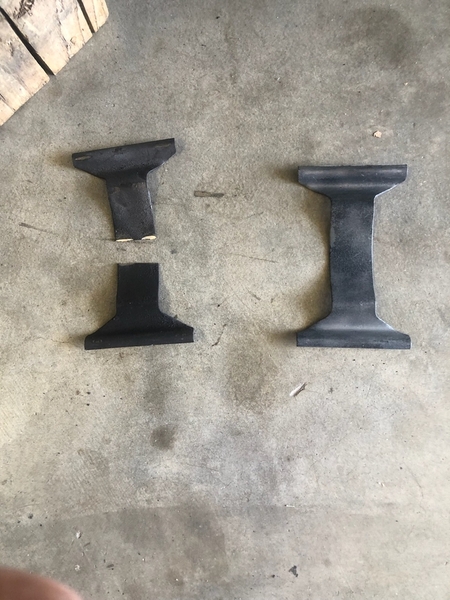
    Another source of annoying noise - FOUND!

    I had been struggling with a rattling noise that I was convinced was my shocks / springs losing preload as I went over bumps (because it happened shortly after I first installed them…)

    But…. I kept checking them, and they were secure.

    Then I found this….

    I am pretty sure it’s the culprit, the two halves were loose in the caliper, and I could make them rattle by just touching it….

    I’ll let you know (or delete this post) if replacement of the brake pad retained doesn’t solve my noise problem!

    Rocky21C6F6AA-3368-4CBC-BAA5-22469F0CFF01

    Attachments

    Images (1)
    • 21C6F6AA-3368-4CBC-BAA5-22469F0CFF01
    Last edited by rocky

    Hey Ken – if you scroll up the page, I’ve got my install documented. I used the Cool Cruisers of Texas (Taiwan) Toyota FJ-40 three point harness kit.

    The lower mounting point just bolts inside the plate on the rocker.

    I drilled through the lower box structure on the rear bulkhead to mount the reel.  I put a doubler plate on the back of the box structure.

    The CCOT kit comes with all the hardware you need, bolts and brackets. I don’t know if that’s the only place you can find it, but it was very convenient to order.

    I think there’s a couple other people here that have used that same kit. Some of the later model cars (‘74s?) that originally had three point belts probably have an easier install.

    My ‘73 had the reel inside the rocker, but the non-retractable belt hanging on the bulkhead.  My wife always had a terrible time, trying to hook the shoulder belt, and then stab the tongue, while holding all the pieces together…. This is way better than that.

    You have to build an angled spacer, or bend the mounting strap, so that the reel is in a vertical position. If not, the reel locks up when you try to pull the belt out.

    Good Luck

    Chuck

    P.S. I think the kit was just shy of $200.

    Add Reply

    Post
    ×
    ×
    ×
    ×
    Link copied to your clipboard.
    ×