The center row of switches is the heating and vent. The switches are a little unconventional; they are:
Fan
Temp
Vent/floor mix
Defrost
Recirc/Fresh mix
Gives a little more flexibility. Allows a variable mix of Floor and vent, a variable mix of fresh/recirc, and independent control of Defog.
Sorry if I diverted the front discussion. We should break dash into separate topic.
quote:Originally posted by Edge:
LIV1S
I like your idea of the wall mount mural, that would be a great idea combined with a large background photo of the actual car.
I bet there are very few Pantera front cuts around.
regards,
Tony.
You are probably right. I see more back halves than fronts. I had an opportunity once to buy a complete back half of a Pantera (from firewall, deck lid, tail, lights and all. I wanted to keep it as a spare but wanted to get some use out of it. I was tempted to louver the deck lid and make it into a barbecue but decided against the whole project
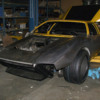
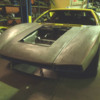
Mr. John Gilbert was busy today fitting the front left fender.
Car is sitting way to high at the moment due to a lack of parts in the nose area.
This picture gives a reasonable idea of the shape, tyre tucked in there for reference, but missing the flares.
New pedal box housing welded in on the right side for the RHD conversion.
I will keep the left side pedal box housing as a box for electrical fuses & relays.
Front tyres are 285/40ZR-17 Bridgestone Expedia.
New laser cut nose structure, (second attempt) worked out well & finally got the hood hinges in the correct position.
Regards,
Tony.
Attachments
Side view
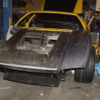
The welded join in the top of the wheel cutout will largely disapear when the flares are installed & what remains will be hammered to shape.
Here you can see how the higher fender with more of an arch to the shape flows into the shape of the door.
If you have a good look at standard Panteras you see that where the top of the fender meets the door it peaks, it does not flow smoothly.
So this is one of the slight alterations we have made to the shape as well as the increased inward curvature to the top face of the fender.
Again, the car is sitting way too high.
regards,
Tony.
Attachments
The front hood is tricky getting it to open and clear the front ridge properly.
Fantastic work.
Fantastic work.
Looks very promising, indeed! I'm impressed
Thanks Mikael.
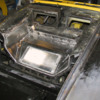
A few modifications to the front compartment.
Now has a new cross member welded in between the shock mount points.
Being that I have cut out the cross member behind the radiator this is the replacement to stiffen the front directly where the stress occurs.
Also seen here is the recessed removable Aluminium battery box.
This is about as low down as you can get in the Pantera & in an ideal position to help balance the car.
Designed to house the big 8037-327 830 CCA Optima battery.
This required a re-location of the sway bar positioned further forward to allow room for the battery box.
You can see a small round bush low down on the right of the picture.
This is a support bush for a Schroeder 26” splined sway bar.
Regards,
Tony.
Attachments
I work with metal, but I'm a hillbilly welder. This level of fabrication skill simply boggles the mind. Please keep posting pics (more pics) of your work.
This thread is NUTS! Awesome.
Tony,
Very nice work!!
Your experience that "95% of all of the chassis strength is from the front of the suspension arms rear wards" has certainly been borne out by several "Group 5" or "GTO/GTX" style race Pantera chassis.
My own race Pantera follows a similar approach - get rid of (or at least lighten) the parts not adding structural support, and re-engineer the rest to make it stronger.

I really like your subtle fender reshaping. Look forward to following your updates!
Will you also be cutting off and reworking the rear??

Dave
Very nice work!!
Your experience that "95% of all of the chassis strength is from the front of the suspension arms rear wards" has certainly been borne out by several "Group 5" or "GTO/GTX" style race Pantera chassis.
My own race Pantera follows a similar approach - get rid of (or at least lighten) the parts not adding structural support, and re-engineer the rest to make it stronger.

I really like your subtle fender reshaping. Look forward to following your updates!
Will you also be cutting off and reworking the rear??
Dave
Old news but I cut mine too and built an aluminum hood:
http://www.rc-tech.net/pantera1/hood/hood.htm


I hope to be installing the hood pretty soon.
http://www.rc-tech.net/pantera1/hood/hood.htm


I hope to be installing the hood pretty soon.
Dave, you’re correct in where the stress is.
After all it’s the wheels that impose twist into the chassis, so anything forward or aft of the suspension can aid in strength, but not very well.
Best area for bracing is at the source & between the front & rear wheels.
I have also added bolt in tube braces under the fenders that connect the nose to the shock mounts & then back to the foot pedal area. This in turn will have a bolt in section that connects back to the roll cage.
So in effect a full "bolt in" tube roll cage structure made in sections.
The rear is to receive new fenders to wrap around the new larger wheels.
Not sure yet if I will add more stiffening to the rear, but likely bolt in bar work.
Love the look of your race prepped chassis, that looks hot.
Comp2, your build & your site is very inspirational. Lots of really great ideas going on there.
My hood has a similar cut out, but because I have discarded the pop up lights & the cross tube, as well as the forward cross member I have a huge gaping hole for the hot air to exit the radiator.
This gives me lots of options in this area.
My frustration is the shear amount of time involved & progress is too slow.
Regards,
Tony.
quote:Originally posted by Edge:
My frustration is the shear amount of time involved & progress is too slow.
Regards,
Tony.
X10!! I completely understand!
Awesome work Tony!
I got into this thread late as usual. Larry Stock hit a hump-back bridge at 150 mph in his street '73 during a Silver State open road event in 2006, and BROKE both lower front subframes clear off the tub where they are factory-welded. The uppers were OK. It happened nearly at the end of the run, and a checkpoint worker paced off some 135 feet of 'air time' from the scrape marks he left past the bridge. He runs and sells an elaborate bracing system in front and back that extends some distance from the wheels and requires welding to install properly.
Larry (with a navigator-friend on board the whole time) proceeded to drive the Pantera home some 135 miles at more-or-less legal speeds. It wasn't until later the next week before he noticed some 'looseness'and put the Pantera up on a lift for a check....
I suggest not concentrating your chassis efforts just between the wheels; there are other areas that merit study for stiffening, too. IMHO, seam-welding the entire car is best, replacing all the flexy spot-welds.
Bosswrench.
That’s very interesting info.
When I mean between the wheels, that’s not just side to side but fore/aft as well.
Your right, seam welding would stiffen the car greatly.
That’s one of the things they do to most production race cars, touring cars etc when they add a cage to the car.
Modern cars are often much worse on their spot welding, or the complete lack of adequate welds. There’s so much thin sheet metal in there that’s just barely welded together. The limitations of fast modern production techniques I guess.
A question for you.
On the lower chassis rails, my car has extra stiffner plates added at the area of the bottom of the foot wells.
If you took a vertical line at the front face of the foot wells down to the chassis rails thats where the extra plates are wrapped around the chassis rails.
Like a wrap of sheet metal around the rails, maybe about 4" long down the rails themselves.
Is this original?
regards,
Tony
Slow progress.
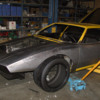
Here the front right fender has been partially welded in place.
Still no flares yet & the car still sitting too high in the front due to lots of missing parts.
Just visible is a fabricated RHS frame in the nose which is simply a frame fabricated to line up the fenders & use as a guide for fender position measurements.
This will be removed once the fenders are fixed in place.
The right side fender is showing the slightly more pronounced curvature to the top of the fender.
Regards,
Tony.
Attachments
Add Reply
Sign In To Reply


