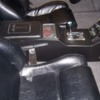
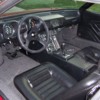
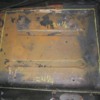
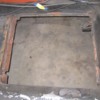
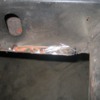
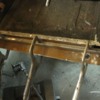
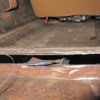
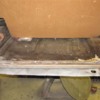
Biggest problem I have with all of these dropped floorpans is, to have fore-and-aft adjustability you must cut a floor support crossmember- the one just in front of each seat- which weakens the whole floor structure. Choice #2- you leave the crossmembers in place and simply make a big hole in the floor, bolting the seat(s) solidly to the dropped floor with no adjustability.
With my 6'2", 200-lb body, I'm comfortable with stock floorpans- even with a helmet on, simply by having stock early seats reupholstered in good materals and adding a simple rake adjustment to the stock seat backs. We routinely make 500 mile trips with no backaches. FWIW....
Jack--I think?
I totally redesigned the pans and was able to keep the front///bottom of the original cross-member in tact and supply a new reinforcement which makes it stronger than original---which is not that hard to do. I also supply new seat mount rails and my pans are 16 gauge steel rather than 20 gauge. These pans fit the car far better than any this built to date.
(side view of dropped floor seat install)
Kirk
Attachments
Pantera Lover (Guest)
quote:Originally posted by Kirk Evans:
Jack--I think?
I totally redesigned built to date.
(side view of dropped floor seat install)
Kirk
These seats do not look stock? What are they??
OzGT5 (Guest)
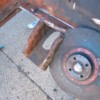
Anyone have any pictures they can post up of the drop pans actually going into the car and the size of the hole once cut out. Would make for interesting viewing.
Kirk,
When did you re-design your pans? I'm wondering if the ones I just installed
are the new design or an earlier design. The pans I installed are full width
with a small lip on two sides (one lip at the center tunnel and one at the
rear). The outer sill side welds flush to the sill. The front welds flush
as well and is shaped to match the floor shape after it is cut with a portion
that caps the fore-aft frame rail that is cut. The passenger side has to be
notched for parking brake clearance. Holes need to be drilled (or a nut
welded to the pan) to mount the female (receiver) portion of the seat belts.
Two heavy u-channels per side are provided. The seat rails bolt to the
channels (have threaded holes for both lengths of Pantera seat rails with two
holes at the front and one at the rear). The channels run the length of the
pan and butt up against the fore and aft edges of the pans. When welded in,
they stiffen the pan floor and form a load path for the fore-aft crossmember
that was cut. The back of the pans are sloped but the cut we made was vertical
so triangular filler pieces were needed underneath (along with rectangular
plates to cap them off) to completely tie them in. Also underneath, the
side-to-side crossmember welds directly to sides of the pans. When measured
from the outside, the drop is approxiamtely 3" at the rear.
The sills are sloped and the passenger side seat is offset towards the sill
so it can clear the parking brake. With the dropped pans, the outside edge of
the passenger seat rubs on the sill, even with no sound deadening or carpeting.
I cut the spacers off both old pans and stacked them under the passenger seat
rails to raise the seat and it still rubs slightly. If I recall correctly,
even with the original pans, the seat was offset enough that is rubbed on the
carpet (can anyone confirm that for L model seats?). I think some re-shaping
of the seat is in order, though I suppose one could just live with it as the
only time I move the seat is when I remove the bulkhead cover.
Do you offer carpet to match the pans?
Dan Jones
[quote]If I recall correctly, even with the original pans, the seat was offset enough that it rubbed on the carpet (can anyone confirm that for L model seats?). I think some reshaping of the seat is in order, though I suppose one could just live with it as the only time I move the seat is when I remove the bulkhead cover.[/quote
On our '72 L model seats (early 3-piece style), the passenger seat is on stock seat adjusters & floor spacers, and is now offset 2" towards the door. It doesn't touch the side upholstery although it's close. Are you sure those are stock seats, adjusters and have stock spacers under the adjusters? Because of the inward 45 degree angle of the inner side structure, if the seats are lowered, the clearances automatically get closer.
You can avoid removing the seat(s) and rear bulkhead upholstering when working on the engine by simply sawing the bubble section loose from the main fiberglas panel. The mod goes clear back to the '80s. Two different articles were published over the years in the POCA Newsletter. The bubble's upholstery is separate from the rest of the vinyl, and can be removed & reglued on the separated bubble, and the bubble assembly mounted to the firewall with velcro. Then when you need to access the front of the engine, only the bubble and inner door need be easily removed. It not only looks stock but is far more convenient, some GR-4s had this mod as-received from the factory, so a case can be made that- like a dropped battery, it's a factory upgrade. Figure on spending a Saturday afternoon doing this simple mod.
quote:Originally posted by Bosswrench:
With my 6'2", 200-lb body, I'm comfortable with ... having stock early seats reupholstered in good materals and adding a simple rake adjustment to the stock seat backs.
Bosswrench,
What kind of "simple rake adjustment" did you use on your seats? Does this allow for the seat to also fold forward? If you have any pictures of the mod could you please post them. Thanks a bunch.
quote:Anyone have any pictures they can post up of the drop pans actually going into the car and the size of the hole once cut out. Would make for interesting viewing.
Here's POCA President Mark McWhinney's "tall man conversion" article on the 'wayback machine', with a link to pictures, but I think they're pics of someone else's conversion:
http://web.archive.org/web/200...anteraadventure.com/
http://web.archive.org/web/200...s.net/~gpd4/pantera/
Garvino, rake adjustment couldn't get much simpler.... if you have the early 3-piece seats where the back removes from the seat base. These were stock on '71- early '73 Panteras. In that seat, there are two side bolts and two in back that hold it together. Take the back off and with a hacksaw, continue the back holes clear down the straps until you have two forks.
Reinstall the seat back, adjust the back for the rake you prefer and tighten the stock allen bolts up, being sure the washer is on the outside between the bolt head and fork.
For years, I carried a metric allen wrench in the car to adjust the back rake whenever Judy & I swapped seats, since I'm a foot taller.
Then I found 4 aluminum "tooling knobs" in a machine shop catalogue. I bored a recess in each knob for the stock allen bolt head, pressed a knob onto each bolt, crossdrilled through each knob & bolt-head for a roll pin to make a knob with a metric stud, and now I can adjust the seat rake while the Pantera is rolling, by simply untightening the knob's tensions, pulling on the seat back and re-tightening the knobs by hand. Sometimes, it's the little things that count; for instance a tiny bit more back-rake on a long trip.
[QUOTE]Originally posted by Daniel_Jones:
Kirk,
When did you re-design your pans?
Do you offer carpet to match the pans?
Dan,
Sorry I missed this. You have the original design which is fine---no worries! The new design is primary an attempt to change the side profile as seen from a distance. You set are much easier to install and the tin cross member is no where near the strength of the 16 gauge pans with the rails. I have tested the twist and can assure everyone they improve the platform. Aerodynamics---not so much but there are other areas you can improve the cars shape if counteracting pans is an issue.
I'll bring some carpet when I come back down to see you--sooner that later I hope.
I'll post some install shots of the pans for everyone to review.
Kirk
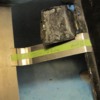
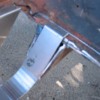
Here is a shot of the rear reinforcement trimming plate we send along in the kit so you can accurately cut the support to fit the back of the pan plate. This makes the trimming much easier and accurate when matching the back cover.
Attachments
Add Reply
Sign In To Reply


