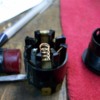
Here is a shot of the metal piece with the pin in it that I bent ever so slightly. You can see the spring also.
Snapped it all back together, put the wires back in place, plugged it in to the dash wiring harness pushed button to release it...and voila!!! Blinking lights!!!!
One good thing out of this (I keep saying this with this car....!!!!) is that the yellow wire spade connection, which is apparently the main power in or out or something important, was found off of the spade connection once I got the dash out! Very loose when I plugged it on! I tried to pinch the curled section of the female clip to be more tight on the male spade...and promptly broke both of the crimps off! No pliers required! Broke them by finger power! Needless to say, it would seem that this connector had some heat on it to cause this metal to crystallize!
I put another connector on the wire....and we're all set!
HERE IS ONE THING I LEARNED while working on this dash about this switch. OK two things...four things....
1) This switch is the one with the resistor on the back! If anyone is looking to buy one....
2) This switch will NOT come out of the dash without pulling all of the wire connections off. Or at least half of them. The wires are about 6 inches long, and terminate in a HUGE red connector. Even IF you could get the front portion of the switch and wires out of the dash, this large red connector is NOT coming out. Forgettabout it!!!
This of course means that you have been able to get your hand up in the dash to get the large plastic retaining nut loose....
To me, there is no physical way possible to put this switch back in the dash, without removing the dash!
To pull the switch, you loosen the nut. The nut is too small to fit over the spade connectors around the perimeter of the back of the switch. So you muscle it out...knocking off all of the wire connections, which is gonna be TOUGH cuz there are 7 wires +1 wire in the middle, that are really really tight connections!
When the switch finally comes thru the hole, the plastic nut and the thin lock washer of sorts, fall down the rear of the dash most likely if you are fortunate, and all of the 8 wires scatter....and retreat into the dash.
That was the easy part!
Now how to get it all back in place?! Put the new or repaired switch into the hole, round up the thin washer and the plastic nut, and work to get them back up inside the dash and onto the rear of the switch. Watch out for cramps in your fingers and forearm, lower back, neck... from being in very odd contortions to get at the rear of the switch.
Now once the switch is tight, you can begin to guess which of 8 wires you are holding in your fingers and which connector you are putting it back on! Seriously! You cannot physically see the wires any longer, nor can you see where you are putting them.
I guess if you have removed your steering column, you might be able to see.....but I doubt it......
So, now is when you go grab the .38 revolver and unload it into the driver's floor pan!!!!!!
Once you calm yourself with 3 or 4 beers and a half a pack of cigarettes, begin procedure to remove the dash pad/top..........32 fasteners later.....ba dump bump!!!!
3) the red lens does NOT come off of this particular push button to allow changing the bulb. When it burns out, replace the switch.
4) the front bezel of this switch does NOT unscrew to allow you to drop the switch out the back and down and out.......ever.
I am not sure where I read about #3 and #4, but certainly it was copied from another car shop manual and used for filler in the Pantera manual.....!!!!! OK, it was perhaps true for the EARLY cars....but I have no idea when this new style switch (with the resistor on the rear) was implemented....nor do I know if there were multiple versions of early switches.....
I do think these later switches ended up in BMW's of some sort...... There is an SAE 72 number on the bezel indicating part was intended/designed/approved for 1972 vehicles of some sort....
SOOOOO while I had the dash out.....I put my newly repaired switch back in the hole, tightened the big plastic nut, verified that the switch was oriented properly and not at an annoying angle, and then plugged all the wires back onto the rear of the switch. Wow, that was easy!!!!
Where was I......oh, yah....evaporator housing...... Started draining the freshly installed antifreeze mixture out of the system so that I can disconnect the heater lines without dumping 2 gallons of coolant all over the carpet! I'm not a hose squeezer......sounds like a good way to damage new hoses.....but I know it can be done with the right tools.
Onwards!
Steve
PANTERA INTERNATIONAL
A DE TOMASO CAR CLUB
Presents the De Tomaso Forums
The On-Line Meeting Place for De Tomaso Owners and Enthusiasts From Around the World
Clicking on the banner will take you to the sponsor's website.


