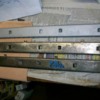
OK, here is an after picture of one of the other lower seat mounts which was equally as grungy as the one above.
I welded up the three leaf clover hole in the one above, ground and filed it round and level again, hit it with some high temp silver/grey Rustoleum rattle can paint to protect it further.
If doing this, just be sure to keep paint off of the surface on the upper piece slides against the lower piece (put some synthetic grease there!) and also keep paint out of there the rollers roll. Everywhere else should be covered! They won't be shiny zinc plated.....but they won't be ugly and rusty!
Presently going to run the stock OEM rollers...have been told this is a bad idea.....but they are all still round! Well seats aren't going in just yet, so will need to source some eventually. Hopefully the old ones will allow us to try out the ('Vette) seats and see if we like them!
Update on the dash!
Reassembly of the interior is almost complete! Have everything installed except for the front lower RH tunnel cover. Going to leave this off until I know that nothing is leaking!!! Those panels are a PITA to install...! Seems like they are a mighty tight fit what with carpet seams everywhere!
Also need to put the seat belt bar back in place.
I worked on getting the RH lower wheelhouse cover mount fixed up too! Looks like it was spot welded in place originally, but both of those have torn out and left tiny holes. Not optimum for trying to re-spot weld them OR MIG weld them back into place!
I used my Roper punch to put a good hole in the horizontal seam that is inside the wheel well, and drilled out the lower hole so that a sheet metal screw fits thru it. Then used self tapping screws into the bracket to secure the piece to the horizontal seam and the lower rocker panel seam. If this doesn't hold it well enuf, will need to resort to more violent means of keeping the bracket in place!
Need to de-slime the cover a bit....not sure what got on it, but looks oily......then I can install it and FINALLY put the rear wheel back on! ....set it down off the blocks.....AND GO FOR A RIDE!!!!
We'll see.....other project involves carpet, padding, nailing strips....and a dumpster.....and same dumpster and a small truck full of floor tiles......ugh!
What did I get myself into........this time baaaaby?
Cheers all!
Steve
Picture guide...
Top rail, RH hole was the three leaf clover hole...welded up and hand finished back down, plus paint....
Middle rail is last one out of the bucket. Probably spent more time in there than the others......have only cleaned it with small stainless brush.
Bottom rail was bucketed, AND dipped in Evap-O-Rust for a final treatment. I think this one was pretty bad, as it didn't clean up as well as the others. But it is WAY better than when I started!
PANTERA INTERNATIONAL
A DE TOMASO CAR CLUB
Presents the De Tomaso Forums
The On-Line Meeting Place for De Tomaso Owners and Enthusiasts From Around the World
Clicking on the banner will take you to the sponsor's website.


