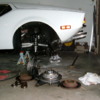
Here's the rear uprights back from the machinist. The new bearings have been installed and the new rotors and hats replace the old. The old bearings and rotors are seen. The old rotors weigh 2.0 lbs. more than the new rotors. This is spinning mass that's new deleted. That'll make the brakes function just that much better. It's more than just 8 lbs. removed from the car's weight, is spinning inertia, or less of it.
You also can see PI Motorsports rear Euro bumpers and Euro rear tailight lenses.
Also noticable is the complete exhaust, metallic ceramic coated, which doesn't just look cleaner and prevent corrosion, but the main function is to keep the exhaust heat from transferring to the exhaust system metal surfaces. The primary function is to shoot the heat out the tips, into atmosphere, not build up in the metal.
The machinist was tutoring me about bearing preload. The axle nut preloads the bearings with the factory spacer between the inner and outer bearins. The specs for the axle nut torque is minimum 300 ft/lb. Different people will provide different rear axle nut torque spec recommendations. I don't want the axle nut loose enough to spin off, but I don't want the axle nut so tight it binds the bearings at all. These are measurements in 1/000's of an inch, and pressure, to pull the bearings in and seat them on the upright's inner notches. So, I'm setting the torque wrench for 360 ft/lb. That's 20% tighter than the minimum 300 ft/lb., but less than the 400 ft/lb spec I've heard. Just my best guess for this decision.
The torque wrench is adjusted by spinning the grip clockwise to increase torque or counter cloockwise to reduce torque. I'm fascinated by this, so I may take this torque wrench apart later to see just how it works....
The new calipers have four pistons and the old ones have one piston. The new brake pads have twice as much surface area. What this means, like for this week end, is I want to try and avoid running the engine to get vacuum assist to the brake booster. So, I'm going to get my buddy to start the engine, get the vacuum up, smash the brakes really hard, and cut the engine. Then with the torque wrench aleady set on the axle nuts, do the work on the torque down. The new billet axle nut socket fits really tight on the new axle nuts, so this is good to help keep the socket from slipping off the nut with a lot of pressure on it. Don't want to lose a fingernail or smash my knucles or fall down....
The new rotors are zinc coated to prevent rust, and probably have some machine oil on them form the machine work. I took a towel and wiped this stuff off the rotor braking surfaces. Next, I'm applying lacquer thinner to a clean towel and wiping the rotor braking surfaces again, followed by a clean toweling off with alcohol. You don't want to use water or soap, this will contaminate the brake pad material.
All these details add up to performance, and that's why you're interested and reading this stuff. That's the fun stuff, and I hope to get this 'monster' on the road, this weekend. It's slam time. I'm going to crash this project, full focus and concentration, until it's finished. Not hurrying thru the details, but not messing around either.
My buddy is a master mechanic, so I have to give Mike credit here. Thank's Mike, my voice was starting to crack a little, then when you called, it gave me confidence. Then I started calculating all the details out, and when you get here, I'll be ready with the parts pre-assembled, cleaned lubed, and the garage floor is now swept up like a Formula One garage. We're ready!
Hope nothing goes wrong. Glad to have a little time left in case something does go wrong. Really glad to find the bearing problem and get that fixed, at a very convenient time in the project.
PANTERA INTERNATIONAL
A DE TOMASO CAR CLUB
Presents the De Tomaso Forums
The On-Line Meeting Place for De Tomaso Owners and Enthusiasts From Around the World
Clicking on the banner will take you to the sponsor's website.


