

Here is a classic example of why doing work on classic cars takes so darned much time!
(I haven't been working on the car much lately...have been multi-tasking it with a project in the backyard that includes new sprinkers getting dug in, and now I'm expanding our back patio area, so am leveling dirt, moving dirt, gonna shovel in sand, and lay in a few hundred square feet of stained pavers....have been busy and have a bunch to go!) ( I did order new motor mounts...! They are on their way!)
Out back, on the left and right sides of the engine, there are two "heat shields" (asbestos sorta stuff....) that are meant to keep heat off of the stuff in the LH luggage area, and on the other side, the gas tank.
Well, the one on my LH side is toast, and I have been meaning to replace it with something more modern with less or no asbestos content.
Since I have the engine out, this should be an easy job. I figured about an hour per side.... I ordered some "prime candidates" for materials, and a day or two back decided to jump in and pull the shield off and see how it is constructed and what I can do to rebuild it!
(There are before shots above somewhere....)
Here is a shot of the insulation pad and the heat shield removed from the wall of the engine compartment. Now keep in mind that I've already welded a canvas Eddie Bower bag to the inside carpet of the LH luggage area a few years back, so I know there are issues.....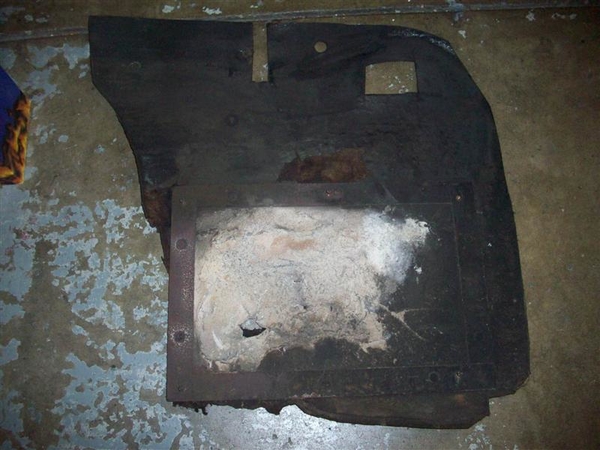
Hole is not really obvious.
Removing the small 11ish x 14"ish asbestos pad reveals this!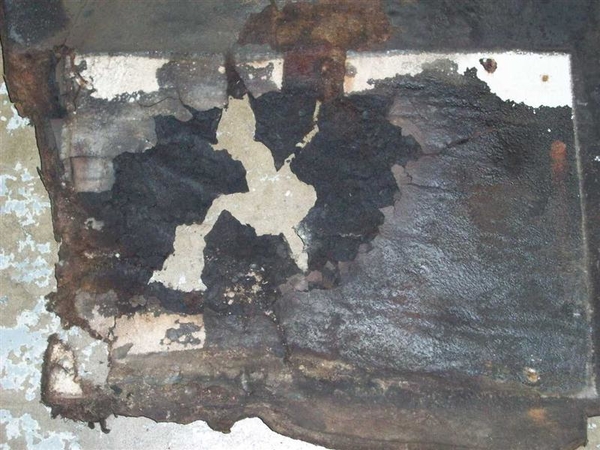
Had not figured on this piece being so destroyed!!! (This is the same crap that DeT glued to the bottom of the gas tank and the insides of the doors and rear quarter areas. REMOVE THIS STUFF AT YOUR EARLIEST CONVENIENCE!!! It does nothing but trap moisture against the steel....and we know what that results in? Ferrous Oxide.....ugh!
Here is the other side of the heatshield, note the thru hole...this is the side that sits against the inner pad.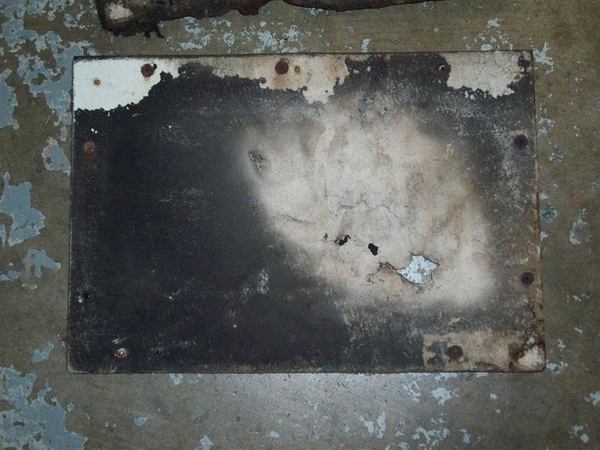
Here is what awaited me underneath the padding..... ya think those headers got warm? ![]()
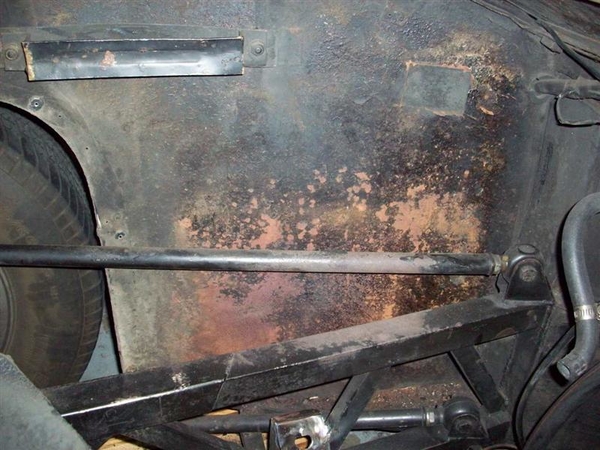
I had not planned on refinishing the engine compartment walls.....!!! Not sure how much I want to do! It will NEVER end.....
Lastly here are the two products that I am considering. Both were procured from Aircraft Spruce. The stuff on the left "Fiberfrax" is what I want to use to recreate the asbestos stuff in the small shields. I was thinking of backing it up with a small piece of the stuff on the RH side "Cool It" that would be hidden from view.... It is two silver metallic sorta layers with a thin sandwich of yellow fiberglass sorta looking insulation in the middle.
I'm not real wild about using the Cool It for the engine compartment wall....not sure about the silver look.... Will see what some others have done and how they came out! Feedback is good folks..hint hint....
So here is how my "hour long job" (per side) has turned into a saga.... Now I need to source some flat head rivets, cuz the asbestos was held in place with rivets.... I need to source, pattern, and install padding before the shield, AND I need to clean, sand, and repaint the inner fender well before I can do either of the previous!!!! Double UGH!
I sure am glad this is one damned fine looking automobile!!!
Ciao!
Steve


