

Wow! It's been so long since my last update I almost forgot my password!!! OK, it's been just under 4 months since I last posted. It's been 3 months and aprox 3 weeks since I've worked on the car! Since my next task was stripping and painting, I've had to wait for pleasant weather in order to have the garage door open...and to muster up the will power to get back out there! So tough to do when it's 50ish degrees out....We hit high 60's this week, low 70's....spring is here! I'm back in the garage! I kept busy doing ebay sales and some tilt-colums...they only need parts cleaner and no paint....so I could convince myself to do them....but freezin my butt off not to mention my fingers, and trying to will paint stripper to work....nope. Not going there!!!
OK, that is a lie. I must have found some time to work on it, because I made up the dummy shock struts! Used some aluminum angle stock I got from Home Depot. Figured I could re-use it to make a fan shroud support at some time in the future... when I get ready to build a fan shroud for a new set of electric fans....but that's a different post...
So, shocks are out, struts are in, removed all the cross member bits so I could get at things with paint stripper, sanding tools, and whatever else comes up!
Here is what I started with on Tuesday this week: (5 pics of stuff so I can figure out where to put it all back to...)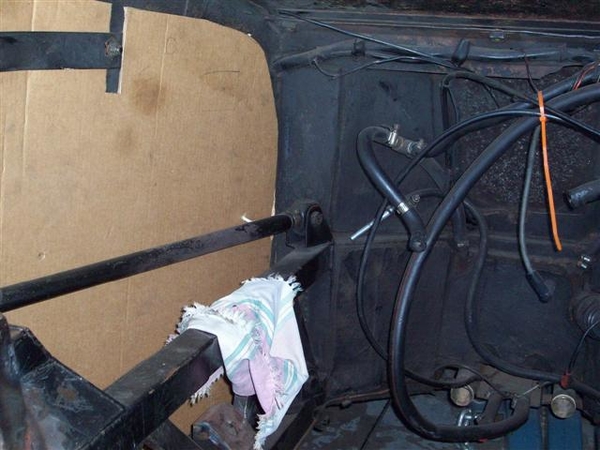
I have not yet pulled off the sound/heat insulation from any of the forward areas of the bulkhead, nor the RH side. Only from the left side where you can see the cardboard template I'll use when I work up the new insulation material...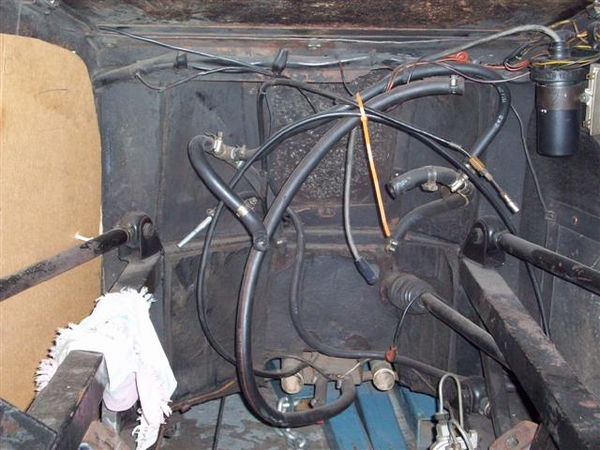
I'll be leaving the ballast resistor out. No need for it with the DuraSpark II module and coil. Good shot of the Bosch voltage regulator.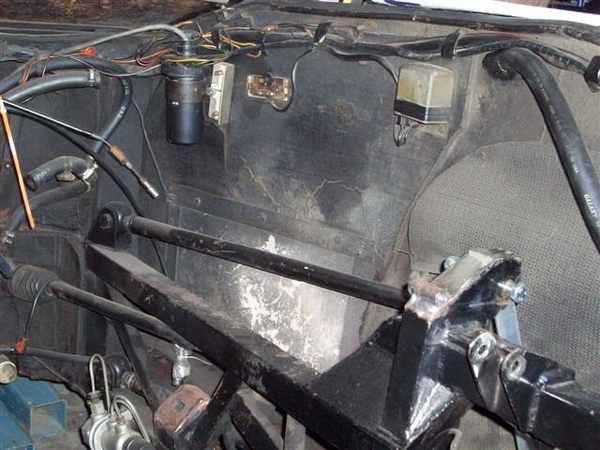
Here's where I mounted the DuraSpark module. Gotta watch out for the jack mount on the other side here!!! The rubber/canvas wheel well shield is not stock. PO had these build and installed way back during it's rebuild where it got the Boss 302 engine. Not sure how well they work......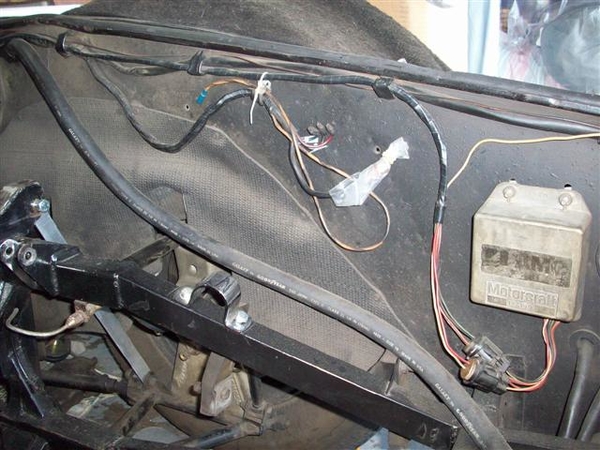
Good shot of the original style starter solenoid. This type with the "bump" button on the top are still available! The solenoid to the right, is there to supply a full +12V to the DuraSpark module during cranking. Once it stops cranking it works off of +12V from the run circuit of the ignition. This relay was from a mid 70's Ford Galaxie or big Merc, "horn relay" is the official name, so should be able to handle the current....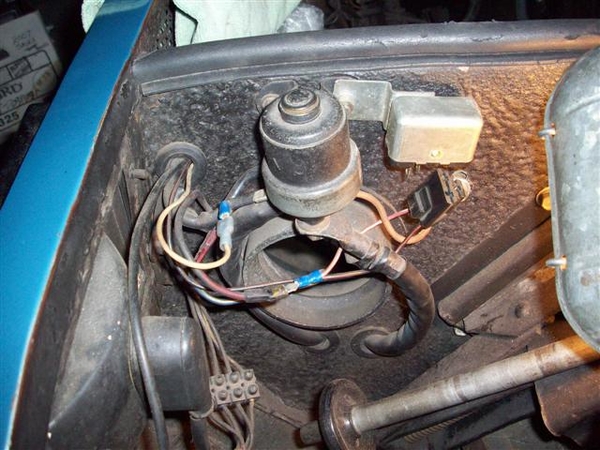
The wire holder and the bracket for the LUCAS washer bottle are held in place with aluminum pop rivets, so I hit them with the drill and popped these parts off for refinishing, and to make it easier to clean the panel and get at stuff in general!
A few minutes with a long scraper/putty knife and this is what it looked like! I also pulled out the wiring on the RH side, marked the wires with tape labels, and secured it neatly with 4" pieces of two sided 1" velcro strips. Now I can move it around nicely to work around it. The four 4-link bars are removed and the chassis is actually sitting on jack stands. I will be dropping the upper and lower a-arms so that I can degrease the mounting areas, clean, and repaint. Going with a silver to brighten things up in the engine compartment! A 1" thick piece of closed cell foam on the crossmember works wonders to sit on when cleaning!!!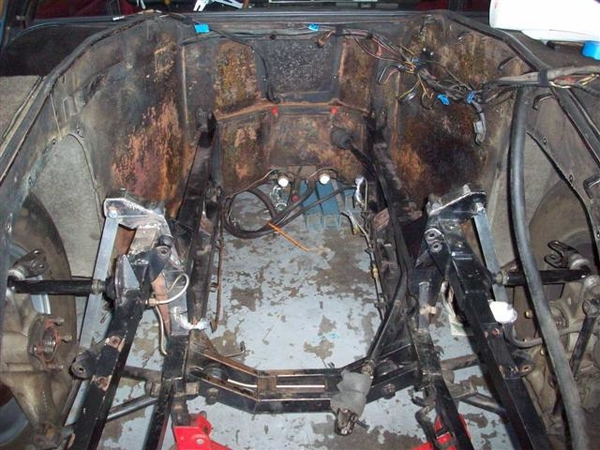
I dug out an old can of aircraft paint stripper and went to town on the LH panel area. This is where I closed it down on Tuesday night. Oops! Didn't take a picture of where I stopped on Tues! I only got the forward LH side, up to where it turns to the right. I got to this point after another night with a small paint brush, can of stripper, a couple of putty knives, a plastic pickup tub, and a roll of towels and a box of plastic gloves! Oh boy!!!
Here is where I stopped late last nite: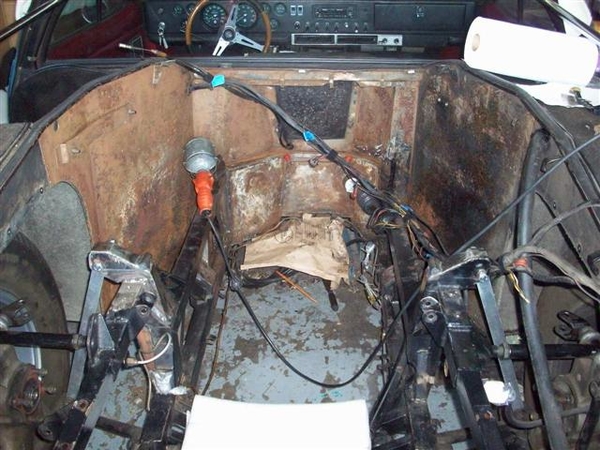
By now I'm figuring I have 10 weeks before Reno. Actually 11, but I have a trade show and a weekend away scheduled with the wife, and I'll need a break from this thing any way, end of April.... Progress will be good as long as I can get the painting and refinishing of the engine compartment done. Stuff like upper and lower a-arms go on the "optional list, as they can be done just about any time easily. The 4 link rods will be done now....they are not so easy once the engine is back in....unless you have a car lift....go ahead, make me jealous!
My plan is to take Fridays of from now until June. I have the time, and the boss is happier if I take it that way actually....his pucker factor goes way up when I'm gone for too long...... ![]()
![]()
![]()
Another night spent with stripper and tools...and here is where I left off a few minutes ago. Oh, I also found that a small brass and or stainless "parts brush" really cam in handy in all of the spot welded areas, cracks, seams, and even the flat panels...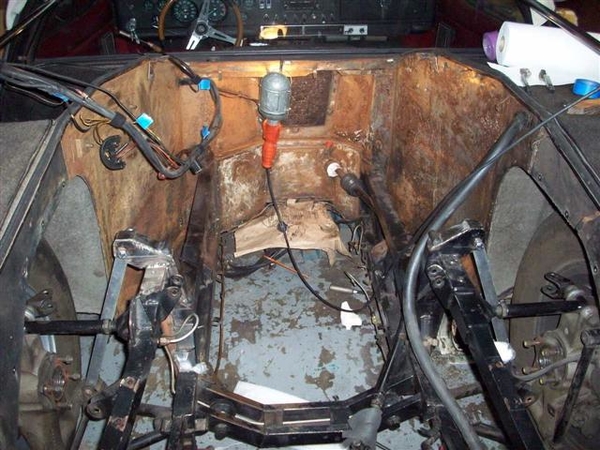
What I found under the black paint on the panels was some sort of white-ish filler primer sort of stuff. Sometimes it comes off easily, others, not so good. There is also adhesive glue from the insulation still on the walls....and surface rust....then there are the spots where it seems "super bonded" or burnt on! Could be the stripper not working properly...it's old.....
OK, I am out of stripper! Used up my stock of brass brushes, half of the stainless one I started with, and have one new one in reserve. Time to hit Home Depot...in the morning.
You can see that I stopped over the wheel well opening, where the rear panels meet the front panels. The rear sections are pretty flat, so I hope will go rather quickly. I hope.... Will need to be careful with the stripper around the rear valance area, so may take out the AC condensor to gain more access....it isn't charged...so....we'll see!
I was very pleased to see nice clean steel under most of the metal. It looks orange now, like rust, but it is surface rust that has formed from the stripper absorbing moisture in the air....or something like that. I will clean this off some more with sandpaper and then protect with something like Galvaprep and follow with Prepsol as a cleaner just before caulking the seams/corners, and paint.
Some of the paint on the chassis frame is very resistant to the stripper, and other sections, once hit with stripper, slides right off.... We'll see what happens with a new can....
I also may have baked this paint on via the header heat....but I repainted most of the chassis back when I was putting it back together last time. I'm pretty sure it was just rattle can Rustoleum, semi gloss black, maybe high temp..... It held up well, except the areas closest to the headers and where I ruptured a brake line and hosed it down with Dot4 fluid....
So, the bad news is that I will be spending at least 2 days more on cleaning down the chassis to get it ready to paint. The good news is that I'll only be spending about 2 more days cleaning and prepping for paint!!!! I did buy a new DA sander for this job...may have to bust it out and see what it does! I have some minor metal displacement from spotwelds that I would like to "dull" down. Small points of sharp steel formed and I hate cutting myself on them when I'm working on stuff..... I'm not going to go crazy and fill spot weld divots, only remove the sharp tips and points of displaced metal.
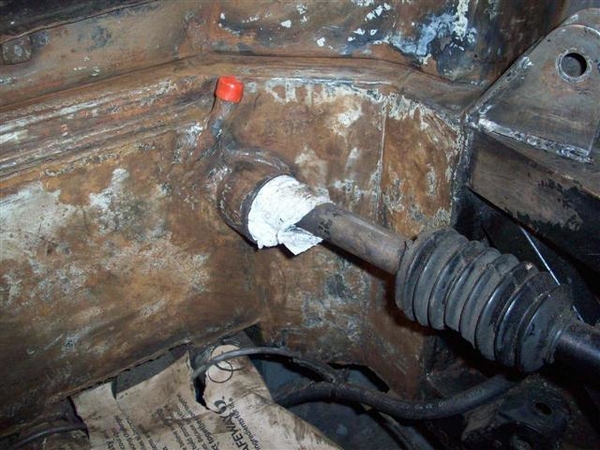
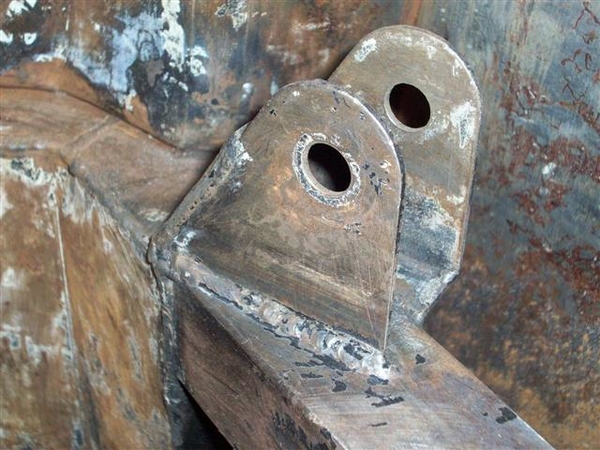
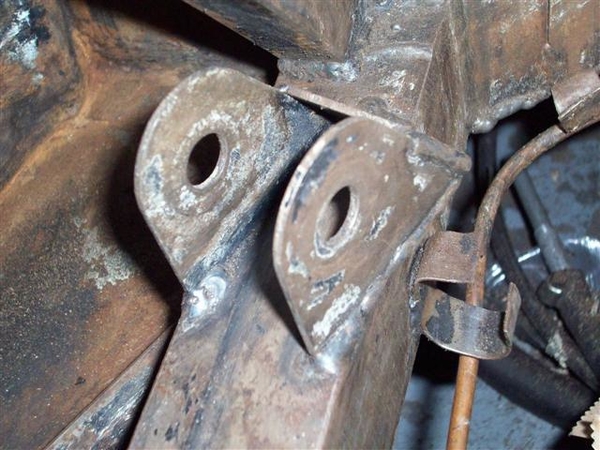
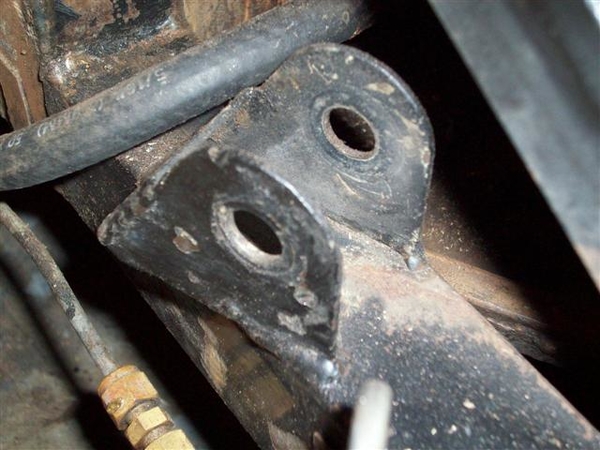
Here are some shots of my bulkhead juntions, where sheet metal body meets bulkhead, and where rear frame section meets bulkhead.
From Left to Right: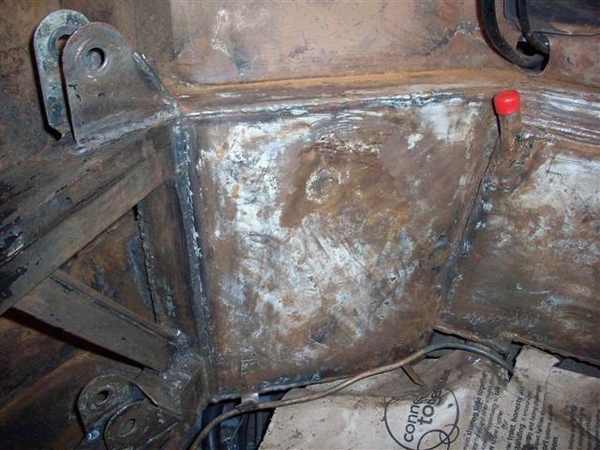
Here is the center section. Some guys have a big opening here with two large round tubes visible....not here!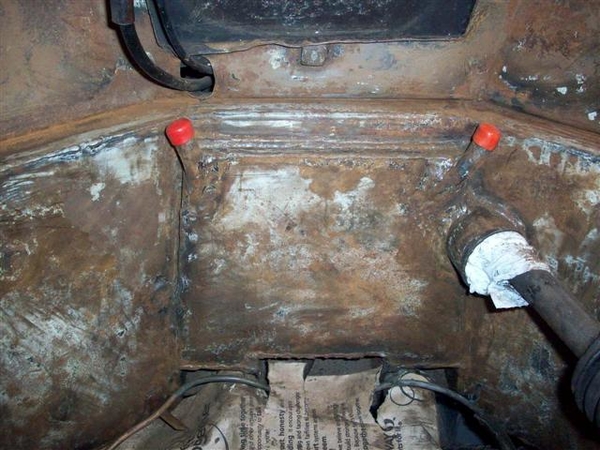
Here are the 4-link attachment points. I have heard guys tell of these cracking too, so if you are in here, check it out, again L to R top, then L to R bottom.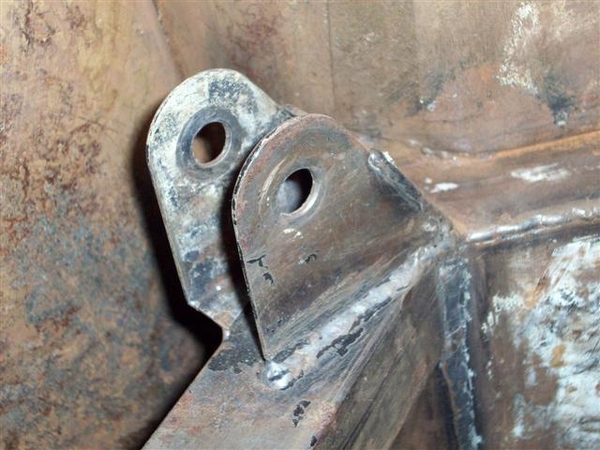
I didn't get into this area with the stripper all that well. Something to do tomorrow.... ![]()
I'm glad to be back on this!
Steve


