

OK, a couple things about lists of "things to do"......they never quite get all finished, because you're always finding more things to put on the list.....to finish...!
Friday was a very nice day here, so wrapped up a lot of small stuff! Primed and painted up the rear strut arms. I used Garth's trick of aluminum foil to cover the booties! It worked fantastic! Precision taped the large lock nuts, and then the tin foil worked to cover the rest! No primer or paint where it shouldn't be!
Here's a shot of the clothesline in play...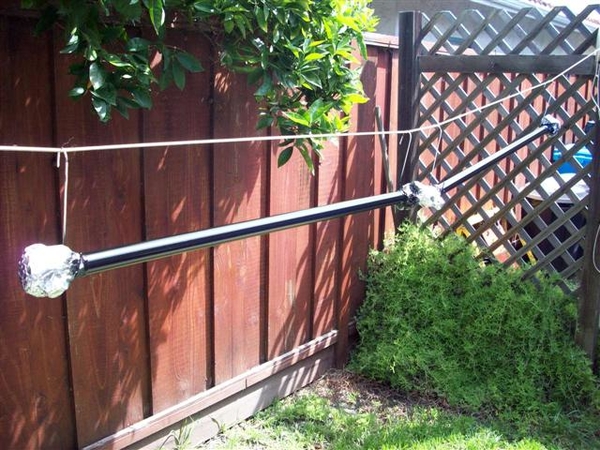
I let these "age" over night after baking in the sun, before unwrapping them.
Friday before painting started, I cut and did a final fit on the firewall insulation material, and once the temps warmed up a bit, installed it all!
Installed the heat shields, wiring, coil, engine compartment lamp, voltage regulator.
Looked like this before I started on Saturday morning.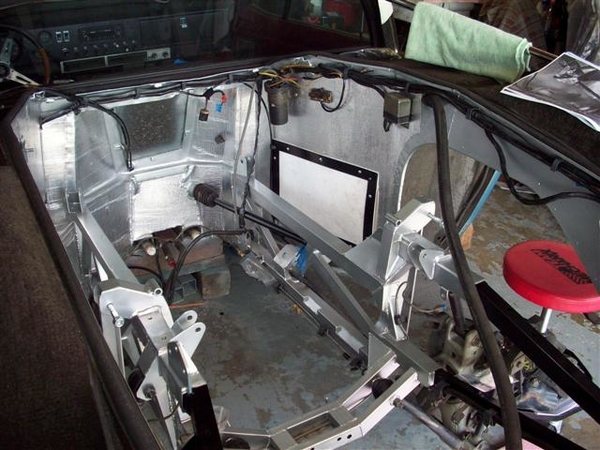
ONE thing I am EXTREMELY grateful for during these activities, was the digital camera. I went back in my archives to over a year ago, where I had stored pictures of the "before" I started repairs/stripping, fresh after the engine was pulled. I took fairly high resolution pictures, and when printed on standard size paper, I was able to see all sorts of details that aided me in reassembly!!!! If I couldn't see it clearly on a picture, I could always go back to the computer and blow it up 300%...or so it seemed, to check the little things that "got away" from this rusty steel trap of a brain!
Saturday, unwrapped the ends of the strut rods, disassembled them a tad, squirted a few shots of grease in each rubber bootie, and replaced three booties as they were cracked or damaged. (Perhaps header heat didn't help....who knows....)
Dug out the shocks and set them in place. Connected up brake lines to the new caliper hoses, worked on fitting the clutch slave line back in place. Copper tubing had gotten slightly out of shape, but it was convinced to cooperate!
After installing the heat shields on the front firewall surfaces I find out now that the insulation is so much thinner than the original stuff, that I don't need such long screws.....they stuck thru the carpeting!!! And also I didn't like the idea of that going on next to the gas tank on the RH side, so today, I picked up some shorter stainless #6 sheet metal screws and then cut the last 1/16" or 1/8" off of them to "dull them up!" Came out nice!
I also installed the speedo cable and brake vacuum tube on the LH frame rail and secured it into place along with the clutch line.
Rebuilt the heater hose "tree" with pieces of the new Goodyear blue Hi-Miler where I could use it, and some other bits and pieces as needed. 1/2" on the LH side including connection to intake, and 5/8" where it connects to the water pump...although I guess that could technically get swapped to a 1/2" fitting in the water pump....we'll see.....it's got new 5/8" for now!
When installing the new motor mounts I sourced out, I ran into a small problem with the LH line where it connects to the brake amplifier, mounted on the RH inner frame rail (NOT ALL CARS GOT THESE!). Piece of new hard line I formed and ran was too tall and hit the aluminum engine bracket! When the old modified frame mount was there, it cleared. Since I shortened it back to stock....problem #1!
Can't put the wheels back on, because I need to bleed the brakes....and I can't bleed the brakes...because...
I had used a Swagelok 3/16" brass union to splice the front bubble flare piece of tubing, to a standard flare piece of tubing when I replaced the hard line to the left caliper a few years back. It had a rub through from contact with the axle at some point in it's life....I got to experience the failure one year after the big show in Vegas...luckily while on a trip home from work!
The Swagelok fitting turns out to be one time use thing when it comes to the ferrules. I successfully reformed the tubing for clearance, but needed a new ferrule to install as now the old tubing was too long.... I reduced a "loop" and now had extra length....
Well, I used to have an extra union, as I bought two....but for the life of me, I couldn't find it! (I hope whoever I gave it to used it well!!!)Looked through all of my Goose parts boxes, the traveling tool box, by garage box, small parts bins....nope.
So, about 5 minutes scrounging around on Ebay, I found a new stainless steel version for $5, and a brass "T" for another $4 which I will gut for parts so I can re-use the old union as a spare in the tool box! Those should be here by Tuesday or so.
Today, I added some tie-wraps in critical places (used them danged pictures again!) and washed up the wheels and tires. Cleaned up the coolant overflow tank a bit, gently knocked it on the workbench to loosen up some scaly bits stuck to the bottom....
I tried to find some 1/2" PCV line hose, or vacuum hose, but struck out at the local parts houses... will keep looking. I used a piece of heater hose from the brake vacuum tube to a piece of hard line which connected to a fitting on the intake, but noticed that it was very collapsed. If it collapsed under braking, that could be bad....so I need to find a length of reinforced rubber line that will not collapse so easily.... Hard line to the fitting on the intake may all change too...since this intake is not as tall as the Boss intake was......so will keep this on the list for engine stuff!
Didn't yet install the last piece of shifter rod. Helped the wife re-pot some plants....least I could do!!! I'll wrap this piece in shop towels to protect the paint....be careful with the hammer this time!!!!
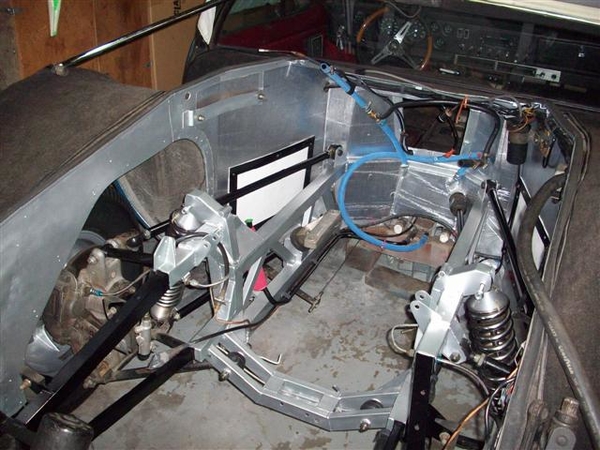
So, without further delay, here is my new engine compartment, "almost" ready to receive an engine!
First, a (slightly fuzzy) reminder of the old, from up in page2:
And now, TAH DAH!!!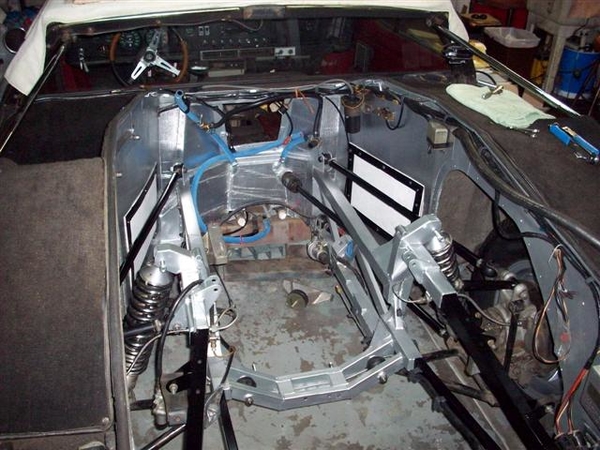
What to do next:
Repair brake line
Fill and bleed rear brakes (pray for no leaks!!!)
Install RH motor mount
Install rear wheels
Install rear shifter rod piece
SET IT BACK ON THE GROUND!!!!
Start an "engine" list!!!
I will install the drive axles once I put in new seals and grease, when I get closer to putting the trans in...no sense banging up all the paint with spinning axles....well, they will not be spinning at a high rate of revolutions...but you get the idea!
Parking brake cable will also get tied into the whole deal once I get the new stainless (Mangusta International) mufflers fitted up. Always install these buggers with the full weight on the rear wheels! They fit easily with the wheels hanging in the air....it's when you put them into the "at rest" position that the problems start happening!
Ciao!
Steve
Attachments
Images (5)


