

Osofast,
I checked out those pulleys and at 5lbs for a 6" pulley, that is one lot of mass! I didn't see a V-belt on that page, but didn't get too far either....thanks for the idea though!
I've checked around a bit and it seems that machining something out of steel or T6061 aluminum wouldn't be all that difficult, just time consuming....
OK, back to the Goose chase!!!
Progress today in the spinterogino dept. (distributor!)
I needed to change the gear from a standard cast iron gear (marked with orange paint), good for regular flat tappet cams, to a steel gear (marked with NO paint!), compatible with roller cams.... I had previously pulled the gear off using my small press.
Getting the new gear installed wasn't going to be easy... (so what else is new??? ![]()
)
I tried this Sunday:
and this:
But it didn't work. Was still a press fit. Since dinner was ready... ![]()
.... I gave it a rest until I could get back at it today.
I had already guestimated and drilled one hole in my new gear at what I had thought was the proper location, based upon the hole in the gear I removed.. Recommended way to do it is to install new gear and drill a new hole thru gear and shaft and install roll pin... Well, who am I to do it the easy way....?
My guestimation proved off by .050" once I found the spec in the book!
So I pushed the gear off again using a tool that I got in an auction or such...somewhere, probably a Ford dealership...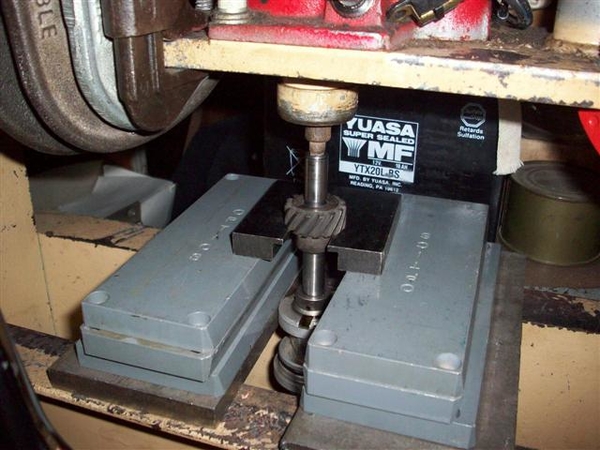
Note that this is the recommended way to remove the gear. Note the little 1/4" stub (in this case one of those little sockets from a multi-bit driver set that I found somewhere....) sticking in the end of the distributor to press against. You can also use a piece of an old distributor drive shaft to either press against or hammer against, but you need to support the gear by the body of the gear and not by the teeth!
Here is the tool and gear: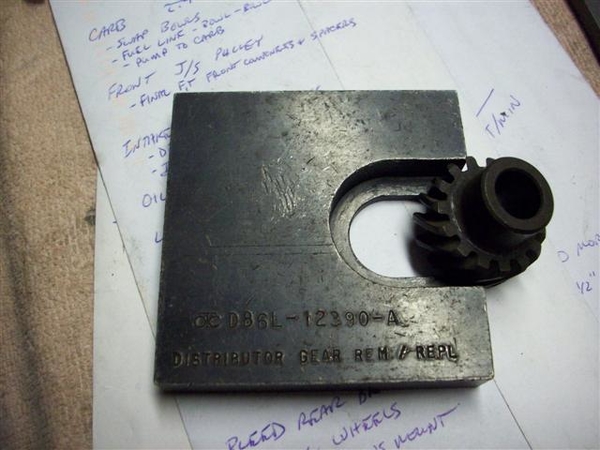
The proper measurement for the distributor is .024" between the little (upper) collar and the body, seen to the left of the gear more "up" on the shaft... Mine was at .025" and I'm not going to redrill a hole for .001"...sorry!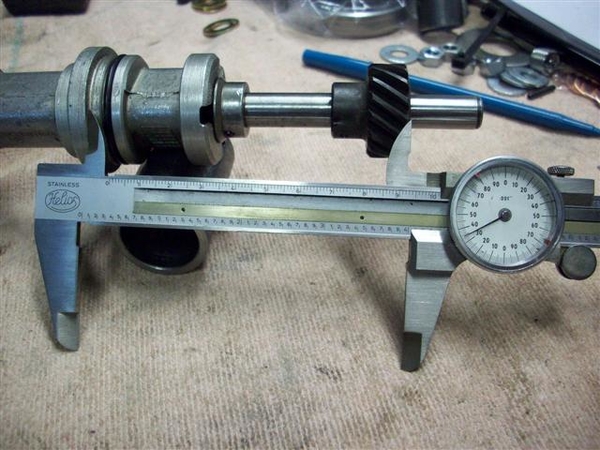
However, the other measurement, from the distributor mounting flange (above the o-ring) to the bottom of the gear, is supposed to be 4.031-4.038" to align properly with the cam gear. I was off by .050" so that was not insignificant...
After polishing the shaft a bit, putting some oil on it, and pushing the gear on in a new spot, it went on nice and easy...but easy in terms of putting it on with a press! It took a few ups and downs....pushing it on...too far...pulling it back off a tad, until I settled on 4.035" or darned close to it!
I then drilled the hole in the gear using measurements and marks I had made and came out dead nuts where I wanted to be. Started with a 3/32" bit and once through one side of the gear, and knowing that the hole was lined up, I carefully used the 1/8" bit to drill the starting side, go thru the shaft, and then drill the other side of the gear. It worked for me, your mileage may vary!
Tapped the roll pin back in place! Bottom is done. Now to the topside!
This distributor was originally for a 1979ish Ford. During these years the 302's were very low compression pigs. As a result, the engineers could get away with running HUGE advance numbers. I found the tower in this one allowed 21 or 16 degrees. It was configured to the 21 degree location... When multiplied by 2 to get crank degrees, that comes out to a whopping 42 degrees of spark advance!
In discussions with the local Mustang shop who are familiar with this engine setup and compression ratio, they recommended 34-36 degrees total advance period, which is pretty much in line what I had been using previously with the Boss 302.
In my pile of parts, I found another DuraSpark tower that had slots of 13/18. I went with the 13, as 13x2=26, plus 8-10 degrees of initial timing would net me 34-36 degrees total advance. If I feel I could use more, I can simply advance the timing up to 12-16 degrees. Keep in mind that the DuraSpark II module has a retard feature during cranking that moves the timing curve back by 10 degrees to make starting easier! I like it!
Here is a shot of the new (old) tower installed and the one I took out is to the right.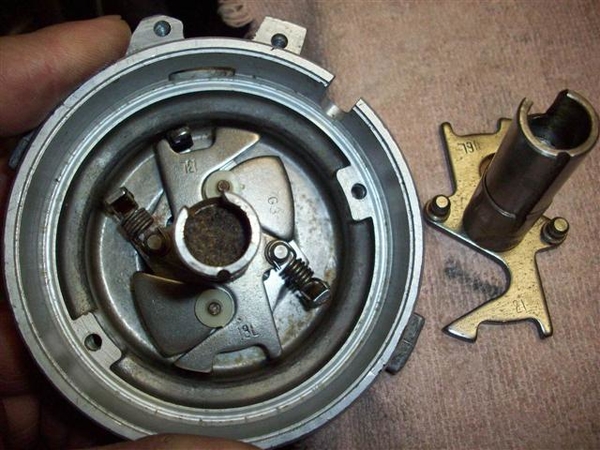
The actual curve would need to be set up on a machine, but from the feel of the spring settings, this should be close! All in (full advance) by 2000-2500 rpm's! A quick check with the timing light will confirm or deny this...
I put all the pickup and stator parts back in the top of the distributor. Checked the pickup with an ohm-meter and found 600ohms. Spec is 400-800ohms for a good pickup module! Cool!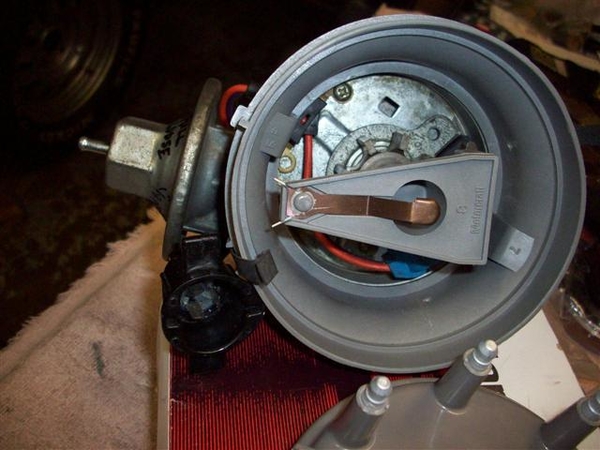
Backed the vacuume advance unit to "loose" but I do not plan on connecting it....at this time.
New rotor, cap adapter, and cap, and we are ready to roll! New wires are still in the box waiting.....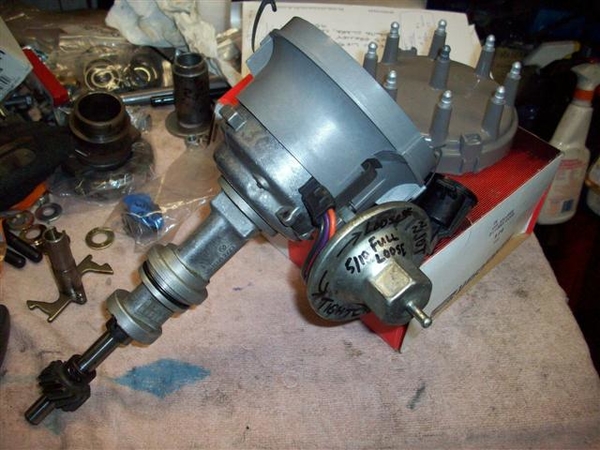
Putzed around with the new bottoming tap I received and finished up the one hole in the rocker arm mounts that I was installing a heli-coil in. This allowed the thread insert to wind further into the hole without drilling a super deep hole into the head.
Fitted one guide plate a little better to the stud and loosely installed the rest of the studs and guide plates.
Adjustment of rockers and guide plates is next, but not tonight!
Ciao!
Steve


