

July 5th....back to the parts store to check out belts....that only took two trips....second belt for the jackshaft pulley was still too small...so called and different sales clerk found me one in between...but this now the smallest increment available....no smaller ones or larger by just a smidge! (OK, at least in their system....)
Ended up with a Gates 13A1230 #9485 (13mm wide, A-type groove, and 1230mm long)
It fits OK, but the adjuster is out towards it's edge. The 13A1220 just wouldn't go on....but then I didn't get postal on it either....! It will work.
With no more to actually do to the intake, jackshaft, and upper end of the heads and block, it was time to install the intake! Cleaned up the gasket surfaces of finger prints and any dusty bits, applied cork end seals to block (double sided tape on them!) set the special Felpro gaskets (for the SVO heads) down and applied sealer (the Right Stuff) in the corners.... Lubed up all of the fasteners with anti-sieze and went to town on the intake!
First thing that pops up, is the fact that you cannot, no how, no way, with the tools that I have at hand, and that's a pile of them, can I get to the center two intake bolts to torque them down!!! The jackshaft bracket just gets in the way of making this a reality!! So I tightened them down a bit without the jackshaft bracket in place, then put the bracket on, tightened the rest down to spec, tried to get a wrench in to torque them some more...eventually removed one rocker arm to get some swing on the wrench....but it was faster to remove the jackshaft support, torque the middle two bolts down, then put the bracket BACK on and torque everything back down again........ I finally got it to the point where the gaskets were compressed, and the tightness of the bolts were at spec....what I ball buster mentally! "Is it gonna leak now?" Of course not.....
With the top end on, it was time for the oil pan. No more opportunities to pull stuff out of the engine if it gets dropped inside! I am using one of the whippy dippy one piece silicon pan gaskets that another club member gave me, as his project went from a 302 to a 351...... Thank-you very much, it fit fantastic! A little of the sealer in the corners, set it in place, and where the hell are the pan bolts???? Found a new set....oh crap, only 4 bolts fit! They're for an FE Ford.....back to the bolt buckets/boxes.....found a set of stock ones...... Installed them...but short one small one!!! Back to the box of "Ford" bolts....problem solved...pan is good-n-tight! I really like the one piece thing, being silicon, they installed little shims around the bolt holes, so that you cannot over tighten the gasket and squish it out! We'll see how she holds up after some miles!!!!
Installed the new dipstick tube, and for grins, dropped in the distributor. Looking like an engine finally! (Distributor will need to come back out for priming the oiling system. ) Also installed various fittings for water/heater with sealer, vacuum fittings...getting the small things out of the way!
Time to start dealing with carb fitment. Have a couple of slightly used Holley carbs, a 570 Street Avenger, which I believe will be fine, but I believe it will leave some performance on the table...so may opt for another 650 that I have set aside. The 570 was jetted very small on the primaries with #54 in them and a pair of 65's out back.....I bumped that up to a 65 primary and 72 secondary. (Ford ran a 66/71 combo in the 1968 GT350, which was a mile motor, so we should be close!) It should not run lean. 8.5 power valve....which may need to go down in value if the cam turns out to not have good idle vacuum. Used re-usable carb gaskets to make that task easier.......should I need it.
The 650 turned out to be jetted much bigger, at a 67/73, so would have worked ...but just a tad rich perhaps......all would depend on what the larger venturis permit in terms of fuel "mixture".
Started bending up fuel line for the pump to the top of the engine....but want to see if a local shop can do "double flare" joints in tubing... if yes, then easy cheesy! If not, then it's grunt and groan with the hand flaring tool....ugh!
Here is a shot showing the fuel line, as yet untrimmed to merge with whatever I make to drop down out of the carb....I should have backed off a bit....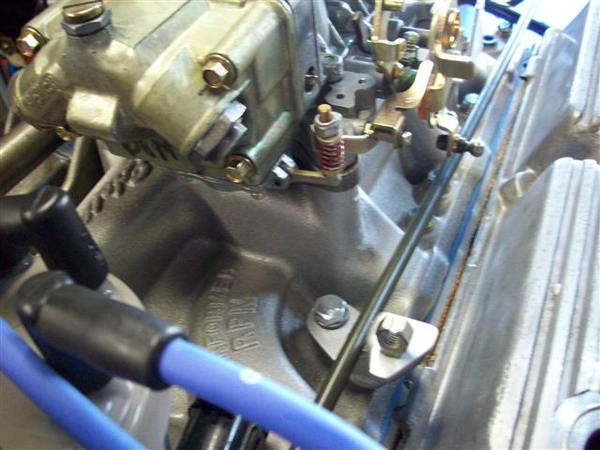
Tuesday night was carb puttering...ordered carb fittings for 5/16" line. 3/8" line is just tooooo big for such a little motor....
Last night: header puttering.....two sets of aftermarket header and neither pair fits well. I am guessing that I have two sets of Hall "big bore" Goose headers.
One set (silver in the pic) has doinks on the front most tube where it looks like the top bar of the LH suspension hit it...second tube may have a mark too....that cannot be good. At least you can get all the bolts in! I may chop out a section of tubing and re-route it ever so slightly.....if I can find some tubing.....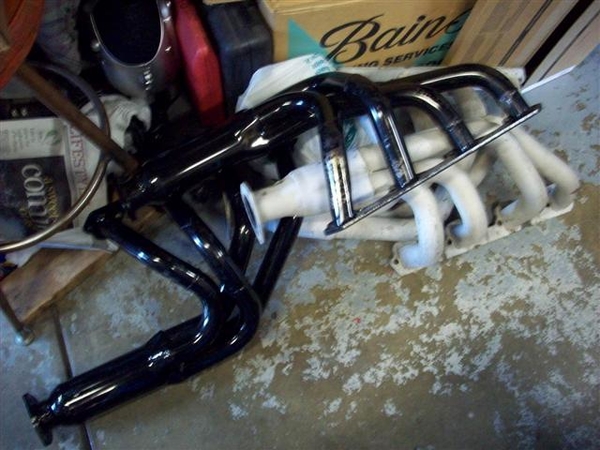
The second set, black in the picture, turned up with one having been installed and actually run, and the other was a virgin....never seen a bolt or carbon trace in it's life yet..... I can see why! There is NO way in hell that you could get a header bolt, or nut if using studs, to fit given the way that the tubing was welded in place.....not gonna happen!
Idea is to see if both headers fit to the muffler at the same point in space. I will then send the best fitting set off to get either Jet-Hot coated or alumi-coated....one is mo' better...gotta look it up.... then install the other set to drive around with until the headers come back from the coater!
Picture isn't too hot, but you can get an idea of the angle that it was coming off of the flange.....
After spending a couple of hours on the pair, I got them to the point that I can get a 1" header bolt in without too much difficulty, but more importantly, I can get a wrench on the bolt heads now!!!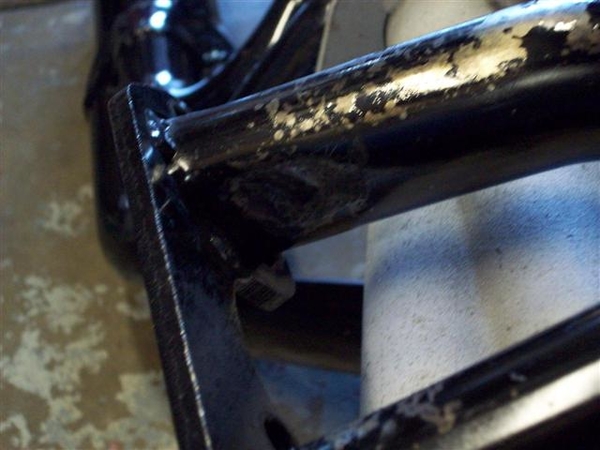
One side had at least 3 spots that needed malletizing, the other at least two....they were just a horrible job done.....!
Fast forward to tonight, July 8th.
Tonight I put the new bowl fittings in and buttoned up the carb. Checked things out, blew out the passages....
I installed the spark plug wires.....which turned out to be a BREEZE!!! Turns out the spark plug wires are numbered.... well duh! That sure took all of the fun out of it!!!! This is a late model firing order, so it is the same as a 351. 1,3,7,2,6,5,4,8 I do need to drum up some 9mm wire separators/retainers.......
Here is something else I knocked off of the list.....something that few of you probably think of...but after reading a couple of recent posts from guys about problems with the ZF's in their Panteras, AND because it is so stinking simple..... there is no excuse... Lube the pivots on your ZF throwout bearing shaft! A half shot of grease should be plenty, wipe off the excess.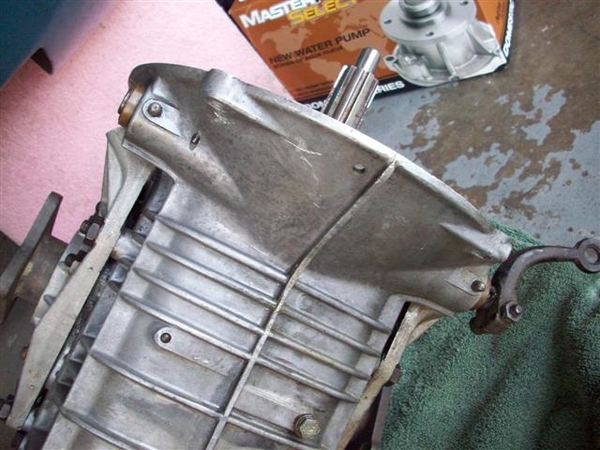
This is the bottom view of the ZF....in a Goose!
A LAST chore for me, is to machine down my T-stat adapter to 1/8" thick from 3/8". Turns out that the 90 degree heater bypass hose gets too close to one of the lock nuts on the jackshaft bracket where it attaches to the front idler bracket. Last thing I want is a blown $5 hose because it rubbed through on the $1 nut..... I was just going to put another hose clamp around it....but decided to go the longer road....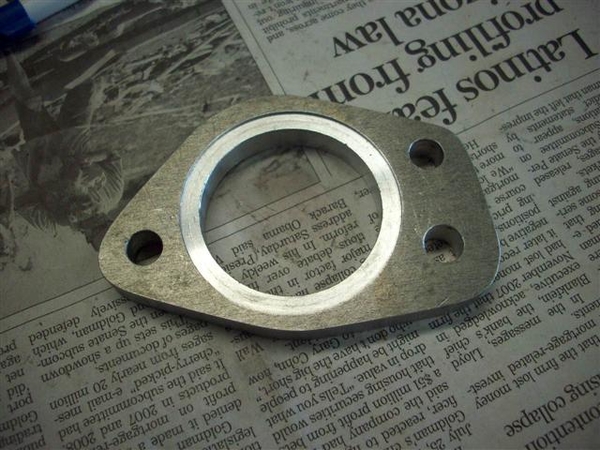
I believe that I can run stock Ford bolts to hold this together, with two gaskets...and the shorter spacer may allow easier wrench/finger access too!
I also had to file down a boss for a timing pickup that the late model replacement timing cover has on it. It appeared toooo close to the lower water pump hose that will be drawing water from the front....radiator. Again, I didn't want anything chafing, so filed the sharp edges off, reduced it's height/length, and polished it up a bit to smooth things......nothing sharp......!
So now my shopping list is FINALLY growing smaller....
30W break-in oil....12 qts should be enough for break-in and first oil change. After that, we move back to Mobil1 either 10-30 or 20-50.....
Fuel line to make "crossover" line to feed rear bowl.
Hose- to connect y-pipe to chassis tube. Still haven't had a chance to try a different store to check it out......
Also, header bolts ( I have a stash, but they are all used, and I don't want to risk buggering up the aluminum threads.....new bolts "should" be clean!) 1-1/4" long studs for valve cover mounting, some nylock-flanged nuts, and perhaps some nylon flat washers (good to 350 degrees!) to seal up the holes in the valve covers when tightened!
Just remembered one more thing! I want to replace the short straight junctions of rubber hose up front to the water tubes, with Gates Green Stripe super duper hose! Need to do that before the engine goes in.... I guess I don't have to...but if I want to fire this thing up....the sooner the better!
Charge the battery....and get a couple of gallons of gas....!!!!
Ciao!
Steve
Attachments
Images (7)


