Thursday:.....I don't remember...that was a long time ago on this project....! ![]()
Friday: Couldn't avoid it....time to install the ZF!!! Something else that is hard to avoid....scratching up the paint trying to get a ZF into the back of a Mangusta! I will need to spend a little time with the teeny brush and some paint...........ugh! It was tough, but then I was the lone ranger on this one...no extra hands or eyeballs...
I didn't take any pictures pulling the ZF out...and couldn't remember exactly how I did it....sheesh this project is taking a long time!!! Again used seat belts....tipped the engine up as far as it would go (remove headers for more clearance!!!!)

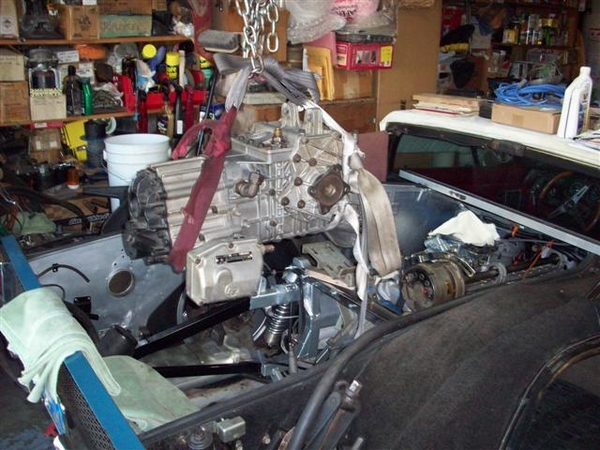
Tried to go in from the side again, like we did with the engine but in the end, going straight in from the rear worked out best.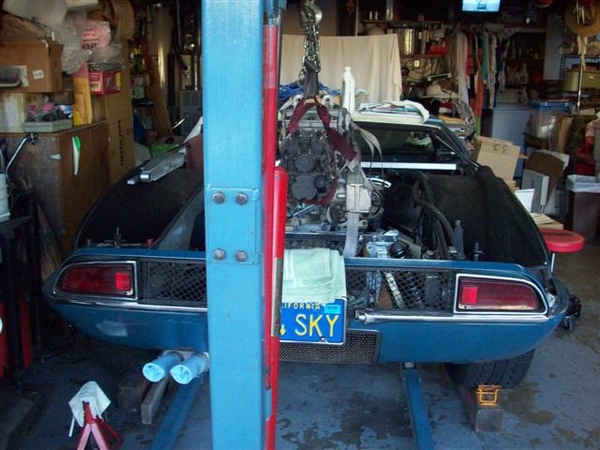
Just a tad nose up allows you to drop it in place, nose facing the left AC mount, and then rotate it clockwise into position while lowering...trying not to get tangled up in the LH steel brake line, or the frame, or the ladder bar, or the AC condensor, or the rear valance...... Setting it close to the lower two mounting holes, HEAVY towel on the crossmember...tip the nose of the input shaft into position and then jack and lift and push....and voila!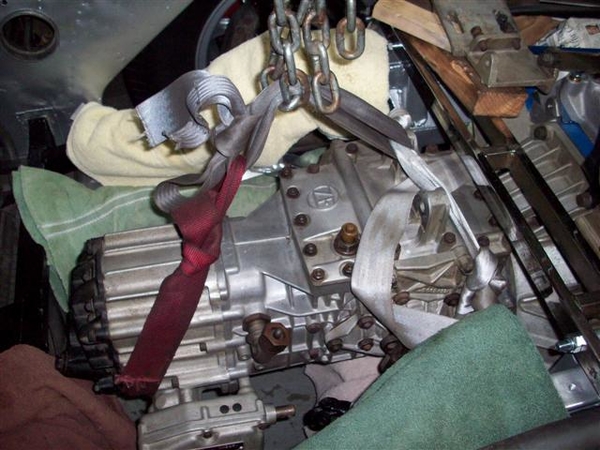
It should be noted that if your clutch disc isn't lined up properly...it will not be half as easy....as this was.....!!! I got real lucky, splines lined up and she slid right into place. Threw on the retaining nuts and dinked around with the rear mount for the rest of the night.
Saturday: worked on rear ZF mount. Needed bolts so took a trip to Orchard Supply for good grade 5 stuff....ended up with some overkill grade 8's for the center two bolts, because they had more "step" on them, and also got some 3" 3/8" bolts to use on the end two mounts, along with my unpatented frame stiffener modification. (Which I forgot to take a picture of...but I think I posted way back in the early pages of this adventure!)
A pair of stainess steel O2 sensor bungs and plugs showed up in the mail! Figured since I was welding...may as well put a pair of these in the tail pipes just after the header flange.... Could aid in tune up and performance tuning on the chassis dyno!
Installed the half-shaft assys. NOTE: with your wheels hanging suspended (frame on jackstands) do not be alarm if all of a sudden your wheels seem to bind at 180 degree intervals.... What is happening, is that your half shaft ends are binding against the ends of the u-joints. One side does it on this car, the other doesn't...go figure..... Once you put the car back down, you will not have this problem....or at least you shouldn't!
Once the half shafts were firmly in place, I installed the clutch slave cylinder, but of course had to take it back out because I couldn't get enough adjustment out of the rod, because some of the threads got buggered up...pulled the rod out, chased the threads with a tap, greased it all up again, and put it all back in place!
Installed the roll pin back into the shifter shaft, and installed the ground strap to the rear of the ZF trans and to the frame.
Started trying to fit hoses and figured out that when I got the last two hoses to try (for connecting the bottom of the Y-pipe to the frame pipe) that I didn't have my glasses along....so ended up with 1.5" hoses instead of 1-3/8"!!!!
Sunday sunday sunday!!! Sorry...drag races are happening up at Sears Point....couldn't resist!
Played with hoses today! I hit the Kragens with my old hoses to return, and my old hoses from the car...my glasses, 6" steel rule, and a tape measure for anything over 6"....
Found a Gates #22185 hose of the proper 1-3/8" diameter! I was able to get two hoses that will do the job...give me a spare to carry in the tool box... for only $8! The hoses I was returning ran $17-20!!!
I cut this apart, with the RH section as you see in the picture being my primary piece, and the LH section as my spare, but I found an errant slice in the area near where the clamp would go, under the label....so I wouldn't want to chance that.....of course once I cut the hose up I ruined my option of returning it...but for $8 I'll order another and be real fine with it! Hang it in the rafters!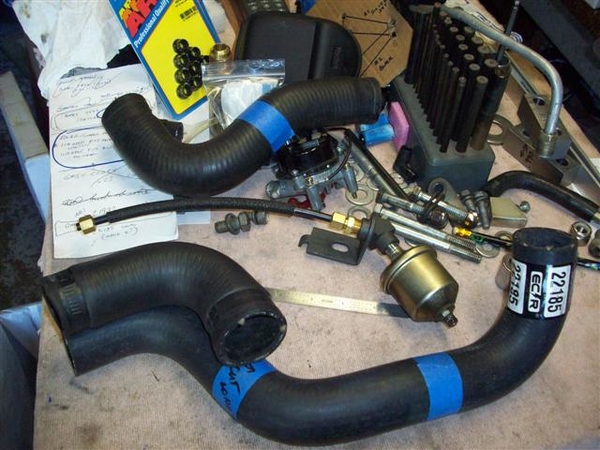
My old lower hose is at the top of the picture....and can also serve as a spare for this too! I'm surprised at the difference in length of new to old...but then EVERYTHING but the actual Y-pipe and the under frame tube is different....gotta keep telling myself this...! Installed the "uncut" piece in the car...one hose to go! (Ordered another potential for the water pump hose.....but the flex hose I have may work in a pinch.....read that as "requires trimming prior to installation.....")
Something else to note in the picture above...my solution for relocating the oil sender unit! This piece is donated from a Boss 302 parts book. Cars with power steering and a Boss 302 needed more room in the area....so this was the solution. Mounted it up with a 5/16" bolt to the front of the head and it came out nicely! Cost me a Ben Franklin to do it....but all I had to do was pick up the phone to National Parts Depot (Mustang parts+++) and it magically appeared at my front step two days later, already put together..... (I tried looking for the fittings to do this....but gave up....I wanted to finish the car, not manufacture everything needed....)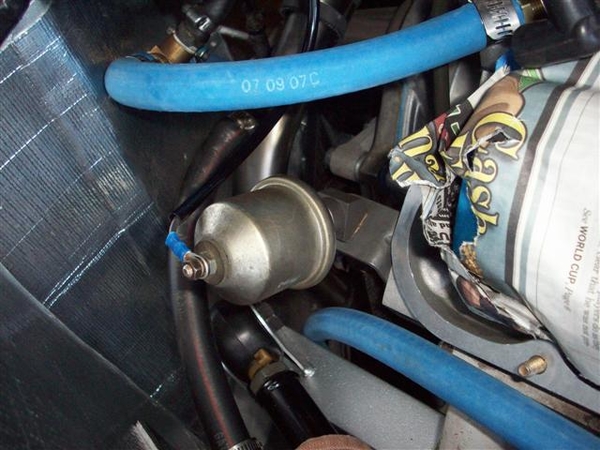
It will clear the valve cover just fine, and everything else...... Nice clean installation that perhaps others of you could use as well!
Here's why....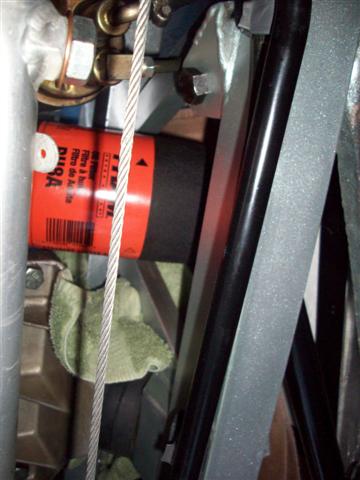
You cannot see the oil line in this picture, but with the fuel pump, the oil sender extension AND the oil filter all in there....it's tight! This car had an oil filter remotely mounted.....so I never had problems previously! But since the threads in the remote adapter weren't threaded deep enough for this engine insert, I have left it out for now and will change filters with the large mess that everyone else has......!!!!!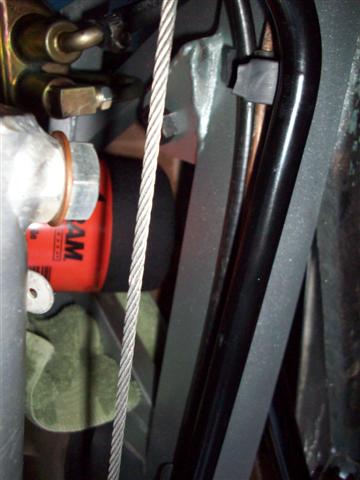
As a result of the remote filter...I never was aware of how tight things are there...including even getting the oil filter up near the engine! The filter would not physically fit between the oil pan and the frame rail, until I unclipped the vacuum hard line from the rail and moved it just out of the way, as you can just make out in the second picture above.
Took care of a few things on my "Don't Forget List"!!! Tightened lower shock bolts, motor mount bolts (to engine), and the top clamp on the vacuum hose to my bent up steel line. Still have a few things to do, but that's OK as long as I have them written down!
Installed some heat shield to the back of the firewall door to replace that garpy crap that DeTomaso used for water collection....I mean insulation.....
Dug out my sway bar and set that in place. Due to all the bolt length and orientation changes due to the attempt at a simple frame stiffener, I will need a spacer between the frame and the sway bar clamp to raise the bar to clear. I checked this out before, and I think 1/2" will work, but will check again and see if I can get away with 3/8"! That is where I left off this evening.....looking for suitable scraps of material or a willing donor!!! None found yet...but it's gotta be around here somewhere....!!!
Ciao!
Steve


