

The march continues.... (from two days ago..no work last night or tonight due to grandkids at the house, and a mystery clutch malfunction in the 68 Cougar (son's car now..) plus taking the wife out to dinner and a street dance sorta thing...pay the dues....!)
Called about header coatings, Caps of Fresno appears to have a high temp (1700 degrees) version that uses titanium...or that's what they call it.... instead of aluminum, which melts at 1300 degrees and can then separate....so for no additional cost, they can do the higher temp job! With blasting the old electrostatic coating off of the headers I want to use, they can still turn around the job in 7-10 days! Great!!! More later..
I worked on the sway bar spacers next...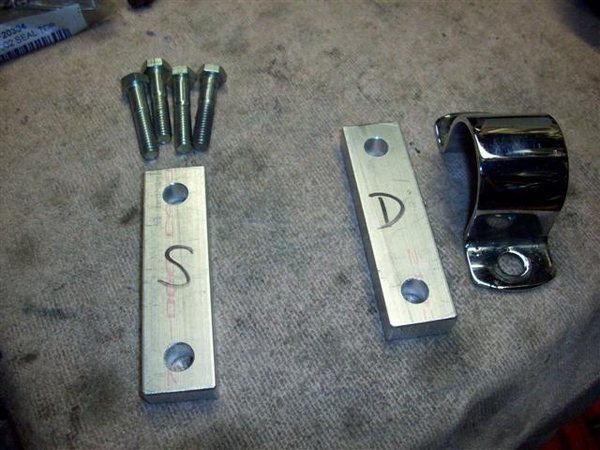
These are cut from the same 1/2" x 1" bar stock that I made my prototype chassis stiffener bar from.... Cut to length and drilled with 3/8" holes. I have not yet beautified the rough edges on the ends....
I also ordered some smaller diameter headed 12 point 1-1/4" long bolts....as trying to use the full headed bolts causes the side of a socket to contact the ladder bar and may or may not fit down onto the bolt! I have seen many a socket head (allen head) bolt used just for this reason! These things look like 12 point header bolts....for lack of a better description. Will post a pic once I get them....more special order from Fastenal! I also ordered a 5" long button head bolt to try was an alternator pivot bolt to perhaps help with my belt interference issue.....
Back to sway bar spacers....
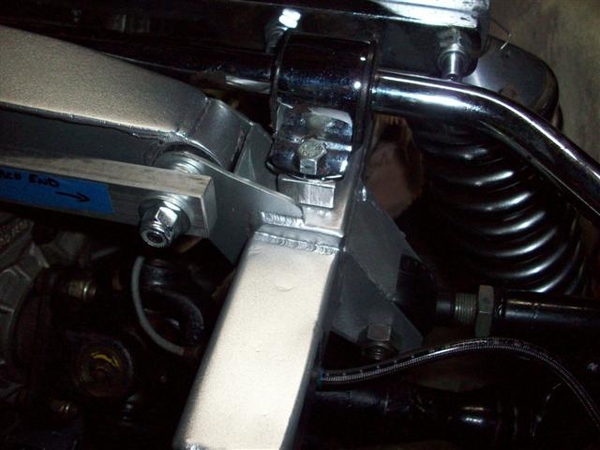
Installed left and right....I gotta be getting close...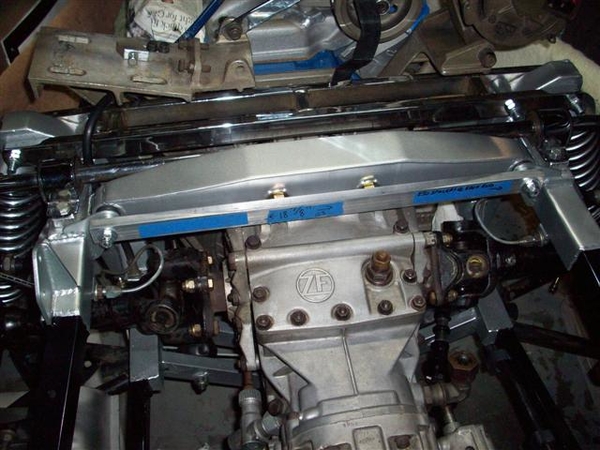
Close up: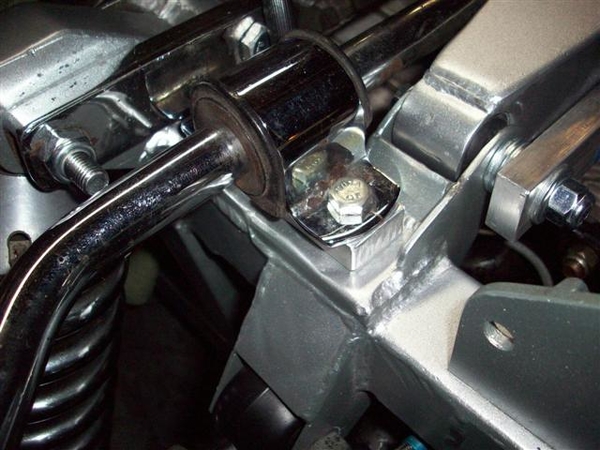
Last thing I did the other night was to get down my original air cleaner and check the fit! That was the goal of all of this work after all!
Well, it looks real good....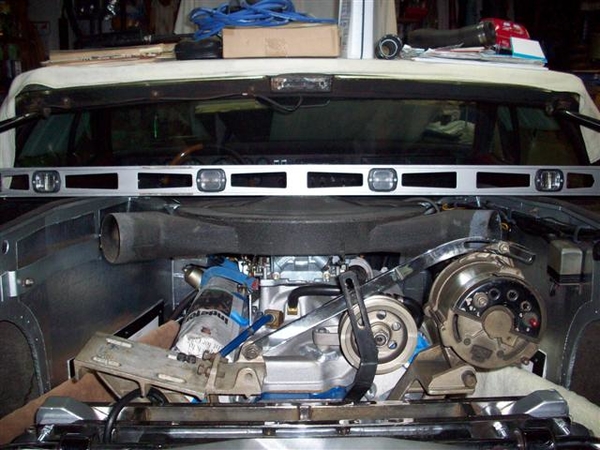
But success is fleeting and not to be found here..... The air tube horns are about 1/2 proud on either side, and the center of the air cleaner would just contact the shield by 1/8-1/4", if you are to believe that they would be flat... I used a level here to simulate flat....of the closed covers....
The carb stud also is proud by about 1/2 inch, but I could effectively deal with that in a creative sort of manner if I had to...
The long ending to this story will be to go back to my Performer intake with a shorter carb mounting pad.... I have the manifold but it needs the ports enlarged, and the rear mount piece welded onto it... Installation is something that I don't see as being too large a deal now that I have been through everything else!!! But for now, we run the Performer and I dig out my old low profile air cleaner to get out of the garage and down the road a few miles!
The lower carb height will probably cause me to use a manual choke setup....which after looking at this...is probably what I will need to do with the Performer RPM intake that I have installed presently. Just too much stuff over near that pesky center bearing area of the shaft bracket!
....I thought my measurements were more foolproof....so much for RevA!!!
Gonna go post some header pic's in a new post!
Ciao!
Steve
Attachments
Images (5)


