

OK, let's just say for all practical purposes, this was a TV show, with say Chip Foose in it, the cast is assembling an exotic "make over car" and one of the mechanics forgot to install a seal somewhere.....since they were going to tear the car apart again anyway before final assembly, it really didn't matter much. Just a PITA!
EDIT 04/06/20 I built the new engine in 2008 and it didn't get around to installing it for two years, as the car was running..... When I tore the old 'Bird engine down and after the initial assembly, I left the rear oil seal hanging around on my work bench for some time as a reminder to get a new one. (Well that didn't work....... !!!) I eventually got tired of working around it, and rather than tie it to the engine/stand/etc as a reminder, I tossed it in the garbage telling myself that "I would remember this!" HAH!!! How we lie to ourselves sometimes!!! ![]()
![]()
![]()
If you scroll back up to my post on 7/12/10 (page 4 of posts) the top picture of one of the posts has the rear engine view as installed finally in the car. You can just barely make out there is no seal..... This is a low res pic, but on my higher resolution original I could see that I had no seal installed!!! At the time, this was consuming so much brain time that I couldn't get to sleep, so I came out to the computer and cruised thru all my old pictures until I found that picture and realized what I hadn't done!!!!
I've reposted a better pic with no seal for your convenience!
End of edit! Cheers!
Seal not in place: BIG GAP there! DUH!
That's my story and I'm stickin' to it!
So now that I have torn every thing apart and installed the rear main seal, as my last task in the engine rebuild....I've started the reassembly process.
Seal in place: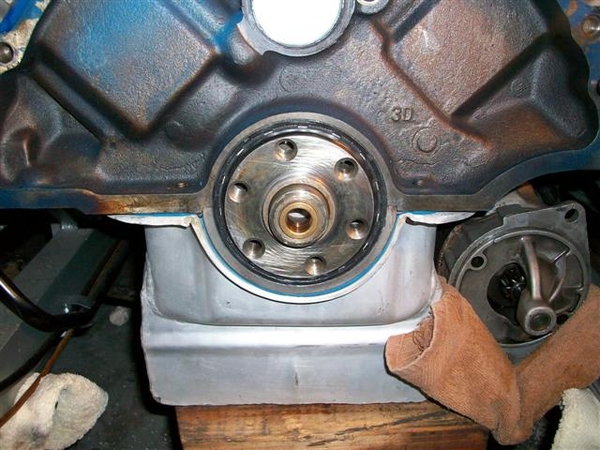
Local shop recommends a fine coating of sealer on the outside of the seal. My 91 shop manual references a section on installing this seal several times....there is no section! (21-1...)
Patience, a 1" steel punch of sorts, and a plastic mallet was all that was needed to put the seal in place. A thin coat of oil on the inside seal area...and tap it in flush with the rear of the main cap.
After de-oiling all of the flywheel, block plate, bellhousing, flywheel bolts with solvent, I put that all back together.
Flywheel bolts got "The Right Stuff" on the threads.....(found the ARP thread sealer with Teflon later....), Ford Tech says used RTV and torque to spec.....75-85ft-lbs.
Torqued the pressure plate bolts to 15ft-lbs on the aluminum flywheel. Used a conventional alignment tool for the disc, which proved effective as trans slipped right in place! No muss or fussing with mis-alignment...
Here is a shot of the front of the ZF with the throwout bearing in place.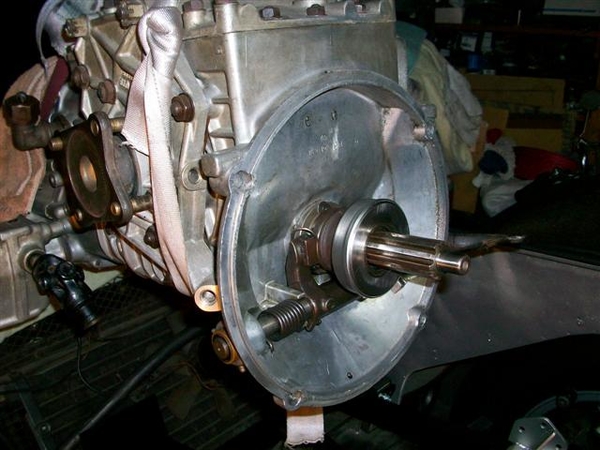
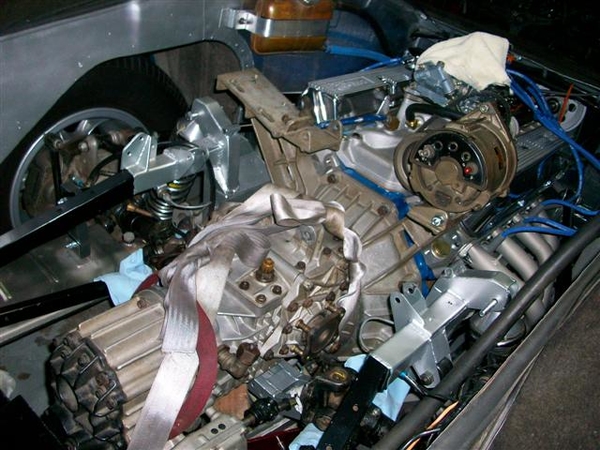
A few more shots of the ZF going in. Tipped the rear of the engine up (disconnected exhaust at the flanges). It should be noted that this time, I removed the rear ladder bar. This gave me a LOT more room to work with to get the trans in place. Should have done that the first time!!!! Excuse me, I meant during the "trial run"!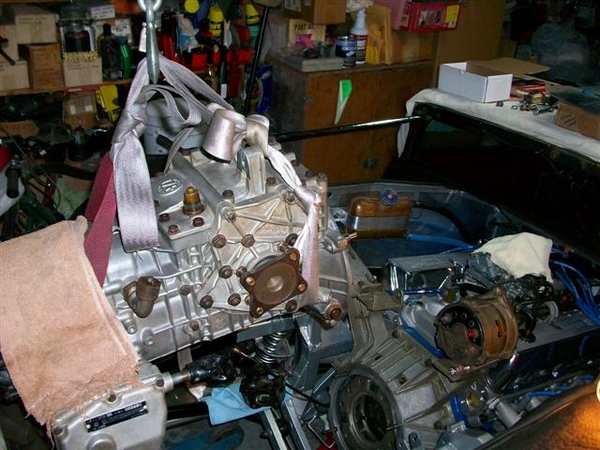
"Easy does it" is in order running the engine hoist. A few towels to keep paint on the metal bits...and the fancy sling made up of old seat belts! Works great!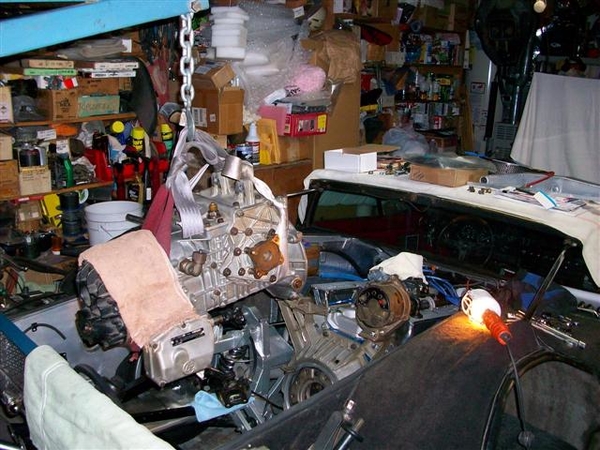
The seat belt sling actually allowed me to lift up on the rear of the trans to give me a slight nose down attitude. Setting the towel, folded up a few times, on the rear spare tire support worked great. Just have to watch out for brake lines etc.... basically everything!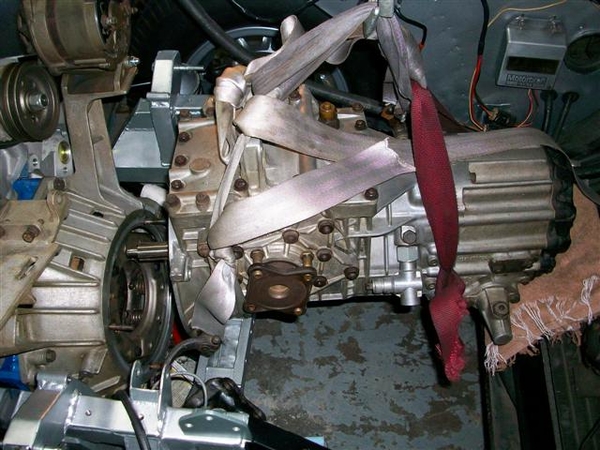
Lower real slow, check to see you are not hanging up on the studs and bending them!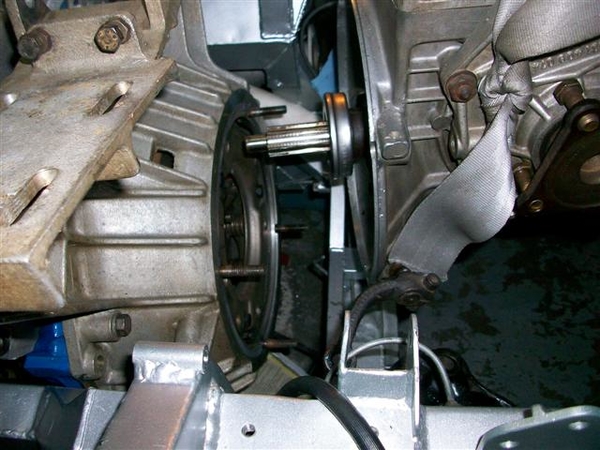
Almost there....slight pushing and pulling and minor up/down with the hoist and it slipped right in place with no opposition! Wow! That is a new concept!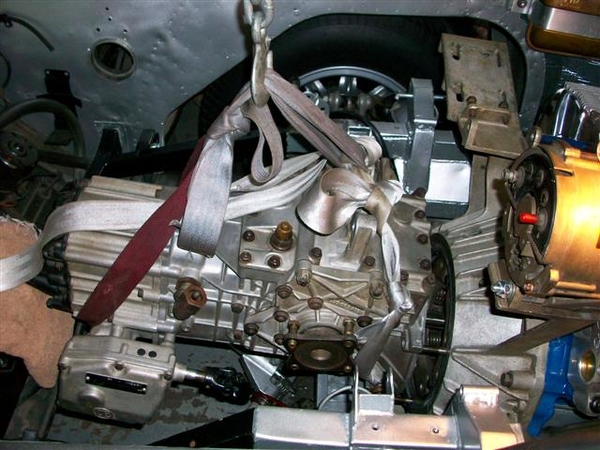
And here is where our hero left off tonight.....ZF is sitting in place (on a 2x4 on top of the cross member) and is bolted snugly up to the bellhousing!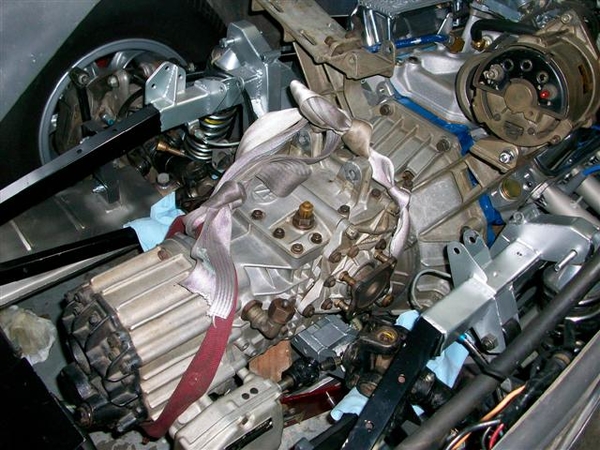
Tomorrow I can finish final tightening of everything else, reinstall the crossmember, ladder bar, sway bar, exhaust bolts, axle connections, speedo cable, shift linkage... adjust the shifter mo' better, and may be see if I can get out of the damned driveway with my new lower oil pan!!!!
Time for some sleep so I can get my butt home early to dive back into this!
Ciao!
Steve


