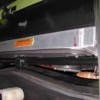
I have the fluidyne radiator mounted in the stock position and the dual Flex-a-Lite sucker fans. I made short brackets that attached to the top and bottom Fluidyne support channels. I carefully drilled and taped the channels for 6-32 flat head (or oval head) screws and installed the screws with red loctite. When drilling the channels, I put a piece of sheet metal under the channel lip (between the radiator core and the lip) to prevent drilling into the core. Then I placed the sucker fans on the radiator and marked the brackets for the holes in the fan shroud. I removed the fans and the brackets, drilled and countersunk the brackets for #8 screws. I installed one 8-32 screw through each bracket and secured with a nut. Next, I assembled the brackets to the radiator and the fans to the brackets and placed the assembly into the car. Red circles and arrows are the brackets.
Once the radiator and fans were in the car, I discovered that the top shroud mounting screws were too long and that I could not use the acorn nuts that I had purchased. Seems they hit the headlight connecting tube. I removed and disassembled the radiator and fans and replaced the top screws with shorter ones (1"??) and used reduced hex aircraft nuts.
The next problem was that the center fan shroud and mounting boss hit the headlight connecting bar center support. The '71 cars have a center support for the light bar but the later ones do not. I cut the front of this support rearward as much as possible, and tried the fit again. I found that I could not use a top center mounting bracket, so I removed it. I decided that the five other mounting points would be sufficient.
Another test fit revealed that I need to trim some of the center mounting boss and some of the stiffener rib near the light bar bracket. This solved that problem.
Next problem was that the Fluidyne installed upper drain valve wouldn't clear the light bar. After some thought, I dug through my pipe fittings and found a 1/4"NPT x -4 AN 90* elbow and an AN -4 cap. Perfect!
This gave me the clearance that I need at the light bar and I also provided an air bleed! When bleeding the system, I place a paper towel or shop rag around and under the fitting and loosen the cap slightly until coolant arrives. Makes it quick with no mess.
Another thing that I did was to remove the lower Fluidyne drain valve, add a pipe nipple and coupling, and reinstalled the drain valve into the new pipe coupling. This allowed the drain valve to be more accessible from the wheel well and helps prevent coolant from draining onto the radiator support cross member.
Next problem was that there wasn't very much clearance between the hose tubes on the radiator and the car's sheet metal. I searched NAPA's radiator hose catalog and checked their stock, but I couldn't find a hose with a really tight 90* end (that they had in stock) so I went the copper tubing route. Also note that the Fluidyne hose ends are are 1 1/2" and the stock Pantera cooling tubes are 1 3/8". The solution here is to soak a piece of 1 3/8" straight radiator hose in hot water for a minute or so and, while still hot, force the hose onto the radiator. Let cool and remove. You have just made a perfect transition hose! If you have a piece of 1 1/2" o.d. tubing, pipe, or stock of some sort, this is a little easier to use than the radiator.
The end result is that I have driven the car on 100* days with the A/C on in heavy stop and crawl traffic and have never seen temps above 208*F. I have a mechanical water temp gauge, a 180* t-stat (correct for the cleveland), and an Edelbrock high volume water pump.
John
PANTERA INTERNATIONAL
A DE TOMASO CAR CLUB
Presents the De Tomaso Forums
The On-Line Meeting Place for De Tomaso Owners and Enthusiasts From Around the World
Clicking on the banner will take you to the sponsor's website.


