

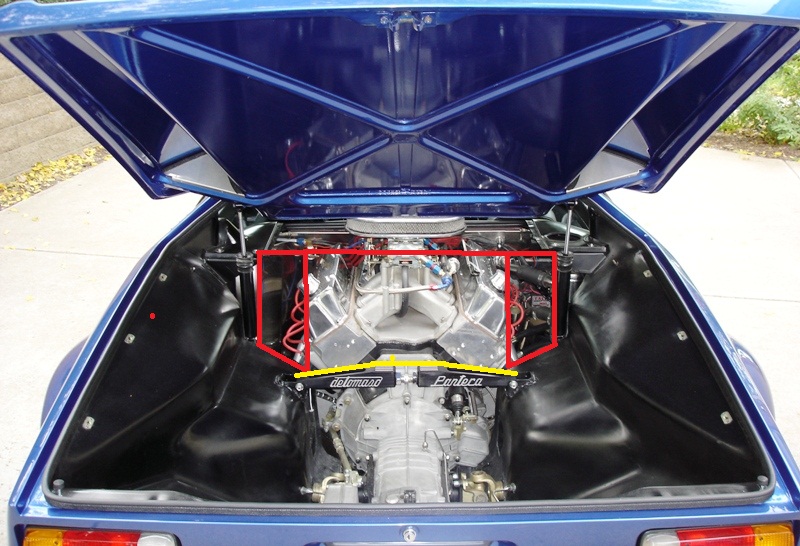
Vizard says that well designed headers can accomplish the equivalent of 3-4 lbs boost if done properly. ….I’ll have some of that thank you. As a bonus, I dropped my engine off at the builder last week and it looks like the 180s will fit while on his engine dyno……exxxcccccelllent
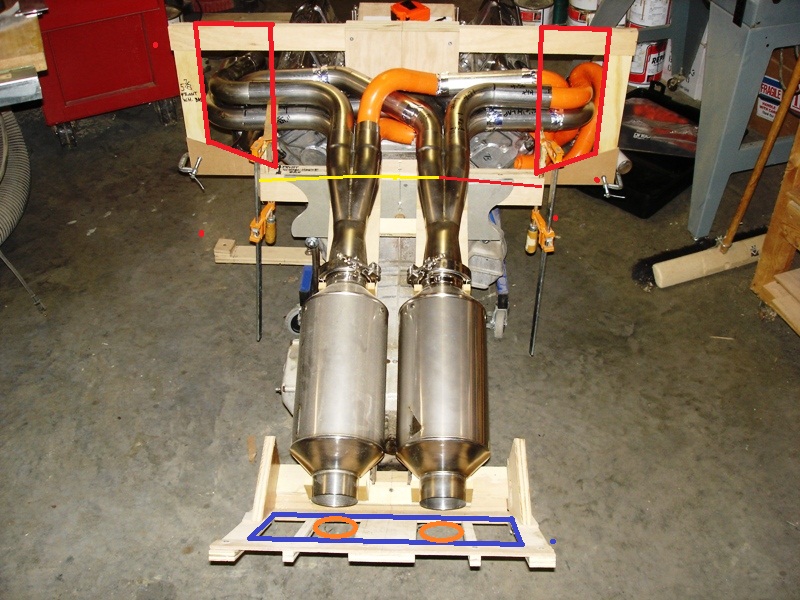
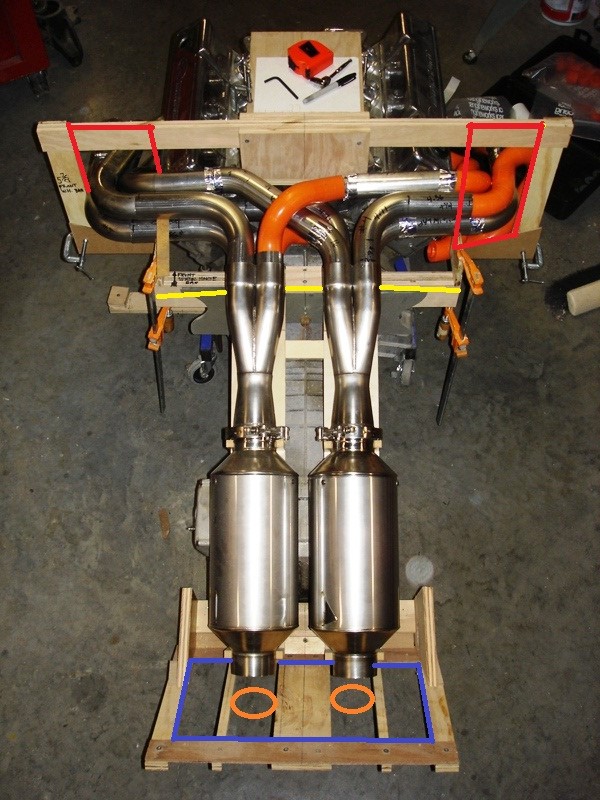
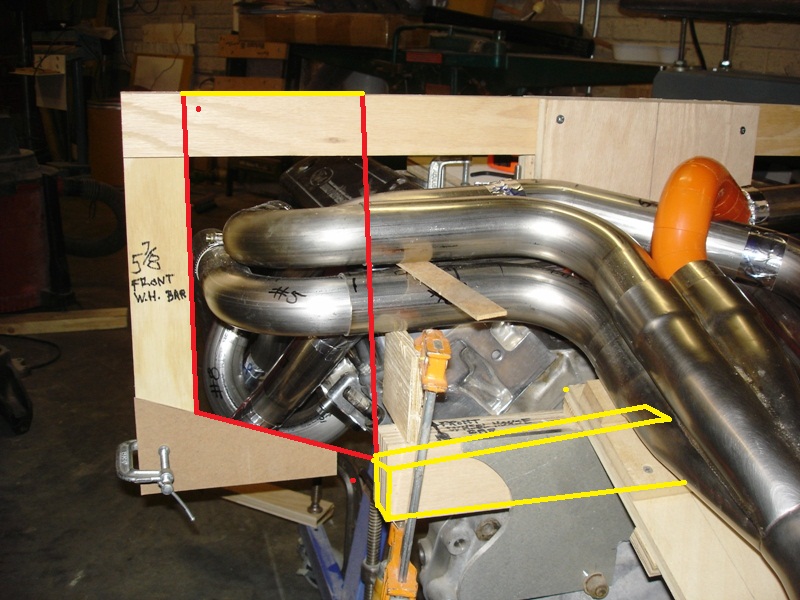
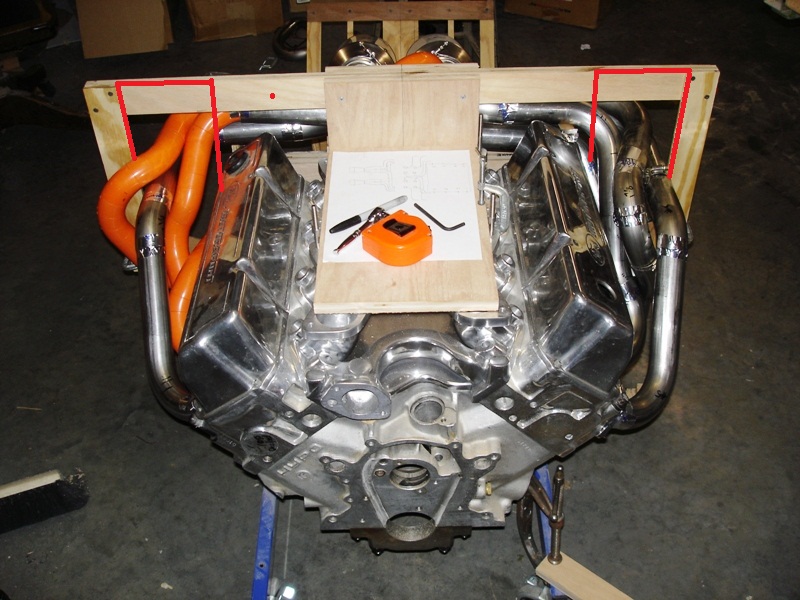
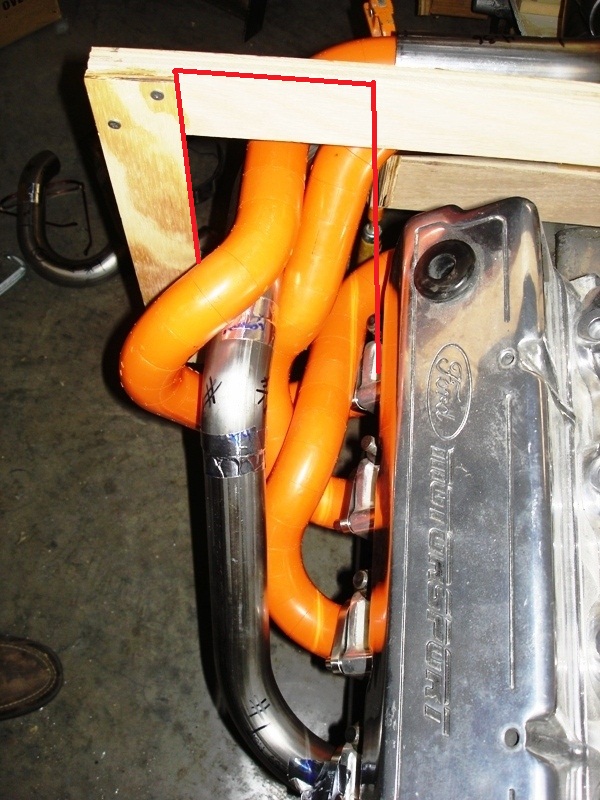
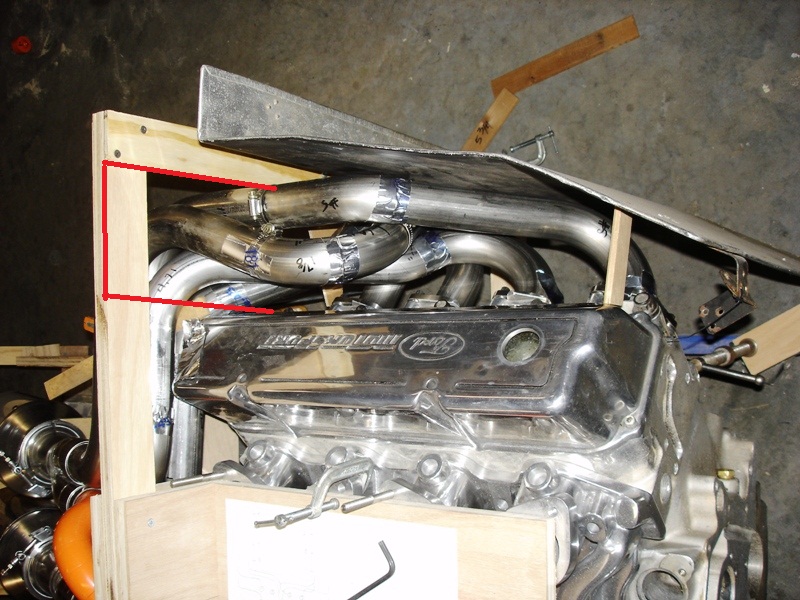
So I provided my engine specs and Vince at Burns recommended triple stepped headers (1 ¾-1 7/8 – 2”). He commented they would actually be easier to build than a single diameter non-stepped primary and perform better. I figured what the heck, why not, in for a penny in for pound. The optimal length depends upon your engine specs but in most all cases, the primaries will need to be longer because it’s physically not possible to complete the cross over legs (#2, #3, #6 & #7) at that length. I started targeting 36” length primaries and ended up at 38” length. I just couldn’t get there and found the routing on cross over primaries were the pacing cylinders. This will vary depending upon your layout. I looked at a lot of 180s on Panteras and GT40s. There are lots of ways to get there. I opted for the layout pictured below which causes a rotational, equally timed, firing order around the collector to promote symmetry in scavenging. The fact that I used 6 ¼” diameter mufflers also contributed to the challenge with the crossover primaries because spacing the collectors further apart creates more disparity in length between crossover and non-cross over primaries, so 4” mufflers would help this aspect but be louder as well, especially with only about 13” of active length.
As noted in my previous posts, I opted to mock up the long block and build these out of the car because I didn’t want to take my car out of action for the build (wise move since it’s been a year now), and just couldn’t see crawling around the engine compartment to do this; better off in a chair on the shop floor. It took me as long to establish all the critical/corresponding dimensions and create the mock up as it did to cut and piece all the stainless together!!

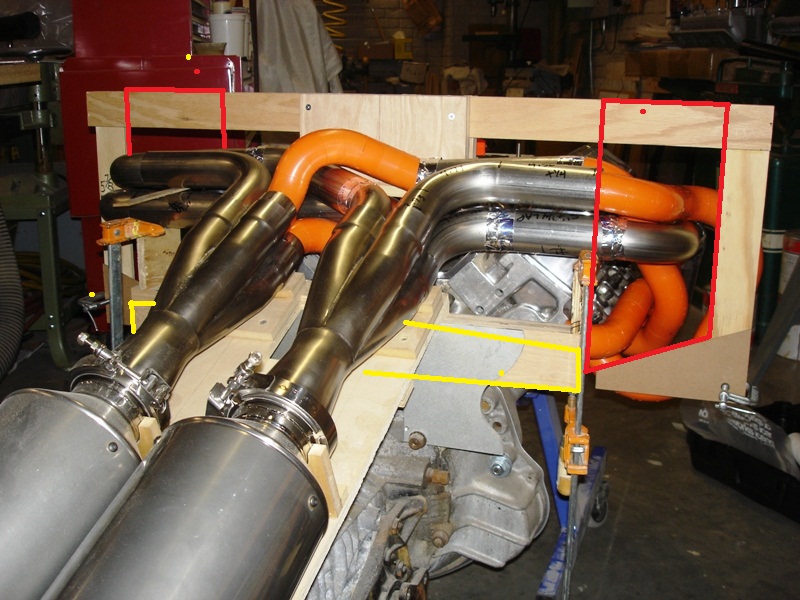
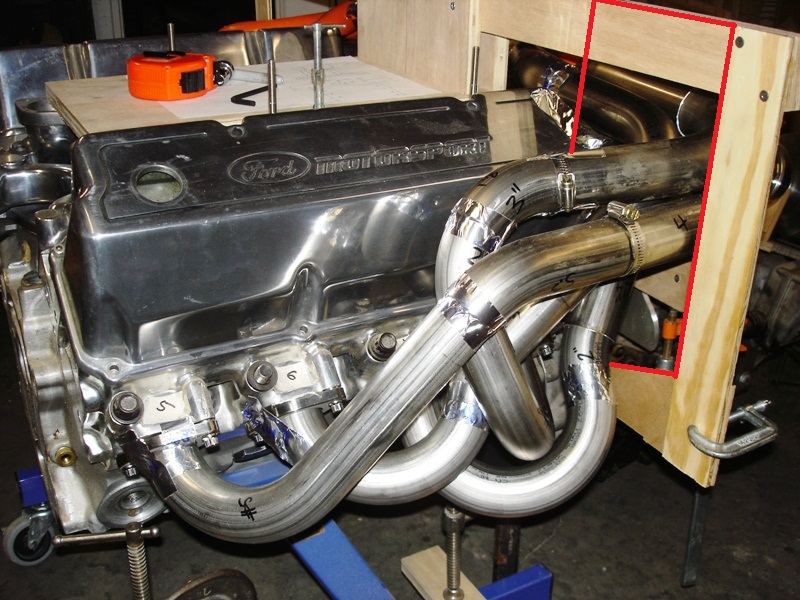
I opted for 16 gauge instead of 18 gauge stainless mandrel bends. My first instinct was to save weight and go with the 18 gauge but I went with 16 ga for a couple reasons. Each leg of the primary would nest neatly inside the next making it self-fixturing. I also felt it would be quite strong and this was a plus since 180s grow significantly as they heat and create quite a bit of stress when they do. 16 gauge is also a little more weld friendly. I only give up 6 lbs using 16ga compared to 18ga. I didn’t find that the step headers were easier than a single diameter from a fab standpoint. For one, you need to buy three sizes of mandrel bends. In reality, I did not get to fully utilize the nesting of the tubes in each step transition since the space constraints and routing inevitably dictated that a step would need to occur in a bend rather than a straight section where the tubes could nest. The one thing I would do differently on the routing would be to make the first step from the collectors head for the target area with a 45 degree bend rather than a 90 degree bend. I might have been able to achieve 36” if I did so or perhaps if I routed the crossover primaries first. The first step from collector at 45 degrees would also keep these primaries further from the IR induction inlet air filters. I’ll need to make some shielding to minimize cylinders 4 & 8 from sucking hot air.
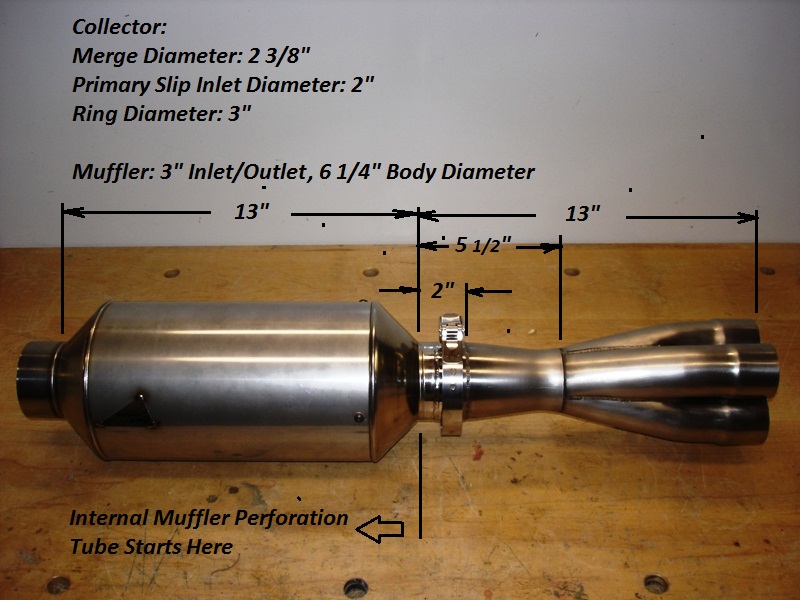
A wanted to use a good merge collector to maximize scavenging potential and the recommendation was 2 3/8” merge and cone back to a 3” ring. This is quite a bit tighter than what would be recommended for a normal 4 into 1 but the equal spacing of the 180 firing requires smaller collector area for proper velocity and scavenging. This all adds up to quite a bit of length and if you look at my mock up, you can see it doesn’t provide much space for mufflers and to make the initial turns on the primaries.
With all the effort to plan and fab, I figured it was worth using stainless. Big cost adder but hey, you only go around once right? The most pleasant surprise of the whole process so far was the ability to cut the 304 stainless. After doing some searching, I found DeWalt offered a 12” circular saw blade that they claimed could be specifically used to dry-cut stainless up to 16 ga. I was very skeptical. I found the blade online and gave it a shot. It was recommended to be used at about 1000 rpm. I had a speed control for AC brush motor so I put it to use on my circular saw. It worked OK but was kind of slow going as the speed reduction seemed to be a significant power reduction as well but once you got through the initial cut and broke through the tubing cutting across the two walls of the tube, it went fast until it hit the other side. You could see it would build some heat there. So, for grins, I just decided to try it at full speed rpm. To my amazement, if I applied proper pressure, it blasted right through .062” wall 2” stainless tube throwing a little bit of amber on the initial and final break through. The cuts were fairly clean and square, and each cut only took 3-5 seconds. No odor, and believe it or not, very little heat! I could touch very close to the cut immediately afterward and the cutting part of the saw blade as well? I would then dress the cut tube on the belt sander (also dry) and deburr. I never would have believed dry cutting stainless tube was possible in this manner. I did make some wooden fixturing to clamp and hold the tubes in place for the trickier cuts. Surprising, most of the cuts were quite easy to hold and I did not feel like I would lose control of any pieces holding them firmly against the fence. I did use face shield and ear protection.
I bought a series of the three diameters of mandrel bends in 90s, J-bends and J-45s. Everything I bought was on 3” center line. I looked at three methods of controlling/determining equal length; trial and error, bendable wire of prescribed length, flexible metal hose, and the new fangled modular blocks. I discarded trial and error immediately since I already had an eye watering investment in stainless and wasn’t too interested in a pile of scrap. After I got a good look at the bulls eye I needed to route through, I broke down and bought the “ICE” modular block basic kit which was supposed to be enough to do one side of normal 4:1 headers. Since there was going to be a lot of primary length in 180s and I already had all 3” CL bends, I opted for a custom set that had the majority in 3” centerline pieces since that is what I had in tubing, with 20” of 2” CL and 4” CL, and straight; the rest all 3” CL. I must say, I’m not sure I could have accomplished the routing with any confidence in the equal length without modular blocks. In all, I think the blocks are a clever idea though fragile for metal working environment and a bit overpriced. Nevertheless, I own them.
Now I have to disassemble everything and degrease the tube because although the bends I bought were nice quality tube and bends at a good price, they were also still full of the bending lube, so each segment needs to be scrubbed out with a tube brush in a bucket of degreaser before welding.
I estimate there are about 40 welds to be tigged up. That’s about 240”/20' of bead!! I think this is going to need to be done in two or three steps. The first will be to mark the position of the first step of each primary on the header flange. I think I’ll take a cylinder head and have my bud weld each of these segments first while bolted to the head. Firstly, the head will be a great heat sink and hopefully minimize header flange warpage. If there is warpage, I can correct this while there is still a fairly short and manageable tube length on it. Secondly, I suspect the tube will suck up in a slightly different position and will need to be tweeked with with a bit of bending and/or tweeking on the abrasive belts to keep the butt joints good and tight. I think at the same time, I’ll have a few of the other welds that occur within each step completed and also weld the lugs onto the collectors so they can be used to tighten the primaries into position on the collectors and fixture for final assembly and welding, tuning fit along the way.
Sooooo, anyone want to build a set of 180 degree headers for their Pantera?
Being stainless, they should already reduce heat transfer to the engine compartment. I just can’t get myself to coat the stainless exterior. I like the look of stainless. I would like to coat the interior and will probably use a jet hot distributor and the best thermal barrier possible. Can anyone with firsthand experience recommend a vendor to coat the internals of the headers? A Midwest US vendor is preferred but since it’s only the shipping cost I guess it doesn’t make much difference. It just needs to be someone that knows what they are doing and is willing pay attention to the details.
Best,
Kelly