I'm soon to be replacing heads, cam and intake. The gasket sets that I have include the "turkey tray", intake to head gaskets and the cork manifold end gaskets. If I use the turkey tray, do I still need the material gaskets? If so, on which side of the turkey pan do they go, head to tray or intake to tray? Another question is since I will be runnning an Edelbrock RPM Air Gap, do I need the turkey tray since the runners are elevated off the bottom? Edelbrock instructions say not to use the end gaskets and to seal with a bead of RTV but say nothing about the turkey tray. Thanks in advance.
Original Post

Replies sorted oldest to newest

...Place your manifold onto the heads with NOthing under it! With a flashlight look down the ports (can do this with a single plane manifold) and see how well the manifold ports align with the head ports. I found that with NO gaskets, the ports align perfectly. I also found that there is a 1/4" gap at both ends; too wide to seal with just silicone or other sealant, making it a Must use of the two thick Black rubber end seals. I used 'Permatex Ultra Black' RTV sealant (seems to work well with Gasoline), around the ports and on the tips ONLY of the ends seals. NOT on or under the rubber seals, leave that alone!. Doesn't leak a single drop. You do NOT need the 'Turkey Pan'; unless your manifold has the exhaust heated 'underbelly' that would cook oil and form 'ash' that can cotaminate the oil. On SOME manifolds any gaskets at all, will cause a misalignment of the ports. This may not be of importance to some engine builders. If you DO use the tray and the composite gaskets, the comp gaskets go between the turkey pan and the manifold because the tray must have an 'absolute' contact with the heads and block in order to seal the lifter gallery of it's oil, and Don't forget to place a 'Bit' of sealant at each of the four corners. If, when placing your manifold on the heads with Nothing under; you find that there IS No gap at the ends (Front and Rear), then there is no need, and No room for the END rubber seals (as Edlebrock advises) and RTV should be sufficient. In my case I only had to use the end seals and a little RTV around the ports and 4 corners. It sealed perfect. This was with a Highly Modified Weiand Dual Quad Intake. Good-Luck with it!!...
Dennis,

In agreement with Marlin, the turkey tray is only needed if the manifold has exhaust heat warming it up. The RPM Air Gap manifold does not have an exhaust heat crossover and therefore does not need the turkey tray.

To respectfully present some info contrary to Marlin, Ford abandoned the use of end seals more than a decade ago. If you buy an intake manifold gasket kit for many Ford vehicles all you get is a tube of RTV sealant, no end seals. Just lay down a "pretty" bead of RTV about 50% thicker than the gap and let it dry completely before you install the intake. One manifold I sealed up required about a 3/8" bead of sealant. They don't leak. I have found the cork & rubber end seals we used in the past would eventually weep oil, especially cork.

cork is great for sealing wine bottles, terrible for making gaskets.

cowboy from hell
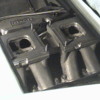
...This post needs a picture. Here we're looking down intake port number 8, at the Valve stem and head. Port alignment is perfect, side to side and top to bottom; because NO gaskets are used, except for the two rubber end seals and RTV around the ports...

Attachments

Images (1)
  • At_Removal_of_Dual_Quads_650's_024
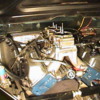
...My Friends, I Thank You for Your interest! This 'project' was purely experimental at the beginning, as the Weiand Tunnel-Ram (I think the Most Beautiful Manifold ever created for the Cleveland) was Highly Modified. Being too tall and radical; the entire Top portion adaptor (3.0" in Height) was removed and 'discarded' (sold on eBay). Adaptor plates were machined to mount Twin Holleys. The plates total 1.0", in effect lowering the Entire Assembly 2". It was by accident that the aircleaner mounting 'plane' came up Exactly in-line to the decklid surface. I never cared for the engine covers. I never had the center cover, and who would want to cover over that beautiful Ford Cleveland, anyway. The results were beyond even My expectations; in a word 'Smooth' delivery of power from off idle to Infinity! Or until Valve float, or She 'Blows'! Without even trying, your breaking the tires loose from at a stoplight. Gently driving around corners will still 'Break them loose'! It's quit a feeling. (Try explaining 'That' to the Police, when pulled over!) Fuel Distribution at Any RPM was never an issue. The linkage is NOT progressive. All primaries open at an equal rate. I chose to use Vacuum Secondaries, as Mech. Secs. are for 'Race Only'; because the Transition and Cruise curcuits are activated constantly, wasting fuel. In the pictures the carbs with the choke horns milled off are 600 cfm, they gave me an honest 10-12 MPG. The carbs with choke horns (seen in my avitar) are the 450's and have not yet been tested. But I know they will give a higher MPG. Also the 450's (according to the 'Desktop Dyno') give slightly more Horsepower And Torque from 2000-5000 RPM. Equal to the 600's from 5000-7000; with the 600's pulling ahead only after 7000 RPM, which I don't expect to ever push this engine to! Would I do it again!? Thats a Big YES!! Because I can always go back to the 'Torker' and single 750. But! The neccessary decision to 'slightly' cut the deck-lid; I agonised over for just about a Year, before making my mind up to Go For It! It's My Pantera and This is the way I want it. I won't be 'here' when the Next owner takes the Keys, so be it. I do NOT claim that the Desktop Dyno Program will ever take the place of a 'Real' Dynomometer; but it is a Great place to start, experiment with different parts, and remove some of the guesswork out of the equations. Here are the figures I came up with. Enjoy the pictures! If You need to see more, we can work something out. I have Hundreds of them! The power bands are high in the Revs! This engine is not a stroker, it's just a .030 over 351. All figures are 'At The Flywheel'. With the twin 600's CFM: 500 HP @ 6000 RPM, Max. 525 HP @ 7500 RPM, 447 LB/FT @ 5500 RPM. With twin 450's: 495 HP @ 6000, Max. 515 HP @ 7000, 446 LB/FT @ 5000 RPM. If we go to twin 390's: 490 HP @ 6000, Max. 508 HP @ 7000, 446 LB/FT @ 5000 RPM. With the little 390's I would expect to get somewhere around 18 MPG. Remember, Yes! There are two 4 barrels, But! Each Carburator is only effected by Half of the Engines Total Vacuum. And it's the Vacuum that defines how much fuel is used. The Priority of all this experimentation was to put One Venturi over Each Intake Port and maintain a 'resonable' Fuel/Air Planum! I may have to post the Pics in a following post. Stay tuned! "...Long May You Run...", and God Bless America!!...

Attachments

Images (1)
  • At_Removal_of_Dual_Quads_650's_007
...I understand your question! The 'Bridge' is a support and NOT a 'Pressure/Signal Balancing Planum'. Pressure/Vacuum Balancing is done by a connecting hose. Also; that is why it was important that the carbs be Perfectly Matched and functioned equally through their opening range. In the final results, Each Cylinder 'Draws' the Amount of Fuel/Air that it needs, and the Carburation Delivers with 'Massive OverKill'! As an example; 'Individual Runner' Manifolds have NO link for equalization between all 8 ports. Also, as standard; the Vacuum Secondary Diaphrams are connected for equalized opening. The Proof is in the Testing; and this set-Up tests very well! Doug, I Thank-You for Your input! NOW! Ask me about 'Piston Ring Washing'!!...
I ran a 1969 boss 302 mustang with twin 600 holleys on a Shelby 2 x 4 intake. The stock hood even closed with the aircleaner. 12.5 to one comp. 430 gear 590 lift cam on street in 70's Loved to romp chebys. 10 to 13 mpg at 60 mph. Sure was fun !!! Still have all the parts and car, but it will come together after Pantera.
Post
×
×
×
×
Link copied to your clipboard.
×