Replies sorted oldest to newest
Chrome can be "soldered". It requires a special solder fluid and correct hard solder (gress 850 - 950 deg Cel..dep. on Ag portion) material.
https://www.brazetec.de/en/index.html
not clear to me if the soldered corners can be chromed.
and for sure you CANNOT make a full frame, see original - one side was left open.
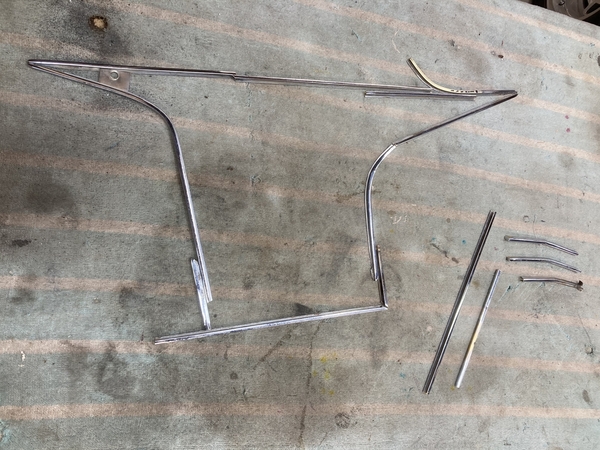
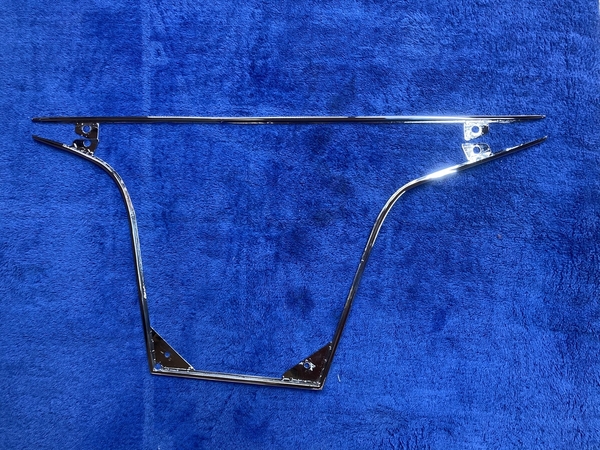
To add some clarity, the channel base metal is brass that has been chrome plated. I am thinking I need to remove the plating down to bare brass at each joint.
Then join them with a process that will accept chrome and have the revised trim replated.
(The factory corners definitely appear to have been brazed.)
I plan to build one long piece to cover the top edge and bend and join the pieces necessary to form a U-shaped portion to cover the other three sides.
if you remove the chrome in the corners THEN it will be asy to hard solder (850+ Celsius with decent silver solder Ag as high as possible = lower solder temp but strong enrough)
you need to see what happens to the "thickness" in the corners where the chrome was OFF..as new Chrome will leave a slope/step.
I would try to leave as much as possible Chrome on the visible side, only remove it on the back side and then hard solder it. I assume a thin layer of chrome then would do, def on the visible side.
I DO NOT KNOW the min thickness required to really have the chrome stick - needs a chat with your chrome folks...you probably need to "swivel" it down a bit.
One more issue: if you bend the chrome plated U shape rails the chrome will crack..so Guess is better cutting real edges then hard solder them....this is all EXPERIMENTAL..you need to run some tests..
Matthias
Larry,
Bending and fabricating the right side from the two pieces you have will deform the channel, if you could find another left hand side trim it would simplify your task as the right should be mirror image and flip of the left. This way you would only be soldering the corner joints where you can also trim a little chamfer on the gauge panel to accommodate the solder inside the join if necessary.
Julian
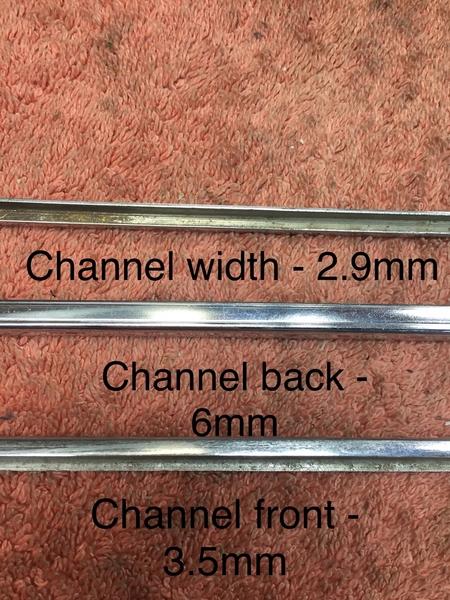 The original left-hand piece can be slightly re-curved to function as the new left-hand piece. But, a left-hand piece cannot be flipped to use on the right hand side as it is too short, and the channel is not symmetrical. I could overcome the length problem but trimming the wider backside would be a major pain.
Julian’s suggestion of a chamfer on the panel to allow for the increased thickness at the joint is what I have been planning on.
But remember, the factory did successfully bend this channel and did successfully braze it together.
Please remember I am asking what the best way is to join together two pieces of brass. I believe it can be TIG welded and I am still looking for confirmation of that.
And I still need a craftsman capable of performing the task. I have considered silver solder here at home and will be exploring that path with my remaining scrap pieces of trim
Larry
Attachments
Got it on the front vs. back dimensions, thanks. Brass can be TIG welded (brazed) but small parts like that are going to be very difficult as brass is very thermally conductive and requires quite a bit of heat, which will want to vaporize the zinc. As posted on the email forum I think your best bet would be an time jeweler / watch maker with a micro-torch to braze.
Julian
you could put the part on an electrical heater plate as we did all the time for zink soldering..give you def a push on temp.
only for clarification Brazing = hard soldering (smile).
L-Ag40Sn needs only 650 - 710 deg Celsius..easy to do..is expensive due to silver
840 = 450 celsius woow 99% silver? What Product?
lead I agree did call it zink solder --mistake in wording..well no native..smile
L-Ag40Sn needs only 650 - 710 deg Celsius..is on the market. 20$ a stick or so.
no worry like to learn..
Matthias
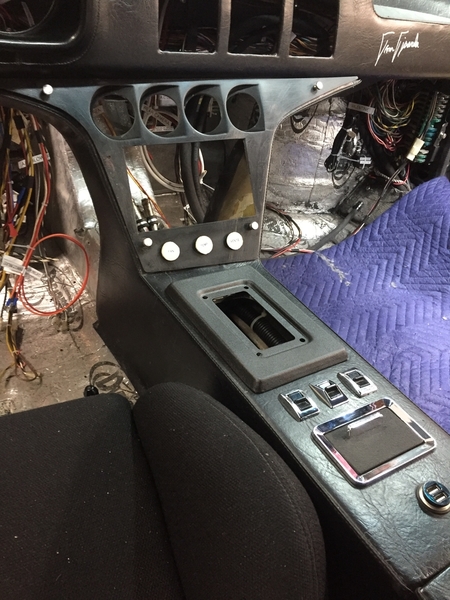
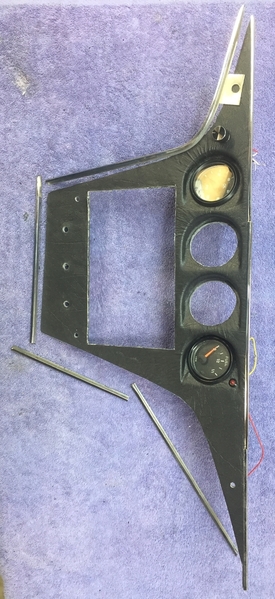
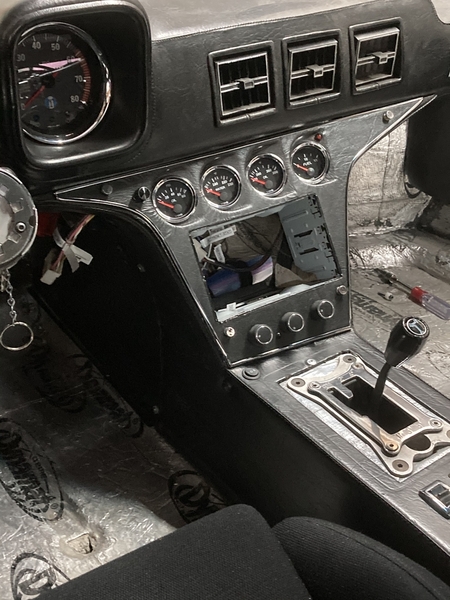
as the photos will show, the project has been successfully completed.
by mixing and matching portions of the stock trim I was able to assemble the pieces in the shapes that were needed
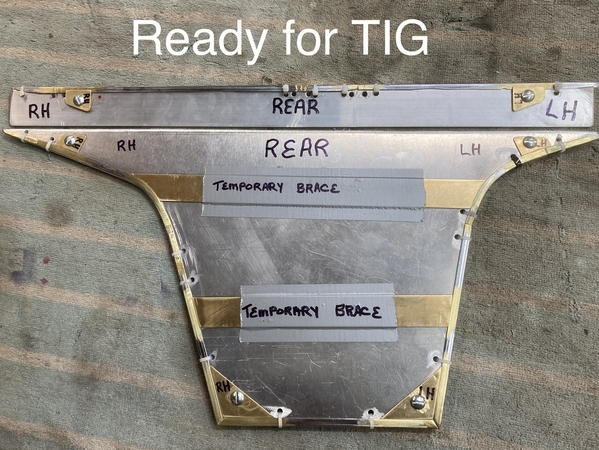
I built aluminum “bucks” to hold everything in alignment; 11 pieces, 10 welds.
I found a skilled TIG welder who joined my pieces with silicon bronze rod.
I spent I don’t know how many dozens of hours filing and 300 grit sanding the TIG joints, and removing the original Chrome.
my local chrome shop took on the project and two months later it was in my hands.
The finished project faithfully mimics the original trim on the smaller gauge panel and looks like it was stock
I love it when a plan comes together
Larry
Attachments
Looks fantastic, Larry! Great execution of your plan! Can’t wait to see your car all finished. 😊
That turned out great!
Nice job!
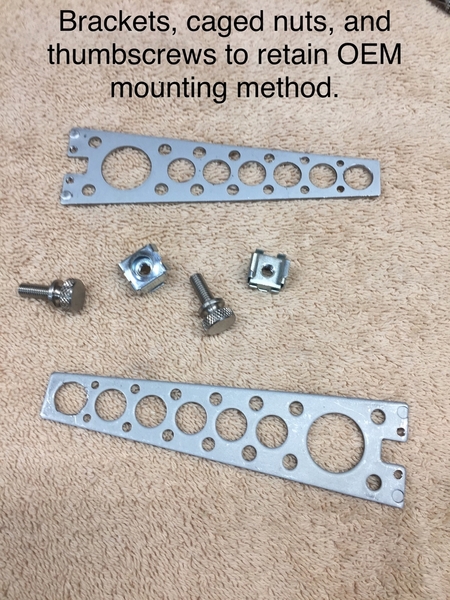
I really like the finger ferrule screws in you have used to fasten the dash panel . Very neat and very functional. They look similar to the fasteners on the relay and fuse panel doors. Where did you find them ?
thank you for noticing. I chose them precisely because they do resemble the factory thumbscrews used on the fuse panel covers.
The factory thumbscrews are an M5 thread.
to mount my new gauge panel I used caged nuts (as used on the steel firewall cover) to allow adjustment for some misalignment between the base and panel. Rather than hunt down M5 caged nuts I used 10-32 caged nuts that I had on hand. As those and the stock M5 threads are very close in size I just re-tapped the four new panel nuts to accept the M5 thumbscrews
I purchased my stainless steel screws from eBay. Search “M5 thumbscrews” and you will have more choices than you know what to do with. I chose to polish my stainless steel thumb screws to match the gauge trim, but there are anodized aluminum thumbscrews in every color of the rainbow. Must be a import car thing
Larry
Attachments
Thanks Larry - about to refix my standard dash panel but at the moment it just has very ordinary brass screw heads showing. I will definitely go for your solution.
Couldn't get the Photo off Amazon. But is this the right size?
4pcs M5 x 20mm Knurled Flat Head Thumb Stainless Steel Screw Bolts
Larry,
The project looks great and the outcome is awesome. Thanks for the tip on the thumb screws.
Curt,
20mm is only about 3/4”.
I think that might be just barely long enough, 30 mm would be a better choice. They can be shortened if they prove too long for any reason
Measure the length of what you are currently using to be sure.
Larry


