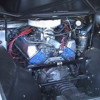
I bought this to use as a poor mans pre-oiler to be used to pressurize the oil before starting the engine, thus eliminating dry starts. The unit has an internal Oring sealed piston that can travel smoothly from end to end depending on the pressure differnce. I plan to fill one side with oil and replace the manual valve shown with an elictric soliniod valve that I can operate from inside the car. The oil pressure sending unit will have a T put under it so I can inject the oil in that port.When I start the engine oil pressure will compress the air on the other side of the internal piston because the solinois valve will be open. After pressure builds on the air side I will close the valve and contain the pressurized oil inside ...untill the next time I start it. When I open the valve and watch the oil pressure gauge go up before I turn the motor over. What do think? Is the sending unit port as good a place as any?

Attachments

Images (1)
  • Dsc01145
Original Post

Replies sorted oldest to newest

Bill,

Your pre-lube device operates very similar to an Accu Sump system, so if you don't mind I'll refer to it as an "accu sump". Most folks use the sending unit port for oil take-off or for "accu sump" installations as you propose.

A better location for connection of an accu-sump however would be on the left side of the block, near the fuel pump. You'll find an allen head pipe plug. The port plugged by that pipe plug intersects the discharge of the oil pump.

I'm not convinced there is any benefit in pre-lubing the motor, but it should be obvious that such a system could cause drastic problems should it fail, so proper engineering is very important.

Your often well lubricated friend on the PIBB, George
I used to unplug the coil wire, but don't bother any more - since I can never cold start without lots of pumping of the throttle to get fuel in the carb.

So, for cold starts, I leave my right foot alone and just crank the ignition. A well charged battery and big tough starter easily keeps the engine turning over without starting. After about 6 - 10 seconds the oil gauge jumps to life and when it hits about 80 I stop, pump my right foot a few times, turn the ingnition again and she jumps to life, well protected. Or so I always assumed.

Am I kidding myself, George, or is the oil really getting where it needs to be just because the pressure rises?
...Do NOT use 'unprotected' rubber hose for Hot oil at any pressure! You'll be sorry!!...You can get ALL the parts for this (See Photo) Stainless Steel Braided hose and Stainless fittings, at 'Summet Racing' and other outlets. I specifically used a 'Swivel' 45 Degree at the rear block connection to lessen the strain at that point, and it has Never leaked a drop! The 3/8' NPT brass elbow (Double Female) and the 2.0" Long, 3/8" NPT Straight 'Pipe' fitting (Double Male), that you will need in order to clear the fuel pump; can be found at 'Home Depot'. I paid well UNDER $80, for the entire set-up!!! This is All 'AeroQuip' Brand; it's the best you can get at any price! Not only is it used in ALL Government and Civilian Aircraft, it is also used in Spacecraft, it is that reliable! So be smart and save yourself some money...One good piece of advice I can give for 'Saving' your engine bearings upon start-up is: Never start the engine with your foot on the clutch pedal and the clutch disengaged! This puts pressure on the 'Thrust Bearing' at the #3 Main While it has NO oil lubrication, and this will cause that bearing to wear-out prematurely! To Start, simply have the Gears in nuetral and the Clutch left alone. And be advised that the orifice that runs under that port where the oil pressure sender mounts is .250" in diameter; I have seen set-ups where the bearings of 'Twin Turbos' are being fed from that single port, it just ain't gonna happen for very long...

Attachments

Images (1)
  • Engine_with_Oil_ByPass_004
...My opinion of the small tank you have pictured is that it is way too small, that thing couldn't even squirt a HummingBird in the eye! You need the 'Accusump' that holds at least One quart, the Two quart size would be That much better. Last, anytime we open-up and 'hang' out the Engines' 'Life Blood' like this, it increases the chance of failure. These modifications must be fully inspected regularly...
quote:
Originally posted by deeb:
Am I kidding myself, George, or is the oil really getting where it needs to be just because the pressure rises?


When the needle on the oil pressure gage "jumps up", oil pressure to the end of the right hand lifter galley has been established. I can't say this is a guarantee the main & rod bearings are fully oiled, but surely after 10 seconds of cranking I would think so.

your friend on the DTBB, George
Hi! LPB. I don't have a parts list but I'll try to make this up, I'll try my best not to confuse you. All AeroQuip was purchased at Summit Racing. (All Brass pieces were found at home depot, but can also be purchased at Summit, and can be steel or stainless steel if you prefer. Brass is just that much less expensive and does not rust). Starting at the front port which is 3/8" NPT Female(National Pipe Taperd) you need: 1)a 2" long piece of 3/8" NPT Straight Brass pipe, Double Male (this is so the 90 degree elbow will clear the block AND fuel pump). 2) Brass 90 Degree, 3/8" NPT Double Female. 3) Straight AeroQuip AN (Army-Navy) #8 / 3/8" NPT Male (This screws into the elbow to bring the hose straight up)(#8 hose is 3/8" I.D. anything larger is unnecessary as the rear port orifice is less than .250" I.D.) 4) One #8 Straight Hose connection screws onto the #8 adaptor mentioned previously. 5) Get the already cut 3 Foot length of #8 Stainless Braided Hose, 'High Performance Rubber' Is far less expensive than the 'Teflon Lined' hose. It can handle 400 degrees temp. at 2000 PSI; think you'll need that much? NO, but what a safety margin!). 6) 45 Degree #8 'Swivel' Hose end. (Parts 4 and 6 must be assembled onto each end of the Hose Part 5. If you do not have the experience of putting these together, you'll have to find someone who does or get instructions. I learned how to put them together when I crewchiefed Heliocopters in the U.S. Army. The only way to get the ends over the 'Stainless Braiding' of the hose is to wrap the ends in Teflon Tape. Or else you'll wrestle with it and ruin the end of the hose or never get it on correctly. 7) A second #8 Adapter to 1/4" NPT Male. Yes! The rear port is smaller the the front port at 1/4" NPT. This will put your hose into the end of the block! To mount the oil pressure sender, you must add a TEE connection having 3 ports of 1/4" NPT Female and that will need a 1/4" NPT Double Male to connect that TEE to the block. If you look again at the picture I furnished, you will see that in addition to the sender I also added a Mechanical Pressure Gauge. I added the 4th port the the 'side' of the Bronze 'T' by drilling and tapping it to 1/8" NPT for the gauge; since it has been years since I have seen a X-shaped 4 Female ports connecter. Remember Straight Hose ends are about 1/3 the cost of angled ends. If you have more questions, shoot me an email at panther@starnetdial.net My installation has yet to leak a single drop of oil!! Good-Luck with it...
...one word of caution I would like to add about this 'crossover' oil connection! When 'they' use to race these 351 Clevelands back in the 70's; 'most' of the engine builders recomended this bypass (now we're talking 'Racing' where every bit counts!). There can be a Downside to every modification! On this one, Perhaps More oil being pumped to where you need LEAST. Like the lifter galleries and filling up the rocker arm area, which can cause more oil being forced through the valve guides. It may have been for other reasons, But about a Thousand miles after I installed this set-up; I had a con-rod bearing spin and go out! One theory I have, may or may not be the case; is that the port under the oil pressure sender is by design a 'Dead-End' for the flow of oil, that makes it a 'Trap' for DIRT and Debris. It has been trapped there for over 3 decades! So then You come along and hook up a pressure hose and because that hose is sure to pressurise before the 'normal' flow gets to that end/rear of the block, all of that debris gets blown into the already worn bearings throughout the engine! In my case it was the #6 con rod. Now this may not have been the cause but I submit it for your evaluation. In the end; the bypass is better installed on a new clean engine rather than an older one that may have trapped dirt. I believe it helps or I would not have reinstalled it (after a thourough cleaning) on my Brand-New 'Boss' 351. As for anyones' older engine, It's your call, just be advised!...
Post
×
×
×
×
Link copied to your clipboard.
×