I was reading through my Pantera manual on installing and removing the engine and transaxle.

It tells you to remove the exhaust, etc. before pulling the engine/ZF unit or installing it. I have also read in the forums that I should remove the distributor when I reinstall the motor as to not break out the back window.

Has anyone ever installed the motor with headers on the engine already? The engine bay is so tight that I thought it would be easier to make sure you don’t have any exhaust leaks but wondered if there was enough room to do this.

Thanks for your help.
Original Post

Replies sorted oldest to newest

quote:
should remove the distributor when I reinstall the motor

AND before removal!
quote:
The engine bay is so tight that I thought it would be easier

No, it would not be easier. Have you studied your engine bay, or another engine bay, with an installed engine?

Not easier, in fact, impossible.

Larry - of course, now is the time for someone to chime in how they did just that and embarrass me. Cool
Having the exhaust headers out of the way will make engine/trans removal/installation much easier.
You can probably get away with unbolting them and laying them back out of the way, this might help more with the drivers side as it can get a little tight in there.
It is easy to break the distributer while installing the engine/trans...............ask me how I know.
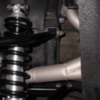
The headers need to be unbolted from the cyl heads before engine removal, as the collector is outside of the suspension upright. Any attempt to remove the engine with the headers attached will result in the collector portion of the header catching on the suspension upright (aka frame). It would be kind of like sticking your head, arms, and shoulders through a picture frame, extending your arms around the outside of the frame and then trying to back out of the frame without moving your arms.

I can remove the exhaust pipe/muffler assembly ('71 car) without removing the half shaft. They have the 2 1/4" exhaust pipe and the welded flange.

John

Attachments

Images (1)
  • P1010002a
About the distributor: I didn't find it necessary to remove it (and thereby add one more uncertainty when starting the engine). I took off the cap though, and I taped a wooden board over the back window so even if I hit (which I didn't) it would protect the window.

I did remove fuel pump, oil filter and starter, don't know if it's necessary

I recommend removing engine and gearbox together. Balance is important. If you hook the giraffe to the center of a chain that's attached to:
-the rearmost right intake manifold bolt
and
-the second rearmost left intake manifold bolt
then the engine/gearbox will by itself tilt 10 degrees forward, perfect for removal and installation Smiler
I can see I got lucky, because my removal and installation required no pry bar, no force, no leveller or anything. Just a short chain from two intake manifold bolts as I describe in previous reply. The chain was so tight that the giraffe hook was around 10" lower than comp2's and Marlin Jack's pictures, and thereby cleared the rear lip without problem. And I had the car on 4 jack stands all the time. No clearing problems going over the rear, no clearing problem below the rear lip, and not touching wood/window, but close.
Just my $0.02...
Garvino, maybe this thread will help you ...

http://pantera.infopop.cc/eve/...130018095#6130018095

There are a few things I DIDN'T do that I wish I would have know about, namely ...

- pull your oil filter - otherwise, you'll mess it up on the driver's side motor mount;
- starter can stay in place without issue;
- think about pulling the long bolt that holds the two pieces of the motor mounts together. You'll see that I removed each motor mount from the block (two bolts each side), but I think it may be easier to leave the engine-side of the mount attached to the block.
- you definitely have to disconnect both headers ... however, you can leave them in the car and attached to your mufflers;
- take note of where I bolted chains to my manifold and bellhousing ... I bought a load-leveler, but chose just to use chains due to clearance issues.

I was a total novice in taking this on - and it worked out just fine.

Best of luck,

EA
Do I need to have the fuel tank shroud installed before the installation of the engine and transaxle or can the shroud be installed after I have the motor in?

I am just about ready to put the motor and transaxle back in but my shroud is pretty rough looking. I am thinking about getting a polished stainless steel shroud, but I don’t want it to hold up my progress.

Any other helpful tips would also be much appreciated. Thanks again.
quote:
Originally posted by Garvino:
Do I need to have the fuel tank shroud installed before the installation of the engine and transaxle or can the shroud be installed after I have the motor in?

I am just about ready to put the motor and transaxle back in but my shroud is pretty rough looking. I am thinking about getting a polished stainless steel shroud, but I don’t want it to hold up my progress.

Any other helpful tips would also be much appreciated. Thanks again.


The Tank Heat Shield is originally Mounted with steel straps and 'Pop-Rivets'. With the Engine in place it will be a tight squeeze to get down in there with the pop rivet tool; even if You left the Header Off until after. I suppose You could access the lower straps from below OR You could use sheet metal screws instead of the rivets, requiring only Your hand and a screwdriver, instead of trying to use the rivet tool in tight quarters. Then there's the Larger Sheet metal screws with a 'Hex' Head allowing the use of a Rachet and Socket to screw them in. I've used those many times. The question is: Can You slip the Shield, Itself down into place with the Engine mounted? I Installed mine when the Engine was OUT. I don't have the answer. I suppose it's workable!! If You want it bad enough!
quote:
Originally posted by Garvino:
Do I need to have the fuel tank shroud installed before the installation of the engine and transaxle or can the shroud be installed after I have the motor in?


I don't think you'be able to pull this off, dude. Not only do you have the issue of getting the rivits in, but you also have to clear the trunion bearing for the shift rod ... which is not going to work with the engine in because you have to use that angle to your advantage.

FWIW, I treated my shroud with metal prep and spray painted it black ... and it looked brand new. Took me a few hours - start to finish.

Good luck.

EA
#3528
...on My original Aluminum Shield, I used a very fine Steel Wool. It Polished up nice! Didn't leave any scratches as would be expected. Looked more like it was 'Chrome Plated'. The Steel Wool 'Cut' the Aluminum with very little effort. And, whats more, You can Polish it while it is still in Place...
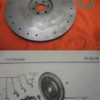
I just was looking at my flywheel and noticed a spacer that is with it. I am not familiar with this and do not see it in any of my Pantera manuals. Since I did not disassembly the car I need a little guidance as usual.

I would guess that it would go between the flywheel and the crankshaft but am unsure. Can anyone give me any guidance on this?

Attachments

Images (1)
  • Flywheel___Spacer
I had some time when I got off work this morning to go down and work on the car.

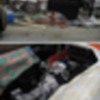
Here are few photos of putting the transaxle and engine together, hanging the motor, and the final motor installation.

After reading through a ton of old posts, asking a ton of questions, and getting help and advice from all of the great members here, the process went pretty smooth.

We had some issues with the motor mounts hanging up on the A/C compressor initially. We also ended up partially putting the assembly and taking it out three times. This was primarily due to needing to adjust the chains so the engine balancer would slide under the rear of the roof line.

Other than that it went pretty smooth. We left the distributor out, fuel pump off, and took the oil filter off for the install. I was going to put the starter on before installation but I did not readily know where the nut and one bolt were.

Attachments

Images (1)
  • Engine___Transaxle_Install2
Last edited by garvino
What you called a spacer really look like the washer that is used on an flexplate (Automatic), and there it goes on the outside of the plate. The flexplate is much thinner, and needs this washer for support.
If this is a spacer like you say, I would think that it should be machined on both sides.
I have never seen a spacer on a flywheel, and think it should be avoided if possible.
Tunnelport492,

I’m glad you mentioned that. I forgot to post the new information that I found out on the “spacer”.

When I actually went to install the flywheel I really took a look at the “spacer” again and noticed that it had marks from where bolts had been tightened against it.

I decided to get another opinion on the subject and went to another custom rod shop. He said the same thing you did – that it indeed was too thick to be a spacer and was used to for support on an automatic transmission.

I’m thankful that I sought out another opinion instead of putting it behind the flywheel as I was told to from the first guy.
Post
×
×
×
×
Link copied to your clipboard.
×