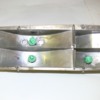
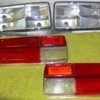
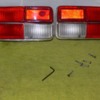
With winter almost over, I snuck into the car storage bag and pulled the tail lights to do some clean up (first of a series of tweaks I'll be making before the driving season begins in a few weeks).

The original silver finish was really showing it's age, so I cleaned off the surface dust and dirt and masked the sockets...

Attachments

Images (1)
  • P1250271
Original Post

Replies sorted oldest to newest

So, some searching and searching and a lot of gas later, I tracked down some hex-capped replacements (M4 -0.70 x 25mm bolts).
However, since they didn’t have a thread-free shoulder like the originals, I thought it best to use a needle file to slightly widen the lens holes so the screws didn’t grip and put pressure on the lens while going in. Next I used a M4 0.7 tap to chase the threads in the housings so that the new bolts spun in easily, but snuggly (the silver paint had tightened things up a bit, so this step really helped).

Attachments

Images (1)
  • P1250278
quote:
the 6 screws were in rough shape, with a couple of them getting close to round inside …

Your solution of using allen head cap screws is the same I have been using for my restored Group 4 lights. The stock screws were metric phillips drive, fillister head screws. I have looked everywhere, and asked my local nuts-n-bolts supplier to try - nothing. Looks like you used black oxide finished screws. I have also found stainless steel and bright zinc coated varieties.

On the housings, you are also using the same paint I have been successfully using. I do however glass bead the housings to provide a uniform, solid surface.

And for revitalizing the lenses, plastic polish kits are now easy to find - marketed as headlight lens polishing kits. I haven't used one, but they appear to be a good choice for an owner's one set of lenses. (I buy my polishing material in larger sizes).

As you found out, it is an easy job with great results.

Well done.

Larry
quote:
Next on tap are speed bleeders

You don't need Speed Bleeders if you use a pressure bleeder like the Motive Power Bleeder. It's a piece of cake. Connect it to your master cylinder, install a drain hose to a catch bottle on your bleed nipple at the brake caliper, and open the nipple.

Motive Brake Bleeder (basic)
http://www.amazon.com/Motive-P...id=1269447212&sr=8-2

Motive Brake Bleeder (w/ cap/seal for rectangular reservoir)
http://www.amazon.com/Motive-P...id=1269447347&sr=8-7

More info on how great this type of bleeder is here:
http://pantera.infopop.cc/eve/...400047655#2400047655

http://pantera.infopop.cc/eve/...?r=31510577#31510577
Sure, now you tell me, I've already bought and paid for the speed bleeders! :-)
It's like all those people

But hey, this discussion is still valuable, by reading the links provided, I've picked up some great tips and since I've never looked for 'blue' brake fluid before, I'll be doing that now so I can switch back and forth between it and the amber fluid in the future.

Adams, I would have loved to try the ALSA chrome paint, but I couldn't justify spending that much for spray paint - $115 for the three step system - when it's going to be covered by the lens anyway ... Of course, if I'm not happy with the brightness, then it may be time to get more serious about either the reflector finish (wonder if loading it up with crinkled tinfoil would do anything?), or the lights ... watching to see what happens with David Berman's LED experiment.
quote:
I would have loved to try the ALSA chrome paint, but I couldn't justify spending that much for spray paint - $115 for the three step system

Agreed, so I'm proposing a 'Tail Light Restoration Tech Session" to our local PCNC chapter. I figure it shouldn't cost more than $10-$20 per person for the paint/materials if we do 10-15 sets of tail lights. Hopefully, there's enough material in that can to do 30 tail light housings.

quote:
if I'm not happy with the brightness, then it may be time to get more serious about either the reflector finish (wonder if loading it up with crinkled tinfoil would do anything?)

I've heard the best results come from lining the reflector with chrome tape. At only $1.99 per foot for the 1.5" chrome tape, it shouldn't cost too much.
http://www.75chromeshop.com/in...bb1f4f5b4f7d7943c5bc
quote:
I figure it shouldn't cost more than $10-$20 per person for the paint/materials if we do 10-15 sets of tail lights. Hopefully, there's enough material in that can to do 30 tail light housings.

I doubt that, very much.

I researched this stuff pretty well a couple of years ago. I believe it is a smaller can than you normally associate with rattle can paint. If you read close enough, it also has a higher pressure AND and higher volume nozzle; so it dispenses much quicker.

And evidently it is quite touchy on getting it to properly work.

I haven't done an actual tally, but I doubt I get more than 5 pairs, if that, from the rattle cans I use.

It IS interesting stuff. And I'd put in my share on a tech session try-out to get some first-hand info.

Larry
If $115 (I never saw a price) for the 3 part system and 5 pairs can be done, that's $25 bucks or so to be seen from a few more feet away. Not too bad spread among users. Can the cans stop off in Alabama first?!?!?

Far as the chrome heat resistant tape, didn't someone here do that and report was not so great? Mine improved with the 'chrome' paint, but always looking for an extra margin of safety.
quote:
The Duplicolor Chrome paint only gave me a shiny silver look. Do multiple coats give it more of a mirror finish?

Not much change once you get good coverage.

Do NOT clear coat it. While the surface is dulled with finger (oil) contact, DupliColor advised me to not clear coat as that diminishes the reflective properties.

Larry
quote:
Originally posted by LF - TP 2511:
quote:
The Duplicolor Chrome paint only gave me a shiny silver look. Do multiple coats give it more of a mirror finish?

Not much change once you get good coverage.

Do NOT clear coat it. While the surface is dulled with finger (oil) contact, DupliColor advised me to not clear coat as that diminishes the reflective properties.

Larry


Exactly correct. Found out the hard way. For some reason the clear turns the formerly-silvery-chrome into gray. No kiddding, dulled it right out. Very odd. Had to start over (not on my lenses though.) Good advice.
Post
×
×
×
×
Link copied to your clipboard.
×