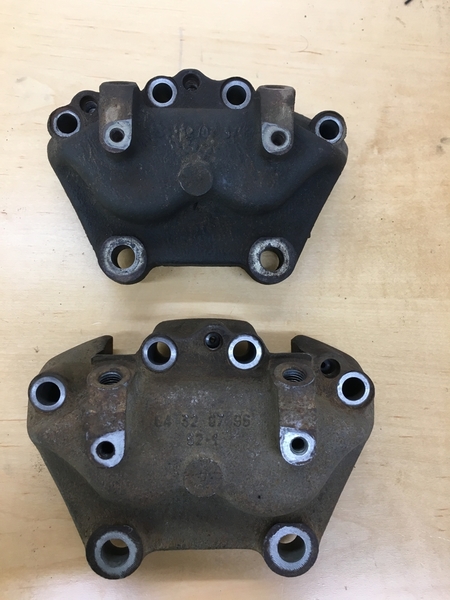
I have the brake calipers disassembled for rebuild. I’m looking for advice on how best to clean 45 years of grime off of them prior to painting them. Any suggestions for soaking them in something?
Steve
I have the brake calipers disassembled for rebuild. I’m looking for advice on how best to clean 45 years of grime off of them prior to painting them. Any suggestions for soaking them in something?
Steve
Replies sorted oldest to newest
Plenty of brake clean spray first, then use wire brushes of different shapes attached to drill. You could also soak them in Simple Green, Purple Power etc. But the wire brushing is most effective.
I was hoping for a over the counter solvent. I’ll stop by the local auto parts store and see if they sell brake clean by the gallon.
Not sure this is applicable to your situation but when powder coating old components such as calipers, wheels or intakes it is advisable to pre-bake the items, prior to coating, to force contaminants out of the metal pores.
I would think a good solvent cleaning, followed by a baking at 350° or so and then finished off with another cleaning prior to painting would give you a good chance of success.
My 2¢
Larry
Most times, we do NOT recommend completely disassembling front calipers because the two flat o-rings that seal the caliper halves are not generally available and are not included in rebuild kits. So you are forced to reuse the old OEMs which is not a good idea. Round o-rings will not reliably substitute, either.Use Girling brake component grease on the flat o-rings during reassembly, and hope for the best.
At the same time, powder coating requires heat of 350 degrees F or more, which is not good for rubber if you don't separate the halves. Interestingly, Wilwood, Porsche, BMW and a host of other manufacturers say the same thing about not splitting their two-piece calipers. Do LOTS of testing for leaks under high pressure after putting the system back together. Brake mods are serious business.
Boss, those O rings are available here:
https://www.pegasusautoracing....tails.asp?RecID=1144
Even then it say's Girling does not recommend separating the two half's for rebuilding. I don't know why. I've done it on three sets, no problem.
I have already acquired the O-rings listed above. Without splitting the calipers I don't know how I would have been able to clean the bores. I worked on them yesterday for an hour with a small wire brush. It is obvious that there was moisture in them that settled in the low spots. They look better but I am considering hitting them with a light hone.
@RSS1 Do you know the torque spec fro the caliper bolts that hold the halves together?
Steve
I do not know the torque specs. I just tighten as much as I could by hand. No leaks.
Besides the unavailable connecting torque specs, I wish the o-ring compound was shown. Neoprene and even Viton flurocarbon are not the preferred rubber materials for intermittent high brake heat, 1200-1400 psi working pressures all while soaking in hot polyglycol-ester brake fluid. Racers get away with some things by rebuilding their stuff frequently while street people seldom if ever do so unless it blows... Please let us know how this works out.
If the calipers are off the car and completely disassembled, you might try soaking overnight in a can of Berryman Chem-Dip Carburetor Cleaner to soften and remove 4 decades of grease, oil and brake dust residue.
https://www.amazon.com/Berryma...uretor/dp/B00DSMEL2A

I stopped by the local NAPA and found thier branded carb dip similar to what is posted above. I removed the basket and used a piece of wire tied through a bolt hole to lower the half caliper into the can. I let it soak for about 24 hours. I removed it this morning and scrubbed it in a bucket with water then washed it down with brake clean. It worked pretty well.
I’m making some progress on the caliper prep. After the carb dip I brushed it with a stainless steel toothbrush to get the lose rust off. Next was to soak it in Evapo-Rust. After removing it from the Evapo-Rust I rinsed it with water and brushed it with a nylon brush then sprayed it with brake cleaner to remove the moisture. Here is what it looks like after spending 2 days soaking in Evapo-Rust. I’m very happy with this result. It is clean bare metal.
What color are you painting the calipers, and what do you plan to paint them with?
Powder coat?
https://www.armortechpowdercoa...pers-powder-coating/
https://www.youtube.com/watch?v=5hNKMVQdCJA
Eastwood Brake Caliper Paint?
https://www.eastwood.com/paint...-caliper-paints.html
Or something else...
https://www.amazon.com/G2-Temp...System/dp/B004BQ87YK
I've used the G2 caliper paint. Worked well enough. Powder coating would be ideal. I imagine they have some method of protecting the piston bores and blocking the holes.
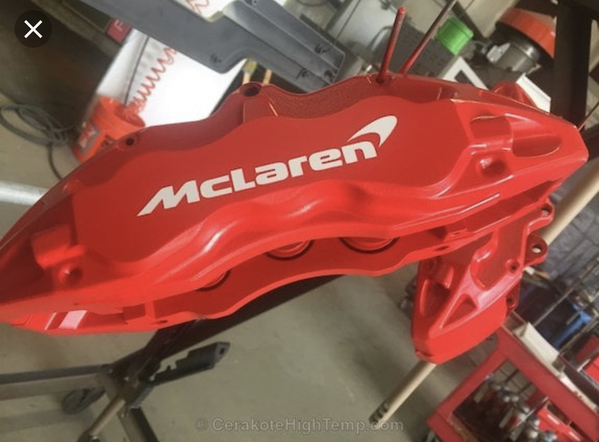
 You might want to try Cerakote. Originally conceived as a firearms coating, it differs from powder coating in that it’s an air dry coating, so it’s safe to use with rubber seals, gaskets, plastic, bondo, etc. The temp rating is up to 1800 degrees. Areas where you don’t want the coating can just be masked off with normal painter’s tape. Engine builders use it to coat pistons. I did my fully assembled ZF trans. They have metallics and clears too.
I did the brake caliper thing six months ago. I had the calipers cad plated. Thought about paint but thought it too much for the unseen. Powder coat would be my choice..
I like the chemical plating processes, like cadmium plating and gold iridizing. I learned circa1970 that the cad plating process can embrittle certain metals however. I had a Yamaha motorcycle frame cad plated, and afterwards all the welds began cracking. Yet other frames (European motorcycles) had no cracking problems.
Ceramic and Jet Hot coating are way cool, but they aren't readily available, and they are limited in colors.
Having a part sand blasted and then powder coated is the easy way out. No argument there. I've had a few things powder coated, and I'm a bit disappointed in the results. I won't use it again. Its too soft, too delicate. Scratches easily, etc. Its not a good automotive finish. That king is wearing no clothes, in the eyes of this fool.
I've not used the Cerakote that David has mentioned … I'm intrigued. I plan to experiment with it in the future.
I think paint, even out of a rattle can, is the best bang for the buck.
(1) You can do it at home.
(2) It takes no more prep than other finishes.
(3) Widest choice of colors.
(4) More durable than powder coating.
(5) You can achieve any finish you want; from flat to high gloss. You can make a part look like a factory part, or make it stand out like a custom part. I've applied paint jobs with a rattle can that resisted paint chipping, and resisted later removal with paint remover. I've been told some of my paint jobs were tougher than the porcelain in a bath tub.
You just have to use the right primer, the right main coat, and the right clear coat. Apply thin coats, and allow adequate time for drying between coats; flood lights and heat lamps help in that regard. Figuring out the "right" paints takes time and experience OR receiving the right advice. I look for primers that dry so hard that they don't feel like paint, they feel like bare metal. And I look for clear coats that "darken" the main coat. Admittedly some guys have better skills than others at making a rattle can paint job look good. Over the decades I've had some rattle can paint jobs come out that looked stunning … yet I've had a few that failed miserably. ![]()
That's why they make paint remover.
George, can you tell us which primer, main coat and clear worked for you?
Cheers
eugenioinnocenti posted:George, can you tell us which primer, main coat and clear worked for you?
Cheers
I don't paint often enough to remember. I can say that I've always had better results with paint purchased at auto and motorcycle dealers, automotive paint suppliers, or auto parts stores, than with paint purchased at home improvement or industrial supply businesses. Technique and temperature are important. I like testing the paint I've selected on junk metal or damaged parts I might have laying around prior to painting the "real" part.
I've found Eastwood's paint to be high quality. The other spray bomb manufacturer with excellent paint is SEM. It used to be available only through automotive paint suppliers but now it's available on Amazon.
In an earlier posting I mentioned Cerakote. Other than it being available in hundreds of colors, one of the nicest things about it is, it's a very thin coating, so it doesn't hide fine details or textures the way powder coating does. It would be the perfect finish for restoring Campagnolo wheels. Because it's an air-dry coating, as opposed to a baked coating, you shouldn't have the out-gassing problems that you do with powder coating. I've even had my throttle bodies and linkage Cerakoted. Try that with powder coat!
All good paints have a system. i.e. Imron, PPG, Jet Glow or Rustoleum.
Don't cross mix systems. Follow their instruction for metal prep. prime and final coat.
Professional painters mix and have their favorite system but as a rookie I follow the directions. Good painting is 98% skill and 2% luck.
I was painting an aileron and when finished a bird flew in my hanger and pooped on my project. Took that as a message from above and let the pros do the painting from then on. I'm now a spray can only guy.
rrs1 posted:Boss, those O rings are available here:
https://www.pegasusautoracing....tails.asp?RecID=1144
Even then it say's Girling does not recommend separating the two half's for rebuilding. I don't know why. I've done it on three sets, no problem.
Hi rrs1. I have been off the blog for way too long. Got back on today and ran across your post. Many thanks for the Pegasus link! Been looking for these seals for a while, just ordered 4 each. Got 2 extra sets of front calipers itching for a rebuild. Thanks again.
You may want to consider new Toyota 4Runner calipers as donors for your rebuild parts. They run the same size staggered pistons and have excellent quality rubber parts. About $100 a pair will net you pistons, seals, dust boots and clips.
Get those internal seals from Pelican and you'll have everything you need to really renew your calipers.
larryw posted:You may want to consider new Toyota 4Runner calipers as donors for your rebuild parts. They run the same size staggered pistons and have excellent quality rubber parts. About $100 a pair will net you pistons, seals, dust boots and clips.
Get those internal seals from Pelican and you'll have everything you need to really renew your calipers.
Larry,
That is a great recommendation. Might you know the model year of the 4Runner that is compatible?
Steve
I bought 86-89 model.
I believe same pistons in a different casting 79-85.
Back 15 years or so, when people were Pulling the shiny moldings pieces off and Powered Coat them, I choose to Paint Mine! I used SEM Spray Paint! SEM Black Primer and SEM Black Satin. First degrease and clean Very well! Then went over everything with a Green scratchy pad, then cleaned again! Two coat of each paint! Of coarse masking everything off so You don't get over spray all over the rest of the Car Took the Longest! It touches up great if needed! 15 years later Still looks Good! Not sure if SEM make Brake Caliper Paint?
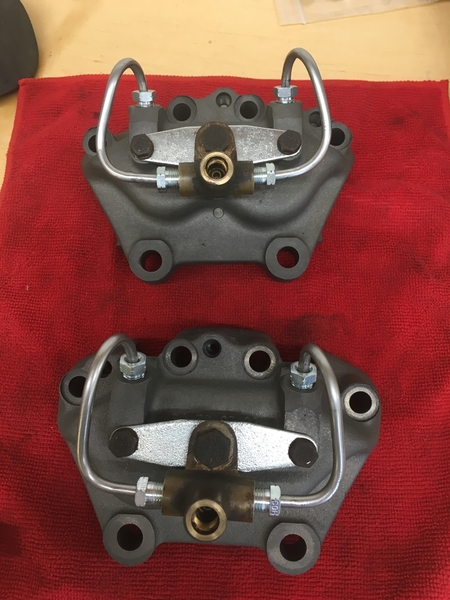
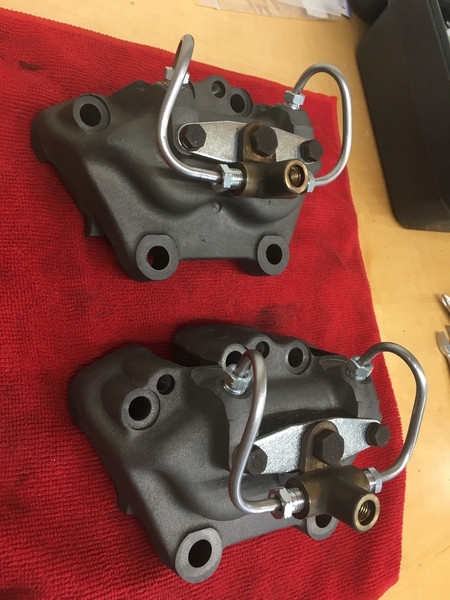
Today I had some time alone so I put it to use in the garage. I was able to make new lines out of stainless. It was a little challenging but doable. You need a hydraulic flaring tool and some practice to get a good result. The caliper end is bubble flare with a 10x1.25 flare nut. The T fitting is inverted flare with a 3/8”-24 flare nut. 

Tsolo,
I'm in the process of rebuilding mine now. Yours looked nice with the ss line. How did they look painted silver? Any pics?
Did you also use ss flare nuts with the ss line? Where did you source them from? I can't seem find the 10 x1.25mm in ss. Not sure if it matters though.
I wasn’t able to find the ss tube nuts so I ordered plated steel. I haven’t finished with this project but I did get them painted. I made the mistake putting a clear coat over the silver which discolored them some. They looked better before the clear way applied.
Steve