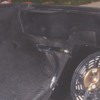
I am starting to clean up my engine compartment's wiring and air conditioning hoses. I plan on running them through the passenger side rear fender well.

Does anyone have any photos of where they drilled to take the wiring harness and A/C hoses out of the car into the rear passenger fender well and then back into the engine compartment at the rear of the car?

I tried to search for some on the forum but there are tons and tons of pages on wiring alone and I am getting tired of searching.

Thanks.
Original Post

Replies sorted oldest to newest

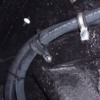
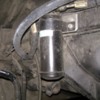
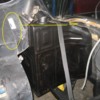
Here's a shot of my AC hoses exiting the engine bay. Once through the opening, I ran them up and above the structural channel securing with adel clamps and ran them foward to the drier that I relocated.

That same channel ends at the passenger side tail light housing, and that's where I cut an opening to route the wiring behind the tail lights. I ran the wiring forward through that channel and exited at an opening that already exists. took a while to get the wires through. Make sense?

Ron

Attachments

Images (1)
  • AC_Hoses
Thanks for the help so far. Just finished pulling the harness and unhooking the A/C stuff. I can not believe the amount of dirt that came out of the wiring harnesses rubber cover for the rear marker lights.

I see that I'll need to cut a hole for the A/C hoses at the back of the car where they will come back into the engine bay. But how about at the front of the engine bay near the coolant tanks? Do I need to cut holes for the A/C hoses to enter wheel well side in this area?
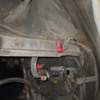
Okay, just pulled the passenger rear wheel and inner fender well. I see now where I can run the wiring harness and A/C hoses right into the wheel well on top of the frame without having to cut a hole. I set one of the A/C hoses on the rail to see how it fits and it looks like I'll have to trim the inner wheel well liner where the hoses and wiring harness run past it.

Attachments

Images (1)
  • Passenger_Rear_Wheel_Well
Thanks for the shot of the splash shield. That is exactly what I was thinking needed to be done to it. Sorry if my terminology is slightly off but I'll eventually get there.

I am heading down see what else I can get done on the car today. Thanks for everyone's advice.

By the way, I think my finger painting is a least as good as a second graders.
Thanks for all the help so far. My mess keeps getting bigger, but it will be worth it in the end.

I am smoothing out some of the dents and spot welds in my engine compartment with my wiring reroute and A/C line reroute.

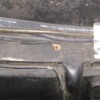
I was wonder what most owners do with the seam on the fender well (pictured below). Do most people weld the seam from top to bottom and then blend it in or do they just leave it?

Any suggestions are much appreciated. Thanks.

Attachments

Images (1)
  • Seam
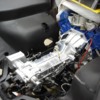
I cut off all the brackets that held the wiring and electrical. This should really help clean up the engine bay. I also have started to sand down the inner fenders of engine compartment.

I can’t believe how many spot welds were used to put these cars together. It is going to take some time to smooth these out.

I am going to hopefully finish running the reroute on the wires and relocating the A/C lines this weekend.

Attachments

Images (1)
  • Passenger_Engine_Compartment
Last edited by garvino
quote:
Originally posted by Garvino:
Thanks for all the help so far. My mess keeps getting bigger, but it will be worth it in the end.

I am smoothing out some of the dents and spot welds in my engine compartment with my wiring reroute and A/C line reroute.

I was wonder what most owners do with the seam on the fender well (pictured below). Do most people weld the seam from top to bottom and then blend it in or do they just leave it?

Any suggestions are much appreciated. Thanks.


I think most people leave that seam as-is. It is hard to smooth it out over such a short distance and not have it look odd. It's also a great transition line if you are doing a glossy or body-color engine bay, leaving that point forward as satin or matte.

Mark

Attachments

Images (1)
  • 1826cleanbay3
Garvino, if you do seam-weld that area, you'll find that the rear end of your car is now consideably stiffer than it was before. That panel overlap continues clear into the weatherstrip channel (covered with 'factory' bondo), and I believe the whole panel is a major contributor to the "standard" paint cracking we usually get only inches away near the gills. The welding will be cheaper and lighter than adding a complete rear-chassis stiffener kit and quite possibly as effective. A good welder can do the job neatly; don't pay much attention to making the engine bay look like it is seamless extruded plastic. As a motorhead, I find well-done welds to be attractive, pointing out that these are real-steel machines.
I don’t know if I am just really slow at doing body work or if there was just a ton of work to do in my engine compartment. I cannot believe how many spot welds I had to take care of. I bet I have almost 50 hours in cleaning up and smoothing out my engine compartment.

Here is a picture from last night after I put the last coat of paint on. It probably looks better in the photo than in person. I have a few areas with some dust in them, but they can be fixed with a little wet sanding and buffing. I’ll have to see if I have enough energy to do that or if I’ll just let it be.

Thanks for everyone’s help with this portion of my project. I still have to finish up the reroute of my wiring. I have also decided to move my A/C condenser up front so I still have a lot of work ahead of me.

Thanks again.

Attachments

Images (1)
  • Painted_Engine_Bay
Post
×
×
×
×
Link copied to your clipboard.
×