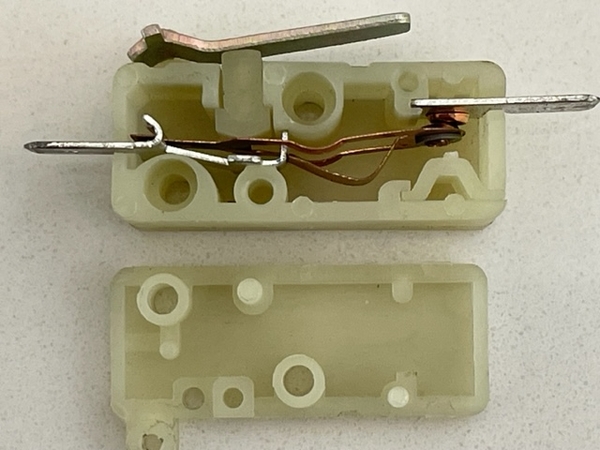
So recently when arriving very early in the morning to a car show my headlights wouldn't go down. Later when I got home I was able to verify the back lower switch had failed. The way I checked it was manually pressing the switch (no clicking sound) and by jumping the wires which worked proving there was power. So I order a replacement from Hall and a couple of days later it arrived and I replaced it and everything worked fine. So at this point having never looked at the internals to a switch figured I'd have nothing to loose if I broke it further. Turns out the side is only lightly pressed on and I could remove it by hand, pulling lightly back and forth. What I discovered two issues. The contact had glued itself to the plastic below leaving it permanently open and that curved copper piece below was out of position. The right side of that piece is permanently attached to the contact but the left side can be moved. On mine the left side edge was off of the silver metal and down on the bottom. In this position it leaves the contact permanently in the open position. Moving that left edge of the lower curved copper piece too high or too low doesn't work. But in this position the switch is back to fully functional again and will be a spare going forward. No regrets spending $$ on a new switch as it was an interesting learning experience. Another interesting observation that's not obvious in the picture is the contact point is the tip of the lower one to the middle of the upper one and not flat across. Someone with smaller tools might be able to improve upon the surface contact area.
Attachments
Original Post


