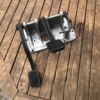
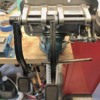
As recommended, I pulled it out and threw it on the bench!
Replies sorted oldest to newest
Do you have the effort reduction kit? Was the linkage wallowed out?
That box does not have the effort reduction kit.
Hi Thanks, I know. I was not planning on adding the kit. Perhaps I should?
Just curious, why did you pull it out, and what are your plans?
I emailed SACC & Amerisport for a spacer, but never heard anything back.
I was considering going through mine, but I’m not sure if it needs it….
Rocky
Hi , I pulled it out since the linkage pin to the clutch master cylinder was stuck. I have worked a lot upside down under the dash in the footwell area and am use to it but after making several specific tools/clamps etc. which all broke, I decided to just pull everything out. Even then the pin to the clutch master cylinder was "fused" to the arm and had to be drilled out. All of his just to change out the clutch master cylinder. I have welded up a piece to hold the two bolts in place so that all can be done from the trunk. I also cut the notch in the metal to allow the pedal assembly to go back in with no pain...this works great. Now the question is to add a reduction kit or not when putting in the new clutch master cylinder???
I have a long throw slave cylinder but internal leaking in the clutch master cylinder prevented the correct throw. (pretty sure) Once done, I might change back to the standard diameter slave as everything else is correct and tight. Will see...
I don't have the reduction kit and don't think its that bad. Then again I don't do an awful lot of driving and have no basis of comparison.
In my experience, the clutch reduction effort kit is helpful on the long throw clutches and may work against you on the diaphragm clutches. At one point I had two Pantera concurrently and actually pulled the kit out of one of them and added the kit to another. The one that I added the kit to was a long throw and it took incredible effort to press the clutch pedal. Once the kit was added, the clutch was wonderful. In contrast, a diaphragm clutch with a hydraulic throwout bearing was very difficult to use with the clutch reduction kit. The clutch seemed to be on or off and made it easy to stall the car when taking off at a green arrow for a left turn. Removing the kit on that set up made the clutch very nice.
The factory clutch reduction effort kit on the later Panteras are mostly worn out by now. A couple of the holes in the mechanism tend to become oblong and the kit does not work correctly. A fresh kit is available from our vendors that has roller bearings where the original kit simply had holes in the steel plates.
@Dan A. posted:Hi , I pulled it out since the linkage pin to the clutch master cylinder was stuck. I have worked a lot upside down under the dash in the footwell area and am use to it but after making several specific tools/clamps etc. which all broke, I decided to just pull everything out. Even then the pin to the clutch master cylinder was "fused" to the arm and had to be drilled out. All of his just to change out the clutch master cylinder. I have welded up a piece to hold the two bolts in place so that all can be done from the trunk. I also cut the notch in the metal to allow the pedal assembly to go back in with no pain...this works great. Now the question is to add a reduction kit or not when putting in the new clutch master cylinder???
I have a long throw slave cylinder but internal leaking in the clutch master cylinder prevented the correct throw. (pretty sure) Once done, I might change back to the standard diameter slave as everything else is correct and tight. Will see...
Any chance you could post a pic of the notch-out , I am at that point but a little nervous about it.
Did you find your clutch effort reduction linkage piece (or any of the linkage parts, for that matter) was / were wallowed out?
I like your hitch pin implementation.
This reminds me…. I need to find one of those clutch return springs for my car!
Rocky
@Dan A. posted:All done and kit added. Pulled it all apart to grease etc. I lack the experience but it would seem that the important angle of the push rod on the clutch master cylinder would cause wear out problems? Anyway, back into the car.
Check out this thread.. especially the last page!
especially the last page!
Maybe helpful
using the zip tie for the return spring!
Hi and thanks. I'll check it out. There is no wear in the various parts. All are new and with new pins everywhere. Had already cut the metal on the firewall to make installing easier. Have done some trials and all just pops into place quickly. The cut really helps.
@rocky posted:Did you find your clutch effort reduction linkage piece (or any of the linkage parts, for that matter) was / were wallowed out?
I like your hitch pin implementation.
This reminds me…. I need to find one of those clutch return springs for my car!
Rocky
PI Motorsports has the springs..
These are all new parts on the reduction kit. No kit before, I added it since everything was out to change the clutch master cylinder.
The roller bearings in the new kit are well done. The factory unit was just steel plate and the pivot holes became oblong with time.
Hi, I was asked to show what I cut on the firewall to allow easy removal/refit of the pedal box. See the photo with my "yellow" lines to show the cut. I actually cut to remove the box and then adjusted the cut to get the box and the new effort reduction kit levers to pass easily. The box did not originally have the kit.
Attachments
Just need to point out that cutting in absolutely unnecessary! Read this one page … starting at the top (includes drawing where to cut if you still decide to do so) .Also important the allen bolt upgrade for the clutch master cylinder!!!
Well for me it was an invisible "cut" which has been documented so works easily. I made my bolts (all including the clutch master cylinder) so that I can remove everything from the trunk side without having to go under the dash.
I have the cut on both sides and it makes the pedal box removal and installation a breeze. You cannot tell that it has been cut when the box is installed. Without the cut it is essentially a two man job.


