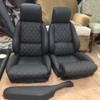
....right up to where I put the passenger seat in the car...and it is hitting the danged parking brake handle cover!!!

Using some of Gary Herrig's last seats he put together. Called him up, as I've known him back to his Goose days, to get some tech support. Basically what has to be modified! He mentioned one of the holes in the Vette seat needed some file work, front inner I believe...and I found that the rear inner also needed some relief with a file! (Working on passenger side here!)

I get all the seat rail mounting holes to line up perfectly, all 14 1/4" apart front and rear....go to drop it in and get one front bolt in.....hmmm can't align the other front hole....

Looking around I find that the rear holes are off about 1/4-3/8"..... eventually traced this to interference with the seat and the parking brake housing cover!!!

LAST thing I want to do is start carving on the Pantera parts......specially since I spent so much time welding up/filing down previous carvings.....nor do I want to cut up the plastic housing!

I would love to hear other solutions that you've done to get these seats to fit properly!

I think the driver seat will fit with no issue....just this pesky passenger side!

74 car. ?? Vette seats.... 85-87ish? Taking out Recarro that work for poo.

Ciao!
Steve
Original Post

Replies sorted oldest to newest

Even the Pantera seats rub the cover.

You can remove the plastic cover and do surgery on the steel sheetmetal bracket that holds the brake handle in place. I don't think that you can completely eliminate the contact.

The Pantera seats fit the cabin the best. Varying from that puts you at your own risk.

Corvette seats fit a Corvette.


You also may be able to shim the left seat track higher then the right to tilt the seat a little.
Am having my Corvette seats installed this week after having to do some "surgery" last week. We also couldn't scoot the seats all the way back because of the center hump among other issues, and we had to cut the bottom steel pan of the Corvette seats to take out the 1-2" hump that lifts the seats to where they interfered. I can stop at the shop tomorrow, and if they aren't installed yet, I can snap some pictures of the bottom pan.

Attachments

Images (1)
  • pantera_seats_(800x600)
Steve,

Here you go. I had a similar issue with my seats, not corvette. Until proven otherwise I believe that the Pre L cars had a sheet metal cover that was wrapped in vinyl. The L cars like yours and mine had a plastic cover that had a protrusion towards the seat. See picture below. What I ended up doing was making a plug out of wood and then making my own fiberglass version without the hump, then trimmed to fit. There are sheet metal tabs that can be bent down, no cutting required that allows for a little more room. This gains about an inch as I recall. I had to eliminate the metal ring that hold the boot down but have never missed it.

Steve

Attachments

Images (1)
  • 50801D1C-A2B6-40C9-B1F2-6129B3262578
Wow!!!! Good Stuff here!!!

Doug: Didn't get Pantera seats with car Frowner Frowner Frowner Otherwise would be having a different conversation, like where to get new foam and covers...... Smiler

Other local club members who have done this swap are really pleased with them. I've sat in them and they are comfy. Long term.....we'll see!

tberg: The Vette "kit" came with aprox 1-1.25" spacers at the front to allow floor to clear that drop in the front where the seat cover clips to on the Vette Seats. I added two thick washers on each side in the back in addition just because it felt like there was a gap.....you could force everything tight.....and bend it a bit......but that didn't seem good.....or right.....

I'm feeling like if I can get the seats in, they should slide really nice on the Pantera seat tracks!

Steve: I like your work!!!! Why the 1/2" + protrusion is sorta odd.....I'm sure I'll understand why when I pop that off to take a look....probably has to do with the boot!

I can probably spray paint an old sweat sock black and slip it over the whole thing, never know it was there...... Wink Wink Actually I may have an old leather shifter boot from a 'Bird or something that may suffice as a nice looking cover!

Next! Look at the hump relocation.......for the engine cover.

Grazi!!!
Steve
Last edited by mangusta
quote:
Originally posted by Mangusta:
Wow!!!! Good Stuff here!!!

Doug: Didn't get Pantera seats with car Frowner Frowner Frowner Otherwise would be having a different conversation, like where to get new foam and covers...... Smiler


Steve


Hall sells the Pantera seats. I guess these days no one has heard of them?

The '74 is the one with the molded cover. Before that the sheet steel cover is what was used. Correct.


The mounting flange for the hand brake can be shaved and the hand brake can be moved closer to the console. The bulkhead can be reduced in a number of ways.

Probably the thing to do is first take it out, then fit the seat, then build a bulkhead cover to fit it.

The pulleys can be moved back about 2 inches as can the alternator and the ac compressor. Kirk's Amerisport modification is an excellent way to go if you don't want to do it yourself BUT virtually any fabricator can do it but it takes a little while to work out the details and several fittings of the seats.


The problem with those Corvette seats is the side bolsters. The Pantera seats don't have them OR need them. The bottoms are true buckets and are going to hold you in place just the way they are.

The original design isn't wrong, just the details on the passenger seat and the bulkhead seem to never have been worked out completely. It was as if the development project ran out of funds at some point and they couldn't even put a cover on the console?

It doens't make sense but it is what it is.


The Corvette seats are the proverbial round peg in a square hole but you are going to need to twiddle on the peg a little to make them fit.

Ultimately I think you are going to need to move the location of the seat holes to the right about an inch to make them work at all.

As far as making the Pantera tracks work easily...good luck on that. Today they will work. I don't know about tomorrow though?


The aftermarket seat that fits the Pantera very well is the Scheel. Too bad they are out of business?
The early Pantera seats where the back is hinged are the best to use in a Pantera.

They let you "adjust" the back of the seat to "help" you fit the cabin better.

They also give you more access to the engine cover as well.

The Mangusta seat is likely to make it necessary for you to completely remove them in order to get access to the engine from inside of the car?

The main problem with Pantera seats is that the original vinyl was too hard. When you recover them in a softer material like an upholstery grade leather, it changes the entire character of them.


The handbrake is the least of the problems. Fixing the bulkhead bubble so the seat can go all the way back, is the big deal.
Last edited by panteradoug
I called over to the shop that is finishing my restoration to see if I could get pictures of the seats. The owner told me he has taken tons of pictures of what was done to the seats prior to installation and will send them to me on Saturday as he is preparing for a race at a track tomorrow. I will post them as soon as I receive them.
The seat saga continues....

SO, I decide that I'm going to tap the two little flanges on the parking brake tower down from a horizontal position to a vertical position, back into the tin from whence they were cut.... These are the pieces that are interfering with installing the passenger side seat "easily"...HAH! This will require a new surround piece as T.Solo pointed out above, AND a new boot retainer, unless I want to bend my original up...which I don't for some odd reason.....the boot is plenty flexible enuf to fit the new 90 degree bend.... I'll just add about 1/8" to the width of the retainer to compensate for rolling it over, to cover the thickness of the boot while doing so. This dimension would never have been in the original plans!

I found a big piece of .050" aluminum sheet that I've had so long I no longer recall from whence it came.... that will serve as perfect material to make both pieces from.

I cut out paper patterns for the surround, until I got comfortable with minor adjustments etc...fitting to the carpet.....

AND tonite I cut out the basic shape for the surround, nibbled the edges such that I could put about an 1/8" "fold over" on all but the top edge, to give the piece some rigidity and also dull the edges that could potentially contact other bits, like radio antenna cables, carpet.....

Have never done any work like this, but have watched body guys, tons of work on TV with fab'ing stuff up, so got out my hammers and my hunk-o-steel plate that has nice crisp edges on it, and started folding away.....the straight sections were easy, and the curved sections required some finessing with the ball section of a ball peen hammer, but it all went SUPER.....right up to the point where I figured out that I had folded the edges the wrong way....DOH!!!!

Have I created a prototype piece for a RH drive car?????

Oh well, I can still use this piece as stock to make the boot surround from.......

Take 2 coming up!!! OR is that RevB.....since we're still in proto production....!?

Ciao!

Attachments

Images (1)
  • 101_8398_(Medium)
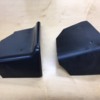
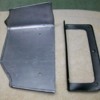
OK, so I redid the part properly and ended up with this!

The top piece has not been bent yet, to make 90 degree bend downwards and will fasten the side section to the other piece I fab'd.

HOPEFULLY this will still allow clearance for the seatback to clear.

I stretched the side dimension (width) about 1/8" to allow for the bend radius to make the distance between holes wider.....a tad.... The piece was only mounted in my car with 4 screws..... will use two original holes up by the top console, and two new ones that will pierce the new aluminum cover, and the parking brake tower metal.

Initial tests are hopeful, but final word will be the entire thing put together and in the car.....more later when I can "get to it"!

Right now distracted with new house with old problems......ugh!

Have a great weekend!

Attachments

Images (1)
  • 101_8431_(Medium)
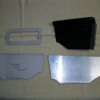
Finally, some progress!

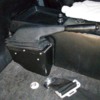
Was able to get top piece bent, and fitted. RH two screws will mount at the top of the sheet metal, but that's OK. You can see upper two holes in the aluminum cover. Screws pass thru these holes into steel tower of the e-brake.

Test fitting shows that I will need to modify the mounts on the seat to put the seat outboard on the tracks (towards the door) about 1/8" or so. Seat back bucket was just touching the top front screw on the RH side..... about the width of the screw head is all I need!

Cheers!

Attachments

Images (1)
  • 101_8548_(Medium)
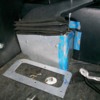
I actually ended up with a small gap in the metal covers that didn't quite cover the hole into the e-brake tower on the top front edge. I just squeezed a piece of stick-on door jamb insulation in and tightened every thing down. Could have siliconed it but that's typically a mess by the time ya get done.

This probably could have been remedied by putting a horizontal flap at the top edge of the lower shield, which would have covered this gap.

Will save that for a very rainy day when I have nothing else to do! "Rev C".....

Fasteners are all original screws, used again!

Cheers!

Attachments

Images (1)
  • 101_8557_(Medium)
Ta Daaaa!!!!

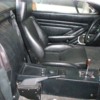
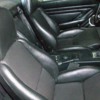
Finished job, seats in place!

Only issue remaining is "the hump" interference with seat back.....but that is a much larger job and not part of this post!

Wife isn't very tall, so she'll likely use the seat in a slightly forward position anyway!

Only tall passengers would be in a position to need more space!

Wife actually commented that she felt more comfortable in the position that these seats put her. I found that I have slightly more headroom, and also a comfortable seating position, than the Recarros offered. Also, less bolster to fight with when in/egressing the car for both of us...

Now, time for a radio.......!
Cheers!!!

Attachments

Images (1)
  • 101_8567_(Medium)

Add Reply

Post
×
×
×
×
Link copied to your clipboard.
×