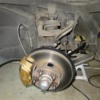
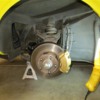
About a year ago, I purchased a set of stock brake calipers that had been modified by drilling through the housing to get rid of the external manifold.

The advantage to this mod is:

  • No need to bleed each front brake piston separately
  • Eliminated multiple fittings and connections
  • Cleaner Look
  • Adapts easily to standard A/N-3 fittings

    * * Please don't say I should buy a new brake kit from one of the vendors - maybe I should, but that's not what this thread is about * *

    The calipers have been modified by drilling a long hole through the casting as shown in the picture below. The hole intersects both piston bores, and allows a fluid passage between them. On this first set, the long holes are filled by setscrews, cemented in place with a JB Weld-like substance.

    Both caliper halves are drilled, so that both pistons on each side are connected.

    In addition, on this set, the lower bleeder screw hole was drilled out to a standard thread, and an A/N-3 brake adapter was installed.

    I cleaned up these calipers, painted and rebuilt them, but I must have missed something in the O-ring groove, because one of the piston seals was leaking. So I had to have my second set modified.

    Here is a picture showing the crossdrilling location, and setscrew cemented in place. Note the A/N Fittings.

    Also note that on this set, both of the manifold inputs are plugged with standard metric 10x1.25 bolts, with copper washers.

Attachments

Images (1)
  • P1010005_(Medium)
Original Post

Replies sorted oldest to newest

My second set is done similarly, although Wade (4280/Mark IV on this board) drilled the pistons from the inside of the cylinders. He drilled through the thinnest part of the wall using a specialized right-angle dentist drill-type arrangement, and a very short carbide bit.

The passage is approximately 3/16" (maybe 1/4").

This approach alleviates any minor concern of blowing out the setscrew, or leakage from the externally drilled passage.

These calipers were cleaned and painted, the pistons were polished, a new rebuild kit was installed, including the flat gaskets between the caliper halves.

Finally, instead of drilling the middle bleeder, a 10x1.25 Metric banjo with an A/N-3 fitting was used in the lower manifold input.

The upper bolt (silver in this picture) has an angled seat machined into it to seal against the standard flare seat in the caliper.

Here's a picture of the completed calipers (without the banjo).

Attachments

Images (1)
  • P1010015_(Medium)
Due to difficulty in locating the proper 10x1.25 metric banjo bolt (I was under the gun), Wade machined it from a standard metric bolt from the H/W store.

Here is the reason I was under the gun, and had to get my car back on the road the next day...

Southern AZ Pantera Wine Tour

Nevertheless, I could watch lathe operations for hours.... (there are better pictures, but they may not be suitable for a family website).

Attachments

Images (1)
  • P1010019_(Medium)
Finally, here's a view of the caliper mounted up.

The clearance of the hydraulic line is great, and everything is neat and clean.

Please don't make fun of my loose safety wiring. I did my best. In addition to the safety wiring, I have the lock tabs as well. Talk about belt and suspenders.

PS> Make sure you know what you are doing when you mess with your brakes - have an expert check your work if you aren't sure. Brakes are serious business.

I am running Porterfield R57 street pads, with vented Mustang rotors. I went to the braided steel lines all the way around, and added a proportioning valve to the rear brake circuit.

I am very happy with the braking of my car.

Rocky

PS - Thanks again to Wade for his help with the fabrication on this project, and especially for the emergency machining support on the banjos.

Attachments

Images (1)
  • P1010025_(Medium)
Last edited by rocky
quote:
Originally posted by jb1490:
.. make sure that those brake hoses clear the tires...John


Maybe I have an off the the wall question, from an arm chair mechanic;

I wonder why the brake lines are not routed from the center of the hub and then out to the caliper. that is having the hose attached to one of the arms? Just a rambling though sitting here!

Tajon, IF you plan to send your calipers to a shop, I found one you could try and then you could let me know if they are any good Wink
In rebuilding stock calipers, one thing that sometimes causes problems is, European brake caliper pistons are often nickel-plated mild steel, not stainless as in the U.S. So water in calipers not only rusts the bores, it wormholes through the plating and pits it. Then the pits tear up the seal and you get a leak that cannot be fixed by simple seal replacement.

This happens not only to Panteras and Mangustas but Ferraris, Porsches and other Euro-exotics. Finding stainless replacement pistons is difficult enough that I've had to make replacements from 312-ss from scratch. Some shops that restore old Porsches etc chemically strip pitted plating from caliper pistons, re-polish and re-plate. Fabricating from scratch is actually cheaper than all this & results in a more durable piston.

For show cars or others that are seldom driven, putting a small paper packet of Drierite in your master cylinder seems to absorb moisture from brake fluid about as fast as the fluid pulls moisture out of the air. NOTE- I assume no liability for my suggestions! I started doing this 5 years ago as an experiment and so far, no bad effects. The action inside a master is mild enough that the paper packets do not get torn up.

I do NOT recommend silicone fluids in brakes for any reason if the vehicle will ever be driven on public roads. The stuff is simply too hard to bleed air out and is unpredictable in operation. It also does NOT keep moisture out of the brakes; instead, because water is insoluble in silicone, moisture condenses in low spots of the system and sits there rusting! A motorcycle I worked on that used the stuff had a line freeze solid in winter, causing total brake failure until it warmed up. No race team on earth uses silicone fluids and you should not either!
quote:
Originally posted by Rocky:
Finally, here's a view of the caliper mounted up.

The clearance of the hydraulic line is great, and everything is neat and clean.

Please don't make fun of my loose safety wiring. I did my best. In addition to the safety wiring, I have the lock tabs as well. Talk about belt and suspenders.

PS> Make sure you know what you are doing when you mess with your brakes - have an expert check your work if you aren't sure. Brakes are serious business.

I am running Porterfield R57 street pads, with vented Mustang rotors. I went to the braided steel lines all the way around, and added a proportioning valve to the rear brake circuit.

I am very happy with the braking of my car.

Rocky

PS - Thanks again to Wade for his help with the fabrication on this project, and especially for the emergency machining support on the banjos.


Ricky, I may be a dipstick but on the pic with the locking wire, aren't the shims behind the locking plate meant to be on the other side of the calliper to centralise it? Pete.
I agree that the shims "look like" they ought go inside, but the bottom line is the caliper has to be centered on the rotor.

My calipers are centered with no shims.

I would have left the shims out, except when I did, the two caliper attachment bolts bottomed out in the blind holes in the knuckles, so my calipers were loose with out them.

So the shims are needed not only to align the caliper on the rotor, but to provide the total "stack up" dimension.

Regards -

Rocky

Add Reply

Post
×
×
×
×
Link copied to your clipboard.
×