Replies sorted oldest to newest

Nope, it's not the gear or the mechanical parts. I removed the glass from the mechanism so that it's loose, not mounted to anything. It sticks about three inches down and takes a fair amount of force to push it into the door. I removed the felt channel on the front window runner and the glass, loose now, dropped down unhindered.

The mystery is why the felt channel should be gripping the glass so vehemently. It seems to be in very good condition. I tried wetting the channel but that didn't help.

Any other suggestions?

Thanks,
John
Well, I sprayed lithium grease in the channels and while it smoothed the window a bit, I ended up taking the felt/rubber guides out of the window channels and cutting some of the material where it seemed to be wedging the window. I have no idea why simply sitting unused, the windows would wedge like that.

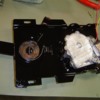
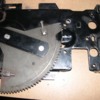
However, in the meantime, I took the whole window lift mechanism out of the door, disassembled the gear assembly, and had a look-see. I thought I had replaced the nylon gear years ago but lo and behold, I hadn't. While the assembly worked smoothly, the gear had a crack so I'm going to replace the whole mechanism.

But not with a brass gear. I'm going with an entire motor/gear combo from a 1990 Ford Aerostar. The modification looks to be a piece of cake as indicated by this article:

http://www.geocities.com/pocascp/Technical/Pantera_Wind...tors_Replacement.htm

I'll post later when I finish the job.

-John
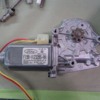
Well, I used a rebuilt Cardone make three bolt Aerostar motor -- left side only thus far -- and it worked great. I figured that if I was going to replace one motor, I'd replace both. The cost of the new rebuilt motors was about equal to the brass gears from Hall. Unfortunately, I took both of the new motors out of their boxes so I don't know if the one I used on the left window is the Cardone right motor or the left.

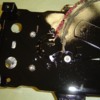
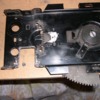
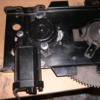
Anyhow, after grinding down the three mounting holes so the motor would fit flush with the plate to which it mounts, I was able to drill the new through holes in the plate so that all three bolts were accessible. One of the bolts was very close to the underside of the large geared arm mechanism so I had to grind down the bolt head so the mechanism would clear it as it moved.

The big news is that you can use the three bolt motor without having to destroy the original motor mount. In other words, if you ever want to go back to the original design, you can. That said, why would anyone want to go back to the original design? The new motor has more torque, it's quiet, and the window is almost as fast as the car.
I cut a small C notch in my gear plate to access the third bolt.

I used the template at Pantera Place for two of the bolt holes then measured the third.

I had to grind down part of the metal guide bump for the bolt to go through but it worked fine.

I am using no spacers on the screws. I tapped the holes in the motor for the screws to go into so there are no nuts used either.

Attachments

Images (1)
  • 62108_026rs
I forgot to mention that I used new ford motors that I bought off of evil bay.
They were $40 ea.
One of them is made in Mexico and the other one was Bosch.

Here is the motor drilled and tapped for the screws. The Screws I used are M6-1.00 X 15mm
They are stainless allen drive. Two of them are button head and the one under the gear plate is a flat head.

Attachments

Images (1)
  • 62108_013rs
Last edited by pittcrew
For years I had Aerostar window motor envy.
To the” mechanically challenged” (me) it looked complicated and required precise filing of the original mounting posts. It also required use of micrometers and left me terrified that if not done perfectly the regulator was than worthless. Basically you were screwed. For those people with an extensive mechanical back ground and machine shop tools etc. it allows for a conversion better than “Tony” ever dreamed of.

However, if you step back to 60s/70s Italian engineering things become much less complicated. Imagine “Tony” correcting many fitment problems with a large hammer. What I am getting to is that often these issues can be addressed with much simpler and easier modifications. This is great for me, again the “mechanically challenged”.

The power motor conversion as performed by So Bill Taylor is the easiest and a far less time consuming project. This can be found on Mike Dailey’s fantastic Pantera resource “The Pantera Place”.

Bill Taylor http://www.panteraplace.com/Page187.htm

This conversion uses the much more readily available Taurus motor. O’Reilly’s sells remanufactured motors for
$41.00 + $10.00 core charge. They carry a lifetime warranty, but most likely will out live me.

Driver side motor (used for the passenger side) part # 42-309
Passenger side motor (used for the driver side) part # 42-308


If you have never removed your window regulator with the OEM factory window motor it can be a real pain. However, if you follow the window removal method as linked below (Aerostar conversion) it is really pretty easy. Again, this link is from
“The Pantera Place”

http://www.panteraplace.com/page164.htm


Bill’s Taurus window motor conversion is very straight forward. You grind off the 3 original motor mounts. Use the Taurus motor
as a template to determine how much of the regulator body needs to be cut. And last use the Taurus motor to determine where to drill the new mounting holes in the regulator body. I was able to use 1 of the original mounting holes. I bolted this hole first to hold the motor in place and mark the other 2 holes. The gear on the Taurus motor is very thick and allows for a lot of adjustment if needed.

The Taurus Motor mounts vertically like the OEM motor. It only hangs down a about half the distance and is very easy to reinstall in the door as a complete assembly. The conversion looks clean and neat and requires no special tools. My only recommendation is that you have a Dremel with HD cutting wheels and grinding stones.

As stated by others you will pay as much for the brass gear to replace the broken nylon gear than you will for the Taurus motor.
The whole project can be done in 2-3 hours allowing for painting and the mandatory beer break.

Worked great for me and probably would for our friend “Tony”. party
Last edited by Pantera 3rd&Last
Great Job 4134! Smiler

Fabrication is done by the use of aquired skills and the first step is taking the chance and trying something new and learning those skills.

I applaude you for taking that step. applause

Now you can look back on this with the pride of having done this yourself.

Everyone on the forum has different things they contribute and we all learn from and support each other.

I hope this is the first of many things you try to accomplish on your car.

Good for you.
Post
×
×
×
×
Link copied to your clipboard.
×