Replies sorted oldest to newest

Sway bars come in different diameters. If you are just moving up to chrome, but keeping same size, no issue. Otherwise, you will need new, correct sized bushings for your new diameter bar. They all have the same external sizing.

As for actual removal, I've never had any spring-back problems. Unbolt the a-arm straps, unbolt the chassis straps, R&R the bars. I've done this with wheels on ground and off ground - no real difference as I recall.

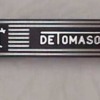
If you are attaching one of the plates originally installed as glued-on valve cover emblems, then you have two choices.

Heavy glue that might work with road bumps and bends, or drill two holes in the tag, drill and tap two holes in the rear chassis crossmember, and mount with bolts.

Or upgrade to this mount that serves as the sway bar bushing holders AND give the emblem look. Not, though, a cheap option. About $250.

Larry

Attachments

Images (1)
  • Picture_5jpeg
Last edited by lf-tp2511
Merry Christmas George,

I see you've been busy.

Be careful removing your hardware. Soak well with your favorite penetrating oil. The studs are no joy to replace should one shear off.

I had my chassis supported on stands and used small floor jacks to raise the swingarms together to a point at which the sway bar doesn't fight you so much when working on the swingarm hardware removal. I've got the sphere ball versions at the ends which use longer hardware than the stock arrangement.

My name tag has small holes drilled near the toe of the Isis and beneath/beside the "o" of DeTomaso and is secured with sheet metal screws. They're in the same location as the screws you can just see in the photo link you posted.

BTW, are you considering upgrading your iron intake and 4300D? My Blue Thunder two plane and 650 Demon are coming off this winter.

See you in the spring.
Hi Larry,
Good to hear from you. Yea, I've been real busy at work and coaching my step son's hockey team. So I haven't had much time to work on my car at all. Just the stripes and new pedal extensions so my wife can drive her.

Which is why I'm so glad that I bought my Pantera. She enjoys it as much as I do, and enough to buy me the parts for x-mas. I was sop suprised when I opened the sway bar.

Thanks for the tips on the install, I'll definitely use them. The car is in a dry safe place for the winter and I'm going over there today to see how the bar attaches to the swing arms. My new bar doesn't have anything on the ends, so I'm guessing it's a "Stock" replacement bar. Also because if I send the original bar in to them, I can collect a core price.

I'm thinking more and more about the card and intake upgrade. I see many cars on this site that don't run stock anymore and due to that they've increased performance. Which is what I want. I liked yur set up, so let me know what you're looking to get for it.

Happy holidays and we'll chat soon.

George
quote:
So please tell me how to replace the studs?

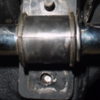
Okay, this is how I did mine.

The original stud is a flat headed bolt - not slotted, not a phillips, not a hex - just a round, flat, smooth headed bolt. It was inserted from the inside, tack welded in place.

Mine broke off even with the crossmember. If yours did not, I would grind it flush with the crossmember. I drilled and tapped the remaining remnant to the proper metric size - 8mm?? Yup, I drilled and tapped the tack-welded head that remained welded to the chassis piece.

I then cut a proper length of 8mm thread and threaded it into the tapped hole. I then managed to get a nut on the backside of the new threaded stud.

I'm not sure all chassis designs allow access to the rear of the stud. Mine is a January, 72 car and there is an open channel that let me (with difficulty) get the nut installed.

I then double nutted the front, exposed portion of the stud (to allow me to firmly grip it) and was able to tighten the backside nut giving me a pretty securely installed replacement stud.

If you cannot get a backside nut installed, I think just threading the new stud into the drilled and tapped hole may be sufficient. After all, when the sway bar bracket is mounted, the force on the stud is pulling everything tight; I don't see how the new stud, even without a locking nut, could manage to unscrew itself. The trick would be getting it to stay put long enough to get the mounting nut tightened. Perhaps some red Loc-tite? Or installing it with some JB Weld?

Failing in either of those two approaches, you could just abandon the stud method and use a metric bolt and thread it through the mounting bracket and into your newly tapped hole.

Or for a cleaner look, you could switch to metric acorn nuts, bench install the new stud into an acorn nut, and install the acorn/stud assembly as a bolt.

I installed a backside locking nut because I knew I could and because it does at least seem a bit more secure.


quote:
I might as well do all four while I'm at it.

I can see no good reason to subject yourself to doing this more times than is needed.

Larry

Attachments

Images (1)
  • Picture_4
Last edited by lf-tp2511
Thanks Larry...I can not get to the backside, from any side, top or bottom. Did you have to cut away anything to get that photo??? About all I can see I can do is there may be a possibility of drilling the stud out, and a very small opening where from the top I can take a chissel and break the head off that was spot welded...but that looks only to be possible on the top studs.
quote:
Did you have to cut away anything to get that photo???

No, I did not. Like I posted, I'm not sure if this is common to all cars. Obviously, not. My car is January, '72

Again, I suggest you drill and tap the spot welded head and follow my advice above.

Other than that, knocking off the head, or completely drilling it out, would seem to leave you with zero options to continue with a fix, as there seems to be no room to insert a new bolt/stud from the backside.

Drill and tap being careful not to snap off the head. It may not be welded on very firmly; torque force of tapping threads might snap it off. Tap slowly, with plenty of tap oil and remove and clean the tap often.

Larry
Last edited by lf-tp2511
Well guys, it was finally a good weekend to get this project off the books. Everything went smoothly thanks to the tips from Larry and Larry. I have to admit that it's been hard for me to wait since X-mas to do this, but I've very happy with the results. When driving her after installing the new bar, I felt the ride smoother and the rear of the car much tighter. Amazing what a new bar will do.

Attachments

Images (1)
  • DSCN2145
Post
×
×
×
×
Link copied to your clipboard.
×