I had a long list of winter projects that I delayed and delayed. A cold, dirty garage in winter is not the most appealing place to be. And working under a car (even the cat) is not always first choice vs sitting on the couch with a beer in hand. Yet, every day I walked past the cat, I promised I would get to work. Well, I'm sure you all know exactly what I'm talking about.

Anyhow, things are now moving along much faster since the weather warmed up. I threw the wife's dirty car into the driveway, washed out the garage and am hard at it.

Aside from the regular maintenance projects - and the added "might as wells" created by taking everything off the car before I could begin - I am finally deep into the four main projects I planned for this winter

Step 1 - inspect for rust, scrape and paint underbody
Step 2 - replace rad
Step 3 - update interior electronics
Step 4 - improve exterior lighting

Here's where I am so far:

Step 1 - UNDERBODY CHECKUP

Step 1 is progressing well. I got a lot of advice and suggestions on materials and processes. But still it is a nightmare of a job that I really should have left for another time. Like retirement. Or old age.

But after inspecting the underside carefully I am pleased that there was nothing serious to worry about anywhere. All was solid and not in need of any repair. But there was lots of surface rust appearing wherever the paint or undercoating had worn away. Of course getting to it was another story.

I discovered an odd array of internal splash shields and panels screwed on that I only found once I started removing the undercoating inside the fenders. Holy crap, I can't believe these parts were formed by Italian craftsmen. But I bought the car when it was less than 5 years old and doubt a previous owner did this work.

Anyhow, inside the rear facing sections of the front inner fenders, buried under lots of undercoating, were several handmade sheet metal panels all surrounded with rubber trim typical of the early 80s. This trim was on all the front facing splash shields when I bought the car. Anyhow, long story short, when all the screws and nuts were uncovered and removed I pulled them out to discover how well protected the car still is. Inside, the metal looked as if the car was completed a few years ago. Not 30 years ago. Clean, dry and still covered in a bright black undercoating and shiny wherever I removed these panels.

And so, knowing how well all was inside, I proceeded to spend the next week scraping and brushing anything that came off. Basically generating a huge mess. I should have left well enough alone. But now that I am done with the front half of the car I am feeling better about it, knowing I won't have to do this again. I really should have waited for when I was changing suspension bushings so I could have removed the entire suspension and had easier access to scrape and coat in a more complete way. But I'll redo some sections when that happens in a few more years. I am comforted by the lack of rust and how solid the channels were and how rust-free all suspension pickup points, ears and welds were.

The rad is out, the front tubes removed, the chassis was scraped clean, wires replaced, hoses replaced and all surface rust areas were treated with POR15 - recommended by many as the right stuff for the job.

And as promised, it turned out to be a permanent skin decoration. Mask, hazmat suit and gloves aside, spending any serious time painting a surface 2" above your face while lying on your back, is a recipe for drips and you're bound to rub against them as you roll around. As I said, I am glad that part is over. Pics to follow. Pics of the shiny black underbody, that is, not the shiny black body stains my wife enjoys commenting on "...honey, you missed a spot..." each morning as I get out of the shower.


Step 2 - RAD CHANGE

My Fluidyne lasted a little more than 3 years - suffering from multiple location corrosion and pinhole leaks. A lot of the rails and valance had been attacked by a year of drips here and there that ran along the underbody resulting in soft undercoating and surface rust wherever collected. I scraped and painted the complete inside rad area, front rail and valance with POR15.

After much review of alternate rads and custom choices, I decided to go with the Fluidyne. Again. I assumed the rad problem was due to the high silica content Prestone I was using. So I followed the advice on this board and ordered NoRosion's Hyperkool. They were a very pro outfit to deal with and also told me about electolysis being the leading cause of quick corrosion of aluminum rads - not the silica in the Prestone I was using. Once the system is back together I will take some volt readings in the coolant with engine on and off and report back.

I am repainting the fan brackets and mounts and redid their wiring along with all the rest of the wiring up front. I have 2 pusher fans and one sucker - 1 pusher on the rad sensor, and the other two on manual switches. Each now has a separate fuse and relay which will be mounted together in the front area.

I also added some brass fittings and pipe to plumb an extended rad drain so I can drain the rad without soaking the front rail anymore. That always killed me.

I'll post pics once it's all back together.


Step 3 - CONSOLE ELECTRICS

I have a Kenwood A/V and NAV system with Bluetooth. All required software and hardware updates. Nothing like watching your map go black as your NAV lady informs you "you have now gone off the end of the earth."

I had to download some NAV updates from Garmin. I also had to replace the Bluetooth unit so it would work with the latest generation iPhone. I really didn't need to know the recording date and album name on which ZZ Top recorded a particular tune from my iPod, but having my entire address book visible will sure made finding addresses and making voice calls easier on screen than fumbling for my phone.

Changing the memory cards and hardware required that I remove the console, under which it is all buried. I don't know about other cats, but I am so sick of dropping wires from switches as I remove them or move the console. There's never enough slack in the wire to any of these switches. So I'm finally doing what I should have done the first (and second)time around.

All the console switches are now wired into two fat connectors. So now I can just open the console glove box, pull out the tray, grab the two block conectors, unplug them and then lift the entire console out. This is the ultimate simple servicing solution for so many things that will eventually require my attention - shifter, linkage, heater hoses, carb cable, etc.

Oh, a freakin' necessity too, given that since I installed the new interior with 10 switches ALL MY WIRES ARE RED!! Try figuring that out on a GT5 using an early model wiring diagram! Thanks to Luc, our local Montreal Pantera electrical wizard for doing a fantastic job!

Here are some pics of the console / switch wiring. My next post covers the exterior lights.

Attachments

Images (1)
  • Slide1
Original Post

Replies sorted oldest to newest

Step 4 - EXTERIOR LIGHTS

I got brand new front turn signal lenses from Larry - no more cracks and burns! I also got some new side marker lenses. So all these will be like new for this season.

However I have been unhappy with the brightness of the rear taillights. I went from hi power blubs, to super clean housings and lenses and still they weren't bright enough.

So a few years ago I ordered John Taphorn's LED bulbs. These were pretty cool and a huge improvement. They are very bright, but unlike light bulbs, which diffuse light in all directions, LED light is only emitted from the front face of of each LED. So they were great for smaller areas, like the reverse light. But I was still looking for more from the turn signal and brake lights.

I finally found the perfect truck brake taillight assembly with a million red LEDs (ok, about 60) in a single sealed assembly. I cut and ground away most of the sealed housing to get to the board and the LEDs.

It was a lot cheaper and easier than drilling my own and wiring it all! With a little work I got it to fit my existing Pantera housing.

The turn signal was more complicated. I could have just repeated what I did with the brake lite unit, using an amber LED board for the turn signals, but I found a very cool sequenced signal board with very bright amber LEDs.

To see the sequencing, check out this short video.

I cut its big housing into 2 parts and after much grinding and melting I figured a way to fit it all in. But in order for all to fit nicely, I would have to cut the rear light housing. This was something I didn't want to do. Not because I'm a purist (ha, that's a good one!) but because I have so much faith in the durability of these Chinese LED jobs, especially given my amateur electronic abilities.

I want to keep my originals, with Taphorn's LED bulbs, unmolested and as a standby so I am ready to switch over in a minute without redoing any wiring. I asked around and Mark C suggested I contact Andy (Carbo) who had just bought some new lights. Sure enough he didn't need his old ones anymore and gave them to me! I also called Larry who sent me some old housings without any of the bosses. Thanks guys!

I have reworked and cut the old housings and will use my existing GT5 lenses and rubber gaskets. So when these Chinese parts crash and burn, I can do a quick switch in under 5 minutes!

Ok. Enough talk. Back to work. Thanks to Larry and all my Canadian Pantera friends for their valued help and support thru this.

See pics below.

Attachments

Images (1)
  • Slide2
quote:
inside the rear facing sections of the front inner fenders

Some of the vendors add those shields to cars as they pass through their shop.

Quella (I assume) added them to 2511 during the P.O.'s restoration.

When the repairs were made to 2511 after my off-road adventure, the left hand shield was not replaced.

I just fabricated and installed a replacement shield last month. It is a very easy upgrade, and does a great job of keeping that area (one prone to gathering dirt, gravel and moisture) high, dry and rust free.

Larry

Attachments

Images (1)
  • Picture_1
Garth:
Here's the link:
PT series Truck Stop/Tail/Turn Lights

Kitty:
You won't be the first to have asked and I am happy to share the info collected over the years of planning that went into it. I have detailed pics and dimensions. Let me know if you need anything. Or just go to panterapassion.com and click on "details." You will see a whole section on the interior design and build.

Garvino:
Be careful you don't actually scar any of the circuit itself, just the exterior of the board. I found that out the hard way, but my electrical genius Luc was able to solder back the connection I lost.

Larry:
That looks nice and snug. I am sourcing some rubber seals and will be repairing or replacing mine as well. I can see the screw head on another shield above it. I think there is another one on top as well. Were those stock?
quote:
That looks nice and snug

Actually, that photo is the cardboard template. I did the final in a thin aluminum. I laid a bead of black 50 year latex caulking where the shield came close (held off about 1/16" from actual contact) and two pop rivets on the straight left side held them in place very well. I then applied another bead, finger smoothed, of caulk along the edges on the outer surface. Let it dry and sprayed rattle can undercoating over the whole shebang.
quote:
Were those stock?

No, not stock. But they should have been.

Larry

Here is finished shield with undercoating.

Attachments

Images (1)
  • DSC02523
quote:
Originally posted by Quickitty:
Your work is totally AWESOME!!
You will have to forgive me, but I intend to copy your interior work. In every way it compliments the car.


I am totally ripping off a ton of Berman's work ... and he knows it!

David, I seriously think you missed your calling as a supercar designer ...

EA
#3528
quote:
I am totally ripping off a ton of Berman's work ... and he knows it!

David, I seriously think you missed your calling as a supercar designer ...


Any originality you think you're stealing from me is actually just stuff I ripped off from others!

And as for missing my calling, I'm very happy designing ad campaigns for super a$$hole clients. Ok, I'm not happy at all. But it pays for parts, lawyers to fight speeding tickets and trips to visit my Pantera buddies.

Speaking of trips, dudes, I'm so pumped thinking about our Rocky Mountain Tour .
quote:
Originally posted by #5754:
Great work David! Looking forward to seeing how the LED taillights turn out, I've messed with a few different LED options, but they just haven't been bright enough for my liking, so I'm hoping this works for you ... I've gone back to incandescent for now.


Russ

Trust me, I've seen them and they are bright. Not that there is ever any danger of anyone driving fast enough to actually keep up with David on the road, but if by some odd coincidence he was actually stopped (by say, the cops...), you will really see the lights. Not as bright as the flashing ones on the cruiser, but close.

Big Grin

Mark
I need help! Has anyone ever installed a valve somewhere in the cooling system to drain it without making a mess? There's got to be a better way than pulling the hose connectors under the car!

I plumbed a drain for the rad, but that only handles 1/3 of the coolant if that much.

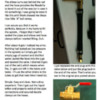
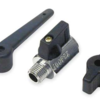
I'm thinking of installing a ball valve at the point where the two tubes bend up to the rad. I'd rather not mess with the tubes and if there was a place to do it I'd rather install a T in a hose section. Has anyone ever figured out the best way to do this?
quote:
Problem will be finding one in 1 3/8"

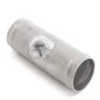
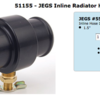
Could always use warm water to force fit our 1 3/8" line onto a 1 1/2" fitting, or buy silicone adapters such as this-


I have 2 of these on my car and the fit is very nice. The 1/8" difference is so small it really isn't very hard to get the smaller hoses to slip on.
Dave,

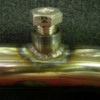
Thanks so much. That was a great help. I found some nice stainless fittings and got my buddy to weld them in the lowest spot in both tubes where they go up to the rad. This should make draining nice and easy in the future.

So you see folks, we all get ideas and help from each other. It's not stealing. It's flattery.

Attachments

Images (1)
  • IMG_0430
Well, I've just done the whole system drain episode in association with my new radiator install, and I really like what David came up with, so....

I found some stainless steel 1/4" NPT couplers at the hardware store, about $3 each. And some SS plugs.

A local machine shop cut the couplers in half, then milled them down to the proper pipe o.d. radius (for a tight fit on the outside of the pipe) and then TIG'd them over 1/2" holes.

Total cost under $50.

Any future system drains will be much easier.

Thanks for the idea David!

Larry

Attachments

Images (1)
  • Picture_7
Last edited by lf-tp2511
Nice! Thats what I needed a couple months ago when I changed fluid, it would make the job much more pleasant. Looking under my car I see the tubes are still up high enough within the frame so that the fittings will just hang down about be equal to the frame rails so it doesn't look like anything would hit them such as mean speed bumps. Also, such as speed bumps, the unit seems to be right in line where the front wheels are, so the whole front end would be raised anyway such as over speed bumps. Maybe someone will put them into production so we can just buy them done. I stuck a plastic stick between my hose and pipe in that same location to drain things, which worked fine but that was kind of hokey.
The fronts have such a small area, so the light bulbs seem to work fine. I noticed no difference when I tried various LEDs. So I stuck with the original bulb housing.

You can see though, that I changed the driving lights to the white LED's bulbs from John Taphorn. They were brighter than the regular bulb.

Attachments

Images (1)
  • IMG_0568
quote:
Originally posted by David B:
Thanks for the nice comments. Actually, my mechanical abilities are limited. But I am learning all the time.

Jan, see pic below. Or just click on Pantera Passion then click on the Isis logo to enter my site. Then go to the DETAILS page. Every mod I've made is well detailed with pics, video and specs.

What the hey David, you are missing your 4 sale sign on those items...runner pipes and radiator gizmo. My limitations revolve around the area of polishing rag and duct tape as tools, although I admit I did quite a bit with my orange L. That radiator mod doesn't look to hard to duplicate though.
Last edited by does200
Post
×
×
×
×
Link copied to your clipboard.
×