Replies sorted oldest to newest
Emmamia,
The old half of my garage was poured in 1963 and used as such until it was re-modeled and the new half was poured in 2000.
I cannot speak to the current garage floor coatings nor prepwork. A professional did the prep work and poured (?) the epoxy floor before the re-modeled garage was put to use.
At the ten year point the old side had areas of failed paint particularly under the heavy SUV parking slot. The sporty side with a car lift and all the use of floor jack, engine stands, etc. still looked good without failure. At the 22 year point the old side continues to slowly deteriorate, but is mostly there. The new side shows the patina of use and very few small spots of epoxy failure.
In my limited experience, I would say that the key step is the prep work on the concrete floor. Good luck.
Warmest regards, Chuck Engles
Agree with Chuck. As with almost any paint project the prep work is the key. Starting with a freshly laid floor is best. Since most coatings are put on existing floors which have been sealed that's when grinding is required. True epoxy (not epoxy paint) works quite well.
I have been using Rustoleum two part epoxy. It is relatively inexpensive and easy to apply. I reapply it occasionally. When doing so, I clear out half of the garage, sand with coarse grit, etch with phosphoric acid, and re-coat that side. Then do the same to other half later. I do not use the color chips because it makes finding small dropped parts difficult.
Attachments
I used the Rustoleum product on a newly poured garage floor. I used the acid etch on the floor just to increase porosity. I was concerned about the product hardening before finishing a three car area; however, with a roller I had plenty of time to apply it. I did use the color chips which has given me "second thoughts" due to finding the dropped washer or screw. As with any paint job - follow directions & prep, prep, prep.
I had a two part do it yourself coating on one of my garage floors. It looked good for a while, but it scratched easily. My newest garage floor coating was done with a commercial grade epoxy coating. It took about three days with the curing time between processes and it was done by a professional. It looks great and is holding up well. It was more expensive that the do it yourself product, but you get what you pay for!
The garage floor epoxy paint is very slippery when it gets wet. Very slippery.
I'd recommend putting down commercial grade carpet tiles. Inside the basement I use those 24 x 24 black interlocking foam tiles. They double as "gym" workout pads.
No prep needed for either. Just lay 'em down and you can trim them with a pair of heavy duty shears or even just a "utility knife" aka a "box cutter".
I looked at paint and there is no way it would survive pulling a floor jack across it. Look it thin peel and stick tile. I put down some black and white in a checkerboard pattern which looks very cool. The stuff is very hard. I finally chipped a piece when a very large metal object was dropped on it.
I used epoxy plus online graphite metallic and pearl with a urethane coat. I love it and it has held up well for the last 5 years. I beat if hard too, and it chips sometimes, but I deserve it when it does
Having done it to 7 or 8 garages I can offer a couple of tips. Avoid the cheap stuff from Home Depot, ie rust oleum etc. .... us a real epoxy floor coating. I happen to use Westcoat Epoxy ( because they are based where I live) but there are many good coatings. You MUST grind the surface or bead it .... acid etching will not do. Also do not use a clear epoxy as your top coat (it will yellow) use a polyurethane or Polyspartic
I did my garage in January 2017 with Nohr-S Polyurea from Legacy Industrial. Not inexpensive, but it IS a professional product. And, it was a bargain compared to what a friend spent having a local company epoxy coat his garage floor just a few months before I did mine! In any case, I am VERY PLEASED with the results!!! I used the Tan color w/ Latte 1/8" chips applied very heavily, but not "full rejection."
- Nohr-S primer tinted Tan
- Nohr-S polyurea coating, tan
- Nohr-S clear with chips (I ordered the extra 4 lbs of chips)
One of the great things about the Nohr-S product is that it has a much longer pot life, so you don't have to race the clock to roll it out before it begins curing. It did take longer to cure, possibly due also to the cold and rainy weather we had when I did it, but the results were worth the extra cure time!
https://www.legacyindustrial.c...yurea-kit-pigmented/
DIY garage floor coating products from Home Depot (e.g. Rustoleum) are only 1-3 mil thick and are known to chip, flake, and pull up from hot tires cooling if you park on it right after a drive. The professional products are usually 9-13 mil thick and are MUCH MORE DURABLE than the hardware store DIY kits.
I filled ALL the joints, cracks and chips in my garage floor resulting from 53 years of usage and tool droppage, and rented a commercial grinder to grind everything smooth. I also did a final acid wash after all the grinding to ensure a good bond. The secret is in the prep!
It's been almost 6 years now and I haven't experienced a single chip in the coating! I've dropped tools, dragged floor jacks with metal wheels across the floor, jacked cars and put them on metal jack stands, directly on the floor, etc. And I discovered a gas leak from my Pantera at one time, so gas sat on the epoxy for weeks before I discovered it, and the floor has held up great!
I was originally planning to use no chips so it would be easier to find dropped nuts, washers, screws, etc. as other's have suggested, but after seeing a friend's garage with no chips that looked like a patchwork quilt because his color was inconsistent between sections, and after seeing mine in the tan primer, which showed EVERY imperfection in the floor even though I was way overly detail oriented in fixing any flaws, I decided to use the chips, and I don't regret it. They hid all the imperfections in the floor. I did find that broadcasting the chips was an art. The first handful or two that I threw spread out in the air and rained onto the floor coating in a nice even distribution. The next handful or two stayed together in a handful/clump in the air and fell onto the floor in a single spot without disbursing as expected. If I ever do this again on another house, I'll throw smaller handfuls more often, or even cut the bottom edge off of a milk jug and tape an air compressor gun to the mouth and use that as a hopper to disburse/broadcast the chips more consistently. When the garage is empty you can see where they are heavier and lighter, but once I put everything in there you can't see any inconsistency in the disbursement of the chips.
If I drop a screw or washer, I get down low to the ground with a flashlight and usually have no trouble spotting the dropped piece of hardware.
A couple of the benefits of the coating...
- The floor is MUCH cleaner than the concrete, doesn't collect dust, and is easy to clean. Spills wipe right up rather than soaking into the concrete.
- It's much warmer to walk on if I go out to the garage bare footed in the early morning or the middle of winter. This was an unexpected but pleasant surprise.
- It looks great in my opinion!
Attachments
Garth, the floor is awesome. I used the cheap box store floor coating, and it ended up being cheap! Got just what I paid for. Gas and brake oil cleaned it right off the floor. If I didn't have so much good stuff (junk) in the garage, I would redo it. I once had two 65 fastbacks before I replaced them with two cats. I wanted to keep them all, but the boss had other thoughts. Marriage is a compromise, and I wouldn't change a thing.
Ken
Garth, Nice write up. Awful lot of equipment to move out and in.
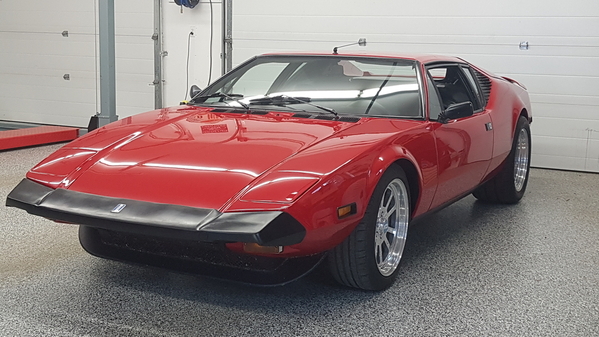
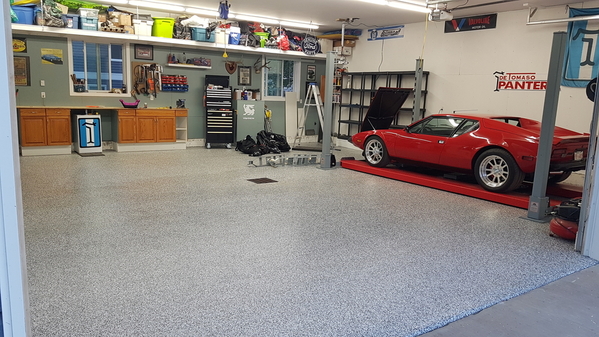
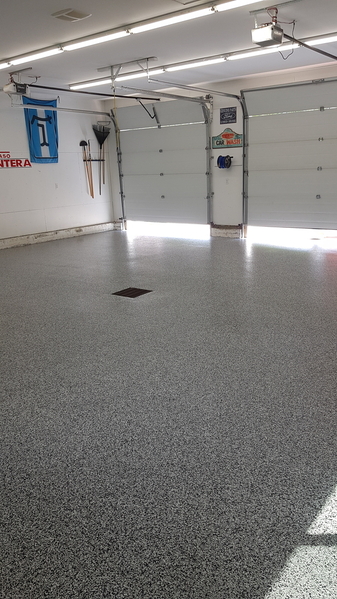
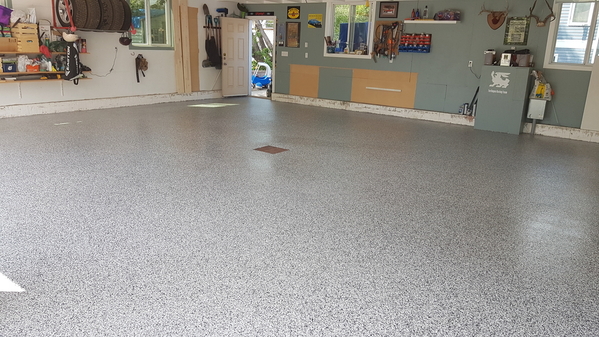
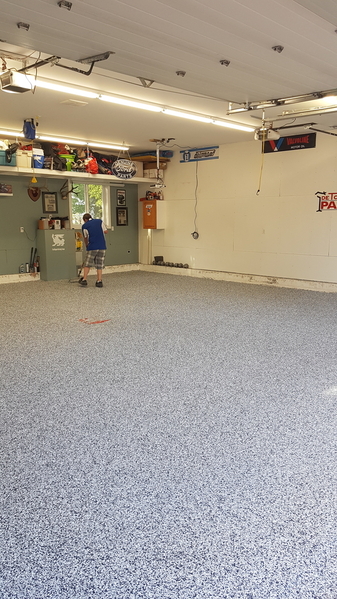 I had a company come in and do a polyaspartic coating. I have a gravel back alley and lots of salt and sand in the winter. It has stood up, but I have only had it for 2 winters. I use Jack's on it and use it as a shop. It looks as new except I can see faintly where I park our daily vehicles but I have never tried pressure washing it. I usually garden hose it off and/or use a water rv broom to brush it off then squeegee. They did tell me that it can be patched without issue if ever needed. If I had a paved street I bet it would still all look as new. One of the biggest parts of the job was cleaning out everything and removing shelving and work benches plus rolling my lift out. I had just short of 1100sqft done.
Attachments
Garth, Otis, What kind of price per sq. ft?
I am located in Alberta Canada. Pricing ranged between $6-$7 a sqft at the time. That included the prep of coming in with a 1000lb grinder and crack fill etc.
My 2-car garage is 18'x28' (504 sq.ft.) and the Nohr-S kit with extra chips and roller, tray, tools, grinder rental, etc. came to about $1,300 total (I bought a cheap set of spiked shoes on Amazon for $10 if I needed to walk on the fresh coating while doing the job, which I did need).
All told, it came to less than $3/sq.ft., but again, that was me doing the job myself! My friend who lives only about a mile from me spent over $5,000 having his 3-car garage done.
@cengles posted:Emmamia,
The old half of my garage was poured in 1963 and used as such until it was re-modeled and the new half was poured in 2000.
I cannot speak to the current garage floor coatings nor prepwork. A professional did the prep work and poured (?) the epoxy floor before the re-modeled garage was put to use.
At the ten year point the old side had areas of failed paint particularly under the heavy SUV parking slot. The sporty side with a car lift and all the use of floor jack, engine stands, etc. still looked good without failure epoxy floor coating las vegas. At the 22 year point the old side continues to slowly deteriorate, but is mostly there. The new side shows the patina of use and very few small spots of epoxy failure.
In my limited experience, I would say that the key step is the prep work on the concrete floor. Good luck.
Warmest regards, Chuck Engles
thank you so much for your suggestion
After considerable research I decided to use porcelain tiles. Having a tile setter do the install was surprisingly affordable and my total bill came in at not much more than having the floor professionally epoxy coated. I have not had any trouble with cracking despite routinely using a floor jack, engine hoist etc. Oil and other stains just wipe off. Given that tile floors laid by the ancient Romans are still around, I expect my floor to outlive me.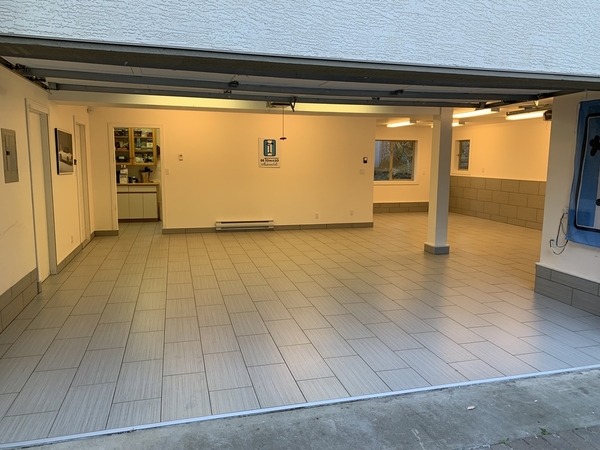
Attachments
FWIW, at my CA house the previous owner had installed ordinary asphalt kitchen tile to convert the garage to a rec-room. When I began parking cars including the Pantera in there, I found that spilled automotive fluids do not react well to kitchen tiles, however nice they look. I wound up stripping all the tiles off and simply epoxy-painting the underlying concrete.
All existing oil spills had to be thoroughly removed or the paint (probably tile cement, too) won't stick. Also found that pulling into the garage with hot tires, the hot rubber and the car's weight tends to bond the rubber to most smooth floor paints. So the next time you pull out, the tires rip out patches of cheaper, poorly bonded paint. Using premium paint and adding grit fixes that. I also personally don't slip around as much.
Note- if you regularly use a pressure washer, it's a good idea to also replace the baseboard surrounds with something tall and equally waterproof, and seal them to the floor with RTV or similar. Otherwise, I found that drywall will soak up water and you'll wind up replacing the inner walls, too!
I'm on the final stretch of building a new workshop / garage and my research is aligned with much of the comment here. Many seem to regret adding chips, surfaces are very slick when wet and current cost for a professional surface would be about $12-15k for my 1,900 sqft.
I came to the conclusion as this is a working shop, not a parking garage I'm going to just use a waterproof penetrating sealer to stop liquids / oil soaking into the concrete. The $15k will buy a decent used mill, lathe and metal brake! The Race deck tiles are a reasonable cost alternative and I may kit out the shop are with some anti fatigue style tiles or mats.
Attachments
on my finished floor, I use a impregneting agent only , no dust and easy to wipe the oil and dirth.
only possible it discolor.
you can use on top of that a finish coating too.
easy to do it yourself.
Simon
Attachments
Like Otis, I had a polyaspartic coating applied with color chips and clear sealer. It's been about four years since it was done and, so far, it's indestructible. Floor jacks and jack stands have no effect what-so-ever.


