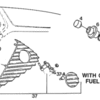
Has anybody done this conversion? I'm doing it now with used parts from Ebay. The main aim is to avoid the fire risk associated with filling in the engine compartment right over the headers.
I had hoped it would be almost bolt-on, but it's far from. The outer body colour panel has to be cut, both a hole the same size as the black-gill-cutout, and some more to clear the pivot mechanism. That's done, although painful. So now the new gill can sit flat against the body.
But now I see that the panel behind is not flat and 1-2"s away like on my previous Pantera that had this from the factory. It's 4-5"s away and at a 30 degree angle. So I'm not sure how to best drill a hole to have the filler come out of, and how to get the end of the filler where the cap is screwed on placed 1-2" below the gills.
I would be best if the filler is fixed, not just hanging by the rubber hose, obviously. And it would be best if the hole into the engine compartment is closed off around the filler neck, so overflow fuel can't just run into the engine compartment, that's the reason for this "project" in the first place.
Has anybody done this and found a smart solution? Does any vendor make a kit for this? Any advice is appreciated, and pictures of course.
Original Post


