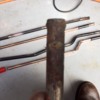
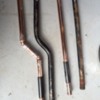
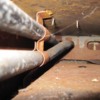
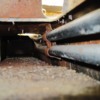
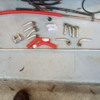
I decided to tackle the heater pipes that run through the shift tunnel, removing them was not quite as bad as anticipated, Took an air powered hacksaw and cut them in several places and cut the clamp that secures them. The pipe on the passenger side has an "s" curve in it and I thought they passed out straight through the console, but the one actually comes out in a line with the e-brake which complicated the job a bit.

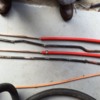
I looked at several options including aluminum heater pipe from Vintage Air and some other things, wound up going with copper pipe and silicone heater hose. I soldered the pipes together and used a slip joint that I cut in half to give the hose clamp something to "bite" on. I used really heavy duty shrink wrap at the end where it passes through the body to protect the pipe.

Attachments

Images (1)
  • heaterpipe
Original Post

Replies sorted oldest to newest

Oh, and the first picture is why I did the job, the holes had rusted through on one end under where the hoses clamped up under the dash. My son suggested I probably could have flushed the pipes with something to clean them out, put some JB weld in the pinholes and slid the hoses down far enough and been done with it. Probably would have lasted as long as I own the car. I hit my 30th anniversary with 06984 next month.
quote:
Any thoughts, concerns before I finish hooking it up?

Looks well-executed. A good off-season project. You surely got your money's worth on the stockers.

Did you use 1 1/4" or 1 1/2" i.d. size pipe?
Stock metal was 1 3/8"

Are you aware that compared to the stock metal pipes, your copper replacements are going to do a much better job of radiating the coolant heat into your cabin by way of the center tunnel?

If your console tunnel has been a bit of an unwanted heat source previously, I fear it will be more so with the copper.

Since you've come this far, perhaps you could restrict some of that increased heat by ceramic coating the copper inside and out? Like is done on engine headers.

Don't mean to rain on your parade, and I hope this is something you've thought out and are good with.

Just thought it better to put this out before your install and before you are faced with an unexpected discovery once you are back on the road.
These are the ones that run inside the shifter tunnel that connect the heater hoses to the heater core inside the cabin. I made them out of 1/2 inch copper pipe because the o.d. of copper pipe is 5/8" I don't expect too much heat gain as the total length of the copper pipe is about 1/2 the length of the steel pipe and the rest is silicone heater hose. I also intend to use shut-offs outside the passenger compartment and put insulation (dynamat type) on the underneath. Should actually be better off heat gain wise when am done.


quote:
Originally posted by Italian hot rod:
quote:
Any thoughts, concerns before I finish hooking it up?

Looks well-executed. A good off-season project. You surely got your money's worth on the stockers.

Did you use 1 1/4" or 1 1/2" i.d. size pipe?
Stock metal was 1 3/8"

Are you aware that compared to the stock metal pipes, your copper replacements are going to do a much better job of radiating the coolant heat into your cabin by way of the center tunnel?

If your console tunnel has been a bit of an unwanted heat source previously, I fear it will be more so with the copper.

Since you've come this far, perhaps you could restrict some of that increased heat by ceramic coating the copper inside and out? Like is done on engine headers.

Don't mean to rain on your parade, and I hope this is something you've thought out and are good with.

Just thought it better to put this out before your install and before you are faced with an unexpected discovery once you are back on the road.
It was not the easiest thing in the world, I was thinking about other options including running stainless under the car and drilling holes through the floor board. I had heard about people finding the original pipes welded in place. What made me remove the originals was when I grabbed the end of the pipes up near the heater core I could rotate them about 10 degrees. I knew they weren't welded solidly in place (at least not in my car). I had to remove the console, kick panels next to the radio console and the shifter. I used an air powered hacksaw, cut through the pipes in the various access points and removed them in about 12" long sections. Perhaps the hardest part is cutting the thin steel clamps that are welded on the passenger of the shift tunnel, you can't see them and you have to stick your arm in the tunnel and cut blindly. If you have "POPEYE" forearms it ain't gonna happen for you. It is a pretty tight fit.
I bought one of those, unfortunately it didn't work for my application. I was going to use aluminum pipes from Vintage Air and ordered some and figured I could bend them, cut them and flare them. They advertise that they are 5/8 barbs on the end, I figured they were 5/8 all the way and could flare and cut the end. They are actually 1/2 outside diameter and just the end is 5/8. They have threaded o-ring fittings on the other end which I was going to use a barbed hose fitting for the silicone hose.
I couldn't find a local supplier for aluminum tube and I got tired of ordering and waiting for parts and then finding out they wouldn't do what I wanted. I have about $400.00 worth of stuff I need to send back.

That tool may work on flaring the thick walled copper tube, I used the thin wall, I really don't expect the pressure to be that high. It has held up to the air pressure in my compressor fittings for 10 years now.


quote:
Originally posted by JFB #05177:
I was thinking about doing similair. as for the bead to secure the hose on the pipe, were you aware they make a tool to make that bead?

http://www.jegs.com/i/Earls/36...entProductId=1140092

https://www.youtube.com/watch?v=M0ELVt8KfVA
I'll post some pictures tomorrow of some of the other options I was considering.

I also put it all together and soldered a cap on the end. I hooked a 5/8 garden hose barb up to the silicone heater hose and put the hose on it. I have about 12 psi pressure on my house water lines and it held up without leaks for several hours. Figured better to test it before I installed it than after.
quote:
Originally posted by fordgt:
I bought one of those, unfortunately it didn't work ....may work on flaring the thick walled copper tube, I used the thin wall,..


intersting and good to know! as I was thinking about getting one. besides redoing the heater tubing/hoses, I was going to run a 5/8 OD tube for a continous radiator vent
Here are some of the other things I was considering. The aluminum pipe may have worked well if I had ordered shorter pieces. I was planning on cutting them, bending them and flaring the ends to fit 5/8 heater hose. Unfortunately, the pipe is narrower than 5/8 so the flare tool wouldn't work. Vintage Air sells different lengths, I would probably buy several of the shorter lengths (24" and less) determine which sizes to use and put the 5/8 flare end through the firewall to mount the hoses to. Then I would use the heater hose connectors from Vintage Air to connect the aluminum tubes to the heater core.
I also had hoped to use the heater hose bulkhead adaptor pictured, But I think that might only work if the engine is out and you had good access to that area.
I just didn't want to wait another week or more while I ordered the parts, so I made them out of copper tube and silicone heater hose.

Just some food for thought for those are considering this job

Gary #06984

Attachments

Images (1)
  • heater_alter
JFB,

I don't think the engine being out would make a difference on their removal (at least the passenger side)since they aren't straight pieces. I don't see how you would get the curved piece through the 5/8" inch hole in the firewall. I was quite surprised to realize they didn't come out as basically a straight shot through the firewall. The passenger side "doglegs" and actually comes out on a line behind the e-brake.

I think that if I was starting at the beginning of the restoration, I would look to see about running them underneath the car and come up through the floor board, but that ship has sailed.
Thanks fordgt for all the great info. How did you get the curved pipe in place? I am having issues getting my console out. I think this is a custom console. No ash tray, a "Compucruise" in its place, no cigar lighter, and a raised area behind that with a hatch lid with small storage. I think the upholstery is covering screws.
has anyone used Pex pipe running through existing tubes and making up at ends to hoses? Repaired several slab leaks with this method. also, how to get antifreeze smell out without flooding tunnel?
Thanks, Randy
attach a picture of your console, perhaps someone here can help figure out how to remove it. There is a screw that attaches the back of the console to the firewall through an "L" bracket behind the firewall cover. I looked at the pex piping as an alternative, but I don't have the crimpers and other tools, I don't think it would fit inside the curve of the one on the passenger side, plus it would have a really small I.D. that probably would not allow for much flow.


quote:
Originally posted by RM5044:
Thanks fordgt for all the great info. How did you get the curved pipe in place? I am having issues getting my console out. I think this is a custom console. No ash tray, a "Compucruise" in its place, no cigar lighter, and a raised area behind that with a hatch lid with small storage. I think the upholstery is covering screws.
has anyone used Pex pipe running through existing tubes and making up at ends to hoses? Repaired several slab leaks with this method. also, how to get antifreeze smell out without flooding tunnel?
Thanks, Randy
Last edited by fordgt

Add Reply

Post
×
×
×
×
Link copied to your clipboard.
×