Success - the heater tubes have been removed. I almost gave up on attempting this but the local garage owner said he would come over and give me a hand.

Tools needed: Hammer, chisel(a really long chisel), Sawzall. Working through the rear tunnel opening under the firewall and the opening behind the shifter, with hammer and chisel, split open the front bracket and open the back bracket to the point where you can move the tubes back and forth. The tubes aren't tack welded but the brackets are. Working through the shifter box opening, firmly hold the tubes and cut through them with the Sawzall. Now the tubes can easily be removed. Chisel off the two brackets if they're still attached.

This went a lot easier than I was expecting and it took about 30 minutes to do. I have a lift and raising the car made it a little easier to see into and work through the rear tunnel opening under the firewall. Of course, this job can only be done with the engine removed.

Below is a photo of the old tubes. They are pretty sturdy and may have nver leaked. But they are full of a slimey black crud and I didn't want that going through my system. I'm glad that I decided to do this.

Dennis

Attachments

Images (1)
  • Heater_tubes_old
Original Post

Replies sorted oldest to newest

Below is a photo of the stainless steel replacement tubes. They are a true 5/8" o.d. and will be a lot easier to put hoses on than the oversize originals.

I need to make a bracket to clamp the tubes to the side of the tunnel. The tubes need to occupy the same space as the originals in order to stay clear of the shifter box. Some have suggested putting in new tubes while leaving the old tubes intact, but I can't see how that could be done.

Attachments

Images (1)
  • Heater_tubes_new
I already had them in for a trial fit and then back out. The tubes are made just right so that they barely clear the openings. After putting them through the rear opening, you first flip them right, slide them forward and then left to get them to go through the front opening. Or was that left, then right.
Nice work! Is that a Backyard Buddy lift I see? Well, if it isn't, it sure looks like one.

Thanks for the insight to this. I want to replace mine too. It will work out well as the motor is coming out before paint.

How did you afix the bracket for the stainless tubes in the trans tunnel? Do you have any photos or diagrams on how this was done?

Thanks,

Mark
Mark,

Good eye. I've had the Backyard Buddy for 7 years and it's one of the best investments I've made.

According to Dennis Quella, they stack the tubes vertically and make a single bracket out of .060" sheet metal about 1" wide. They curl over the bracket top and bottom to hold the tubes and put a bolt through the tunnel and through the bracket between the tubes to draw them against the tunnel.

I didn't put mine in yet but I've been thinking about it. My idea is to make a 2 piece clamping bracket and I made a quick drawing of it. I will also put some rubber between the tubes and bracket for cushioning.

One of these brackets just behind the shifter opening will be sufficient and easy to get to. The rear tunnel opening cover will hold them at the rear. Even though the tubes are stacked vertically at the bracket, there is enough length remaining to have them exit side by side at the firewall. You would want the tubes stacked as close together as possible with just enough room to get a bolt between them(my drawing is off a little). Just as the originals, the tubes will cross over each other so that the left tube under the dash will exit on the right at the firewall.

With my bracket, you could also put a spacer between the tunnel and bracket if necessary to get a little more playing room to get the tubes exactly where you want them. I hope tis helps.

Dennis

Attachments

Images (1)
  • Heater_Tube_Bracket
The stainless tube solution effectively addresses the corrosion issue and is therefore a reasonable option.

It fails to address the problem with radiant heat at other times of year when one seeks a cooler cabin. Certainly, cut off valves help; yet convection eventually warms the tubes on longer drives. To address this, I would recommend one consider runing the heater lines from the coolant tubes in front of the cabin through the console into the heater. It strikes ma as no more work that replacing the existing tubes, yet has the advantage of less radiant heat. Actually there are other advantages as well, but, I digress.

How to is at http://www.spacecitypanteras.c...Cooling-JTaphorn.pdf
quote:
Originally posted by UFO-LOW:
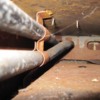
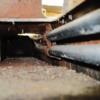
Here are some photos of the heater tubes and brackets intact. One of those "what were they thinking when they did that?!?!" kind of things. Must have saved a buck, I guess. Looking rearward.

Realistically, in the scope of automotive design and engineering, I don't think they were targeting a 40+ year life span. I don't think ANY automaker considers this kind of life span in their designs. The design made perfect sense at the time.

Also consider that most of us have the original tubes in place, perfectly serviceable, and all cars would be if the cooling systems were maintained properly.

Did you replace yours because they were unserviceable, or out of precaution?
I haven't replaced them - yet. I just thought the photos would be helpful for someone needing to do this mod, to see what you're up against.

Mine are rust pitted on both ends, crusty inside, and the rear ends are crushed and bent. And that's the way they were when I got the car. I replaced all the hoses and clamps, RTV'd them up good, and still couldn't get it to stop leaking. So I blocked off the heater ports at the engine and went without; that was 15 years ago. I live in Florida, so no big loss.

As to "what were they thinking", let's just say this wasn't designed with ease of assembly or serviceability in mind. Just looking at it, there is no way those tubes go in or come out, intact, with those brackets in place. They must have welded the brackets together around the tubes, positioned them inside the upper tunnel metal stamping, welded the brackets in, then installed that assembly in the cockpit and welded it in place. They had to design and manufacture the brackets, pre-bend the tubes, and use 4 more hose clamps than would otherwise be required. I'm an engineer, and it had me scratching my head. It would have been much simpler to just run heater hose the whole way, which is what I plan to do (with cut off valves outside the cockpit, of course.)

By the way, you can buy brackets much like those in Dennis' drawing in any good hardware store. They're meant to hold electrical conduits.
PS: I certainly agree with a 40+ year life span being outside the design parameters. Heck, modern manufacturers of all kinds of products have perfected the art of making things that last -just- beyond the warranty. In that light, the Pantera is over designed in many respects. Be that as it may, we Pantera owners have to deal with the effects of our car's advancing age.
Rodney
I've pushed this project off for a while but am now enthused because this is a great solution....my tubes stub out of the firewall and are rotted where the rubber tube slides on. I looked at using plastic as someone on this forum suggested and running the plastic tube through the old steel tubing. I like the idea of putting Quella's stainless tubes in better. Does anyone have any idea if the heater cores have issues once you fix the tubes?

I also looked at running the tubes below the car alongside the radiator tubes and stubbing up through the floor area to the center console where the core is...that would get the heat out of the cabin also.

Thanks for all the posts with pictures and the drawing of the bracket...I had no idea that Quella had these tubes available.
After I got the shifter assembly out, which was a job in itself, I used a mirror and a flashlight to see about where the brackets were. Then I set the camera down in the tunnel, aimed it about where needed, and took the photos with flash. (It's a small camera). It took a few tries, but wasn't too hard.
Post
×
×
×
×
Link copied to your clipboard.
×