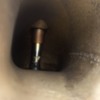
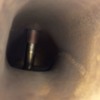
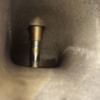
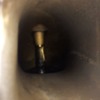
The day started off so well too. Beautiful morning and a great drive in to the office. Accomplished a lot at work this morning. And had a great drive at lunchtime running an errand. But...

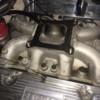
On my way back to the office, the car seemed like it wanted to die when I was coming to a stop. Blipped the throttle and all seemed good. Was sitting at a red light idling when the engine just died. Tried to start it and she would not crank over - Heat? Ground issue? Or worse? I jumped out and pushed her over to the curb, around a corner, and into a parking lot to get out of the roadway. Popped the rear decklid and found the air cleaner nut loose atop the air cleaner. Pulled the air cleaner lid off and found that the air cleaner stud was missing - it had snapped off. And unfortunately it was not sitting in the air cleaner housing or the carb. It apparently made it past the butterflies.

Tomorrow night I'll pull the carb and see if I can find it in the intake manifold. Hopefully it didn't drop into a head and lodge itself between the head and a valve, or worse. I'll keep you guys posted.

Quite disappointing/frustrating! At least the rig matches the car. Frowner

Attachments

Images (1)
  • IMG_4565_640x480
Last edited {1}
Original Post

Replies sorted oldest to newest

quote:
Originally posted by JFB #05177:
disapointing and fustrated are not even the feelings I have and its not even my engine Sympathy

a frozen crank should indicate it did make it to a valve. do you think the size of the piece was small enoguh to make through which might be better than a bent valve. would pulling the valve covers tell you if it was?
Possibly if the "bent valve" BENT at it's fully open position, then there would be excessive valve lash between the tip of the valve stem & the rocker.

The engine not turning is a good indication of a bent valve.

The positive is that it happened whilst the engine was idling/low rpms minimizing the damage vs a 5,500 rpms engine seizure...Mark
quote:
Why would that break?

My best guess so far...

As long as I've owned the car the top of the air cleaner showed witness marks of contact with the leading edge of the rear decklid. It's been like that for years. However, when I rebuilt my engine I swapped out the Edelbrock Performer intake for a Weiand Xcelerator 2V single plane intake manifold which I had the carb pad milled flat to minimize interference issues with the air cleaner and the rear decklid.

My best guess so far is that the air cleaner may sit a tiny bit higher with the changed intake and the decklid is making contact with it, applying a constant load rather than the occasional vibration scrape. I suspect a constant load or stress on the air cleaner stud combined with 3500+ miles of engine vibration may have work hardened the stud and caused a stress failure which occurred right atop the locknut I used to secure it to the carb to make sure it couldn't ever back out.

Tear down starts tonight. I'll share what I find.
Garth,

Unfortunately, I had a similar (not exact) experience a couple years ago.

To make a very long and sickening story very short, the set nut I had on the carb stud had loosened up and fallen into the carb. The resulting "marble on a roulette wheel" sound at a very minimal 10 miles an hour was something I had never heard before (and never want to hear again). I shut the engine off and had the car towed home.

The first cylinder it entered was #8 and it cocked the piston in the bore, cracking the cylinder in two places before exiting through the valve to see what other damage it could do.

Upon teardown, I found that the nut had visited every single cylinder as the nut came apart, getting smaller and smaller as each piston beat the snot out of it.

That 5 cent nut cost $5000 in new engine work and made a door stop out of the block.

I kid you not, I said to myself just 20 seconds before the incident took place, "Man, the Pantera is running really great today!"

I no longer that a set nut on the carb. I welded the wing nut to the stud where it exits the top of the air cleaner. If the stud ever loosens up, it just spins and can never fall in the carb.

I sincerely hope nothing even remotely like that happened to you.
quote:
Originally posted by garth66:
My best guess so far...
... a stress failure which occurred right atop the locknut...

I had recently commented on a failure in the same location (differnt device) as it is a common failure mode. the root of the thread is a stress concentrator and any side loading (bending) will fatigue there. if the air cleaner was touching the deck, then the engine vibrations were constanitly working the stud back and forth.
for the failure, I recomended to the customer to use a long coupling nut, ream out the top few threads so the untreaded section of the stud was inside the nut. however in this case, the best would be to eleminate the contact with the deck and the bending. making the stud not fail might force the failure into the carburator threaded section

Attachments

Images (1)
  • locknutstudfailure
quote:
I welded the wing nut to the stud where it exits the top of the air cleaner. If the stud ever loosens up, it just spins and can never fall in the carb.

Brilliant idea! This afternoon I was trying to think of how I could secure the air cleaner to the carb without risk of the stud (or a jamb nut) falling into the carb. Your solution is so much simpler (and better) than the things I was thinking of. I will definitely do that in the future!
Tonight's update...

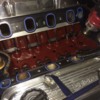
Removed the carb and looked around the intake with a flashlight hoping to find that darn stud - no luck! Shoved an extendable magnet down each port hoping to pull the stud back out with it - no luck! Interestingly, no metal bits or shavings came back on the magnet either.

Attachments

Images (1)
  • IMG_4572
Still no sign of the stud... I expected to see at least a bent valve or scratch marks in the aluminum head from the stud getting banged around atop a valve and or trying to go into a cylinder. But all the intake ports look undamaged.

Here are pictures of each cylinder's intake port...

#1

Attachments

Images (1)
  • IMG_4602
Unfortunately, I couldn't quite get my iPhone into the port to provide a better view of the backside of the valves, but none of them looked visibly bent and they all looked undamaged with no witness marks when I climbed into the engine compartment and put my eye up to each port with a flashlight.

I thought it was interesting how much oily carbon there was on each valve stem, and one valve looks like it has a puddle of oil sitting on top of it - hmmm.

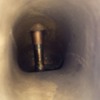
And the #8 cylinder port showed a couple of shiny dots/spots in the inside wall of the port which leads me to believe the stud might have gone down this hole and banged around the inside of the port before being sucked into the cylinder.

I sent a message to some fellow club members to see if anyone has a borescope so I can get a look-see through the spark plug hole. If no one has one, I might just pick one up at Harbor Freight - now where's that 20% off coupon I had from last Sunday's paper?!

This is really frustrating! And looking like it might be expensive.
Hello Garth; What do the exhaust valves look like?!

Have you attempted rotating the engine via a socket & breaker bar on the crankshaft head bolt?

On aside note...I have PLENTY of 20% off Harbor freight coupons if you want to pick some up.

There is a Harbor Freight on Stevens Creek road Cupertino, just a mile away from my double wide trailer...Mark
I had borrowed a friend's Milwaukee inspection camera, but the camera end was too large to peer into the cylinders. That's why I bought the HF unit. You can see both cameras in this picture. The HF unit has a much smaller camera/head that easily fit through the plug hole to inspect each cylinder.

Attachments

Images (1)
  • IMG_4685
Please excuse the quality of the pictures that follow. They are rather poor because I bought the cheap $89 borescope that doesn't capture pictures or video, so I used my iPhone to take a picture of the screen. The HF inspection camera that could take pictures and video was $199, about $110 more than I wanted to spend!

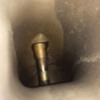
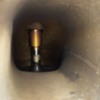
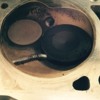
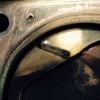
Anyway, only #8 shows any signs that the air cleaner stud may have gone into it. This is the underside of the head, and it appears like an imprint of the threaded air cleaner stud in the head adjacent to the valve seat. No discernible marks on the valve though, although difficult to determine with the borescope. And to be honest, the image on the borescope screen was much sharper than this image - I think I may have had the iPhone a little too close to the screen.

Attachments

Images (1)
  • IMG_4692
quote:
You'll certainly get a better idea of the damage and you are going to have to pull it anyway based on what you've seen.

Definitely plan to pull that head. And thank you for pointing out the obvious - I'm planning to pull the head anyway, so no point wasting time with the other investigation activities. Thanks for that reality check!
Garth, you may have gotten lucky with the broken stud blowing out the exhaust with only minimal damage to the engine. If so, the stud will wind up inside your muffler. If it did, during idle when engine noise is minimal and engine shake is max, you may hear an annoying little jingle from one muffler.... The only way such a noise can be eliminated is to cut open the muffler body and dig around until you find it.

Too late this time, but making up a gr-5 stainless steel stud will fix things for next time. Stainless is tougher than mild steel and will not work-harden from vibration. Lock-tite along with a locknut keeps the threaded bottom secure in the carb boss.
No sign that the valve or stud made contact with the cylinder wall. I was idling at a red light when this happened, and it looks like the stud just started to started to go in, got stuck in the valve, and then got slammed against the head which stopped the engine suddenly from idle (approx 600-650 RPM). And that's why the engine wouldn't turn over or even budge the slightest when I tried to restart - the stud was jammed between the piston and the squish area of the head which wouldn't allow the piston to reach TDC.

The valve definitely looks bent. I'm going to measure for any rod bend tonight, then take the head to my machine shop in a day or so. I'm hoping I can get away with a little clean up on the head and piston, and a new valve. Fingers crossed!
The most delicate part of the piston is the top ring land because of the deep cut-away for the ring. They normally crack from even light impacts so I'd suggest pulling that rod to check the piston and then you'll also be able to check the bearing. I doubt if the rod, bearing or crank were affected if the engine stopped instantly.
quote:
The most delicate part of the piston is the top ring land because of the deep cut-away for the ring. They normally crack from even light impacts so I'd suggest pulling that rod to check the piston

Yeah, I'm concerned about that too. Going to pull the piston as well to inspect.
quote:
Originally posted by garth66:
quote:
I welded the wing nut to the stud where it exits the top of the air cleaner. If the stud ever loosens up, it just spins and can never fall in the carb.

Brilliant idea! This afternoon I was trying to think of how I could secure the air cleaner to the carb without risk of the stud (or a jamb nut) falling into the carb. Your solution is so much simpler (and better) than the things I was thinking of. I will definitely do that in the future!


Garth first hoping that your repairs are minimal in work and cost.

Not wanting to hijack your thread. But this brings up a concern for me and anyone running non OEM intake/carb. The Edelbrock manifold combined with a Demon carb and the ever popular Hall air cleaner is secured by a Hall billet knob.

The air cleaner top rests under the back edge of the OEM screen with a slight bow to the screen rear frame. The securing knob also just barley touches the screen. Their is contact to both and I am now concerned with the stud fatiguing and eventually failing as yours did.

I like the convenience of a stud over a bolt and am concerned about the threads in side the carb fatiguing over time with numerous R&R.

My thought is making a stud from a grade 8 bolt secured with a grade 8 nut. The grade 8 should be difficult/impossible to break even with some constant load ?

Anyone else have a solution ?

"Now nervous" Jeff
Jeff,
If you have a Demon carb, they use a 5/16" stud. Much less likely to fatigue and fail than the 1/4" stud used by Holley and most of the others. Better: Ditch the stud and use a bolt.

Best: Take off your manifold and have a machinist mill the carb pad flat and as low as he dares. The Edelbrock is very receptive to this because the runners were designed for a level carb pad. Take a look at a Blue Thunder and you'll see what I mean.
Have the machinist remove the carb studs and re-drill the stud holes square to the new carb pad surface and helicoil them.
Find an insulating carb spacer that is: a. thin enough to ensure no contact between the air cleaner housing and your engine cover, and b. thick enough to ensure the butterfly linkages don't hit the manifold anywhere between idle and WOT.

Regarding that Hall air cleaner lid: I had my machinist mill a lip around the circumference. It dropped the lid a wee bit and it doesn't look so "thick" sitting on the air cleaner element. I do have to work the element a bit to squeeze it in as the diameter inside the lip is just about 13 13/16" vs the 14" element.

Attachments

Images (1)
  • Hall_ac_lid
quote:
Originally posted by larryw:
Jeff,
If you have a Demon carb, they use a 5/16" stud. Much less likely to fatigue and fail than the 1/4" stud used by Holley and most of the others. Better: Ditch the stud and use a bolt.

Best: Take off your manifold and have a machinist mill the carb pad flat and as low as he dares. The Edelbrock is very receptive to this because the runners were designed for a level carb pad. Take a look at a Blue Thunder and you'll see what I mean.
Have the machinist remove the carb studs and re-drill the stud holes square to the new carb pad surface and helicoil them.
Find an insulating carb spacer that is: a. thin enough to ensure no contact between the air cleaner housing and your engine cover, and b. thick enough to ensure the butterfly linkages don't hit the manifold anywhere between idle and WOT.

Regarding that Hall air cleaner lid: I had my machinist mill a lip around the circumference. It dropped the lid a wee bit and it doesn't look so "thick" sitting on the air cleaner element. I do have to work the element a bit to squeeze it in as the diameter inside the lip is just about 13 13/16" vs the 14" element.


Larry,
Thanks for all of the good suggestions. And I like what your machinist did to the Hall top. I agree it is bit thick.

I think I found a great solution to the weak carb air cleaner studs typical in the aftermarket. ARP makes air cleaner studs that are rated at the equivalent of grade 8 bolts.

I have always liked the quality of ARP products and if the equivalent of a grade 8 bolt there should be no chance of failure.

Jeff
Latest update...

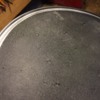
Well, the prognosis only gets worse... I pulled the #8 piston Sunday and found what looked like 2 scratches in the cylinder wall, which assumed to be from bits of the air cleaner stud scratching it in a couple places while the piston rode up and down. I gave it a light hone to see if they would clean up, then examined them more closely; one of them is definitely not a scratch! It's clearly a crack, located at about 7 o'clock as you look down the cylinder. It's an inch or so from the top and extends to about half way down the bore, maybe a little below, near where the bottom of the piston would. My thought is that when the piston hit the bolt at the top of the cylinder and caused the engine to stop suddenly, the extreme force at the very top edge of the piston may have caused the piston to rock in the bore and crack the block, as this spot pretty closely aligns with the bottom edge/point of the piston skirt, right where it comes back up toward the pin. That's all that I can figure. You'll notice in the picture that there are matching depressions in the cylinder wall at 4 o'clock and 7 o'clock which is where the bottom edges of the piston skirt would have pushed on the cylinder wall. When I ran the hone in the bore, these spots weren't even touched by the hone, which means the cylinder wall is pushed out in those two spots.

quote:
do you think you would be able to tell if the bearing got damaged?

FWIW, I did measure the bearing in multiple spots and didn't find detectable bearing crush from the impact. Top and bottom half bearing measurements were very consistent with one anther, with only about ~1 thousandth's difference between side and center measurements.

Another engine pulling party to be scheduled soon. Stay tuned!

Attachments

Images (1)
  • IMG_5724_640x480
And I now have an ARP air cleaner stud, which will be spot welded to the air cleaner wingnut.

Here's a pic looking down the cylinder. You can see the corresponding dark spots where the hone didn't touch the cylinder walls. Note that the left patch isn't as dark because I got in there with some 800 grit sandpaper to clean the spot a bit more when I first thought it was a scratch. Again, these line up with the bottom edges of the piston skirt.

Attachments

Images (1)
  • IMG_5725_640x480
quote:
Maybe the cylinder can be sleeved? It worked well on the rust spots on two of my cyliders

That's the plan... Pulled the engine on Sunday and dropped in a fresh 351C that was slated to go into the Mach 1. That car is just a shell on wheels at the moment, so I decided to "break it in" in the Pantera while I rebuild the Pantera's engine, AGAIN.

Trivia fact on the Mach 1 engine... It was originally out of a Pantera, so somewhat appropriate that it's going into a Pantera, at least for a short while.

Add Reply

Post
×
×
×
×
Link copied to your clipboard.
×