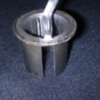
I have managed to get the bolt sleeve and rubber out, no problem. But the fitted outer sleeve is a problem. I have put slices through it with a saw, and I suppose I could chisel it out of there, but don't want to damage the arm. I also don't want to have a tool made, or buy one to press it out if there's another safe way to extract it. Anybody have any tips?
Original Post

Replies sorted oldest to newest

I did mine a while ago but as I recall you need to get the rubber out first and just leave the steel sleeve.

Then I took a Sawzall an cut a slot into that sleeve. Once you do that you can drive a 1/4" cold steel chisel in between it and the arm.

That will bend one side up and at some point the entire sleeve will let go and fall out of the arm.
The way I have done it is to saw 90% through the sleeve in two places about 1/2" apart. Then using a punch you kind of roll the center portion between the cuts out. Not sure if it's the best way but it seems to work ok.

Here is a picture of peardudes control arm sleeve. I was happy to watch at that stage, I had had my fill doing my own. Smiler

Attachments

Images (1)
  • IMAG0454
That usually was printed on a decal/label on the box they were packaged in.

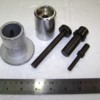
This isn't my tool. I've never had a set. That is from Pantera Place.

My experience with these tools with other kits from other cars is they are pretty self explanatory and you will figure it out very quickly.

I don't know it you will get all of these pieces in that kit number listed above.

Even when you find an original set for sale you need to verify that the set is complete. Few sellers know anything specifically about the tools and tend to be just in the business of reselling them.

I'll bet you a nickel that the seller will want a lot for the kit just because it is marked Pantera.

Most of the kits I'l purchased sell between $100 and $150 for the set and most were never used.
I got them out, but it was miserable. Destroyed two chisels, and a saw blade. My cuts were not as nice as Wanabe's either. Yes I scored the inside of the A arm, but a little dremal work, and they're smooth.

As bad as it is, I'd say this is the way to go. Your only going to do it ONE time. Purchasing a special tool just doesn't make sense.
Glad you got it sorted and yeah it aint much fun. The pic I posted was of peardude's sleeve from a recent workshop session at my place. As I said when it was time to cut those out, I declined to help and busily pressed out his rear axles and bearings instead! I'm not the sharpest tool in the shed but aint stupid!

Two chisels and a saw blade isn't half bad, the way I see it still a heck of a lot cheaper than having some one else do it.
Actually, I used a very similar procedure as Mark illustrated above. Except ...

Easy/Peasy. Did it myself.
No need to use a Saws-all
No need to start by pressing out the centre rubber and metal sleeve of the A-Arm Bushing (in fact, I used these parts to my advantage).

Then, you only need to cut off the top parts of the bushing ... How? Like this:

Tools required:
1) Hand drill. (Although it can be done with a drill press as well)
2) Metal Hole saw that cuts a hole the same size as the ID of the A-Arm Bushing hole .. 2 1/8 inches approx. N.B. Important to remember that a metal hole saw assembly nominally takes advantage of a centre drill bit in order to align the hole cut.
3) A bronze bushing with ID similar to the drill bit Diameter and OD similar to the A-arm bolt bushing sleeve ID. The bronze bushing should be long enought to cover the length of the centre hole saw drill bit. I ended up using 2 bushings stacked on each other. I purchased the bronze bushings from my local General Bearing store.
4) Manual C-clamp U-Joint press or Hydraulic press. (I think we started Mark's job using my C-press before he bought his own).

I placed the bronze bushing(s) over the hole saw drill bit. The bronze bushing on the hole saw assembly just fits inside the bolt hole sleeve of the A-arm bushing and (importantly) acts an alignment tool. Just add some drill bit lube to the inner and outer part of the bushing.
Then .. cut of the top metal part(s) just to the lip of the A-arm proper. (Avoid drilling into the A-arm). Then press out the remaining rubber/metal bushing using the appropriate sized socket.

One cut and One press for removal. (Two presses if you count pressing in the replacement A-arm bushing).

HTH

Add Reply

Post
×
×
×
×
Link copied to your clipboard.
×