Got tacho problems, well actually not working!
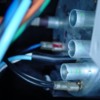
Managed to get it out found the wiring on the back had been tampered with.
Does anyone know if there is a way of telling if your tacho gauge is good or not!
Is there some kind of resistance I should be getting for the coil of the gauage itself.
Checked panteraplace but didnt give me any detail on the tacho gauge. Eeker
Original Post

Replies sorted oldest to newest

Charlie/Micheal
I have had the car for only a few months , the tacho has never worked at all.
The wiring on the back looks likes it's been tampered with, I went on the panteraplace
web site and found out how what the wiring should be like but it doesn't show you the
back of the tacho just a drawing of the connection plug.
Dennis
Eeker
Dennis,

I've not had to work on my tach & I am finding there is not much info available regarding the wiring connections behind the tach. I only have a small version of the Pantera wiring diagram & I am finding my eyes are no longer capable of seeing detail that small. I need to invest in one of the larger versions.

The basics are to verify the wiring behind the tach is connected properly and verify there is 12 VDC to the power connection at the back of the tach when the key is in the run position, that you have a good ground, etc.

Assuming the wiring is correctly connected behind the tach, and the supply voltage and ground are good, the next step is to verify that the tach is connected to the neg terminal of the coil.

The ignition coil has 2 small terminals on it, one marked "+" and one marked "-". The plus terminal has wires landed on it from the key and from the starter solenoid.

The negative terminal also has 2 wires landed on it, a blue wire from the distributor and a blue wire with black stripe from the tach. If that blue/balck stripe wire is disconnected from the coil, the tach will not function.

The tach is an electronic device; therefore a simple resistance check may OR may not indicate a problem. If I were to test the tach, I would remove it from the vehicle, make known good battery & coil connections between the tach & the vehicle using short lengths of wire and then start the car & see if it works. Its like using the car as a test bench/signal generator.

Good luck Dennis, let me know if I can be of further assistance.

your friend on the PIBB, George
Downunder, I have an extra tach if you confirm that yours is toasted. Before I'd buy and ship another one, though, I'd check to see if you can get yours repaired locally.
I installed a MSD ignition and wired it wrong to the tach. Local "experts" told me the MSD Tach Adapter was pretty tough and probably not the problem. This turned out to be total Bull$#!+ as these posts confirm. I purchased another tach and then a new Tach Adapter which solved the problem. I know this tach is OK because it was in the car when I got it working. I then switched back to the original tach which worked fine as well.
I don't know if there are different tachs. Mine matches and works correctly in a '72. Yours may be different. The indicator lights may not be the same in a later car.
Anyway, it may be an option.
Mooso.
Dennis,
The tach can be tested out of the dash and that might be the best way to determine what is the problem.
This weekend I will check the wire colors on my 1972 and let you know what to do.
Basically there should be a +12 Volt connection that would be "on" when the ignition switch is on. A ground connection is also required, usually black lead. Then there is the connection that measures the engine speed, that connection needs high voltage pulses that are generated at the ignition coil. The connection to the coil has to be to the side with the points. This is assuming stock ignition as you said you have.
These three connections are the basics and should make the tach work. You can make all of these connections near the coil with temporary leads to test.
Monday, at the latest, I will post the colors of the proper connections (I don't drive my Pantera to work) or if there are other wires that must be connected for operation.
Dennis,
The color wires that are important to the Tach operation are:

Light Blue and White in black sleeve are connected together and supply +12 volts.

Black wires are ground attached to the tach case.

Dark Blue with Black stripe, (has a red mark on it) wire is the points wire or the wire that provides the pulses for the tach for RPM.

All other leads are for the indicator lights which I removed for the picture. (I added the green dots which are marks for the lights)

You can test the tach at a convenient place at the firewall were the electrical parts are on the passenger side. +12 volts is there via the battery connection to the solenoid, Ground is the chassis, points is the wire that connects to the points.
I assume that the factory ignition system is complete IE capacitor in the distributor.

Attachments

Images (1)
  • TACH3
quote:
Originally posted by Jon3613:
Dennis,
The color wires that are important to the Tach operation are:

Light Blue and White in black sleeve are connected together and supply +12 volts.

Black wires are ground attached to the tach case.

Dark Blue with Black stripe, (has a red mark on it) wire is the points wire or the wire that provides the pulses for the tach for RPM.

All other leads are for the indicator lights which I removed for the picture. (I added the green dots which are marks for the lights)

You can test the tach at a convenient place at the firewall were the electrical parts are on the passenger side. +12 volts is there via the battery connection to the solenoid, Ground is the chassis, points is the wire that connects to the points.
I assume that the factory ignition system is complete IE capacitor in the distributor.


Nothing like a photo to accompany your description!

Way to go Jon! EXCELLENT!!

Smiler
Post
×
×
×
×
Link copied to your clipboard.
×