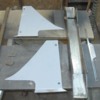
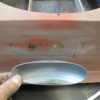
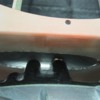
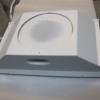
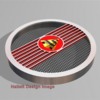
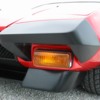
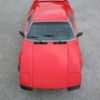
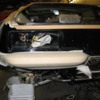
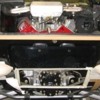
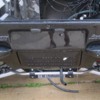
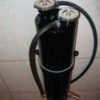
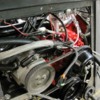
Here a shot of the side covers, camber bar cover and a small filler piece used to cover under the latch---ready to finish prime and paint.
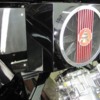
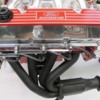
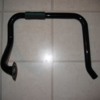
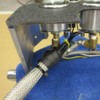
How about this hick-up---The transaxle move back slightly after the real-deal engine was installed and just touched the new shroud---bummer! So I had to figure out transaxle clearance and this was the fix. I cut the end off a 2" 180 deg. U-bend, found the correct location of the clearance needed and installed the tube section.
Attachments
Beautiful work Kirk!
I really like this thread.......
Mark
I really like this thread.......
Mark
This is just beyond an immaculate build. Great work Kirk. Half the time I don't even know what I'm looking at, but it is always gorgeous!
quote:Originally posted by DeMopuar:
Beautiful work Kirk!
I really like this thread.......
Mark
Thank you Mark. I appreciate the support.
If any one reading this thread have any questions, ideas, likes, don't likes, suggestions, or even the "what were you thinking" opinion, please, please, please post your thoughts.
Attachments
quote:Originally posted by A Hudson:
This is just beyond an immaculate build. Great work Kirk. Half the time I don't even know what I'm looking at, but it is always gorgeous!
Thank you---If you're curious or do not recognize something, please ask and I'd be happy to explain better. Sometimes I look at the pictures and don't know what it is---and I built the stuff so no worries.
quote:Beautiful work Kirk!
I really like this thread.......
Amen brother!!!
Top notch work Kirk! Can't wait to see pics of Howard's car soon.
Cheers!
Garth
OzGT5 (Guest)
Hey Kirk, are those bumpers on the black car like mine?
Robert,
They are similar but S fronts are body specific. Yours are fitted to the early fenders like the picture below. The rears are also different--the inboard surface is fitted to the AC opening hole and are designed to go better with the front splits.
They are similar but S fronts are body specific. Yours are fitted to the early fenders like the picture below. The rears are also different--the inboard surface is fitted to the AC opening hole and are designed to go better with the front splits.
Attachments
Here are the bumpers painted and installed just after a bath.
On occasion the Pantera can act like the Wicked Witch of the West---but I have never yet seen one melt so yes I do hose beat them with the water when needed.
On occasion the Pantera can act like the Wicked Witch of the West---but I have never yet seen one melt so yes I do hose beat them with the water when needed.
Attachments
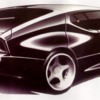
How about this bumper for what I had hoped would the 1991-92 Pantera. Another trip down memory lane. This 3-D master model still sets in the corner of my shop waiting for the right customer.
Maybe you'll read this and call----Of coarse I'd like be become a Ninja to---probably won't happen.
Maybe you'll read this and call----Of coarse I'd like be become a Ninja to---probably won't happen.
Attachments
This was the first late model engine compartment I finished---done allot of early ones. The undercoating was extremely thick---thicker than even the 72 cars. Here's a shot of the stripping process. I use aircraft stripper---many coats and lots of scraping. This is a job Americans will not do so I have to pull out my Italian passport when the stripper flies.
Attachments
Here it is with 2 coats of Rust Defender primer. Bottom coat is baby poop yellow and the top coat is primer gray. This way when you do the initial blocking with 240, you know when you need to slow down as you cut/sand into the yellow coat. Next is a black color coat and 400 wet---ready to seal with DP, base-coat with DBU black and clear with 2021 PPG. Sounds easy but not so much painting inside the compartment up-side-down.
Attachments
I am not worthy!
GREAT WORK!!!
GREAT WORK!!!
How many hours in that engine compartment refinish?
quote:Originally posted by larryw:
How many hours in that engine compartment refinish?
several weeks Larry. The biggest problem was trying to make it side-to-side symmetrical. The car varies so much detail shapes of equal proportions were tough. The stitch welds had to be ground and some of the sheet metal needed to be persuaded. Here is a shot of the inner fender ground and DP-90d ready for the filler.
Attachments
Here's a better shot in primer---you can see the challenge. One of the more difficult areas was the taillight panel and AC shroud mounting surface. To mount the new shroud to the existing straps, I had to raise the left side by 7/8" and build a mounting bar to keep the upper shroud visually straight with the top of the inner taillight mount panel. Sound simple---not so much.
Attachments
This area was tough to match side to side. Later I removed the dryer mount studs and installed it into the right rear wheel well after the new rear condenser shroud and side cover panels were built. The condenser mount tab in the picture was at the right location---the other was very low. Frankly I surprised the condenser mounted without fracturing from the twist stress---good thing the shroud was plastic instead of tin.
Attachments
Here it is with blocking black color ready to be sanded. Remember the body paint was original which made this work much more difficult to do---always keeping the outside protected. It's like trying to build a house from the top down outside in.
Attachments
quote:Originally posted by TomCat:
I am not worthy!
GREAT WORK!!!
Thanks Tom? 2 great stories--one about the F-14 shot. I was driving east to west in June through Colorado or Utah and crested a hill on the expressway to see an aircraft sitting in what appeared to be a field. As I got closer I could clearly see it was a F-14 so being a big war-bird fan I quickly grabbed the off rap and chased down the big old girl. Sure enough it was sitting in a small park alone, engines pulled for all to see. Interesting the caps were off the holes and you could crawl into the after burner holes.
Second is about the "I am not worthy!" I have a good friend who has a somewhat famous rocker background and he is a Pantera owner from 1972---with his original car. He and one of the other band members had to introduce either Aerosmith or Tyler (can't remember exactly) at a function---maybe was their Hall of Fame induction. Back stage right before they walked out to do the introduction, Craig said we have to drop to our knees after the intro and say "we're not worthy". It was the funniest part of the night.
Wayne and I had dinner with him Saturday before Wayne left---lots of laughs!
Thank you for the nice complement.
Kirk
Here are a couple of details showing the new twin cap tank. There is a pressure cap which fill the system and the main storage overflow cap which keeps the system full. This eliminates the two tank requirement and is a bolt-in to the overflow location so you can remove the wheel-well mounting bracket and add a shield to mirror the gas tank shield and keep the header heat off the fire-wall electrics.
Attachments
This is how it the other end or the gauge cluster lines look as it connects to the engine. Various lines going to oil pressure, fuel pressure, vacuum, water temp and electric. The wiring hanging on the air-pump belt ultimately plugged into the wiring that fed through a grommet-ed hole just above the shifter rod and connected to several locations in the dash.
Attachments
Add Reply
Sign In To Reply


