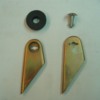
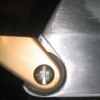
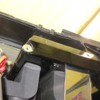
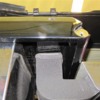
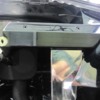
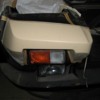
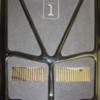
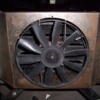
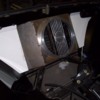
Here is the tab detail.
The tab is locked in place with a factory fastener. The gold color is plating for internal protection.
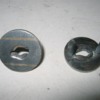
The locks were difficult to build. first I had to cut 2 washers the same thickness as the factory lock, weld the half's on, regrind the assemble into a circle, drill hole and tap for studs, install/weld the studs, grind and polish the face for plating---and the entire part is not more than an inch in diameter.
Attachments
Do you have a good picture of the camber bar cover and how it is secured? Your details look very nice.
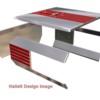
Rich Hallett of Hallett Design Image worked with me all through the AmeriSport years. He is very talented graphics illustrator and designer. If any of you need such services including home design, building design, idea graphics or what-ever, drip me a note and I'll put you in contact with Rich.
Exploded view of gen 3 from the rear
Exploded view of gen 3 from the rear
Attachments
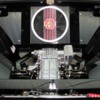
Bloody hell Kirk! I am impressed. You have put some time into that engine screen. Your fabricating skills are getting better and better. I love the attention to detail - just my cup of tea. I made a crazy air box for my friends Pantera a few years ago that sucks air from the ears. I will post some pics sometime. The sound it made was quite amazing from inside the car. 427 DART induction roar in stereo!
Johnny
Johnny
quote:Bloody hell Kirk! I am impressed. I love the attention to detail - just my cup of tea. I made a crazy air box for my friends Pantera a few years ago that sucks air from the ears. I will post some pics sometime. The sound it made was quite amazing from inside the car. 427 DART induction roar in stereo!
You always make me smile my friend---thank you. Frankly Johny, if I had any real money and was to build a car, I'd rather send it to you than any one state side---and I mean that sincerely. There are may capable builders here but I trust you with not to overlook the details.
Here are some shots from the bottom side.
Attachments
This picture shows the side scoop installed without the louvers. The engine cover is installed mating up to the window seal plate. There is a seal gasket around the side cover opening which is hard to see. The louvers are made to install with 2 line-up pins at the top and one allen bolt at the bottom for a quick in-out solution so you can access the air box/distributor/gauge cluster assembly with the engine cover off through the louver opening without removing the entire scoop.
Attachments
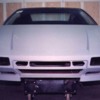
I build new GT5-S front split bumpers which are body specific. The S is not symmetrical so the bumpers vary from side to side. In my opinion, the pictures do not do the item justice---they look far better in 3-D on the S body.
Attachments
Kirk,
You're a true artist. The split bumpers look fantastic. I wish I had half of your abilities.
Thanks for all the posts. It lets the rest of us know what can be done with some talent and ingenuity. Keep up the great work.
You're a true artist. The split bumpers look fantastic. I wish I had half of your abilities.
Thanks for all the posts. It lets the rest of us know what can be done with some talent and ingenuity. Keep up the great work.
[QUOTE]Originally posted by Garvino:
Kirk,
You're a true artist. The split bumpers look fantastic.
Thank you---If I can be of assistance, please call if you need support on any part of your car.
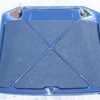
Here is a shot of the deck bottom before installation. The lid inserts glued to the deck were first made in 1979 and I may be putting them back into production soon. The material is the same as the trunk insert and front trunk was lined with. this material can be installed seamless into both the front and rear areas and with the lid inserts makes a great looking combo.
Attachments
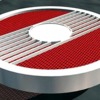
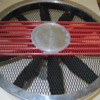
At the other end of the car, I built a new AC condenser housing with a larger fan shrouded from the outside so there was no visible motor and the fan blade was behind a screened billet shroud. The first gen design of the fan cover is pictured. The shroud assembly and rear side covers as a stand alone unit was quite a project. I'll post more shots of the shroud construction later this week.
Attachments
Here is a view of the finished AC condenser shroud and hidden fan shot from the roof. I started with a larger condenser and built from there. The shroud and side cover plates are steal painted, color sanded and polished. I post some shots of the build and assembly procedure later. You can better see the camber bar cover at the bottom of the shot. The center ribs are painted and spaced to match the valve covers and air box.
Attachments
Here is a view of the box looking down from the rear of the car. The motor mount structure runs parallel with the center rib fan shroud trim so you can barely see the motor mounting ribs. Looks simple---not so much. This is one of those items you need to see in 3-D.
Attachments
Here's a shot of the shroud installed as I'm just starting the side shield patterns. There is a base piece underneath which provides the support for the pattern strips on top. This is the best way by hand I have found to make panels like this.
Attachments
Add Reply
Sign In To Reply


