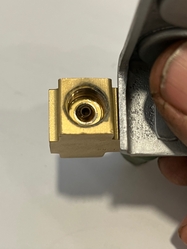
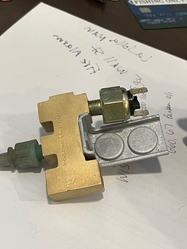
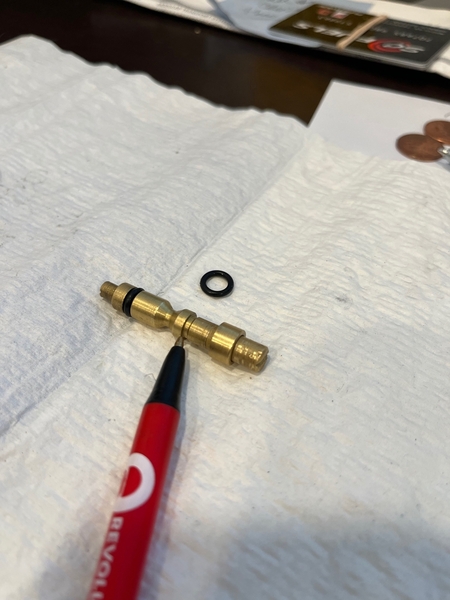
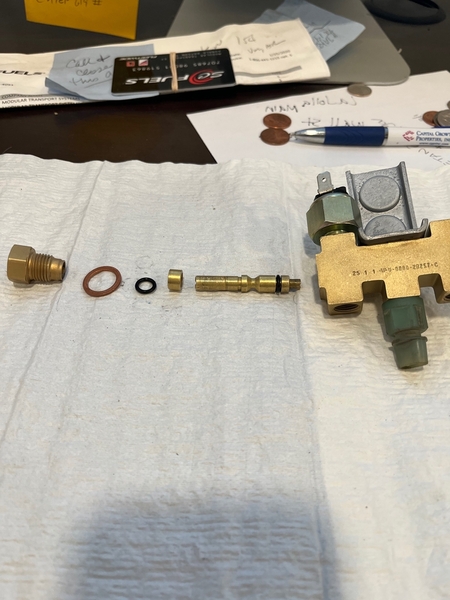
I bought a rebuild kit from Wilkinson yesterday while I was up in the L.A. area. I should have asked some questions but, there is only a copper crush washer and 2 O-rings, how hard could it be? After looking at it closely I noticed a slotted brass screw head in the brake switch hole and after loosening it the screw only comes out as far as you see in the pic. I'm assuming the O-rings go on this screw. Is there probably some crap on the screw not allowing it to be removed?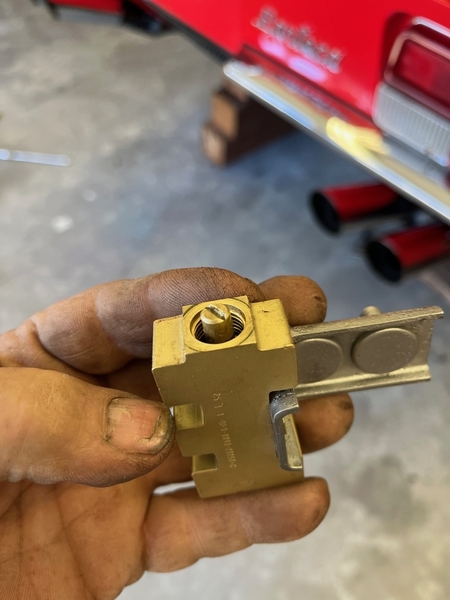
Replies sorted oldest to newest
It should look like this inside;


Ask and ye shall receive, Thanks!!
For more information do a search for shuttle valve.
The plastic switch serves to illuminate the trouble light for the brake system should a break occur in a hydraulic line.
in theory and my experience the two black O-rings isolate that switch from any hydraulic pressure. It is purely a mechanically actuated switch
Sight through the open hole to locate/position and center the groove in the middle of the shuttle valve.
The plunger on the switch should rest in that groove. A loss of pressure on one side of the shuttle valve will cause the side still with good pressure to move the valve. The full diameter of the valve will now depress the switch plunger and illuminate the light
Larry
Donny,
It is possible to crack the distribution block when reinstalling it. The issue is with the brake light switch and the large 17MM tube nut on the rear brake line circuit. It is easy to over torque either of these two steel nuts because you can put a large wrench on them. There is much less risk of cracking the block when torquing the small tube nuts because the wrenches are shorter.
Just ensure the piston is centered on installation otherwise one system ( front or rear ) will not fully function properly. If there is continuity in the rear brake warning switch terminals it is not centered.
Can I just add if you have the other pressure modulating valve out or have replaced it with another new unit put it in the vice before you install it and ensure that the very large nut ( 1 3/8 inch ? ) on the end is sufficiently torqued. I installed a rebuilt one and had no end of trouble with a slow seepage from the bottom of the end cap.
This finally required removal to tighten sufficiently which meant a restart on system bleeding etc. Destiny was to do it all twice ....!
Also, the small blue plastic switch (that reports a failure of the front or rear brake hydraulic circuit) does not seal against brake fluid. It relies on the seals on the piston inside the block. If fluid is leaking from it then the block needs the rebuild kit.


