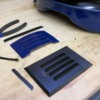
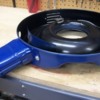
OK, that blew up real good.....make sure your pictures are proper size BEFORE you type a novel......cuz I don't think you get to back up once you hit enter.....oops!

OK, back on track here!

I have found that there are two distinctly different air cleaners found on normal Mangustas. They differ in the shape of the area where the two fresh air inlet snorkels attach to the main body.

The air cleaner I have for my car did not come with my car, and was something that the third owner still had hanging on his garage wall when I found him some 20 years later! Yes, I bought it from him in a snap! He bought it from Hall back in the mid 70's when he owned the car, but it never fit right, so he didn't use it!

This version has rectangular shaped holes in the body where the snorkels were formed to fit. I do not have pic's at the moment.....but will post as this project progresses.

The second version has oval shaped holes where the snorkels attach to the body. See attachment for this type. Pic's are from 8MA1020 when it was here locally. (Belgian car imported to US)

My problem is that neither will fit my car presently. I installed an Edelbrock Performer RPM on my engine and it runs great. However, I am now realizing that there are two issues. The carb flange sits at too much of a downward angle (in the front) and it is generally too tall. (The Performer intake is 1/4-3/8" shorter IIRC.) I could swap out the intake...to gain some clearance, but I'd rather not at this point.

Another problem is the oil pan...which is too low...since as many of you will remember in my "oops I'm doing it again" post, that I found my engine mounts had been raised by at least 1.5" and I had them cut back down to stock height. Well, it wasn't quite enuf to allow my stock air cleaner to fit in this config. Oh, I'm also running 1/2" of carb spacer to keep the electric choke off of the jackshaft support!!! ...I want to use the electric choke....

(I could just take out the carb spacer, remove the automatic choke, all would be over.....but that is too easy....)

I have raised my engine about 1/4" to try and level it out a bit, and to gain ground clearance such that I can design a new oil pan that will be about 1" shorter. I would love to raise it (at front of engine) about 1/8" more! That would put the engine pretty danged level with the frame, and it would make the idea for my new pan work too! (Total lift of 3/8" on top of the mounts.)

SOOO, what is a hot rodder to do???? Well, when you can't find it....make it! more pic's later!

In a little tally of the two types of air cleaner bodies, in pictures that I found either in my own collection or on the MI sight, I came up with this as a start:

Type 1- Rectangular snorkel connections
8MA520, 8MA566, 8MA670 (Chevy car), and mine.

Type 2- Oval snorkel connections
8MA508, 8MA606, 8MA798, 8MA1020, 8MA1242.

From this totally unscientific accounting, it would appear potentially that the Type 1 rectangular were used perhaps early on for say 100 cars or so, and that the Type 2 oval type were used from the beginning until close to the very end! Could have been two different sheet metal shops, or two different fabricators....who knows!

Slight variations noticed: There should be a hose connection of about 5/8" in diameter which connects to the valve cover breather cap, to allow fumes from the engine to be sucked back into the carb and burned....

There may be a small hook or tab on the rear bottom of the body for holding something in place, either a small vacuum hose or perhaps the throttle cable......

Some snorkels have a vacuum motor mounted on one of the snorkels. These, I believe, were MEANT to be block off controls for directing warm air from the exhaust up to the air cleaner to help the engine warm up sooner. I have never seen any more than an actuator shaft on the motor....hanging in mid air!!! Not connected to a thing.... a farce...a joke....a non-functioning piece of hardware..... Some snorkels may have the holes drilled but nothing mounted....

Ciao!
Steve

Attachments

Images (1)
  • 8ma1020aircleaner1lrg
Last edited {1}
Original Post

Replies sorted oldest to newest

Nice weather this weekend, so got to sit out in the sun for a few hours and look at this a bit.

Had two options for bodies.

67 T-bird big block version offered a couple of things...it takes the same element as the stock Goose air cleaner! It is 17" in diameter (smaller than the stock by about 2") and is short, plus had a good drop down amount. Clearance was looking good for the interference with the shields too! Bad news: These are hard to come by! (Unit on the right.)

Second option is a pretty generic 1968-1969-1970 Ford 302-351W standard air cleaner body. Used on many trucks of this vintage too. It offered 1/8" more drop down than the T-bird version and is 18" in diameter, closer to the stock version. Good news: These are easy to come by! (Unit on the left.)

Here they are side by side:


A couple of shots showing the difference in height. About 1/2" or so.


Element on left is non-Goose, right is proper Goose element. I measured the difference to be .475".


With a handy dandy carpentry tool I have no idea where I picked up, I was able to scribe a line in the paint to use as a guideline for cutting. I figured in the thickness of the tin (1/32" or .031") and a radius at the top that would prevent the ring from fully seating, and came up with .525" and "cut above the scribe mark."

Used a small Dremel with a 1-1/4" by 1/16" cut-off wheel. I used the long Dremel extension cable drive thing, but it wasn't necessary. The Dremel and small cut off wheels worked great once you got going! Took 4 cut-off wheels to do the job. Finished the edges with a round sanding drum attachment so as not to cut the heck out of myself from here out.

Here is the scribe thingy:


Worked great using the top edge as a guide!


Probably about 45 minutes of staring at it and 20 minutes of cutting/sanding, and I had two pieces of air cleaner body.... Measure 50 times, calculate 25, and cut once!


Now, I placed the small top ring inside the body of the lower piece. I had to start it on one side of the existing snorkel opening, and work it around carefully until I could push it all the way down. Here you can see that I have not quite got it all the way seated down yet, but it's going!


In place, and now lower in profile than the T-bird unit!


I have this much space to the top of the element now, or potentially the smallest space to the top lid. Good thing the lid has contours in it too!


Once I can get this all figured out, decide what my snorkel units will look like, and cut the opening etc, I will go back and either spot weld or weld completely, all the bits together. Then bead blast it and crinkle paint it to look like the stock unit!

More options that could gain me some room:

1) Make a sheet metal top (still 1/32" material) with a simple 90 degree bend on it vs the large rubber seal that the stock Ford lid has on it (or I could take the seal out!) Form it to resemble the stock Goose unit. (Were these spun or stamped????)

2) Install a tapered carb spacer to level out the carb a bit. Since it sits nose down now, and is just causing the rear of the air cleaner to touch the engine covers, if I dropped it an 1/8" or so at the rear of the carb flange, that would translate into closer to 1/4" at the outer reaches of the air cleaner lid! If I had not been in such a rush to get this danged thing running again, I would have had the intake flange milled about 4 degrees less tapered. (That is what my magnetic dial protractor told me today when I was playing with it!) I can mill my spacer......for now. Ford actually made a tapered carb spacer that is found on some Lincolns I think.....have only ever seen one.....and of course cannot remember what I saw or found it on!

3) Install a Performer intake. Flange is shorter...but I would still need to port match the intake ports, and then would probably need to remove the automatic choke...something I really do not want to do.... yet....

I am trying to keep in mind why I am doing this.....
A) Get cool & clean air into the carb...for those "stuck in Vegas traffic" days. Install a stock or stock looking air cleaner body.
B) Gain the electric/automatic choke function. Once I get the carb dialed back down (real rich now) I will need a choke to start it! Fast idle thing.....
C) Raise the engine enough to gain ground clearance for the oil pan. Stock pan sticks down about 7 1/2", my custom pan was 7", and I need about 6" to be ultra safe, and still carry 6-7 qts in the sump area.
D) I can't possibly get a break on any aspect of putting this car back together...so why not! Big Grin

More as I get there! Need to get some .031" sheet material now!
Will also post pic's of stock air cleaners too.
Steve
Last edited by mangusta
Hey Steve,

Another idea to get a bit more clearance is to flip the air cleaner lid upside down when you screw it onto the carb. You would need a shorter air filter, but that should net you 3/8"-1/2" of additional clearance. Paint the underside of the lid and put your decals on and few people would notice.

OK, logged some more progress on this project this weekend and tonight!

Sat, stopped by a fellow member's business, where he has a fully stocked sheet metal shop! For me in the need for such a place, Disneyland would not have looked better!

I picked up some 12x18" 22 gauge sheet stock from Home Depot. Was cheaper than my local steel super store...by a great margin!

First thing I did was make more rectangles out of these large rectangles on the shear. This is a great tool for making straight cuts without distorting the edges like the hand aviation snips do...and you have to hammer them back flat...not with this guy!


Then I rolled two of them into the tubes that form the outer bits where the paper inlet tubes attach to the air cleaner. This roller is just too cool! I could have used this some more for making these parts!!!! (plus so many other things!!!)


(Tonight I found out that I made these just a tad to large in length, by about 1mm or 1/8", the thickness of a 3" cutoff wheel! When rolled they came out to 81-82mm, and I needed 80.)

When I got done I had a few scraps to practice welding with! I was gonna need more than this!


I made up a template for the top and bottom sections of the snorkles.....this too needed slight modification where the outer circle is formed for the round sections I rolled up....live and learn! I modified 3 out of the 4 that I cut out....I can patch the gaps easy enuf...I hope!


Using left and right aviation snips, I cut out my pieces, tapped them flat again, and deburred them.

After some right angle bending...


and some more round bending...


and some straightening and hammering and more bending, straightening, and hammering, I ended up with some pieces to tack together.

My stack of hand tools for this job.


After practicing my "22 gauge" welding, with ALL of the scraps I cut off of my patterned parts, and the left overs from the basic shearing, I felt I had enough time on the welder to give it a shot.

Here is where I left off tonight.


I have both round pieces seam welded, welds filed down and the outer edge rolled over a bit to allow you to get the paper tube on easily. One of the round extensions is fitted into the inner piece after working on it with a hammer and a heavy smooth piece of round stock and it's close to ready for tack welding together, then some more light hammer work to close up the gaps for final welding of the seams. I can see now where a TIG welder for this would be fantastic! The MIG, while good, just doesn't give me all that much control for this thin tin.

On the piece at the RH side of the above picture you can just make out where my pattern was off where the two halves form the round circle. I didn't compensate for the "pull" when forming the straight edge where the two pieces join together. Not a big deal...it will look like it came from Italy.... hand made and all! good news is that the pieces really do not need to be welded air tight....a teeny tiny hole here or there (just like the originals!) will not let that much warm air in to affect the operation of things....any dust would still be filtered out before the air got into the carb.

More next time!
Steve
Last edited by mangusta
OK! Time to make use of all this rainy weather out here!!! OK, actually the rain is now waning....and this is what I have been up to!

With the snorkels mocked up, I worked on cutting out the holes in the air cleaner body to receive the snorkles....


OK, let me back up a bit! Lots went on here! As you can see in the picture above, I now have clearance at the front of the air cleaner lid, note the slight amount of light peeking up at the front, and the gap below the engine cover at the rear. This didn't happen automagically!

I have an Edelbrock RPM intake installed. I may not have had to do all of this, had I gone with the regular Performer model, but I probably would have had to carve more on my jackshaft center bearing support area, to clear the automatic choke unloader....

I also had a 7/16" carb spacer installed to make everything fit...but, as such, the front of the aircleaner cleared fine, AND the rear was too high! Just removing the spacer was not the answer....see note about choke unloader above!

I purchased a couple of 3/8" flat spacers and determined that I needed a "wedge" spacer cut....


In the rear, is my first WAG at a proper angle...this one was cut at aprox 3.3degrees. After test fitting, this dropped the rear of the air cleaner just fine, but raised the front of the aircleaner! (Notches cut in the one edge are for auto choke linkage clearance on the primary throttle shaft area.

My dad is a machinist, and was helping me out with this.... After he mentioned trigonometry and stuff like "X" number of inches drop per linear inch....I had to get my calculator out and my trig tables....boy, this was scratching for some old brain cells to wake up! After a good deal of dimensional drawing, accounting for front and rear height changes, I determined that a 1 degree spacer wedge is what I wanted. See wedge in the front! This is what allowed the air cleaner to fit properly!

I also picked up some self centering washers, to account for the fact that now my carb is sitting off angle from the holes that the studs are mounted!!!! These special washers have one side that is convex, the other concave. Sweet!!!!

A slight amount of carving on the center bearing area of the jackshaft carrier, and I was back in business!!!! Back to air cleaner!

I welded up the hole where the original air inlet was on this version


Welding on 22 gauge tin is an art! If I had smaller tips for my gas welder, I would have used it, but all I had was my wire feed mig welder....so easy does it! Got a few burn thrus......

My next big job was to spot weld the top ring that I cut off, back on to the top of the air cleaner body. I first tried this with 1/8" holes and the mig welder.....all I did was fill the holes on the inner ring piece and simply mis-color the paint on the outer layer of the body I was trying to attach to! (I did clean off the paint on all sides.....)

Here is a shot of a missed "spot" weld...note the air...


Needless to say, when I got done, I had only one half of a single attempt that stuck...and it popped off! That was out of about 16 weld attempts! ugh!

Was going to borrow a buddies' stand mounted spot welder, but got to his shop, and not only did he not have the proper 220V plug on the cord....but he had no 220 in this part of the shop yet!!!!

Off to Harbor Freight..... spot welders were on sale...so picked up a 220V version.


After trying to translate the poorly translated instructions....were they Chinlish or Englise?)and all of the scrap tin in my garage, I came up with about 3 or 4 good spot welds out of many!

I popped over to the Miller Welding website, and THANKFULLY, they had a PDF version of the instructions for their similar spot welder. MUCH better instructions, but they still left a hole or two to fill...(welding humor there...!)!

I stopped by my buddies shop and used his shear to cut me a boatload of 1/2" to 5/8" wide strips to practice further with...

After adjusting the tongs and pressure accordingly, I was now able to get what I thought were some nice looking spot welds, that actually seemed to be holding!

First attempt at the top, second at the bottom.


Tried this a lot! ...to be sure I was gonna succeed....or do better anyway!


Continued, next post.
Last edited by mangusta
Once I got the top ring spot welded in place, I worked on attaching the snorkels. Spot welded them at the sides, where a small tab of metal was bent back to the body, just like the originals were formed.


In the above pic, you can also see where I formed the lower lip of the snorkel down into the body. Spot welder wouldn't fit in there so it was gonna get welded from the outside.... Top lip is not yet formed...but I later determined to just weld it and cut off the excess.

It's now looking more like my air cleaner!


Welding on the bottom of the snorkel.

I didn't need a full weld here....so half butt welded it....some cleanup to come!

I did a full seam weld along the top, on the inside. This is the right side after cleanup with a cutoff wheel and the ball bit, and file.


Here is the left side before welding. (I had left more of an upper "tab" area after cutting out the first pieces of tin...to account for more material to work with. This turned out to be a good thing to do! The extra metal acted as a heat sink during welding and I had almost no burn thru, as I had with the other side, which had about 1/4" less material sticking out.)


Here is that same side after welding and cutting off the excess and doing some work with a 1/4" ball headed cutter and a little file work....OK, a LOT of file work!


Today, after working with the grinder and files to get all where I wanted, I had one more welding task to finish. A fitting to connect the breather on the valve cover, to the air cleaner.
Came up with this!


Again this is after some ugly welding, and a lot of filing! Too bad no one will ever see this!!!!

Next post!
Last edited by mangusta
Tonight, after about 35 years, was the first time that this car has seen stock paper air inlet tubes in it's engine bay!!!

Fit on the left


Fit on the right


Oh this looks good!


You may ask why I didn't weld completely 360 degrees around? Well, for one, the stock air cleaner bases are not made that way, or at least SOME of them are not....and there are tiny little gaps and holes....so I decided to go with that theme....besides, they won't let all that much air in.....and if they bother me, any offensive gaps or holes will get a blop of JB weld before it goes off for powder coating!

What's left to do? Plenty!

I need to bead blast the entire air cleaner body inside and out, to prep it for powder coat. (crinkle black!)

Also do the lid. Not sure how the rubber seal in the lid will hold up to baking in a powder coating oven! May need to figure out how to remove it without destroying it!!!

For now, I'm going to use the stock Ford lid.... It will work. If I decide to have a more stock looking lid made up, I will need to get much more adventurous and have someone spin me something up! But that is an entirely different subject...and I'm not going there now!!!! This project has sucked up a LOT of my time. Now I know why stock air cleaners are worth so much!!! Because they are!!! The fact that this one is totally custom, yet will look somewhat original, will be enough to fool most of the critics....! Smiler

More when I get it back from the powder coater!

Ciao!
Steve
I've commented on these threads before, and just stay entertained by them.

I don't own a Mangusta, don't have a Mangusta air cleaner problem, but ALWAYS learn something from these posts. Thanks Mangusta Steve!

I am installing a Blue Thunder intake on the Pantera though, and it's gonna bring my cleaner up over an inch, meaning I had to find a 'drop' somewhere. Turns out a 2 barrel air cleaner dropped it that amount.

The way you cut down your air cleaner was super ingenious, and I considered it 'til I found the lower cleaner. Great work as always.
Last edited by ahudson
Progress update:

I asked the powder coater about the rubber seal...he didn't think it would be a good idea!

Looked around and mostly I found "use a sharp" something-or-other and scrape it out..... well I tried that, and only ended up tearing the outer layer of rubber off of the seal, leaving this layer and the glue in place. I stopped destroying it, and decided to try heat! I had heard a rumor that you could put them in your oven at 200 degrees or so on a coffee can or similar, and eventually they would fall out! Well, the wife's oven is too small! (Old house!)

So, I dug out my handy dandy commercial grade heat gun (for shrinking telecom grade heatshrink tubing) and put it to use! Sure enough, after heating the metal from the backside, the glue started softening and eventually would pull out entirely clean! This was not a fast process, but it worked. The seal will live to be glued back in again!

I then bead blasted it to remove the paint and other garp and off to the powder coater!

I chose a semi-gloss wrinkle that has a slightly smoother appearance than the stock finish. It should clean up easier, plus provide smoother air flow on the interior surfaces, if that is a big deal or not....we'll probably never know!

Will post pic's once it returns!

Off to oil pan rev3!

Ciao!
Steve
TAA DAA!!!!


Just got back from the powder coater with this baby! Couldn't be happier! Finish is a semi-gloss but looks a tad glossy....that should wear down with time! It is also smoother than the stock crinkle, but I like that in terms of cleaning it! Plus making a decal stick should be easier....

Bottom View


Here is a close-up shot of the finish.


Inside View


Topside of the lid. Still need to glue in the rubber seal. That should take only a few minutes to do! (Yah right!!!!) anyone have a source for the decal????


Now I just need to reproduce the several hangers that were used to keep the paper tubes in place and from sagging!!!
Ciao!
Steve
That's really cool. You inspired me to do a far worse version for a Pantera, requiring much less talent, but still.

I had to use a 2 barrel 'dropped' air cleaner so my new blue Thunder intake would still fit under the screen. Didn't want to give up the air intake vs. the 4 barrel, so I attempted to remedy that.

Dremelled opening for vacuum door. Then added these...

Attachments

Images (1)
  • Pantera_cleaner_vents,_before_and_after,_smaller
quote:
Originally posted by Mark Charlton:
Steve,

Awesome work as usual. Heck, look at the impact you are having. Even Adams is getting out the snips! Wink

I think you should ramp up and start selling Mangusta air cleaners. You could probably retire on them!

Mark


I AM A SNIPPING FOOL. Get near me and you'll have neater fingernails. Won't feel a thing!

A lot of these original parts (or original looking but better functioning) are more in demand. I guess we can thank the resto-mod movement to a degree.

Seems even the deTomaso market has matured (somewhat) from chrome and flames to higher functioning originality. The Mangusta was always more that way, but mods like this are a perfect fit. Love this thread by the way.
OK, raining like cats-n-dogs outside.....so can't really do much to get ready for Reno, as I need to have both doors open to get my console back in....after I readjust the main jackshaft drive belt one last time....!

SO, figured this was a good time for putting a bow on this adventure! (update the web story!)

Here are a couple of shots of the finished product, complete with repop'd decals from Hall Pantera. They are bubbling up a little bit, but that could be due to my installation technique....or the powdercoating.....I just push them back down.....hoping one day they will get with the program!


Astute viewers will also notice that I have no giant cutout on the engine shield! (where previous moron cut out a half circle to install one of those stupid triangle shaped air cleaners (air restricter!) from the 70's...AND cut off one of the support legs!) I finally installed the new set I had picked up. I still only have 3 supports at this time, but fitting the 4th supports into this deal are not going to happen this week before Reno. Welding around the back glass makes me very very very nervous!!! Not sure if I'm gonna pop the back glass out, or just shield everything super duper good with damp towels etc. We're not talking that much welding.....

One thing I did find the other day, after doing dyno runs, was that if I cranked the wing nut down too tightly, I was actually hitting the choke blade with the air cleaner lid, and affecting the idle speed! (was kicking in the high idle lever a tad!) I had lowered the lid by 5/8" when I shortened the body so this was no real surprise!

After some a little work with a piece of hardwood, a 16 oz. hammer, and a clean towel on the floor, I was able to push up the very center of the lid, to give more clearance. If you look closely at some of the previous pictures of the lid, you will see the "new" profile of that area within about 2" of the center hole!


One final item in the TBC column, is the making up some proper paper tube restraints to mimic the originals. I have thought long and hard about cold steel vs stainless, and I think I'm going to go with stainless for the simple reason that I don't need to paint it or treat it to prevent rust. Had I been in charge at DeT when this car was being built, I would have used stainless...... Smiler

Ciao!!!
Steve

Attachments

Images (1)
  • aircleanerdone8
Last edited by mangusta
Ron,

Not a Boss any longer! I took a Boss 302 out and put in a much better fitting 331, based on a 5.0L roller engine, back in its place.

I needed the high valve covers to fit over the 1.7 roller rockers....and this new style V/C was the only thing I could come up with at the time to get me down the road. I'd have preferred a set of 1" spacers or so...just couldn't find what I liked at the time....so this is it for now! A deception! ...I do like the flat horizontal surface that these present.

I'm thinking about covering the BOSS logo on these covers with a set of original castings that were proper on the original engines.....that say DeTomaso...... That would pretty much tie everything back to the intent of an original appearing engine.

This one has a LOT more ponies than the Boss had.....due to various reasons...most of which have been corrected now...awaiting reassembly and a new body!

Ciao!
Steve
Beautiful car, and nice swap! He is an original owner, or close to it! The 5.0 swap happened years back, with the SD version of the EFI, and now he had it updated to MAF EFI!

I was very tempted....as it DOES all fit under the shields toooo nicely! Wouldn't have had to return my frame mounts for the engine back to stock height! ...but I would have needed to find a spot for the computer etc.

Still, a very nice implementation of modern technology!

Steve
Post
×
×
×
×
Link copied to your clipboard.
×