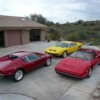
# 3463 is now in Arizona at my friend Steve Julius's. Starting a Re-Restoration which will include Smoothing & Painting the Chassis, Wheelwheels and Engine Bay. Complete new Suspension and Brakes. Refinishing the Engine and ZF. Adding "Bling," Stainless Nuts & Bolts, Polishing, Chroming, Powdercoating or Painting Everything. Moving and Resorting all Systems. The Paint, Interior, Wheels & Tires, and Trim are near perfect and will be left alone. Keep you all posted!

Dave # 3463

Attachments

Images (90)
  • HYPURR_1
  • HYPURR_Reliable_to_AZ_1
  • HYPURR_Reliable_to_AZ_2
  • HYPURR_AZ_FourCars
  • Re-_Restoration___3463_Underside1
  • Re-Restoration___3463_DashGutted1
  • Re--Restoration_AuxFuseBlock2
  • Re-Restoration_HeaterBoxIn
  • Re-Restoration_WindowMotor
  • Re-Restoration_DoorAssembled
  • Re-Restoration_DoorPanelBack
  • Re-Restoration_DoorPanelFront
  • Re-Restoration_Pedals_1
  • Re-Restoration_Pedals_2
  • Re-Restoration_-_Headlight_Bracket
  • Re-restoration_front_suspension_out
  • Re-Restoration_front
  • Re-restoration_front_lt
  • Re-Restoration_front_rt
  • R-Restoration_LH_Fenderwell_Steel
  • Re-Restoration_Fenderwell_Steel_1
  • Re-Restoration_Fenderwell_Steel_2
  • Re-Restoration__QC_Inspector
  • Re-Restoration_QC_Inspector_Lunche'
  • Re-Restoration_Front___Center_Steel
  • Re-Restoration_Fenderwell_Coated_1
  • Re-Restoration_Fan_Relays
  • Re-Restoration_Front_Suspension_Parts
  • Re-Restoration_Konis_Completed
  • Re-Restoration_Radiator_Front-Fans
  • Re-Restoration_Front_Trunk_Complete
  • Re-Restoration_Pantera_Radio_Delete_Plate
  • Re-Restoration_Scorpion
  • Re-Restoration_Engine_Out
  • Re-Restoration_Engine_Bay_B-4
  • Re-Restoration_Engine_Bay_B4
  • Re-Restoration_Engine_bay_B4_1
  • Re-Restoration_Engine_Bay_B4_2
  • Re-Restoration_Engine_Bay_Smutz
  • Re-Restoration_Ring_Gear_Bolts_Safety_Wired
  • Re-Restoration_Front_Chassis_Brace_1
  • Re-Restoration_Steve_Surrounded
  • Re-Restoration_Gas_Tank
  • Re-Restoration_Gas_Tank_in
  • Re-Restoration_RT_Fenderwell_Prepped
  • Re-Restoration_LT_Fenderwell_Prepped
  • Re-Restortaion_Engine_Bay_Painted-Ready
  • Re-Restoration_Cooling_Tubes_Bling
  • Re-Restoration_Front_-_Cooling_Tubes
  • Re-Restoration_Gas_Tank_Shroud
  • Re-Restoration_Water_Bottles
  • Re-Restoration_Front_Beake_Calipers_done
  • Re-Restoration_ZF_Upside_down
  • Re-Restoration_ZF_Rightside_up
  • Re-Restoration_Oil_Pan
  • Re-Restoration_Front_Suspension_DONE
  • Re-Restoration_Front_Suspension_DONE_2
  • Re-Restoration_Valve_Cover_-_Breather
  • Re-Restoration_351_Complete_1
  • Re-Restoration_351_Complete_2
  • Re-Restoration_Engine_Bay_Progress_11-07
  • Re-Restoration_Rear_Suspension_in_1
  • Re-Restoration_Rear_Suspension_in_2
  • Re-Restoration_rear_Suspension_in_3
  • Re-Restoration_Rear_Suspension_in_4
  • Re-Restoration_Engine_Bay_Latest
  • Re-Restoration_Engine_Bay_latest_1
  • Re-Restoration_Pedal_Set
  • Re-Restoration_Cooling_Tube_Drainage
  • Re-Restoration_Exhaust_System_B-4_Coating
  • Re-Restoration_Fluidyne_cover
  • Re-Restoration_Front_Grille_Isis_Logo
  • Re-Restoration_AC_Unit
  • Re-Restoration_HPC_Exhaust_1
  • Re-Restoration_HPC_Exhaust_2
  • Re-Restoration_It_Lives_and_Breathes
  • Re-Resrtoration_Engine_Front_Tidy'd_Up_12-07
  • Re-Restoration___3463_-___4357_12-07
  • Re-Restoration_Aluminum_Billet_Shocks
  • Re-Restoration_Aluminum_Billet_Shocks_Lt_F
  • Re-Restoration_Aluminum_Billet_Shocks_Lt_R
  • Re-Restoration_Aluminum_Billet_Shocks_Rt_R_Mirror
  • Re-Restoration_Lowered_Ride_Height
  • Re-Restoration_2_Fat_Cats
  • Re-Restoration_2_Cats_in_AZ
  • Re-Restoration_4_Wheel_Alignment
  • Re-Restoration_Engine_Bay_1-08
  • Re-Restoration_3_cars___5_years
  • Re-Restoration_3_Amigos
  • Re-Restoration_AZ_4_Cars
Last edited {1}
Original Post

Replies sorted oldest to newest

Mark, When Steve and I attended the Las Vegas event for the Saturday Car Show he claimed that his hands were too clean. I'm just trying to help a brother out with the first part of the project!

George, If it would make you feel better I will send Steve some of my many CORVETTE T-shirts so he will have clothing to wear in "the shop" while working on my Pantera. After 20 years > NCRS membership > 6 Corvettes, I have plenty of work clothes...

Dave # 3463
Check out the newest images added to the photo album. Scraping clean the Floorpans and Gutted Interior and Dash.

# 3463 started out Grabber Blue.

AC lines will be rebuilt, Heater fittings cleaned up nicely, new Relays and Fuse Box next. Wiring harness is in terrific shape. Just sorted out the few bad pieces. It's all good...

All this thanks to my friend Steve "My hands are too clean" Julius.
OK, Mr. Fahrenheit351, per your request, here is what it takes to remove undercoating. I know there are several ways to do it, and after trying many methods, this is the best I've found. Make sure you are wearing really old clothes, shoes and a hat, because when you are done, you will want to burn them....

The process involves several steps. First, get out your heat gun, warm the undercoating and scrape with a sharp 3/4" wood chisel. The hardest areas are in the corners, and curves. Do the best you can, but there will still be lots left. Be extra careful on the back side of painted panels. If you heat them up too much, I'll bet you can bubble the paint. I haven't done that yet, and don't want to.

For the next step, fire up your 7hp compressor, and put a 2" cup wire brush on a die grinder. Wear a face shield and ear plugs, and go to town. You will make an incredible mess, and be covered with little black pieces. You can't do this step first, because the thick gooey undercoating will just clog the wire brush, and just smear stuff around.

Step three is disgusting. Take a pan of mineral spirits and a rag, and start wiping. Let the liquid soak in as you work your way around the fender. Don't let any area dry out - keep it damp. In five or ten minutes, go back and wipe off what you can. Mineral spirits will soften even the hard stuff, and will eventually get you down to bare metal. You can help it along with the wood chisel. It will take several application of mineral spirits. Each time, you will remove half of what's left. (If you can get down to one atom, then remove half of that, you have nuclear fission). By now, you have nasty brown goo all over your clothes, on you face, your arms and arm pits, and have tracked it all over the floor..

Final step is a rag and lacquer thinner. Plan on about ten hours per wheel well. -Steve
The engine bay & rear fenderwell coating removed. Uprights, shocks and rear brakes will be removed next. The engine bay will now get some grinding, filling and sanding > then coated.

The gas tank is being boiled out, pressure tested and then painted semi-gloss black. The sending unit is new.

Way more to go > # 3463 is about 40% complete.
Hey BoxBoy - where've I been? I just found this thread. GREAT GOING! I love seeing you spend all that money so I can just be a spectator! That thing is going to be super.

Aside from the rattlesnakes and scorpions, what 'dangerous' surprises have you found with your car? Anything that was terribly suspect, or borderline failed, or previously crashed? Simply curious.

Keep the GREAT photos coming. You're doing a "book worthy" job.
Adams,

Glad you found the thread... On a 35 year old car with just a mechanical and cosmetic resto B4 > EVERYTHING needs to be done. Window-headlight motors, assemblies, pedals, doors, heaterbox, seat tracks, suspension, on and on. No kidding...

What we are finding is time capsule condition steel and no bad or suspect stuff. A unbelievable, no-rust condition Pantera.

I'll keep the pics coming.

Dave # 3463

Add Reply

Post
×
×
×
×
Link copied to your clipboard.
×