Here's some pictures for you!

I was asked to restore an engine compartment. Mangusta 8MA1182. I actually finished it back in June but I have been so busy with my new workshop I have not had time to sort out the pictures and add some words.

The car came to me with the paint and body already done. Working around the fresh paint was inconvenient but possible. This car gets driven often in the UK and on the continent. It has been with it's current owner for over 26 years.

Pic 1. Scruffy engine compartment.

Attachments

Images (1)
  • 1
Original Post

Replies sorted oldest to newest

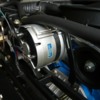
Pic 19. I would like to have taken it apart for painting but it would not be possible to reassemble without the bearing scraping the paint off the shaft as it went back together. I painted the shaft and also the ally casting. I shot the silver and then applied a clear coat with lots of matting agent in it. I found this makes it look like a new casting because there is no shine. I later had some other ally parts vapour blasted and it was hard to tell which was bare ally and which was painted.

Attachments

Images (1)
  • 19
Last edited by johnnywoods
Pic 33. Vapour blasting (also known as aqua blasting) for those not familiar is a wet blasting technique that uses tiny round glass balls suspended in high pressure water. It's like a sand blasting cabinet but with a windscreen wiper on the inside. Because the abrasive in round it has a peening effect rather than an abrasive affect so it makes the ally very bright like a new casting.

Attachments

Images (1)
  • 33
Pic 37. I have no idea how others do this but I decided it would be nice to be able to drop the engine in with the chain block so that it sits on the chassis rails and then push the car over the pit to access the engine mounts. I made these padded chassis rail protector plates and adjustable ears that bolt to the heads. I managed to get it all together without chipping any paint so it must be a good idea!

Attachments

Images (1)
  • 37
Pic 46. The carpet that covers the petrol tank has a vinyl piece sewn around the filler cap. I cut and bound new carpets but didn't even attempt to sew this round piece because my sewing machine does not have a giant throat depth so I would have to roll up the carpet to reach in far enough and would end up with a big mess just like original!

Attachments

Images (1)
  • 46
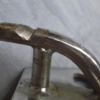
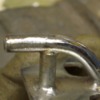
Pic 63. This car had slop in the steering. Most of it was in the Rose/Heim joints that screw into the end of the steering rack. Unfortunately this size does not exist any more - M12x1.0 M12x1.25 no problem, but not M12x1.0 I looked and looked but found nothing. I also looked into the old Renault racks that donated it but they never had the Rose/Heim joint as far as I can tell.

I had no choice but to press the bearing out and find another. This was not straight forward because the Rose/Heim joint body formed the outer casing of the bearing so it self-destructed when I pressed it out and left two ribs that prevented me from pressing a new bearing in.

Attachments

Images (1)
  • 63
Last edited by johnnywoods
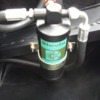
Pic 71. I had it recreated by my friend with a sign shop. It says "Diavia" "Auto air conditioners. Diavia SPA, Molinella, Bo, Italy. I Googled this but they are long gone. It was hard to tell the exact colour of the original sticker so I guessed. The gold could in fact be white? I intend to have some more of these stickers printed and sell them on ebay.

Attachments

Images (1)
  • 71

Add Reply

Post
×
×
×
×
Link copied to your clipboard.
×