Here's some pictures for you!

I was asked to restore an engine compartment. Mangusta 8MA1182. I actually finished it back in June but I have been so busy with my new workshop I have not had time to sort out the pictures and add some words.

The car came to me with the paint and body already done. Working around the fresh paint was inconvenient but possible. This car gets driven often in the UK and on the continent. It has been with it's current owner for over 26 years.

Pic 1. Scruffy engine compartment.

Attachments

Images (1)
  • 1
Original Post

Replies sorted oldest to newest

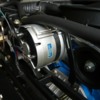
Pic 19. I would like to have taken it apart for painting but it would not be possible to reassemble without the bearing scraping the paint off the shaft as it went back together. I painted the shaft and also the ally casting. I shot the silver and then applied a clear coat with lots of matting agent in it. I found this makes it look like a new casting because there is no shine. I later had some other ally parts vapour blasted and it was hard to tell which was bare ally and which was painted.

Attachments

Images (1)
  • 19
Last edited by johnnywoods
Pic 33. Vapour blasting (also known as aqua blasting) for those not familiar is a wet blasting technique that uses tiny round glass balls suspended in high pressure water. It's like a sand blasting cabinet but with a windscreen wiper on the inside. Because the abrasive in round it has a peening effect rather than an abrasive affect so it makes the ally very bright like a new casting.

Attachments

Images (1)
  • 33
Pic 37. I have no idea how others do this but I decided it would be nice to be able to drop the engine in with the chain block so that it sits on the chassis rails and then push the car over the pit to access the engine mounts. I made these padded chassis rail protector plates and adjustable ears that bolt to the heads. I managed to get it all together without chipping any paint so it must be a good idea!

Attachments

Images (1)
  • 37
Pic 46. The carpet that covers the petrol tank has a vinyl piece sewn around the filler cap. I cut and bound new carpets but didn't even attempt to sew this round piece because my sewing machine does not have a giant throat depth so I would have to roll up the carpet to reach in far enough and would end up with a big mess just like original!

Attachments

Images (1)
  • 46
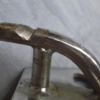
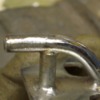
Pic 63. This car had slop in the steering. Most of it was in the Rose/Heim joints that screw into the end of the steering rack. Unfortunately this size does not exist any more - M12x1.0 M12x1.25 no problem, but not M12x1.0 I looked and looked but found nothing. I also looked into the old Renault racks that donated it but they never had the Rose/Heim joint as far as I can tell.

I had no choice but to press the bearing out and find another. This was not straight forward because the Rose/Heim joint body formed the outer casing of the bearing so it self-destructed when I pressed it out and left two ribs that prevented me from pressing a new bearing in.

Attachments

Images (1)
  • 63
Last edited by johnnywoods
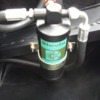
Pic 71. I had it recreated by my friend with a sign shop. It says "Diavia" "Auto air conditioners. Diavia SPA, Molinella, Bo, Italy. I Googled this but they are long gone. It was hard to tell the exact colour of the original sticker so I guessed. The gold could in fact be white? I intend to have some more of these stickers printed and sell them on ebay.

Attachments

Images (1)
  • 71
Many thanks for the complements! I am very pleased with the way it turned out.

To answer the questions, no, I did not vapour blast the box as I dont have the equipment, I took it to this man http://www.youtube.com/watch?v=r1cwHdwDOvU Aluminium stays bright for a long time because it's peened by the tiny glass balls with no sharp edges. I did not coat it with anything. If it was my car I would have painted it and added matting agent to the clear. That way it stays nice for much longer and is easier to clean.

The carb is a Holley. I was not involved in building the engine only making it look pretty. Not all Mangustas came with the carb mounted backwards in my experience.
I found the strap for the jack so didn't have to make it.
I will get some Diavia stickers printed up and let you know.

Johnny
Johnny,

What an impressive job! I must say that in my opinion, your skills, ingenuity and resourcefulness and second to none. The interior restoration you did on 8Ma1294 was the nicest I have seen, and this works is at the same level. Truly impressive. Your fellow De Tomaso UK owners are lucky to have you nearby.

Great work and, as always, THANK YOU for doing such a great job sharing your expertise with us.

Mark
quote:
I will get some Diavia stickers printed up and let you know.


Great!

The original owner of my Mangusta said he picked the car up at the factory and was offered a Holley as a performance option, which he took. I wonder if standard was the 4300 mounted backwards with a Holley as optional equipment?

Did all Mangustas come with a light in the engine compartment? Anyone know of a source for those?
quote:
Originally posted by vyprgt2:

Did all Mangustas come with a light in the engine compartment? Anyone know of a source for those?


It is the same light as in the front trunk. Maserati used the same piece.

Denis
Johnny,

What another fantastic restoration, your ingenuity and skills are almost from a bygone era. You definitely need to publicize this as much as possible, people should be queuing at your door for your services.

How many hours did you have in the restoration altogether?

Tell me more about the new shop, is it in S. Molton still?

Julian
Wow! Once again, your work is too another level unseen.....

From one who went through about half of this pain in the engine compartment, great work!!! The only bad thing about this all, is that the first time you drive the car, is the last time it looks new...! Axle u-joints are unforgiving bastards......no matter how long ago it was that you greased them, they still manage to spooge black dots of grease with abandon...... won't talk about ZF lube....ugh! Price you pay for loving the hell out of driving the machine!

JB probably bought you a new tractor for all of this work....or a nice set of weather tight doors for the shop....or new roofing...or ....you get the picture!

Ciao!
Steve
Johnny, all,

Just looked at this thread again....easy to do...and I noticed some bits that I had missed earlier!

This is the first car I have seen (or been able to see...) the clamps retaining the heater hoses to the firewall, and the clamp for the AC hose on the top of the compressor!

How did you finish the edges on the air cleaner tubing clamps???? Bead blasting or ??? Then plated? I was thinking some stainless....but hard to finish the edges...!

Ciao!
Steve
Hi Steve,

The clamps holding the water hoses to the bulkhead and the one on top of the AC compressor are correct.

I dont think the induction hoses where originally clamped to the air cleaner body but I felt it looked unfinished so I took some large stainless hose clamps and reduced the length and TIG welded them back together so that there was very little thread remaining, that way I could hide the thread and screw underneath. I then polished the top side of the clamp and ground the underside so that I could clue a strip of skinned neoprene that was slightly wider than the clamp to get it to bulge either side and look like it was meant to be there.

This is the type of skinned neoprene I use a lot in my restorations. It's very soft and fills gaps.

http://www.woolies-trim.co.uk/...ed-sponge-strip.aspx

Johnny
quote:
Originally posted by Johnny Woods:
Pic 79. These gullwing safety latches are not original but the owner wanted to keep them so I had them replated.


Hey Johnny , here is interesting detail! The secondary latches are in the Mangusta parts book !

Attachments

Images (1)
  • IMG_2050s
The extra latch at the forward bottom of each wing was an original feature of the later cars. The tell tale is if the wing has a sheet metal loop catch welded to the forward bottom of each hatch opening. Not sure of what numbered car this feature started. 718 has no sign of this and 1302 has the latch connections on the wings, but no actual latch to secure it! Again Italian consistency at it's finest!
My goose has brackets that look like the one posted above by 69goose.


Also, like 69goose, my car has no latch to hook onto these loop connectors/brackets.

Were there originally safety latches as Johnny has posted that hook onto these brackets ( 42-45 on parts diagram do look pretty convincing)

If so, can someone post a photo of an original latch?
Last edited by vyprgt2
quote:
Originally posted by vyprgt2:
quote:
Originally posted by vyprgt2:
quote:
Originally posted by vyprgt2:
quote:
Originally posted by Johnny Woods:
Pic 89

Is the yellow a/c fan placed in more or less the correct place in Johnny's example photo(toward the driver's side of center, on the forward side of the condenser)? Some cars have it on the other side of the condenser and more centered....

Also, is the Mangusta fan the same one used in the Pantera ?
vypr...

Yes, the fan is basically in the same location...it needs to clear the spare tire & bracket that you see there also.

The yellow blade fan is likely the same as the Pantera, but not all Mangusta's received the full shrouded yellow bladed assy.

Most got a minimal mounting system made of all thread bent where bends were required, and welded to a fan bracket. Fan motor may have been similar to one of the radiator fan motors.... but blade assy was a 6-ish bladed plain (sorta clear) plastic with smaller vanes.

Note nuts and large washers in fins of the condenser! You can just make out threaded rod welded to fan retainer at about the 4:00 position of the motor.

Attachments

Images (1)
  • 101_3271
Richard, the safety brackets are one of the precious mysteries of the Goose, they show up on this car and on the parts drawing...but it seems really not anywhere else.

Vyprgt2, I cannot be dead sure what was built in the last days of the Mangusta, but most were built using the white small fan blade that is used for the left side radiator, a Motocraft motor and a bracket made of all-thread rod...These continued at least until what was on my car (8ma1076). Attached is a picture of the Bordinath car, which I'm guessing is (as the rest of the car appears) as it left from the factory...

Attachments

Images (1)
  • 4
Lee,

Your statement should be "as it left Ford"....as Bordinath modified a lot of the car using later model parts as needed! ....or perhaps parts that appeared on later Ford cars!!!

The collapsible spare tire is not a DeTomaso feature.... I think it also had a Ford air cleaner with a chrome lid, ala 351C cars...IIRC.

Cheers!
Bordinat did do some alterations to 8MA1196, but the AC fan lloks pretty much the same as on 8MA1114, (http://markscars.ca/Photo_Galleries/Pages/Mangusta_1114.html#45)
8MA1216 (http://www.provamo.com/Members/Registry/RegistryImages/R8MA1216/R8MA1216.asp)
and 8MA1244

I do believe the early cars had the same fans as the front radiator mounted on threaded rods, but the later production definitely had the yellow fans later used on the Pantera using a small shroud to increase the flow.
[QUOTE]Originally posted by LeeA:
Richard, the safety brackets are one of the precious mysteries of the Goose, they show up on this car and on the parts drawing...but it seems really not anywhere else.


My car has the bracket as shown in post 104 on each wing.
On closer inspection (now that I know what I'm looking for and where), I found clear impressions of the rectangular brackets which originally must have held the latches on the engine bay walls.
John, where was my head when I owned a junk Goose? I was so discouraged with rust everywhere even on the underside of the roof, I sold the hulk to your countryman Roger! I understand he now has it back together & running.

'Course, shipping plus the $100,000+ USD it would have cost to get your level of restoration was also out of my reach. BRAVO for your work!
J DeRyke
quote:
Originally posted by vyprgt2:
[QUOTE]Originally posted by LeeA:
Richard, the safety brackets are one of the precious mysteries of the Goose, they show up on this car and on the parts drawing...but it seems really not anywhere else.


My car has the bracket as shown in post 104 on each wing.
On closer inspection (now that I know what I'm looking for and where), I found clear impressions of the rectangular brackets which originally must have held the latches on the engine bay walls.


I just got ambitious and looked at the late Geese on provamo

Lo and behold 1288 and 1242 clearly have safety latches !
www.provamo.com/Members/Regist...8MA1242/R8MA1242.asp
quote:
Originally posted by LeeA:
wow, good eye ! Especially, with so much going on in 1288...
(and Nate, 1242 has a pleated headliner, and Mike, no leather on the Ferrero steering wheel...).

What is the earliest car found with the safety latches ?

so far, the earliest I have found is 1116 with wing brackets to accept latches

1256 has wing brackets

1136, 1242, 1288 have latches (also 1182, which is the subject car of this thread)
Last edited by vyprgt2
Since all Mangustas newer than #1136 were detail-completed in Germany, maybe the safety latches are a Mercedes or BMW part? Such extras could have been added by POs over 50 yrs.

Heiko Ostmann's class winning race Mangusta #1052 lost a rear cover during competition, DNF-ing that event (Silverstone?) So rear cover safety latches seem worth installing. Note- Heiko still won the 2009 C.E.R World Championship in GT-1 against GT-40s, Lolas, Ferraris and others.

Add Reply

Post
×
×
×
×
Link copied to your clipboard.
×