I've been going through the AC system and finally had a look inside the (early type) evaporator. Thought it would be good to share some pics, as it is probably a ripe area for maintenance, especially if your system is actually working and creating condensate!

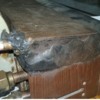
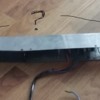
Pic 1 shows the unit upsidedown, illustrating the sealing between the main unit and the condenstate tray (black plumbers putty everywhere!). Globs of cork insulation were used to seal the coil tube area (it was removed prior to this shot; I now recognize as cork tape). Hard to believe that the putty is 'normal', but you never know.

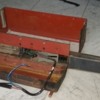
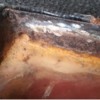
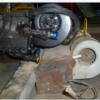
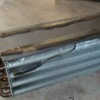
Pics 2&3 show tray and tray detail, evaporator core removed. The drain tubes are positioned relatively high in the tray so it seems like there could be condensate sitting in your tray for extended periods of time (maybe finding rust is not surprising).

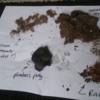
Pic 4 shows what came out of the assembly. Two thin sheets of styrene insulation surround the core and they held up perfectly. The other foam in there didn't, I'm not sure where it was used as it was literally dust.

I've since blasted and epoxy primed the pan, amazingly it's going to be fine. Looking to seal things up further and possibly fit some some aluminum scrap to help close the major gaps that the cork tape originally filled. Hoping to clean up and use 'as-is' otherwise, will advise how this works outSmiler

Attachments

Images (1)
  • a_AC_evaporator_reduced
Original Post

Replies sorted oldest to newest

Hi Mike, I removed it a long time ago but think it's easy once the coolant hoses are disconnected. So...no dash or dash top removal needed, but removing the padded trim piece on the bottom corner buys some useful clearance for hose access.

There is one 1/4-20 screw or bolt on each end of the housing that fastens the unit to some hanging brackets behind the glove box. Captive nuts are built into the evaporator housing. I'm not aware of any fasteners on the front edge of the unit (nothing in my parts bin at least) but it would make sense - seems like the assembly will be unstable without additional support.

There are two holes shown in this pic where 2 small dia. fasteners COULD be used. Anybody have screws here extending up into the dash? Any other fasteners used?

Attachments

Images (1)
  • 20180816_172249
Wow, I've been shopping in the wrong places. Thanks!!! any ideas as to how much it needs from empty?

It's not a high priority item at the moment, but when I tear into it I'll take pics and add the details to the repository of information.

Thanks for the info guys...

BTW, does anyone know how many 'goose owners are in here? seems like a limited number, but those that are here (such as yourself) are hard core and know their stuff... a VERY valuable resource indeed.

MH
Pulling the Pantera dash is easy- there are only 4 screws (one behind the glove box). Putting it back correctly may take a weekend.... Note that you do NOT need to disconnect all the wires & stuff from the dash- only a few. There's enough length in most to allow the whole dash to sit in the drivers seat along with the disconnected steering wheel, while you wrench on the AC/heater box from the passenger seat. I wrote an illustrated article a decade ago (I pulled mine twice in a month), and I think there's a description on Mike Dailey's www.Panteraplace.com website.
Thanks Bosswrench, I'll probably be replacing all the hoses and seals on my goose as well. I'd prefer to do it once and only once.

the system is complete and intact, I've check the clutch on the compressor and it works, the condensor fans works too. But for some reason it the compressor was unplugged. I'm assuming whoever unplugged it had a reason.

MH

Add Reply

Post
×
×
×
×
Link copied to your clipboard.
×